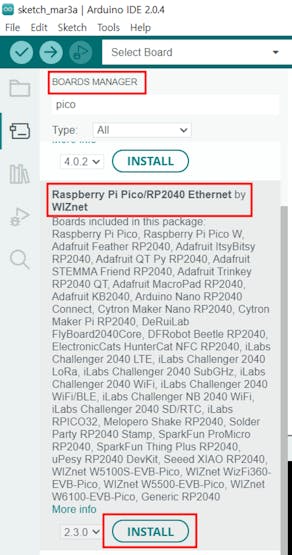
Go to Board Manager to search for PICO and install Raspberry PI PICO/RP2040 Ethernet by Wiznet.
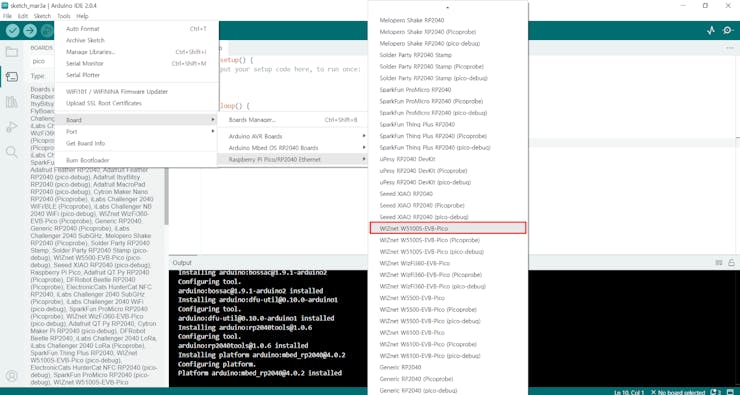
Go to Tools -Board, you can see that Raspberry PI PICO/RP2040 Ethernet is added. Now you can use the W5100S-EVB-PICO on the Arduino IDE.
1.2. Test
It is a process that can be omitted and checks if Ethernet works well. When you complete the above process, you can use the examples of the installed board manager.
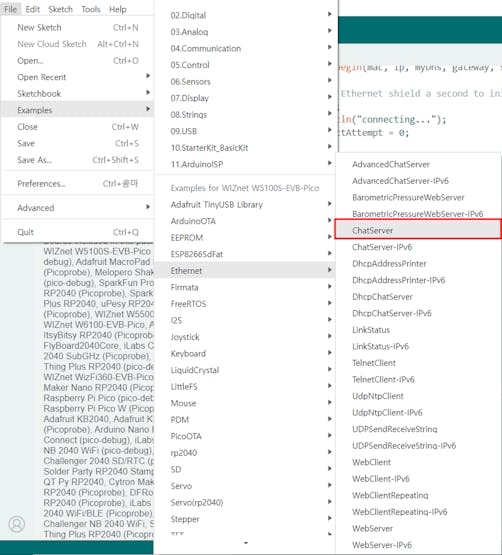
Go to Tools-Board and select the W5100S-EVB-PICO board. Then, select File -Examples -Ethernet -Chatserver.
After loading the example file, change the network setting value and release the comment of the CS pin setting. Compile the example code. Go to Tools -Port, select the port where the board is connected, and upload the file.
// ...

// Enter a MAC address and IP address for your controller below.
// The IP address will be dependent on your local network.
// gateway and subnet are optional:
byte mac[] = {
  0xDE, 0xAD, 0xBE, 0xEF, 0xFE, 0xED };
IPAddress ip(192, xxx, xxx, xxx);
IPAddress myDns(xxx, xxx, xxx, xxx);
IPAddress gateway(xxx, xxx, xxx, xxx);
IPAddress subnet(xxx, xxx, xxx, xxx);

// ...

void setup() {
  // You can use Ethernet.init(pin) to configure the CS pin
  Ethernet.init(17);  // WI/Znet W5100S-EVB-Pico W5500-EVB-Pico W6100-EVB-Pico

  // ...
}
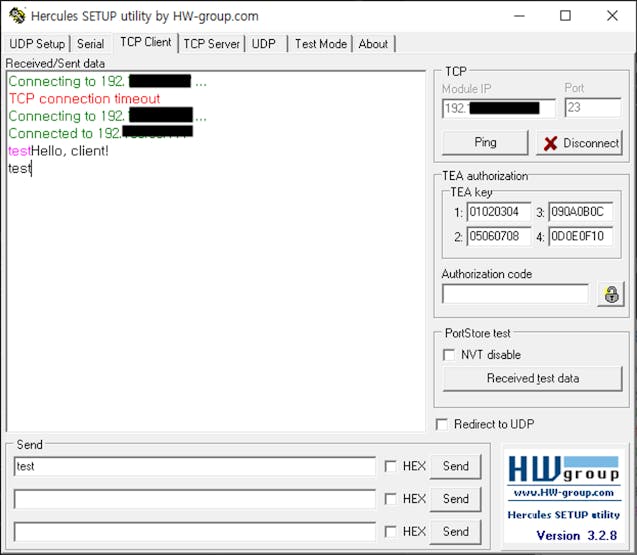
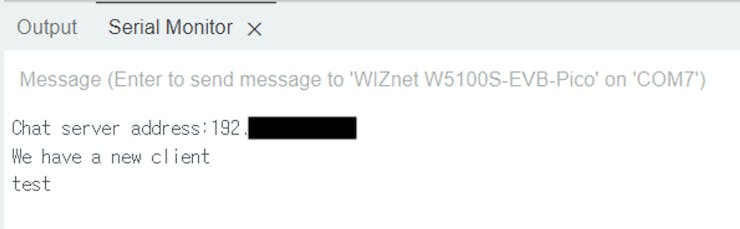
Tested using Hercules. Go to TCP Client and set Module IP and PORT and connect. If the connection is complete, send a test message. If you send a message, you will receive a message from the serial monitor and Echo again. I confirmed that Ethernet worked without a problem.
2. Beebotte + W5100S-EVB-Pico
Beebotte is a cloud-based platform that provides real-time data management and communication services for connected devices and applications. It allows developers to build and manage IoT (Internet of Things) applications that collect, process, and act on data from sensors, actuators, and other connected devices.
2.1. Create Channel
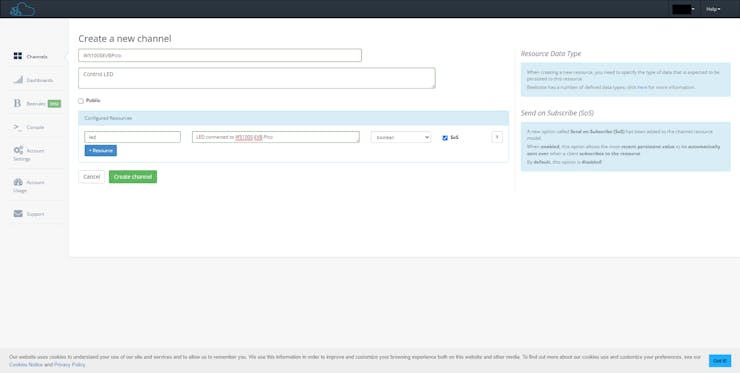
After accessing the Beebotte site, you can add a channel by clicking the Create New button. The channel name W5100SEVBPICO was set, and the LED resource of the boolean type was set.
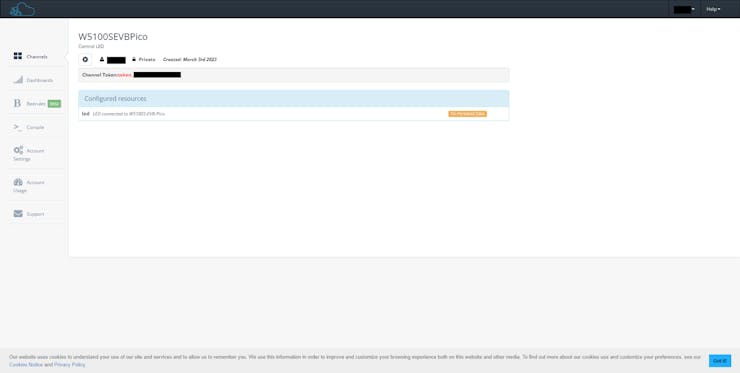
Enter the created channel and you can check the tokens on the channel.
2.2. Code
The code used the tutorial code used on the Beebotte official site. Two libraries were installed: PubSubClient and Arduinojson. Install the library below.
I used LEDs built into the W5100S-EVB-PICO. Change the LED pin number to 25 and set the Beebotte Token value issued above and the channel name and resource name created.
#include <SPI.h>
#include <Ethernet.h>
#include <PubSubClient.h>
#include <ArduinoJson.h>

#define LEDPIN 25  // Built-in LED pin of W5100S-EVB-Pico.

#define BBT "mqtt.beebotte.com"         // Domain name of Beebotte MQTT service
#define TOKEN "token_xxxxxxxxxxxxxxxx"  // Set your channel token here

#define CHANNEL "W5100SEVBPico"  // Replace with your channel name
#define LED_RESOURCE "led"

// Network configration
byte mac[] = {
  0xDE, 0xAD, 0xBE, 0xEF, 0xFE, 0xED
};
IPAddress ip(xxx, xxx, xxx, xxx);
IPAddress myDns(xxx, xxx, xxx, xxx);
IPAddress gateway(xxx, xxx, xxx, xxx);
IPAddress subnet(xxx, xxx, xxx, xxx);

EthernetClient ethClient;
PubSubClient client(ethClient);
It is a code that receives and handles messages. The entire code can be found in Github.
// will be called every time a message is received
void onMessage(char* topic, byte* payload, unsigned int length) {

  // decode the JSON payload
  StaticJsonDocument<256> doc;

  // Test if parsing succeeded
  auto error = deserializeJson(doc, payload);
  if (error) {
    Serial.print(F("deserializeJson() failed with code "));
    Serial.println(error.c_str());
    return;
  }

  // led resource is a boolean read it accordingly
  bool data = doc["data"];

  // Set the led pin to high or low
  if (data == 0) {
    digitalWrite(LEDPIN, LOW);
  } else if (data == 1) {
    digitalWrite(LEDPIN, HIGH);
  }
  // digitalWrite(LEDPIN, data ? HIGH : LOW);
}
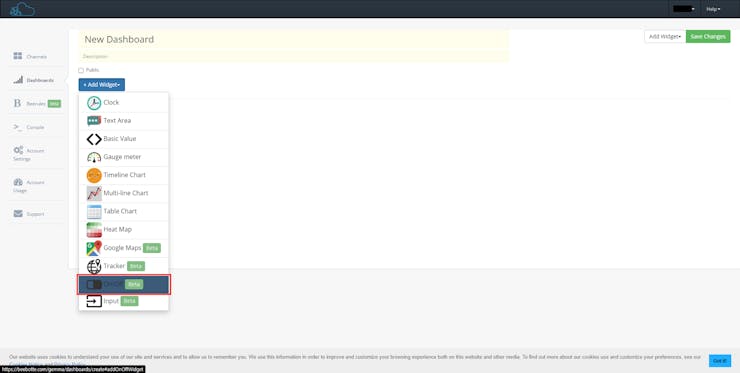
2.3. Create Dashboard
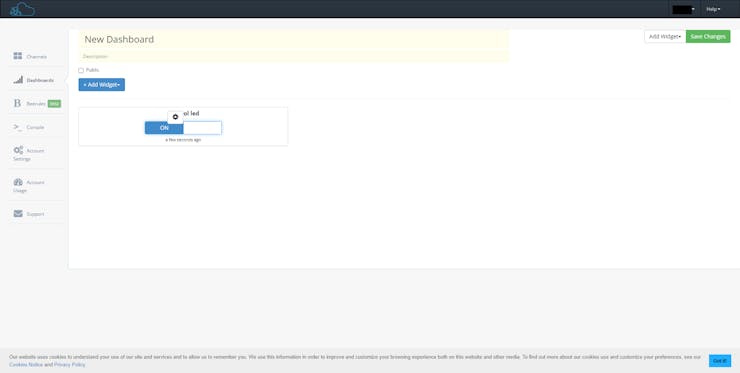
Click the Create Dashboard button to create a dashboard and add ON/OFF widget to the dashboard to control the LED.
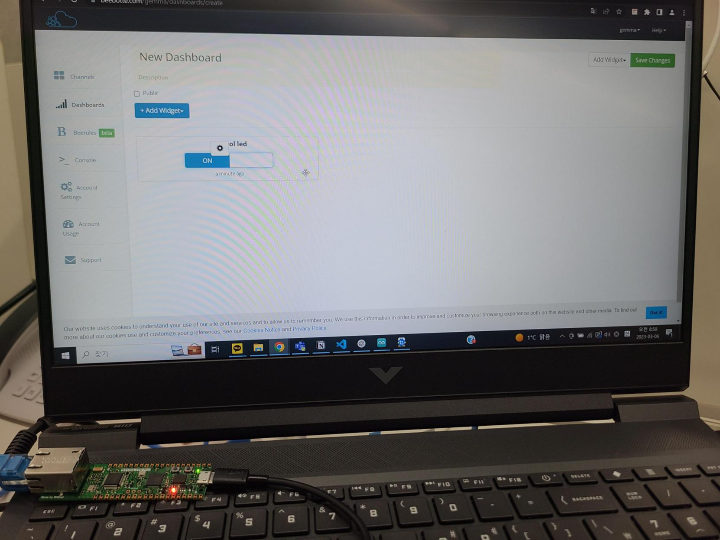
Now, you can control the LED by clicking the widget.
Click on the widget to see that the built -in LED on the board is turned on and turned off.


 Software Apps and online services