
The W5500io-M module controls LEDs via a web page.
HTTP (Hypertext Transfer Protocol) is an application-layer protocol used for distributed, collaborative, hypermedia information systems.
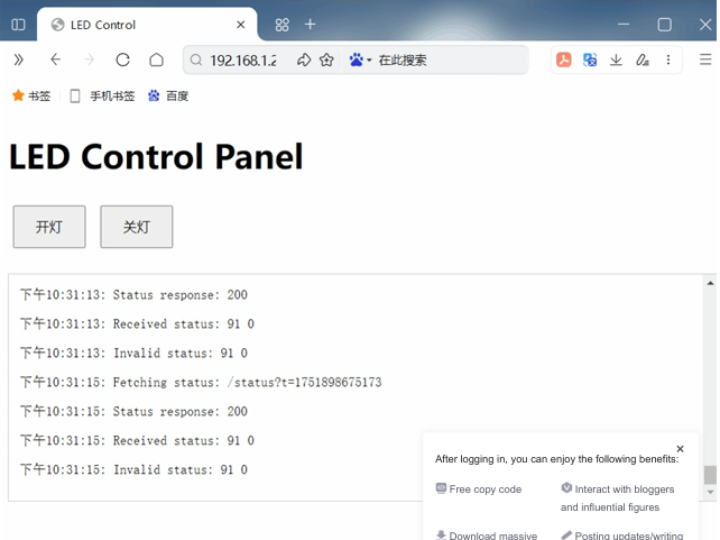
Table of contents
1. Introduction
2. Project Environment
2.1 Hardware Environment
2.2 Software Environment
3 Hardware Connection and Solution
3.1 W5500 Hardware Connection
3.2 Scheme Diagram
4. Routine Modification
5. Functional Verification
6. Summary
1. Introduction
HTTP (Hypertext Transfer Protocol) is an application-layer protocol used for distributed, collaborative, hypermedia information systems. It transmits da TCP/IP communication protocol and is the foundation of data communication on the World Wide Web (WWW). HTTP was initially designed to provid publishing and receiving HTML pages. Resources requested via HTTP or HTTPS are identified by Uniform Resource Identifiers (URIs). This is a brie the HTTP protocol. For a more in-depth understanding of this protocol, please refer to the introduction on the Mozilla website: HTTP Overview - HTTP |
The W5500io-M is a high-performance SPI-to-Ethernet module launched by Weishi, with the following features:
Minimalist design: integrates MAC, PHY, 16KB cache and RJ45 network port, directly connects to the main controller via 4-wire SPI interface, 3.3V compact size suitable for embedded scenarios. Simple and easy to use: Users no longer need to port the complex TCP/IP protocol stack to the MCU, and can directly develop based on applicatio Abundant resources: Provides a wealth of MCU application examples and hardware reference designs that can be directly referenced and used, gr the development time. Hardware is compatible with the W5500io-M module, facilitating solution development and iteration. Wide range of applications: It is widely used in industrial control, smart grid, charging piles, security and fire protection, new energy, energy storage fields. Product Link: Product Details
2. Project Environment
2.1 Hardware Environment
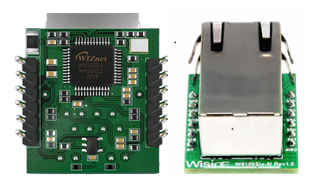
W5500io-M
STM32F103VCT6 EVB
Network cable
DuPont wires
Switch or router
2.2 Software Environment
Development environment: Keil uVision 5
FeisiChuang Serial Port Assistant
Example code link : w5500.com/w5500.html
Browser
3 Hardware Connection and Solution
3.1 W5500 Hardware Connection
1. //W5500_SCS ---> STM32_GPIOD7 /*W5500的片选引脚*/
2. //W5500_SCLK ---> STM32_GPIOB13 /*W5500的时钟引脚*/
3. //W5500_MISO ---> STM32_GPIOB14 /*W5500的MISO引脚*/
4. //W5500_MOSI ---> STM32_GPIOB15 /*W5500的MOSI引脚*/
5. //W5500_RESET ---> STM32_GPIOD8 /*W5500的RESET引脚*/
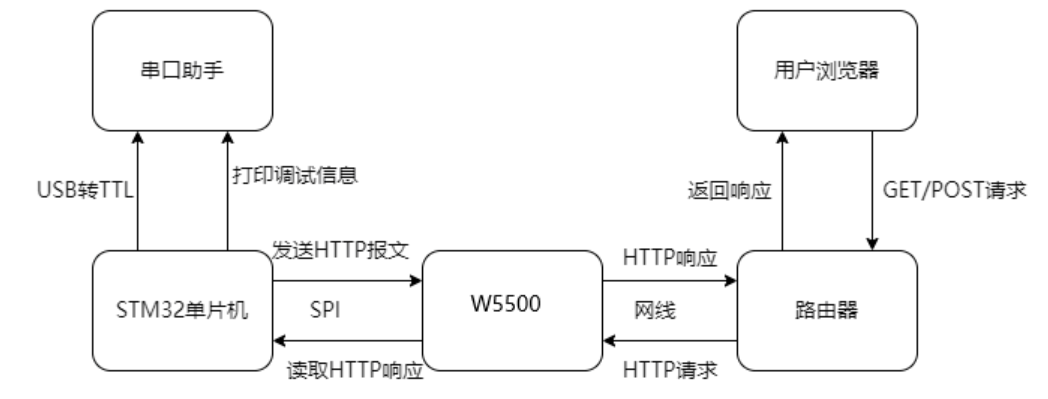
6. //W5500_INT ---> STM32_GPIOD9 /*W5500的INT引脚*/3.2 Scheme Diagram
4. Routine Modification
1. We create a web_server.c and a web_server.h file , and add header files , global variables , and initialization to web_server.c .
#include "user_main.h"
#include "web_server.h"
#include <stdio.h>
#include <string.h>
// 全局变量
uint8_t txBuff[2048] = {0};  // 发送缓冲区
uint8_t rxBuff[2048] = {0};  // 接收缓冲区
uint8_t socketCount = 8;      // 支持的Socket数量
uint8_t socketList[] = {0,1,2,3,4,5,6,7}; // Socket列表

// LED状态管理
uint8_t led_status = 0;       // 0:关灯 1:开灯
uint8_t status_content[2] = "0"; // 状态页内容
2. Create an HTML user interface , mainly including an on/off control button (JavaScript event) , a real-time debugging information panel , a status polling mechanism (updated every 2 seconds) , and a timestamp logging function .
uint8_t *contentName = "index.html";
// 修改后的HTML内容 - 添加了更详细的调试信息
uint8_t content[] =
"<!doctype html>\n"
"<html lang=\"en\">\n"
"<head>\n"
"    <meta charset=\"GBK\">\n"
"    <meta name=\"viewport\" content=\"width=device-width, initial-scale=1.0\">\n"
"    <title>LED Control</title>\n"
"    <style>\n"
"        #light {\n"
"            width: 100px; height: 100px; border-radius: 50%;\n"
"            margin: 20px auto; border: 2px solid #333;\n"
"            transition: background-color 0.5s;\n"
"        }\n"
"        .light-on { background-color: yellow; box-shadow: 0 0 20px yellow; }\n"
"        .light-off { background-color: #ccc; }\n"
"        .btn { padding: 10px 20px; margin: 5px; }\n"
"        #debug { margin-top: 20px; padding: 10px; border: 1px solid #ccc; font-family: monospace; max-height: 200px; overflow-y: auto; }\n"
"    </style>\n"
"</head>\n"
"<body>\n"
"    <h1>LED Control Panel</h1>\n"
"    <button class=\"btn\" onclick=\"controlLED(1)\">开灯</button>\n"
"    <button class=\"btn\" onclick=\"controlLED(0)\">关灯</button>\n"
"    <div id=\"debug\">Debug information will appear here...</div>\n"
"    <script>\n"
"        const light = document.getElementById('light');\n"
"        const debugDiv = document.getElementById('debug');\n"
"        \n"
"        // 调试函数 - 在页面上显示调试信息\n"
"        function log(message) {\n"
"            console.log(message);\n"
"            debugDiv.innerHTML += '<p>' + new Date().toLocaleTimeString() + ': ' + message + '</p>';\n"
"            debugDiv.scrollTop = debugDiv.scrollHeight; // 自动滚动到底部\n"
"        }\n"
"        \n"
"        // 初始加载时获取状态\n"
"        fetchStatus();\n"
"        \n"
"        function controlLED(state) {\n"
"            log('Sending control: ' + state);\n"
"            fetch(`/control?action=${state ? '1' : '0'}&t=${Date.now()}`)\n"
"                .then(response => {\n"
"                    log(`Control response: ${response.status}`);\n"
"                    if (response.ok) {\n"
"                        log('Control command successful');\n"
"                        fetchStatus();\n"
"                    } else {\n"
"                        log('Control command failed');\n"
"                    }\n"
"                })\n"
"                .catch(error => {\n"
"                    log('Control error: ' + error);\n"
"                });\n"
"        }\n"
"        \n"
"        function fetchStatus() {\n"
"            const url = '/status?t=' + Date.now();\n"
"            log('Fetching status: ' + url);\n"
"            \n"
"            fetch(url)\n"
"                .then(response => {\n"
"                    log(`Status response: ${response.status}`);\n"
"                    if (!response.ok) {\n"
"                        throw new Error('Bad status: ' + response.status);\n"
"                    }\n"
"                    return response.text();\n"
"                })\n"
"                .then(status => {\n"
"                    log('Received status: ' + status);\n"
"                    updateLight(status.trim()); // 确保去除空白字符\n"
"                })\n"
"                .catch(error => {\n"
"                    log('Status error: ' + error);\n"
"                });\n"
"        }\n"
"        \n"
"        function updateLight(status) {\n"
"            if (status === '1') {\n"
"                light.className = 'light-on';\n"
"                log('Light ON - UI updated');\n"
"            } else if (status === '0') {\n"
"                light.className = 'light-off';\n"
"                log('Light OFF - UI updated');\n"
"            } else {\n"
"                log('Invalid status: ' + status);\n"
"            }\n"
"        }\n"
"        \n"
"        // 每2秒轮询一次状态\n"
"        setInterval(fetchStatus, 2000);\n"
"        \n"
"        // 初始日志\n"
"        log('Control panel initialized');\n"
"        log('Waiting for status updates...');\n"
"    </script>\n"
"</body>\n"
"</html>";
3. Add URL parsing and control logic
static uint8_t parse_url_action(uint8_t *url) {
   // 从URL中提取action参数
   uint8_t *pAction = (uint8_t *)strstr((char *)url, "action=");
   return *(pAction + 7); // 返回action值
}
// 根据action执行LED操作
static void do_led_action(uint8_t action)
{
   if (action == '1')  // 开灯
   {
      printf("[LED] Turning ON\n");
      led_status = 1;
      status_content[0] = '1';
          }
   else if (action == '0')  // 关灯
   {
       printf("[LED] Turning OFF\n");
       led_status = 0;
       status_content[0] = '0';
          }
   else
   {
       printf("[LED] Unknown action: %c\n", action);
   }
   // 打印当前状态
   printf("[STATUS] Current LED status: %d\n", led_status);
}
4. Add an initialization function for the web server .
// 初始化Web服务器
void WebServer_Init(void)
{
   // 初始化http服务器
   httpServer_init(txBuff, rxBuff, socketCount, socketList);
   // 注册html页面
   reg_httpServer_webContent(contentName, content);
   // 注册状态页面 - 关键修复:确保状态页正确注册
   reg_httpServer_webContent("status", status_content);
   // 注册控制端点
   reg_httpServer_webContent("control", (uint8_t *)"OK");
   printf("[WEB] Server initialized\n");
   printf("[STATUS] Initial LED status: %d\n", led_status);
}
cpp
run
5. Add a web server
// 启动Web服务器
void WebServer_Start(void)
{
   for (uint8_t i = 0; i < sizeof(socketList); i++)
   {
       httpServer_run(i);
   }
}
6. Add core processing functions
void handler_user_function(uint8_t *url)
{
   printf("[HTTP] Request received: %s\n", url);
   // 检查是否为控制请求
   if (strstr((char *)url, "control") != NULL)
   {
       // 1. 从URL里提取出action的值
       uint8_t action = parse_url_action(url);
       // 2. 根据action的值,执行相应的LED操作
       do_led_action(action);
       // 调试输出
       printf("[CONTROL] Processed action: %c\n", action);
   }
   // 检查是否为状态请求
   else if (strstr((char *)url, "status") != NULL)
   {
       // 确保返回最新的状态值
       printf("[STATUS] Request received. Returning: %s\n", status_content);

       // 更新状态页内容 - 确保返回最新值
       reg_httpServer_webContent("status", status_content);
   }
}
// 状态获取函数
uint8_t* get_led_status(void)
{
   return status_content;
}

// 状态更新通知
void update_led_status(void)
{
   // 当LED状态改变时调用此函数
   reg_httpServer_webContent("status", status_content);
   printf("[STATUS] Updated status page to: %s\n", status_content);
}
7. Add the web_server function .
#ifndef __WEB_SERVER_H
#define __WEB_SERVER_H
#include "httpServer.h"
#include <string.h>
// 初始化Web服务器
void WebServer_Init(void);
// 启动Web服务器
void WebServer_Start(void);
extern uint8_t led_status; // 0:关灯 1:开灯
extern uint8_t status_content[2]; // 状态页内容
#endif
8. Add an external interrupt in user_main.c to represent LED state changes , so that the local LED state can be displayed on the browser page .
__HAL_RCC_GPIOC_CLK_ENABLE();
GPIO_InitStruct.Pin = GPIO_PIN_2;
GPIO_InitStruct.Mode = GPIO_MODE_IT_RISING;
GPIO_InitStruct.Pull = GPIO_NOPULL;
HAL_GPIO_Init(GPIOC, &GPIO_InitStruct);
HAL_NVIC_SetPriority(EXTI2_IRQn, 0, 0);
HAL_NVIC_EnableIRQ(EXTI2_IRQn);
void HAL_GPIO_EXTI_Callback(uint16_t GPIO_Pin)
{
if(GPIO_Pin == GPIO_PIN_2) {
led_status = ~led_status;
status_content[0] = (status_content[0] == '0') ? '1' : '0';
}
}
void EXTI2_IRQHandler(void)
{
__HAL_GPIO_EXTI_CLEAR_IT(GPIO_PIN_2);
HAL_GPIO_EXTI_IRQHandler(GPIO_PIN_2);
} 5. Functional Verification
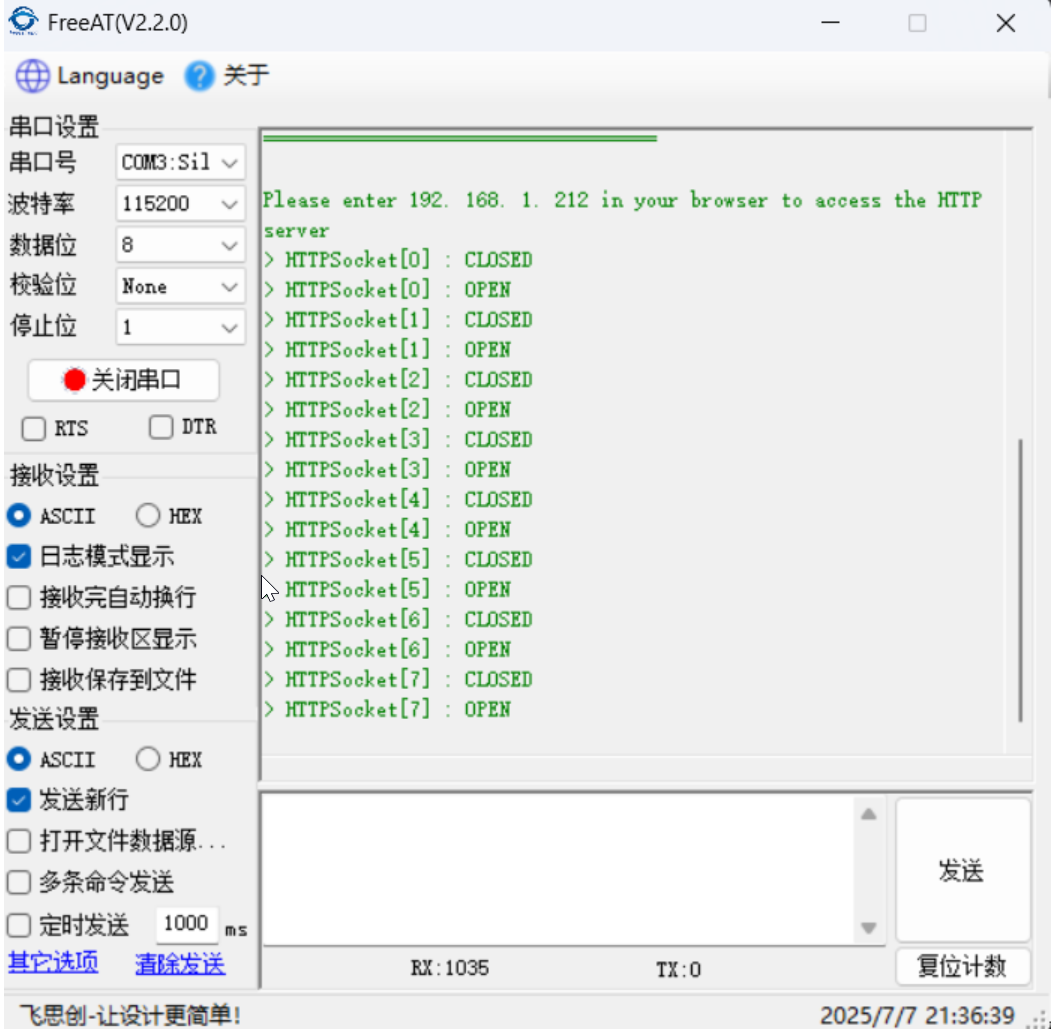
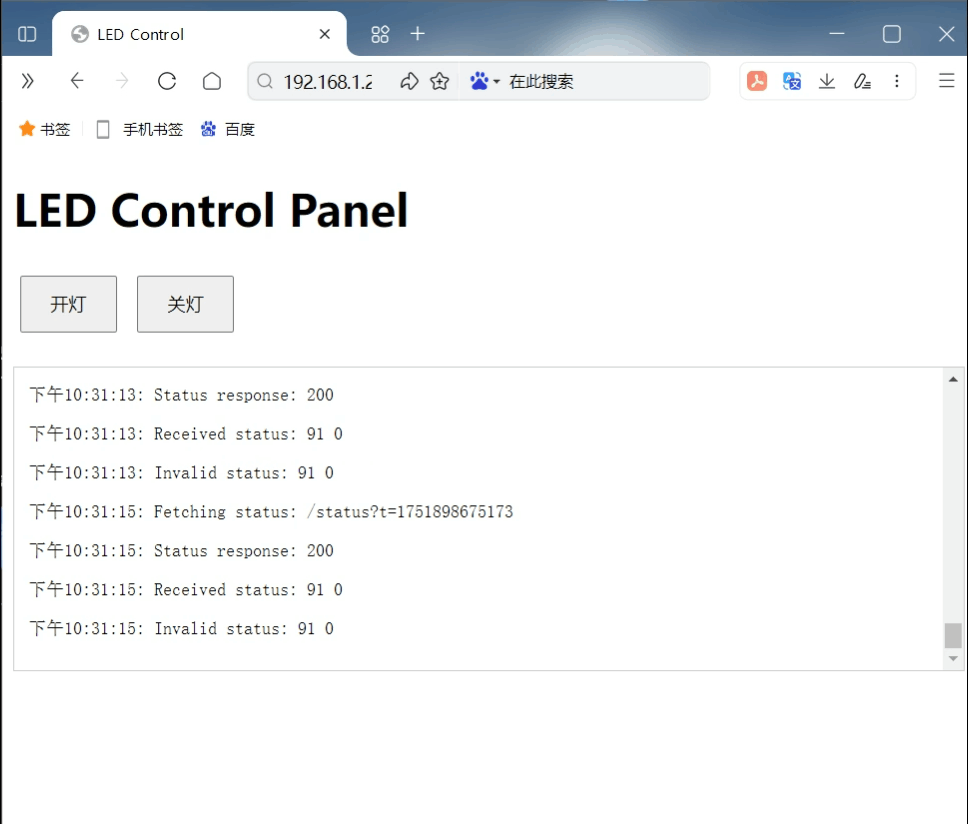
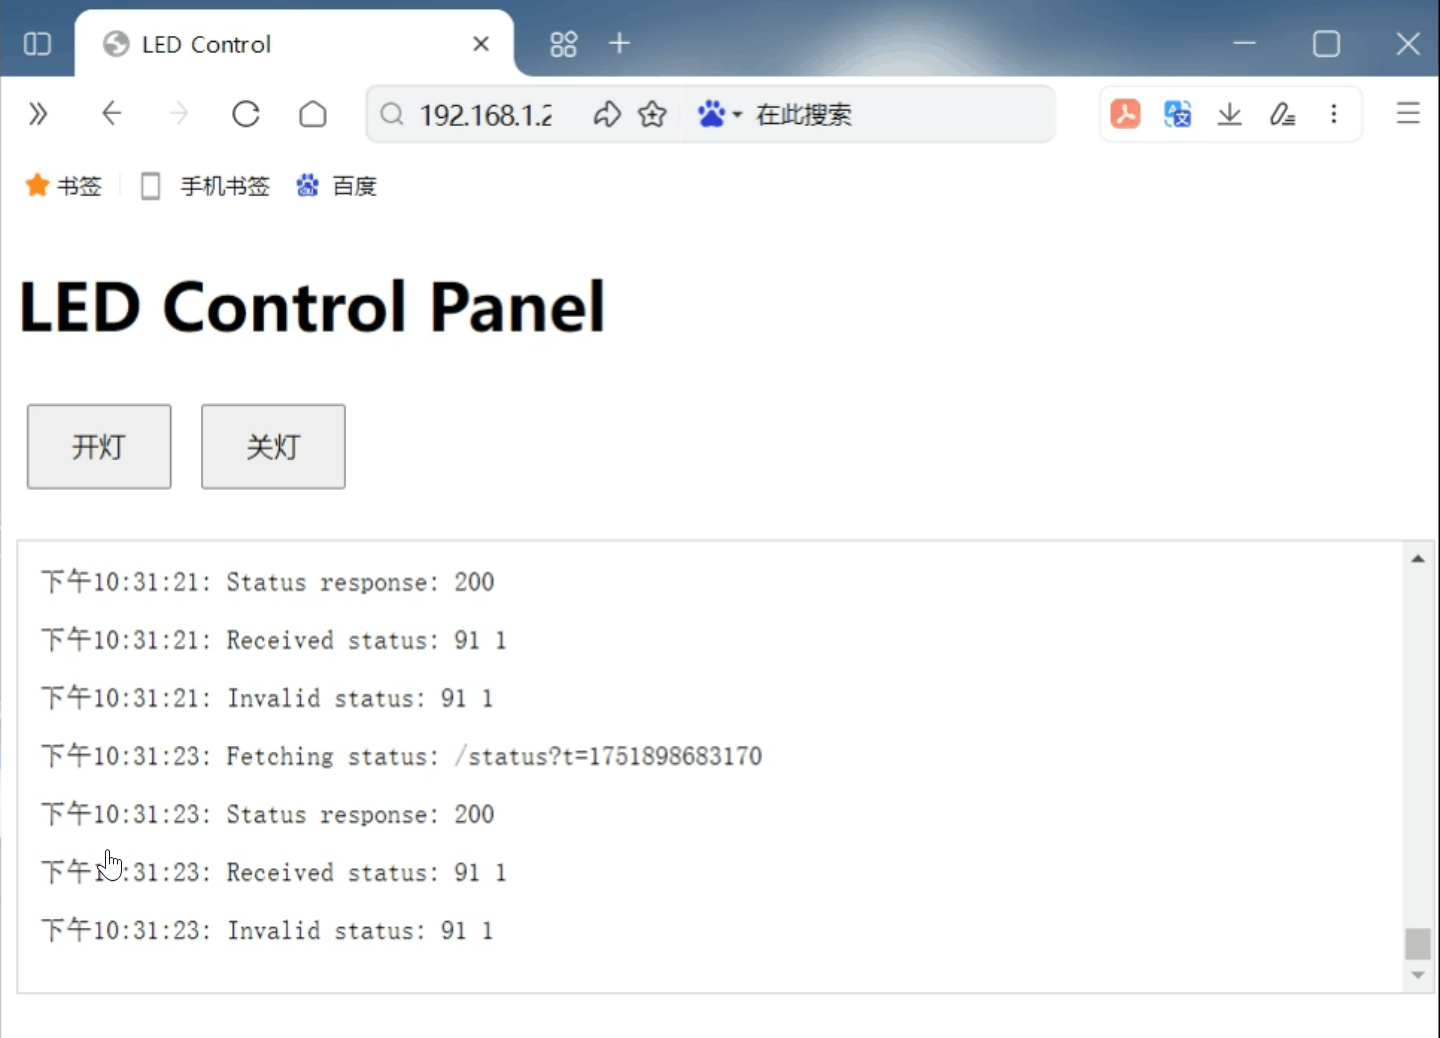
1. After hardware connection is complete , power on the program and print the following information : Enter 192.168.1.212 in your browser to access the HTML page .
2. Enter the IP address prompted in your browser to access the control page .
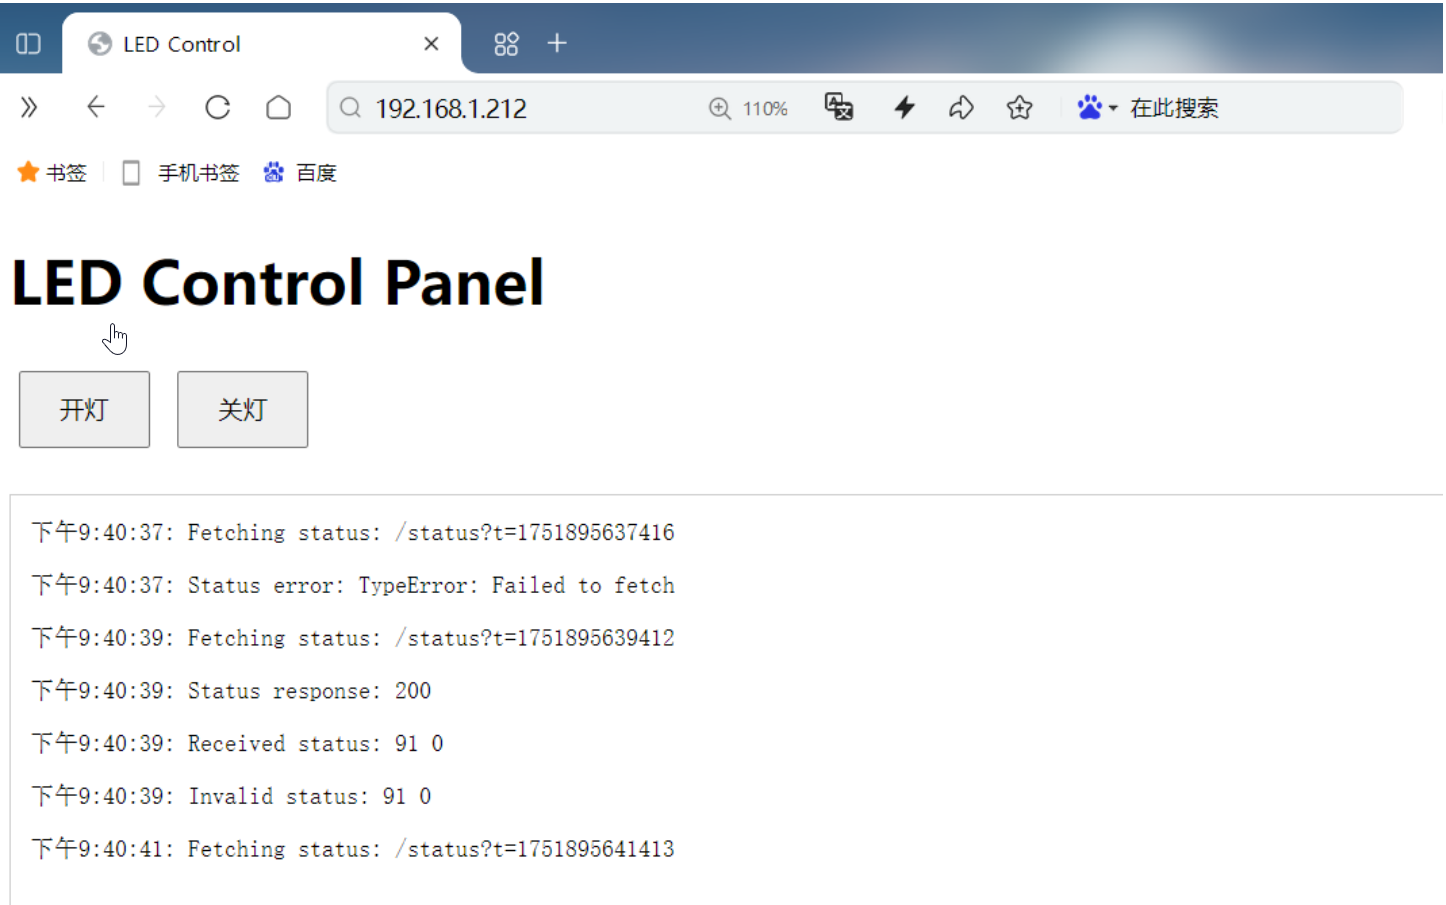
3. Click to turn on the light
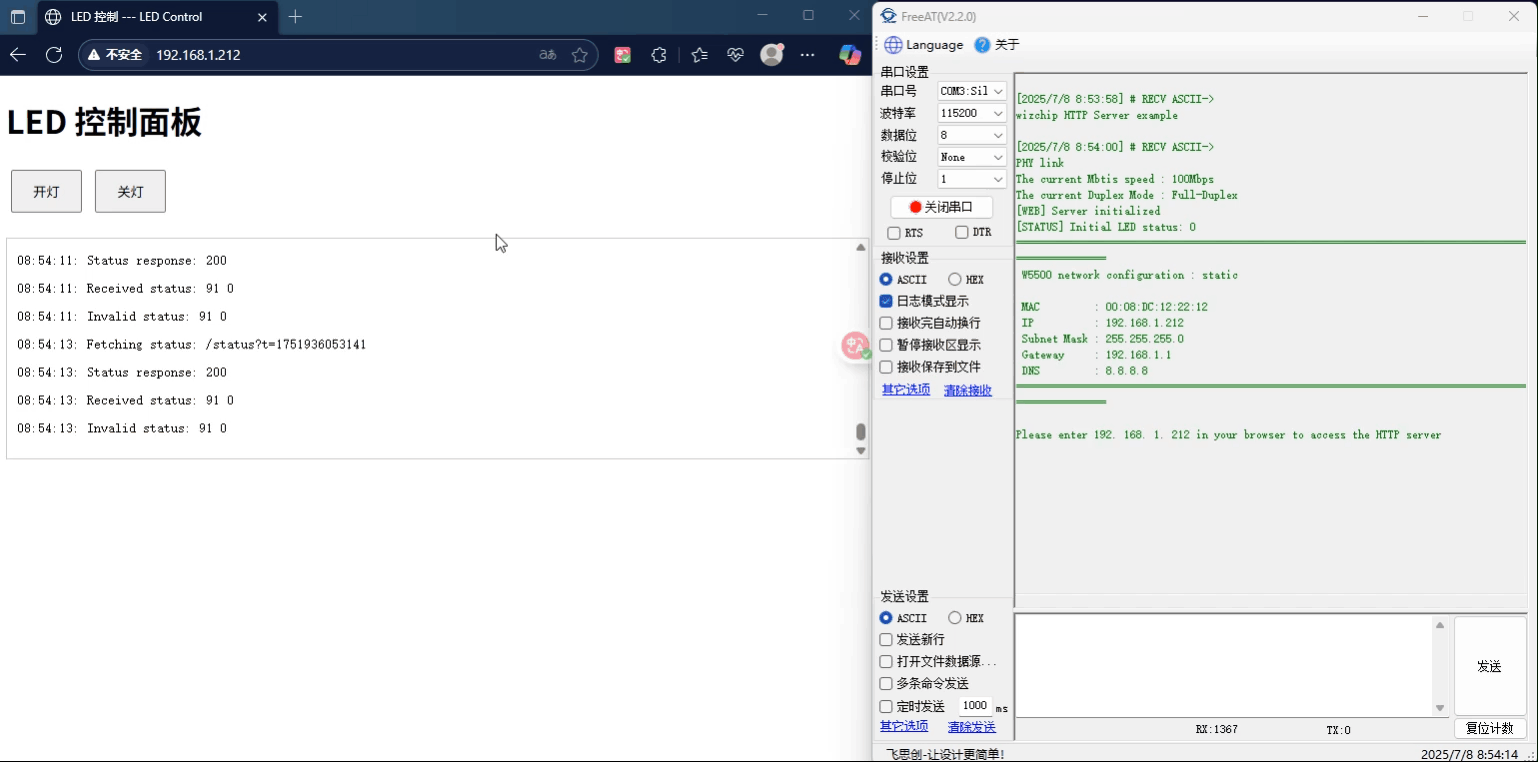
4. Click to turn off the lights
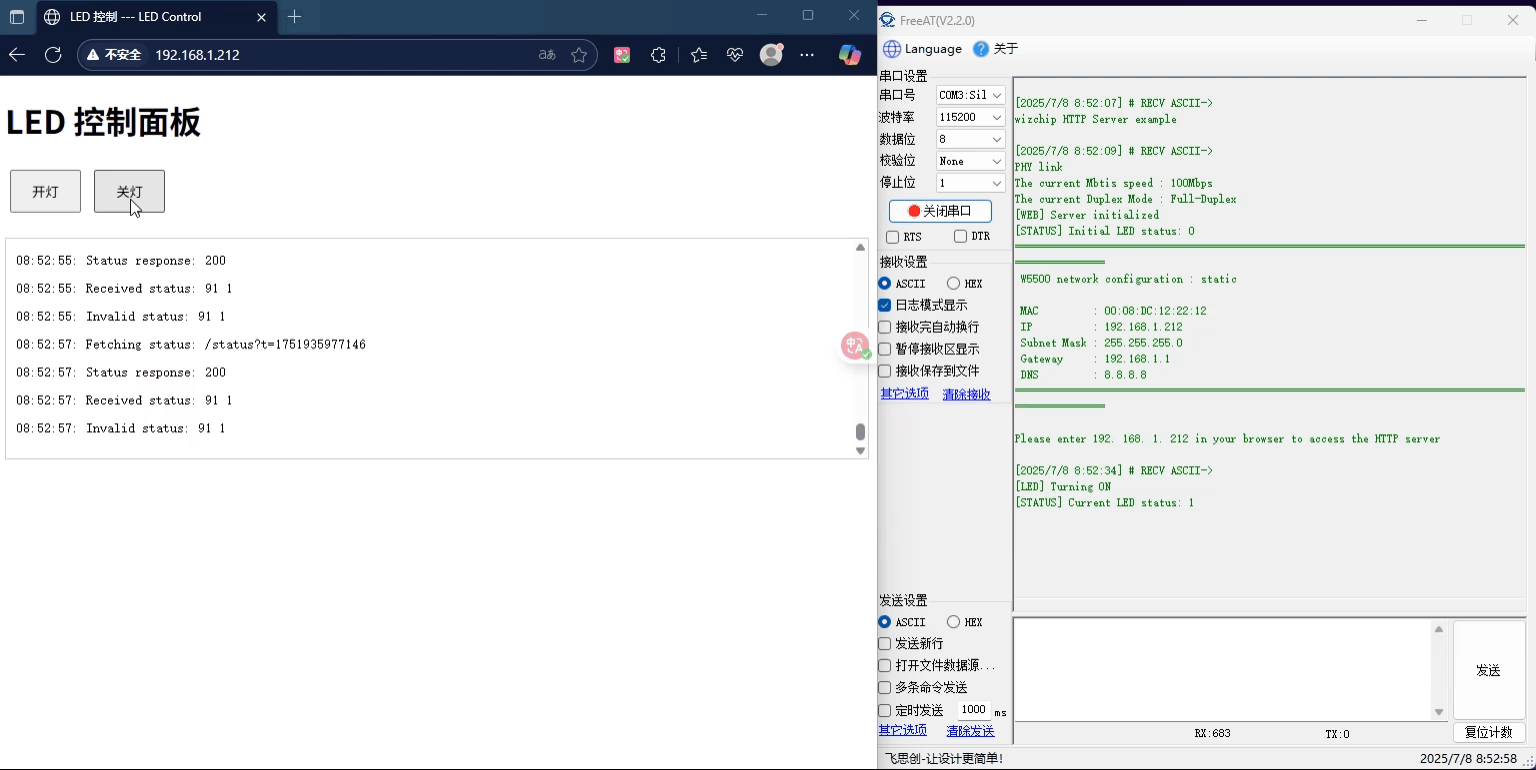
5. In our code , we define PC2 as the control port for the LED . Entering an interrupt will toggle the LED 's state and display it on the browser . We externally trigger an interrupt on PC2 , and the LED changes from off to on .
6. When we trigger an external interrupt on pin PC2 again , we can see that the LED changes from on to off .
6. Summary
This project successfully implemented remote control of relays via a web page by combining the W5500io-M module with an STM32 microcontroller, verifying the feasibility of an Ethernet-based embedded web server solution. Thank you for your patience in reading! If you have any questions during the reading process, or would like to learn more about this product and its applications, please feel free to leave a message via private message or in the comments section. We will reply to your message as soon as possible to provide you with more detailed answers and assistance!