Ethernet/UDP DMX Bridge im Eigenbau
In the Loxone forum , resourceful people, including Robert L. , have been working on a cheap way to build a DMX controller with a network co
In the Loxone forum , resourceful people, including Robert L. , have been working on a cheap way to build a DMX controller with a network connection from an Arduino with an Ethernet shield and RS485 converter.
The first idea was to connect to the Loxone Miniserver as a replacement for the official DMX extension using a "virtual output" via UDP. Of course, this also works with any other system - for example node-red or everything that speaks UDP.
As is well known, UDP does not produce a TCP-ACK, which avoids overhead, but also does not guarantee that a data packet actually arrives. With dimmer control, however, it is irrelevant whether only 97 out of 100 packets that describe a dimming curve arrive.
Incidentally, the original code can also be run on an ESP8266 and Robert L. even wrote an adapted version for the inexpensive H801 (ESP8266) WLAN dimmer, which can control LEDs directly and no longer requires a separate DMX dimmer.
The users in the forum brought many shortcomings of the original DMX extension to light and often spoke out in favor of Robert L.'s solution.
In electrical distribution, WLAN is less beneficial and I had been looking for a way to finally implement Ethernet on a circuit board myself for a long time and had found the right project.
The prototype
Obviously I had big plans when I announced in the forum that I could design, produce and assemble an open-source board (CC-BY-SA) version of the board and offer it for sale.
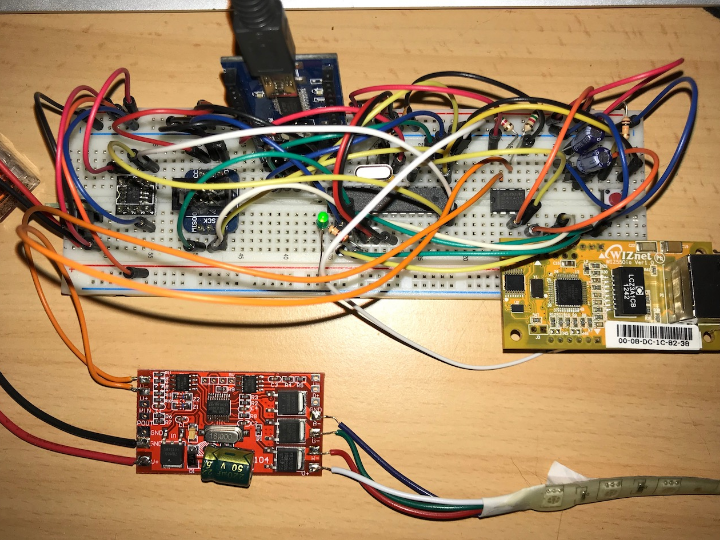
The construction of the prototype alone was quite demanding, which can be seen clearly in the picture above. To test it, I ordered a cheap 3-channel DMX dimmer on ebay because I don't have my own DMX installation.
I just cleaned up the original code a bit and added the EEPROM function mentioned later. I added DHCP to the Ethernet connection, which will then also be the default setting.
circuit
Over the last few weeks and especially over the last weekend, I was able to see for myself how much work goes into something like this. This is by far my most complex circuit (so far)!
But I would like to explicitly mention the help from the Loxone forum again, without whose input the implementation would not have been possible. Luckily for the Ethernet part with WizNet's W5500 I was able to use the layout of the W5500 Ethernet Shield which is freely available as open source.
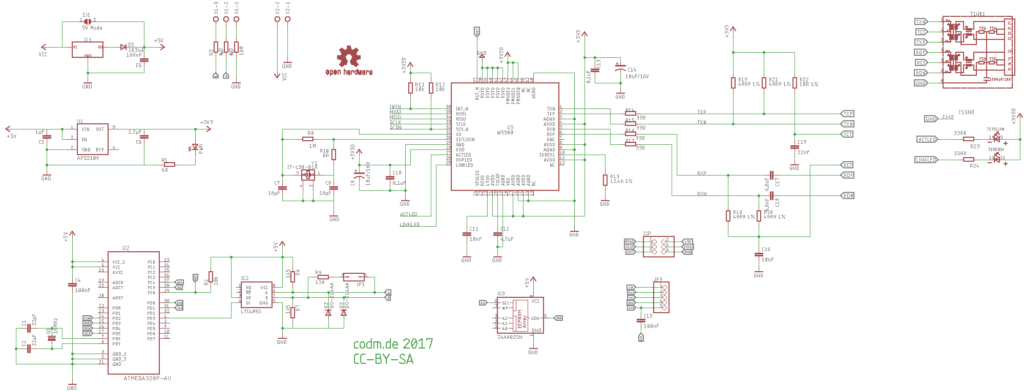
Ethernet DMX bridge circuit
The W5500 is the second further development of the W5100 built into the usual Arduino Ethernet Shield. Together with Paul Stoffregen 's excellent Arduino Ethernet library , which was originally developed for the Teensy , the increased processing speed is clearly noticeable. Of course, direct comparisons with the "old" hardware still have to confirm the subjective impression.
Paul's Ethernet library has several advantages. Among other things, the complete auto-detection of the W5x00 used, but above all the better processing in the library itself:
Wiznet socket registers are cached, which greatly reduces SPI communication overhead, at the cost of a small increase in RAM usage. TCP connections and UDP packets accessed in small chunks typically see a substantial performance boost.
Additionally I integrated a 24AA025E48 EEPROM from Microchip into the circuit. The memory of the EEPROM is not used, but it comes with an EUI-48 ID that can be used as a globally unique MAC address for the Ethernet interface. I found inspiration for this at Freetronics , an Australian Arduino manufacturer.
The WizNet chips do not have a MAC address by default. They bring one with them now, but it's a sticker on the circuit board and therefore not really useful for the code on the microcontroller.
Normally, you simply initialize the Ethernet library with any MAC address, which is absolutely sufficient for the local LAN. But if you want to use several of the same devices in the same LAN, you have to adapt the address for each one and thus compile your own software. This effort is eliminated by using the EUI-48 ID of the EEPROM, which actually makes "out of the box" use possible in the first place.
The power supply will be selectable between 24V and 5V. In the 5V version, the OKI-78 voltage converter is omitted, which means that you can save a few euros with this version.
PCB, case and BOM
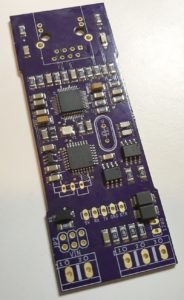
After the circuit, it was time to lay out the circuit board. I would argue that this was the heaviest chunk of work.
Since the circuit board is created and "baked" in the laboratory of a prototype manufacturer I am friends with, I decided to use SMD-1206 components that are easy to assemble by hand.
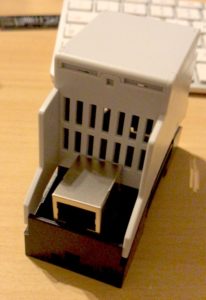
Phoenix Contact BC 35.6
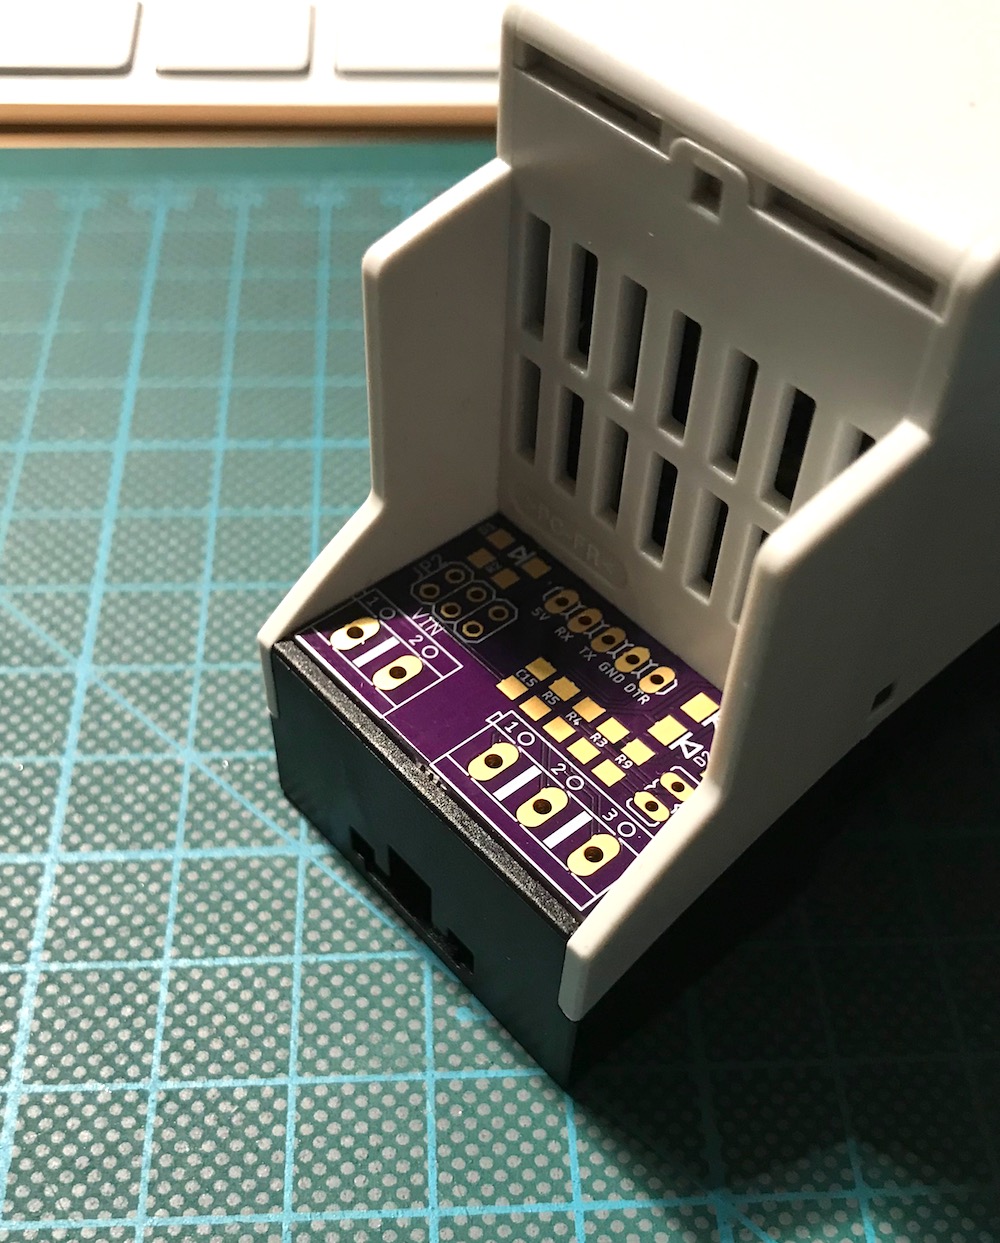
The aim was not to make any housing processing necessary in order to also give non-hobbyists the opportunity to use and assemble the Ethernet DMX bridge. The winner is the excellent Phönix Contact BC 35.6 2TE DIN rail housing. Thank you for the uncomplicated sending of samples to try out the different housing types and the excellent advice from the sales representative.
I routed the UART as well as the ISP of the ATMega328p to the outside. The UART is required to enable programming via Arduino IDE. For the pin assignment, I decided to use the arrangement of the FOCA FTDI adapter , which also allows me to auto-reset the ATMega for programming via DTR.
There is no integrated FTDI chip for cost reasons. In addition, programming is only necessary once – if at all. With jumper cables you can of course also use any other USB-FTDI adapter. If your own adapter does not provide a DTR signal, a manual reset of the circuit during programming is sufficient to end up in the Arduino bootloader and thus transfer the Sktech.
With the ISP I play the Arduino bootloader and of course it also offers the possibility of direct programming of the MCU.

Ethernet DMX board layout
The circuit boards have now been ordered from OSHPark and are already on their way to production.
The next step was the "sourcing" of the nearly 60 components - that alone was a full-length affair.
I put DigiKey, RS-Components and Reichelt side by side. I will order most of the components from DigiKey because they have better discounts on SMD-1206 and also stock brands like Murata and Panasonic. Reichelt is ahead with some components and also gets part of the order. RS-Components was either just comparable or more expensive - I could only have saved a bit on the network socket. However, the advantage would have been eaten up again by the shipping costs.
outlook
I will offer the first boards in the Loxone forum and am curious to see what the experiences and feedback look like. The board can be ordered with a case (optional) in the planned cod.m web shop.
Achso, here of course the whole thing in action
I'm really amazed at how responsive everything is. By the way, you can see the Loxone web interface, connection then via virtual output via UDP.
As always, if you have any questions, feedback or criticism, please feel free to contact us.
updates
The finished circuit boards have now arrived and it looks really good. Will the days then times order the parts to equip the whole thing.
Update II
The boards are now populated. Unfortunately, as is almost usual with a first prototype, an error crept in. But with a quick fix everything works and I'm really a little proud
Meanwhile I have finished V0.3 of the layout. I'll sleep on it for another night and then put it into production. If these then work, nothing stands in the way of a small series.
Update III
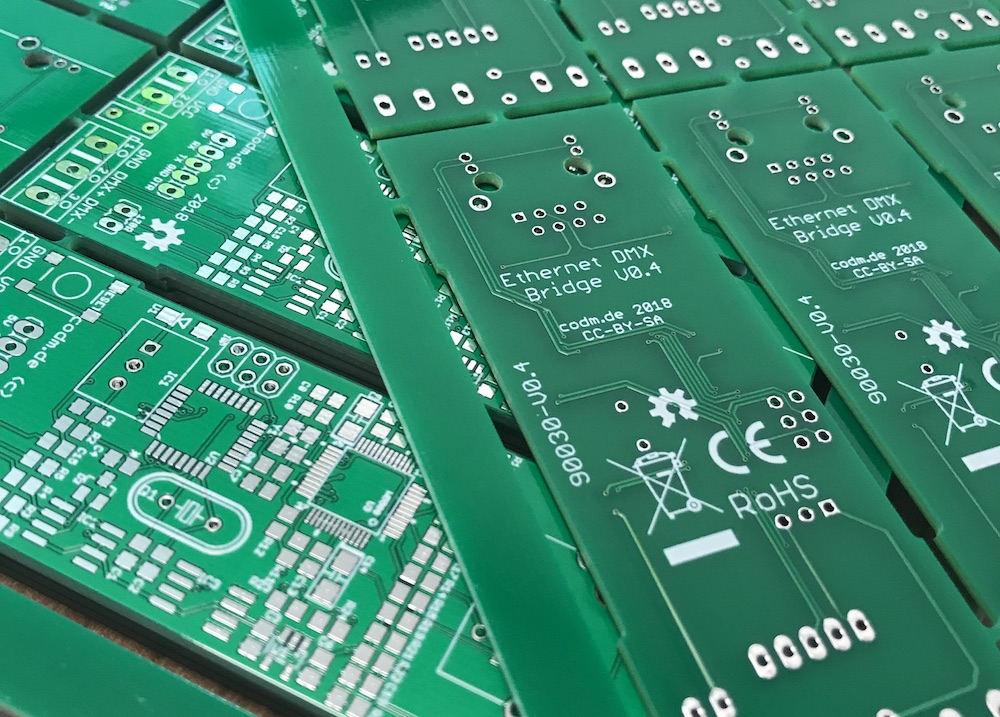
In the meantime, some time has passed and we have used it: Our WEEE registration, so that you can officially sell electronics in Germany, is on the way and should be approved in the next few weeks. The CE declaration of conformity for the Ethernet DMX Bridge is almost complete.
The most important thing, however, is that we have an appointment with the assembler next week to have the components assembled by machine. To do this, we had to have a panel produced and can now produce a small series: