
Try the W6300-EVB-Pico
Exploring the W6300-EVB-Pico: A Hands-On Test of WIZnet’s Latest Ethernet Development Board
This content was written by namo02268 on the Qiita website.
Original link: https://qiita.com/namo02268/items/a211e127fc38b32cd63a
Summary
This Qiita post by a Japanese developer provides a detailed walkthrough of testing the W6300-EVB-Pico, a development board featuring WIZnet’s latest W6300 Ethernet chip. The article explains the setup process, pin configuration, and how to build and run example projects using the board. Through practical testing, the author shares insights into communication performance, ease of use, and compatibility with Raspberry Pi Pico environments.
Project Introduction
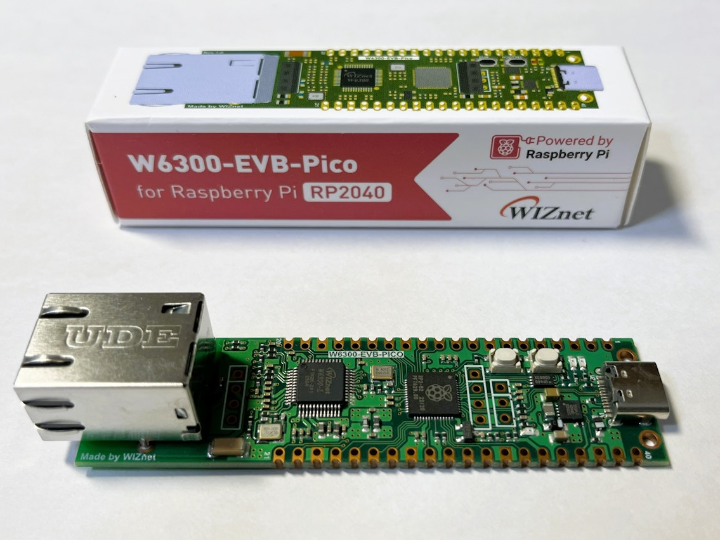
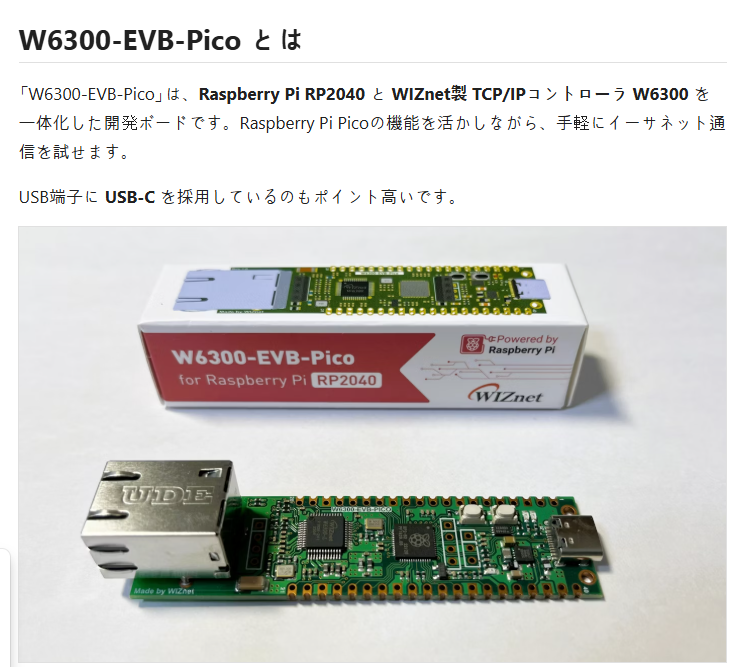
This project demonstrates a complete hands-on process for testing WIZnet’s W6300-EVB-Pico, a development board integrating the Raspberry Pi RP2040 microcontroller and W6300 Ethernet controller on a single board.
The article walks through setting up a simple HTTP “Hello World” server using the official WIZnet-PICO-C repository. It provides clear step-by-step instructions from environment setup to successful Ethernet communication:
Development Setup:
The author uses Windows 11 with Visual Studio Code. The “Raspberry Pi Pico” extension is installed to simplify building and flashing RP2040-based projects.
Project Import & Build:
After cloning the WIZnet-PICO-C repository, the user opens it in VSCode, imports the project configuration, and edits CMakeLists.txt depending on the target board (W6300-EVB-Pico or W6300-EVB-Pico2).
Network Configuration:
The network parameters (MAC, IP, subnet, gateway, DNS) are manually set in wizchip_http_server.c.
The W6300 supports both IPv4 and IPv6, showing its advanced network stack and flexibility for future-ready designs.
Building & Flashing:
The project is built using CMake and Ninja. The output file wizchip_http_server.uf2 is then uploaded to the board by entering BOOTSEL mode and dragging the file to the USB drive recognized by the PC.
Running the Example:
After connecting the board via Ethernet and powering it through USB-C, the user accesses the configured IP address in a browser to see a webpage served directly from the W6300-EVB-Pico — confirming that the embedded HTTP server is working.
This demonstration highlights how the W6300-EVB-Pico allows developers to quickly experiment with TCP/IP networking on a compact and affordable hardware platform. With its USB-C interface, dual IPv4/IPv6 capability, and official open-source SDK, it is an excellent starting point for prototyping IoT devices and connected systems.
Korean Ver
요약
일본 개발자가 작성한 이 Qiita 게시물은 WIZnet의 최신 W6300 이더넷 칩을 탑재한 개발 보드인 W6300-EVB-Pico 의 테스트 과정을 자세히 설명합니다. 설정 과정, 핀 구성, 그리고 보드를 사용하여 예제 프로젝트를 빌드하고 실행하는 방법을 설명합니다. 실제 테스트를 통해 통신 성능, 사용 편의성, 그리고 Raspberry Pi Pico 환경과의 호환성에 대한 통찰력을 제공합니다.
프로젝트 소개
이 프로젝트는 Raspberry Pi RP2040 마이크로컨트롤러 와 W6300 이더넷 컨트롤러를 단일 보드에 통합한 개발 보드인 WIZnet의 W6300-EVB-Pico를 테스트하기 위한 완전한 실습 프로세스를 보여줍니다 .
이 문서에서는 공식 WIZnet-PICO-C를 사용하여 간단한 HTTP "Hello World" 서버를 설정하는 방법을 설명합니다.저장소입니다. 환경 설정부터 성공적인 이더넷 통신까지 명확한 단계별 지침을 제공합니다.
개발 설정:
저자는 Windows 11과 Visual Studio Code를 사용합니다. RP2040 기반 프로젝트의 빌드 및 플래싱을 간소화하기 위해 "Raspberry Pi Pico" 확장 프로그램이 설치되어 있습니다.
프로젝트 가져오기 및 빌드:
WIZnet-PICO-C 저장소를 복제한 후 사용자는 VSCode에서 이를 열고 프로젝트 구성을 가져오고 CMakeLists.txt대상 보드(W6300-EVB-Pico 또는 W6300-EVB-Pico2)에 따라 편집합니다.
네트워크 구성:
네트워크 매개변수(MAC, IP, 서브넷, 게이트웨이, DNS)는 수동으로 설정됩니다 wizchip_http_server.c.
W6300은 IPv4와 IPv6를 모두 지원하여 미래 지향적인 설계를 위한 고급 네트워크 스택과 유연성을 보여줍니다.
빌드 및 플래싱:
프로젝트는 CMake와 Ninja를 사용하여 빌드합니다. wizchip_http_server.uf2그런 다음 BOOTSEL 모드로 전환하고 PC에서 인식하는 USB 드라이브에 파일을 드래그하여 출력 파일을 보드에 업로드합니다.
예제 실행:
이더넷을 통해 보드를 연결하고 USB-C를 통해 전원을 공급한 후, 사용자는 브라우저에서 구성된 IP 주소에 액세스하여 W6300-EVB-Pico에서 직접 제공되는 웹페이지를 확인합니다 . 이를 통해 내장된 HTTP 서버가 작동하고 있음을 확인할 수 있습니다.
이 데모는 W6300-EVB-Pico를 통해 개발자가 작고 저렴한 하드웨어 플랫폼에서 TCP/IP 네트워킹을 빠르게 실험할 수 있는 방법을 보여줍니다. USB-C 인터페이스, 이중 IPv4/IPv6 기능 , 그리고 공식 오픈소스 SDK를 갖춘 W6300-EVB-Pico는 IoT 기기 및 커넥티드 시스템 프로토타입 개발을 위한 훌륭한 시작점이 될 것입니다.