
Arduino Voice Control
Voice control for Arduino using Ethernet Shield with built-in W5100.
COMPONENTS
Hardware components
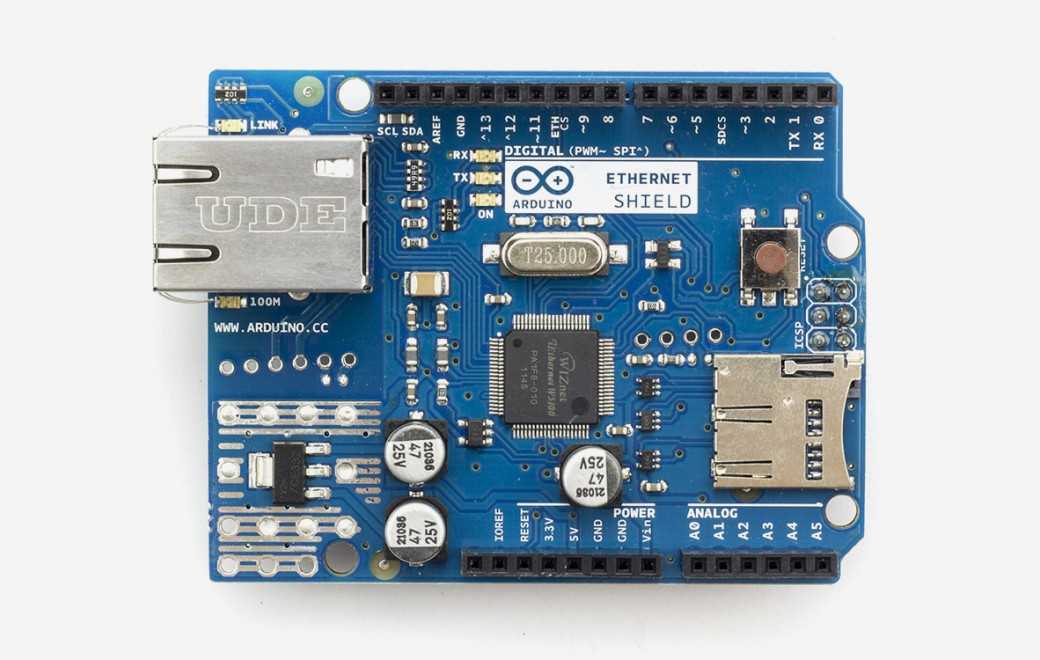

Arduino - Arduino Ethernet Shield
x 1
PROJECT DESCRIPTION
This code is a simple web server client example that uses Arduino to read a specific text file from a web server and control an LED based on its contents. Below is an interpretation of the main functions of the code.
1. Library and global variable settings:
- Import SPI and Ethernet libraries.
- Set the led variable to control the LED connected to digital pin 5.
- Set a unique MAC address assigned to the Arduino board.
- Set the serverName variable indicating the server's domain.
- Set the IP address of Arduino.
- Create an EthernetClient object and set the client variable responsible for communicating with the web server.
- Set the readString variable for string parsing.
- Set variables representing the number of lines and newline characters.
#include <SPI.h>
#include <Ethernet.h>
const int led = 5;
byte mac[] = { 0xDE, 0xAD, 0xBE, 0xEF, 0xFE, 0xED }; //MAC address
char serverName[] = "www.arduino.php5.sk"; // website for example test
IPAddress ip(192, 168, 2, 40); //IP address
EthernetClient client; //client mode
String readString; //our parsing variable
int x=0; //line counter
char lf=10; //line feed
2. Setup function:
- Set the LED pin to output mode.
- Initialize Ethernet using DHCP, if failed, try again using a static IP address.
- Initialize serial communication.
void setup(){
 pinMode(led, OUTPUT);
 if (Ethernet.begin(mac) == 0) {
    Serial.println("DHCP unsucessful, trying again.");
    Ethernet.begin(mac, ip); //try with our IP (static)
  }
  Serial.begin(9600);
}
3. Loop function:
- Sends an HTTP GET request to the web server, requesting the contents of a specific text file (/PHP_en/translations.txt).
- If the connection is successful, data is read from the web server and the data is output to the serial monitor.
- Analyzes the received data and executes commands to turn the LED on or off.
void loop(){
if (client.connect(serverName, 80)) { //Try HTTP connection
    Serial.println("Connected");
    client.println("GET /PHP_en/translations.txt HTTP/1.1"); //stiahni text zo suboru
    client.println("Host: www.arduino.php5.sk"); //host --> rovnako ako v serverName
    client.println("Connection: close");  //ukonc pripojenie
    client.println(); //koniec requestu
  }
  else {
    Serial.println("Connection unsucessful."); //Chybova hlaska o neuspesnom pripojeni na webserver
    Serial.println();
  }
  while(client.connected() && !client.available()) delay(1); //little wait...
  while (client.connected() || client.available()) { //if we are connected.. read
    char c = client.read(); //read bytes from buffer
    Serial.print(c); //raw feed from web with header
    if (c==lf) x=(x+1); //count lines
    else if (x==12) readString += c; //build string
   }
if(readString=="Turn on"){
 digitalWrite(led, HIGH);
 }
 else if(readString=="Turn off"){
 digitalWrite(led, LOW);
 }
 else{
 Serial.println("Unsupported string, change on-line your voice/text input."); //bad string
Serial.println(readString); //write to serial monitor what we got in variable
 }
  readString = (""); //clear String
  x=0; //clear line counter
  client.stop(); //stop request
  delay(5000); //again run loop after 5 seconds
}
In other words, this code is an example of Arduino reading a specific text file from a web server, analyzing its contents, and controlling the LED according to the results.
Documents
-
Arduino-Voice-control

Comments
Write