
ROVWIZ (ROV-WIZnet)
ROVWIZ (ROV-Wiznet) mini ROV Control IOT with ethernet comunication
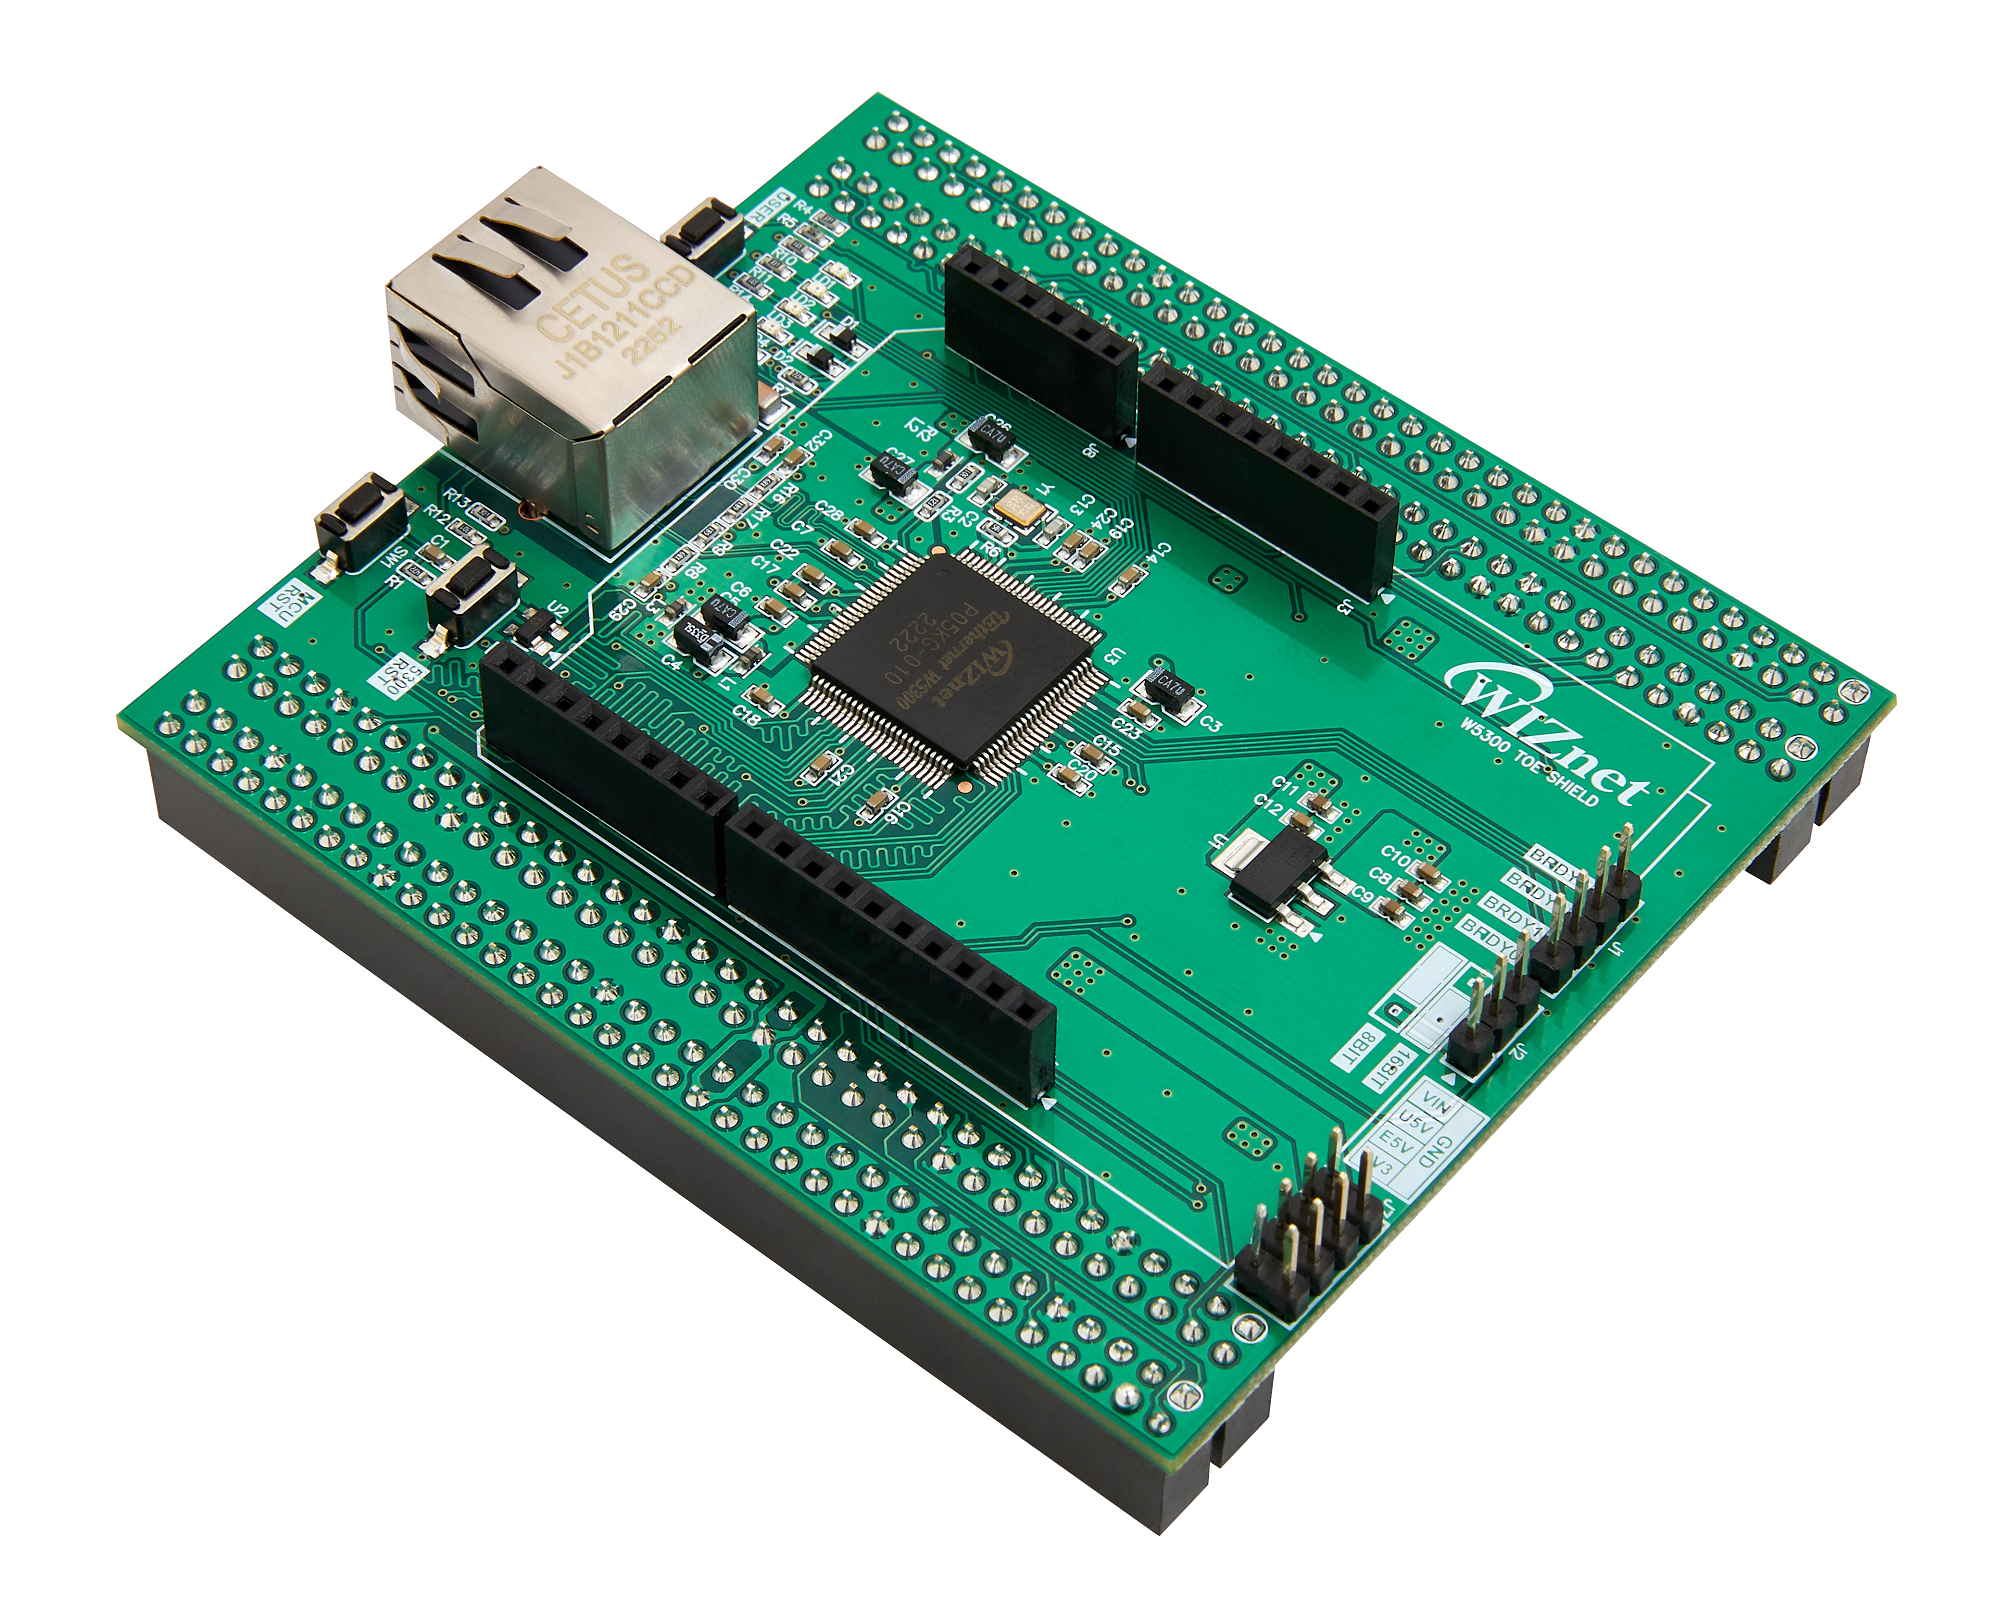
WIZnet - W5300-TOE-Shield
x 1
solidworks - SolidWork
x 1
Indonesia is a maritime nation; therefore, we, from the ROVIndonesia community (SUROVOTIC), will attempt to create a mini ROV inspired by several fish found in Indonesia. The inspiration from fish is also reflected in the aerodynamic design of the Mini ROV, which is crafted to achieve maximum efficiency and agility. As technology advances, Mini ROVs are becoming an extension of underwater explorers, assisting us in comprehending the intricate and vulnerable marine ecosystems. With its adaptive nature, the Mini ROV serves as a bridge between the human world and the underwater realm, which still holds many mysteries.
ROVWIZ is the name of this ROV, which we have constructed using the IoT system by utilizing the W5300 network controller chip. By employing the Ethernet network as the connection between the ROV and Groundstation (as the control medium), we use the STM32 Nucleo-F722ZE for ROVWIZ's maneuver control. We can controling ROVWIZ use Smartphone or Tablet, so it's very portable.
So, prepare yourself to embark on an intriguing adventure with the Mini ROV inspired by the wonders of fish and the ocean's beauty that remains largely unexplored.
In this production, there are several steps involved:
- 3D Design using Solidworks 2022 Student Version
- Mechanical Assembly
- Controller Design
- Programming
Hardware
- STM32F722ZE
- W5300 arduino shield
- UTP cable
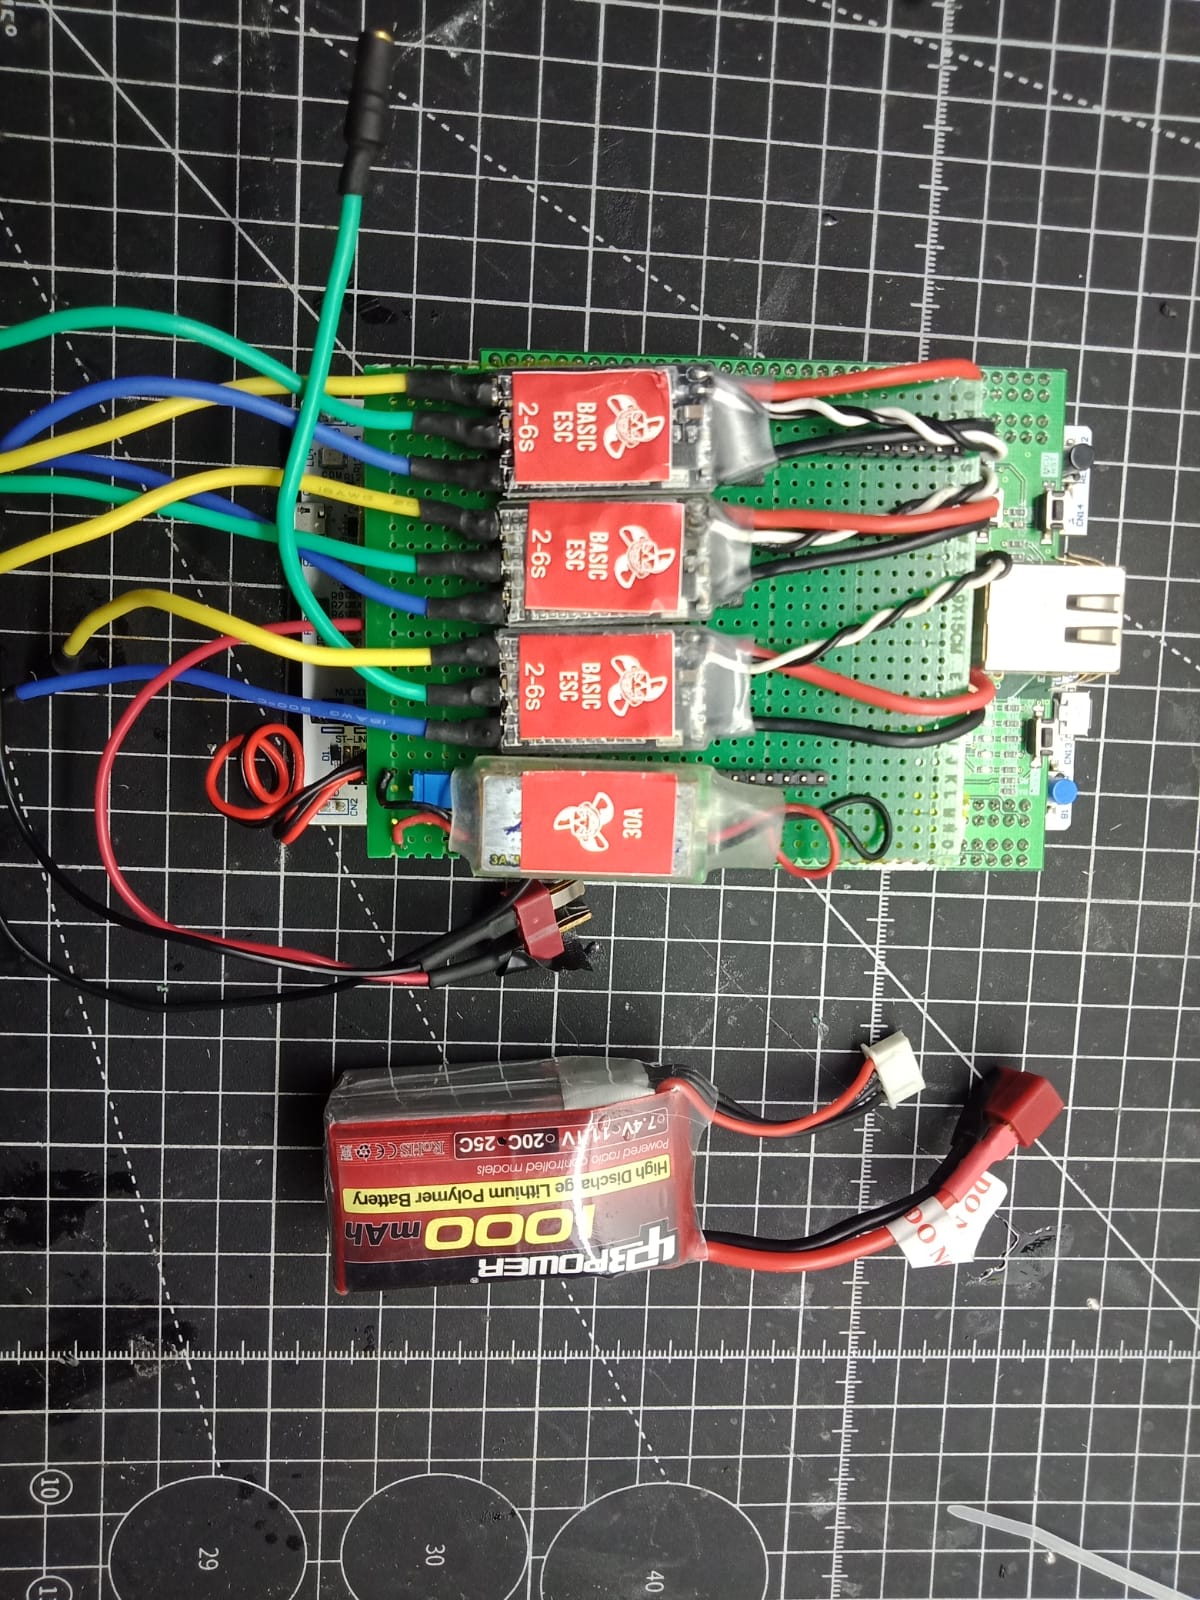
- 3 ESC Surovotic
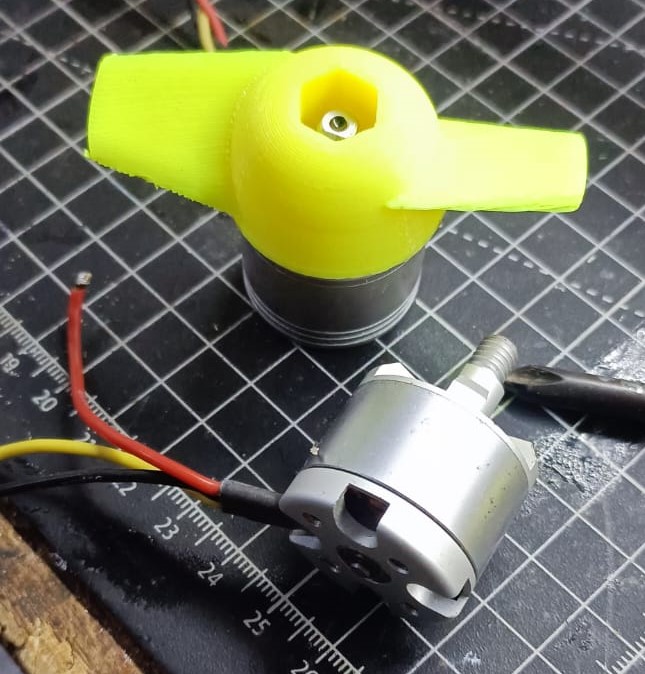
- 3 Brushless motor (from DJI Phantom 800kv)
- Lippo Battery
Software
- STM32CubeIDE
- Solidworks
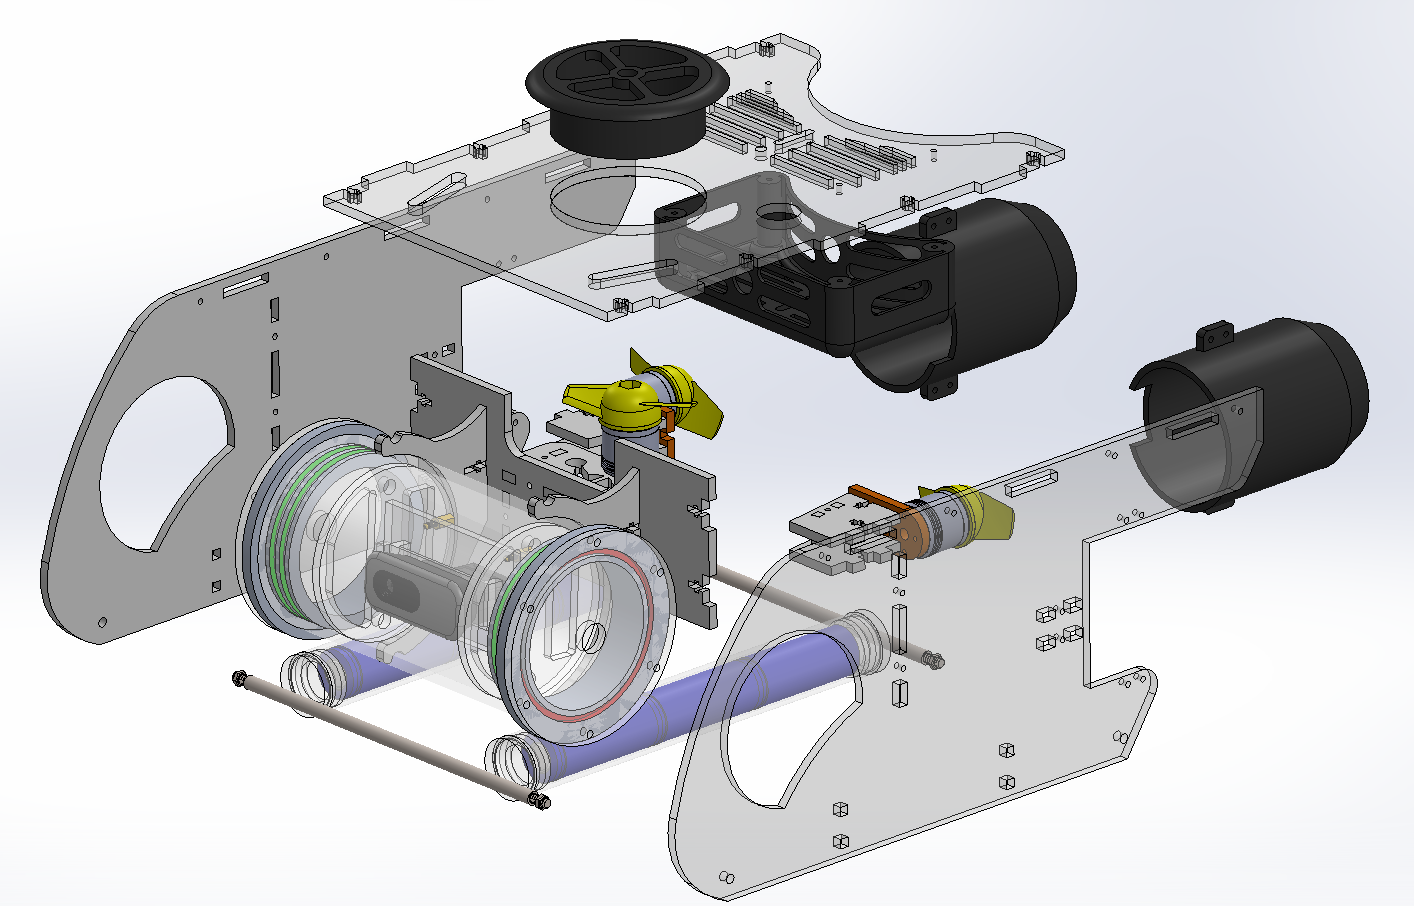
Step 1 : 3D Design
In this phase, we design a ROVWIZ using the Solidworks 2022 Student Version application: during this step, we design all the parts we will use, starting from the frame, motors, and several other components. The design we've created is sleek and looks incredibly agile in maneuvering, drawing inspiration from the shape of a fish.
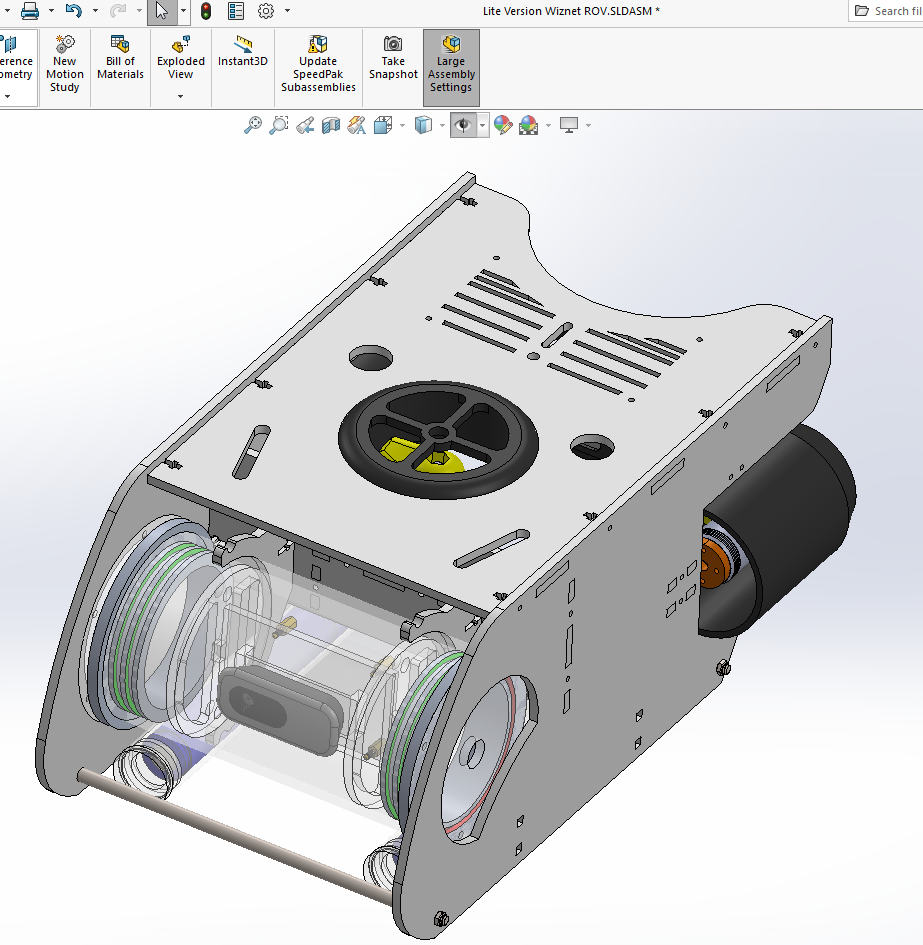
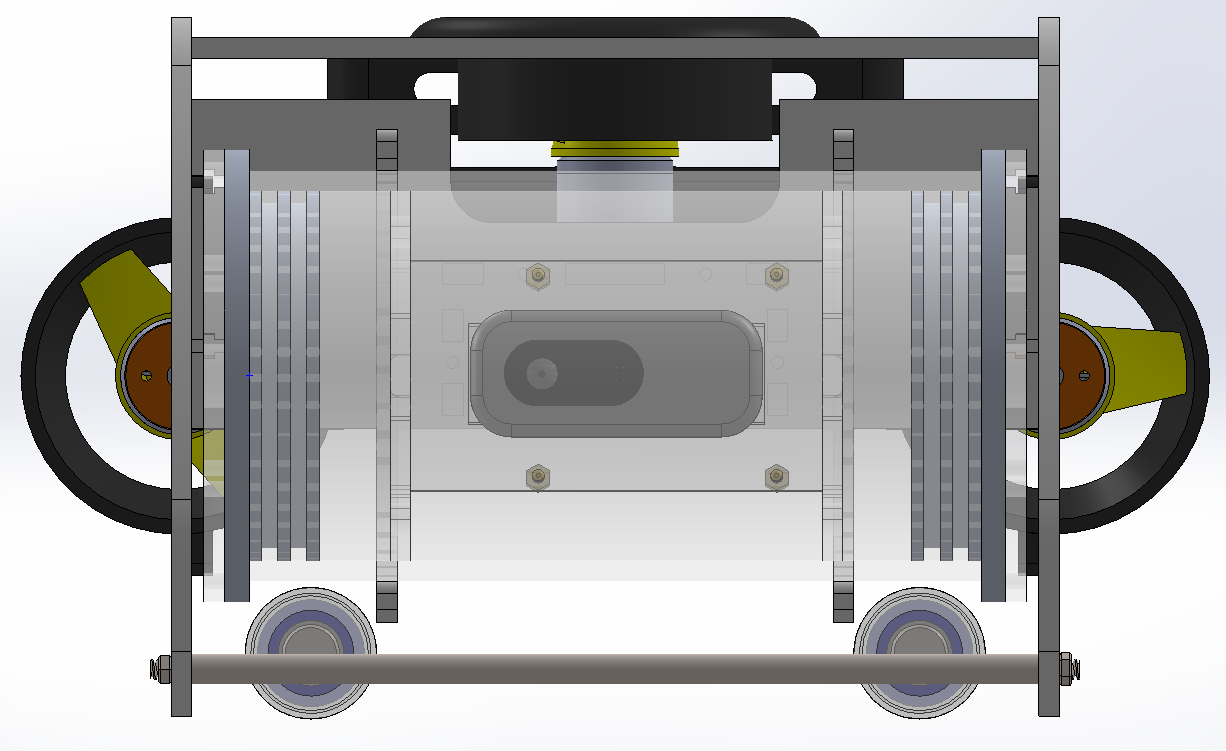
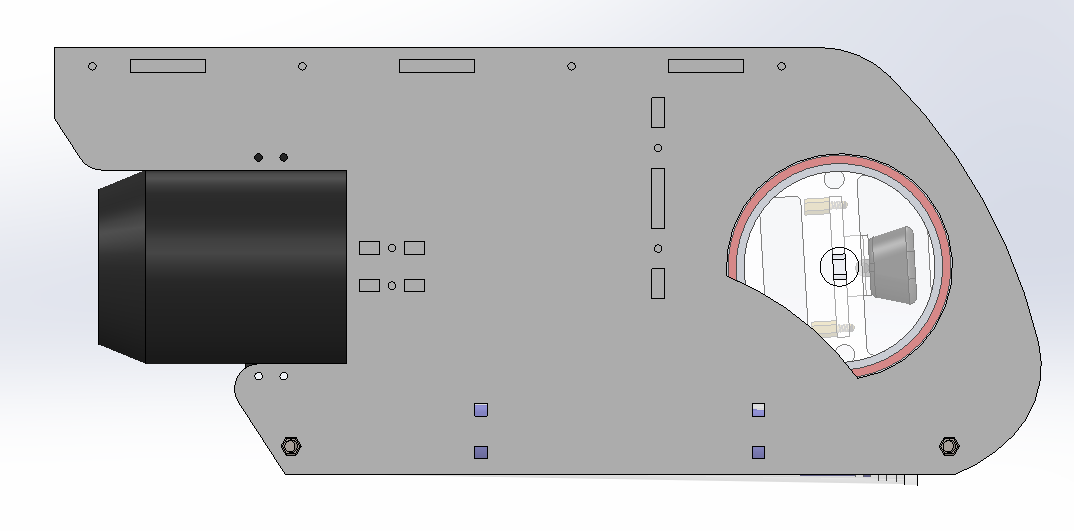
Front side Right side
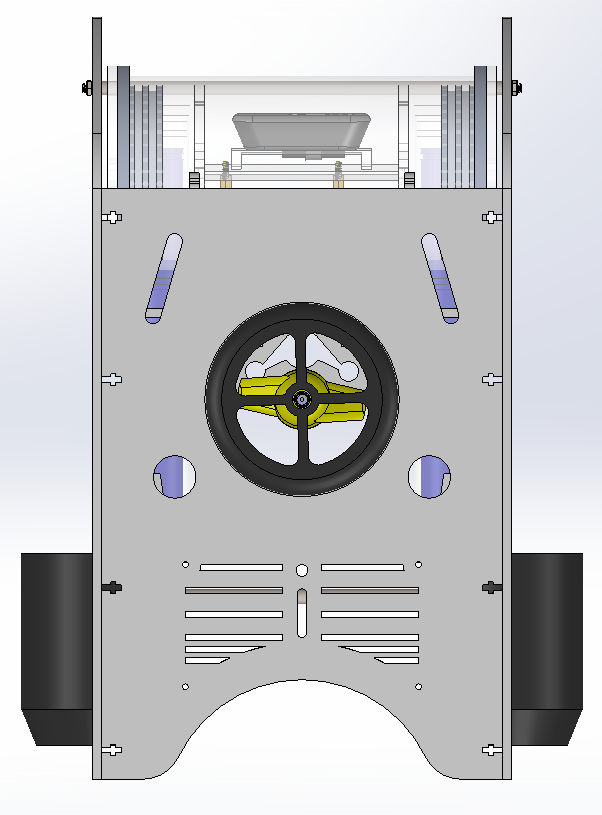
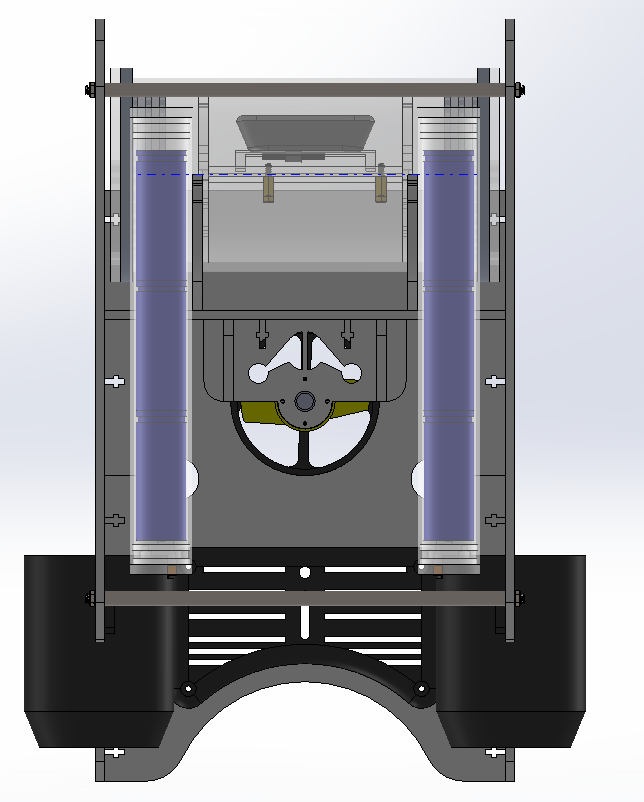
Top side Bottom side
Video Design
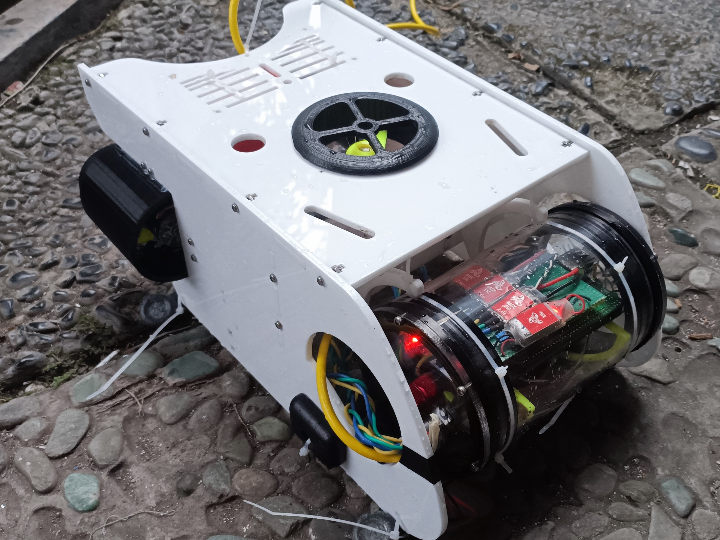
Step 2 : Mechanical Assembly
All Frame ROV we use acrylic 5mm. Its very simple to use.
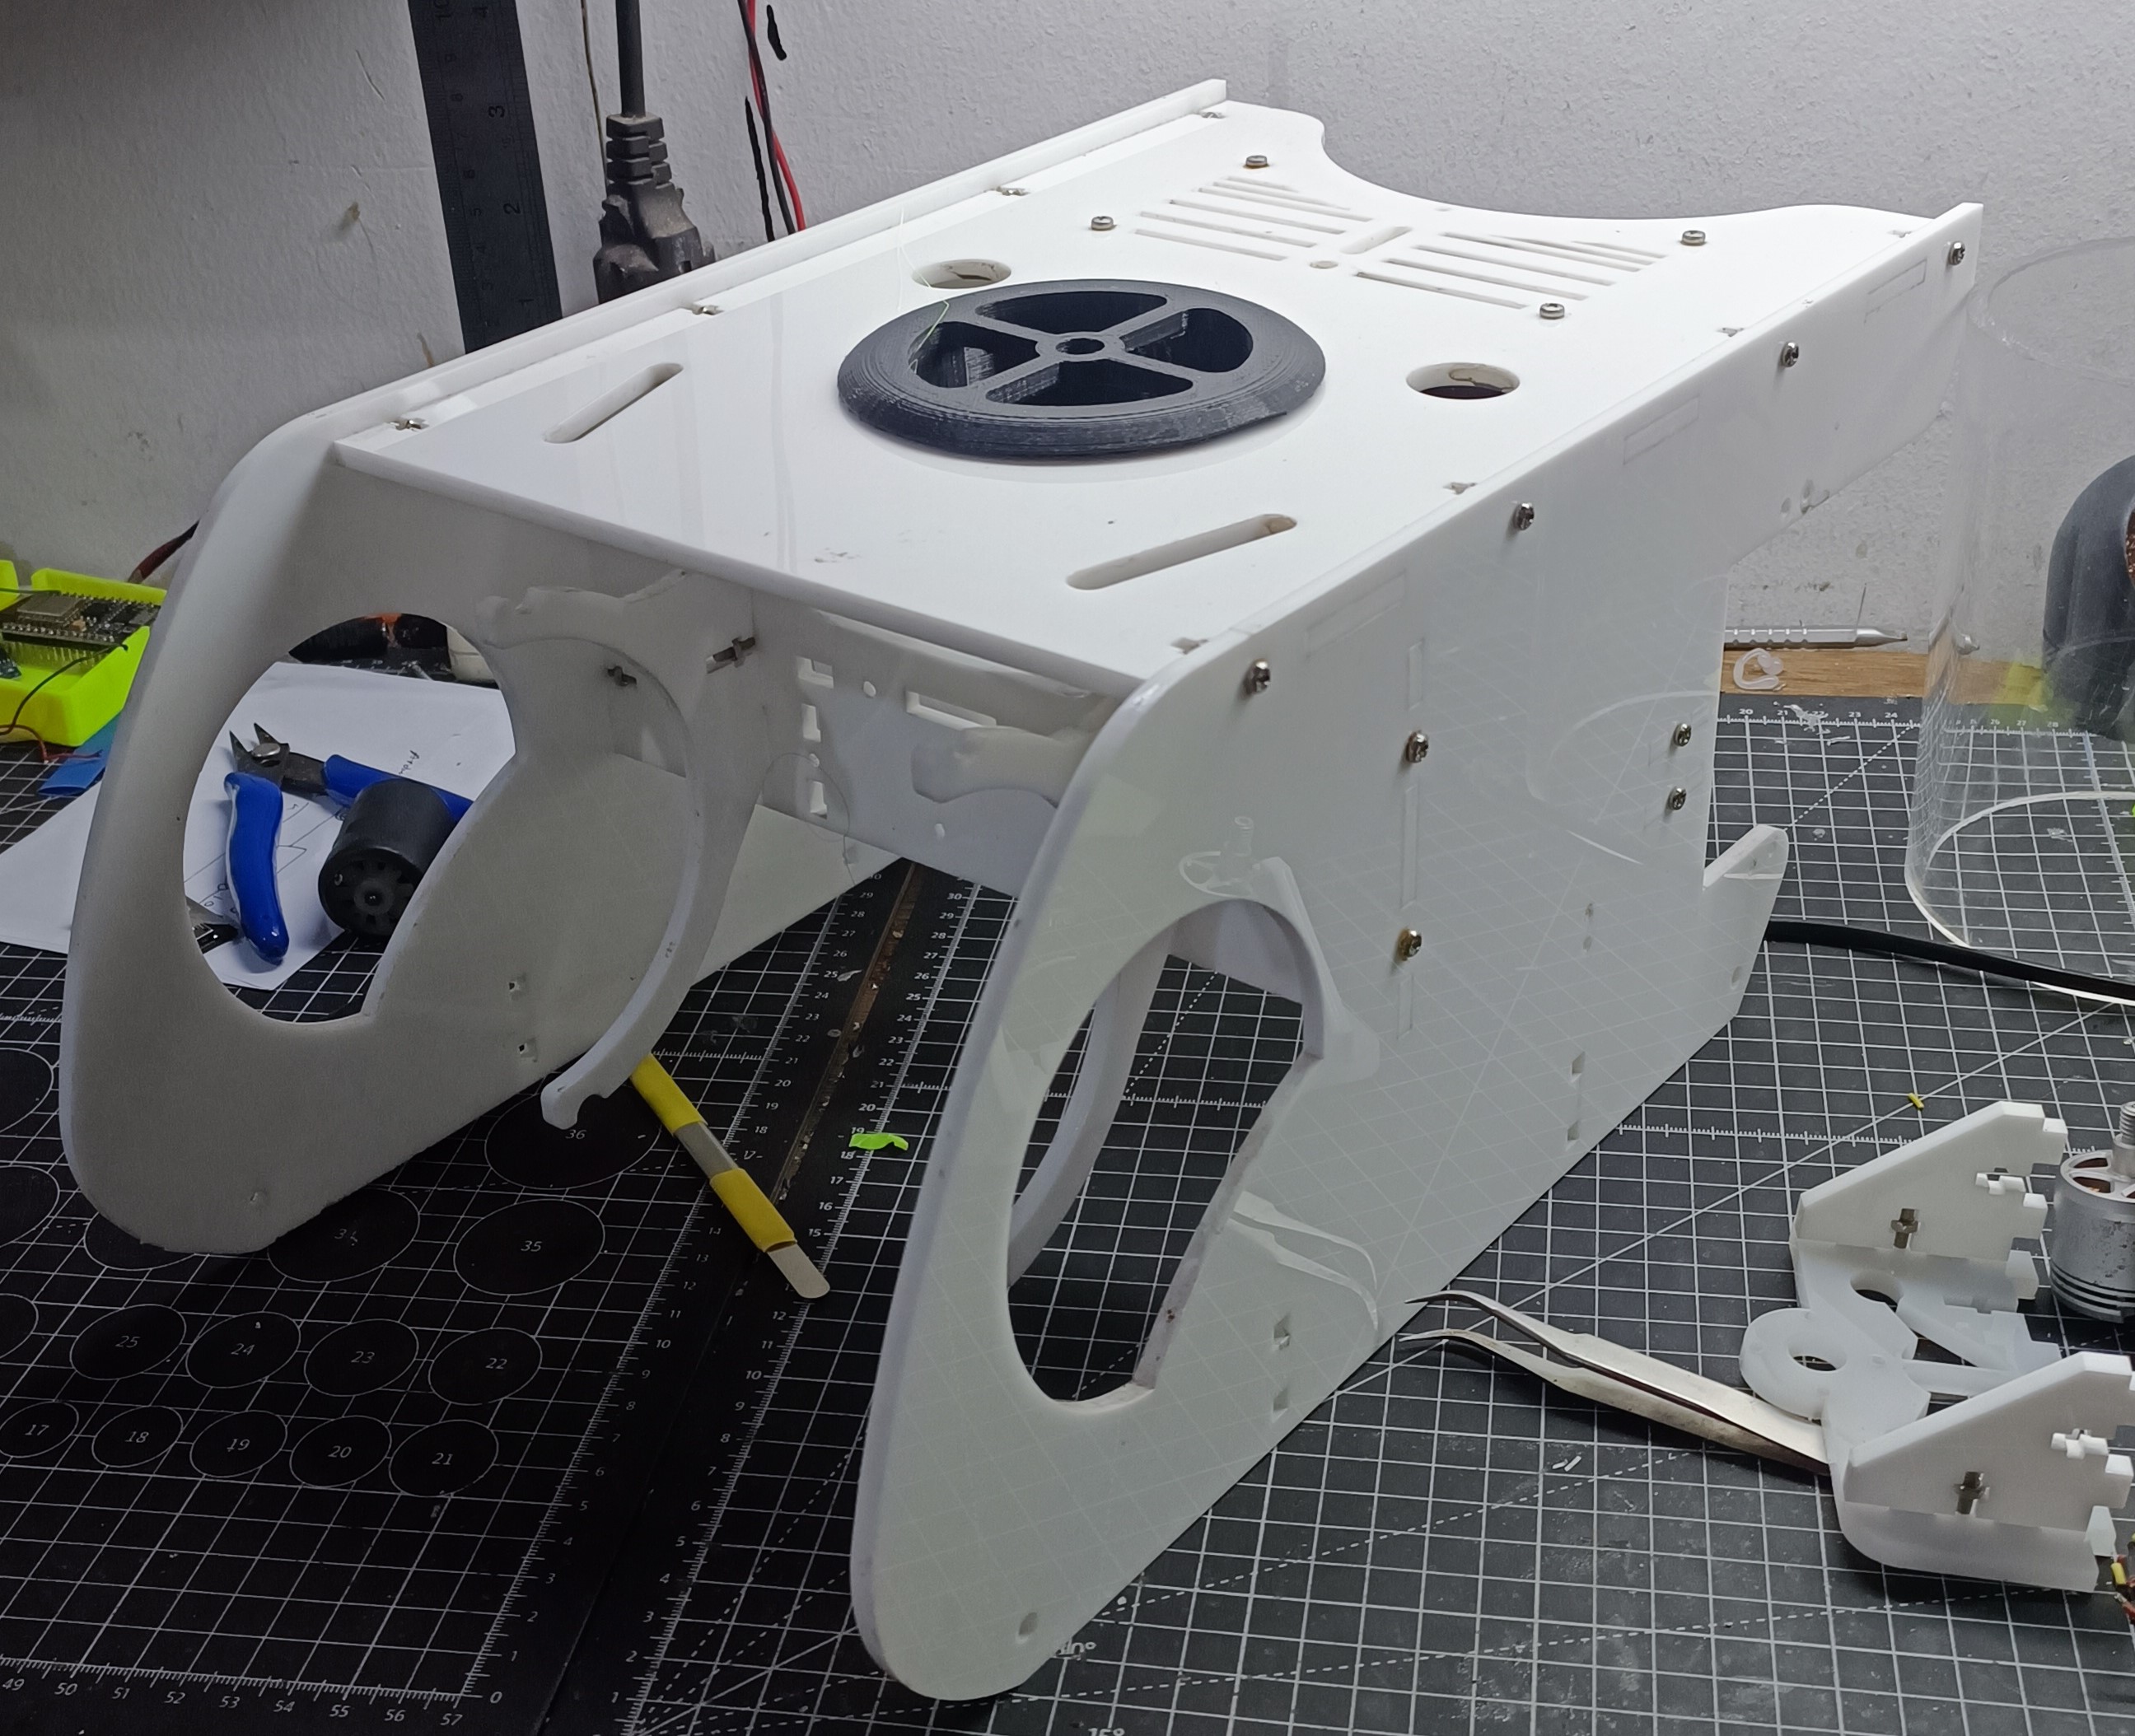
And to support manuver ROV we make bade and cover guard from 3d Printer PLA filament. And 3d printer many support to make some part for ROVWIZ.
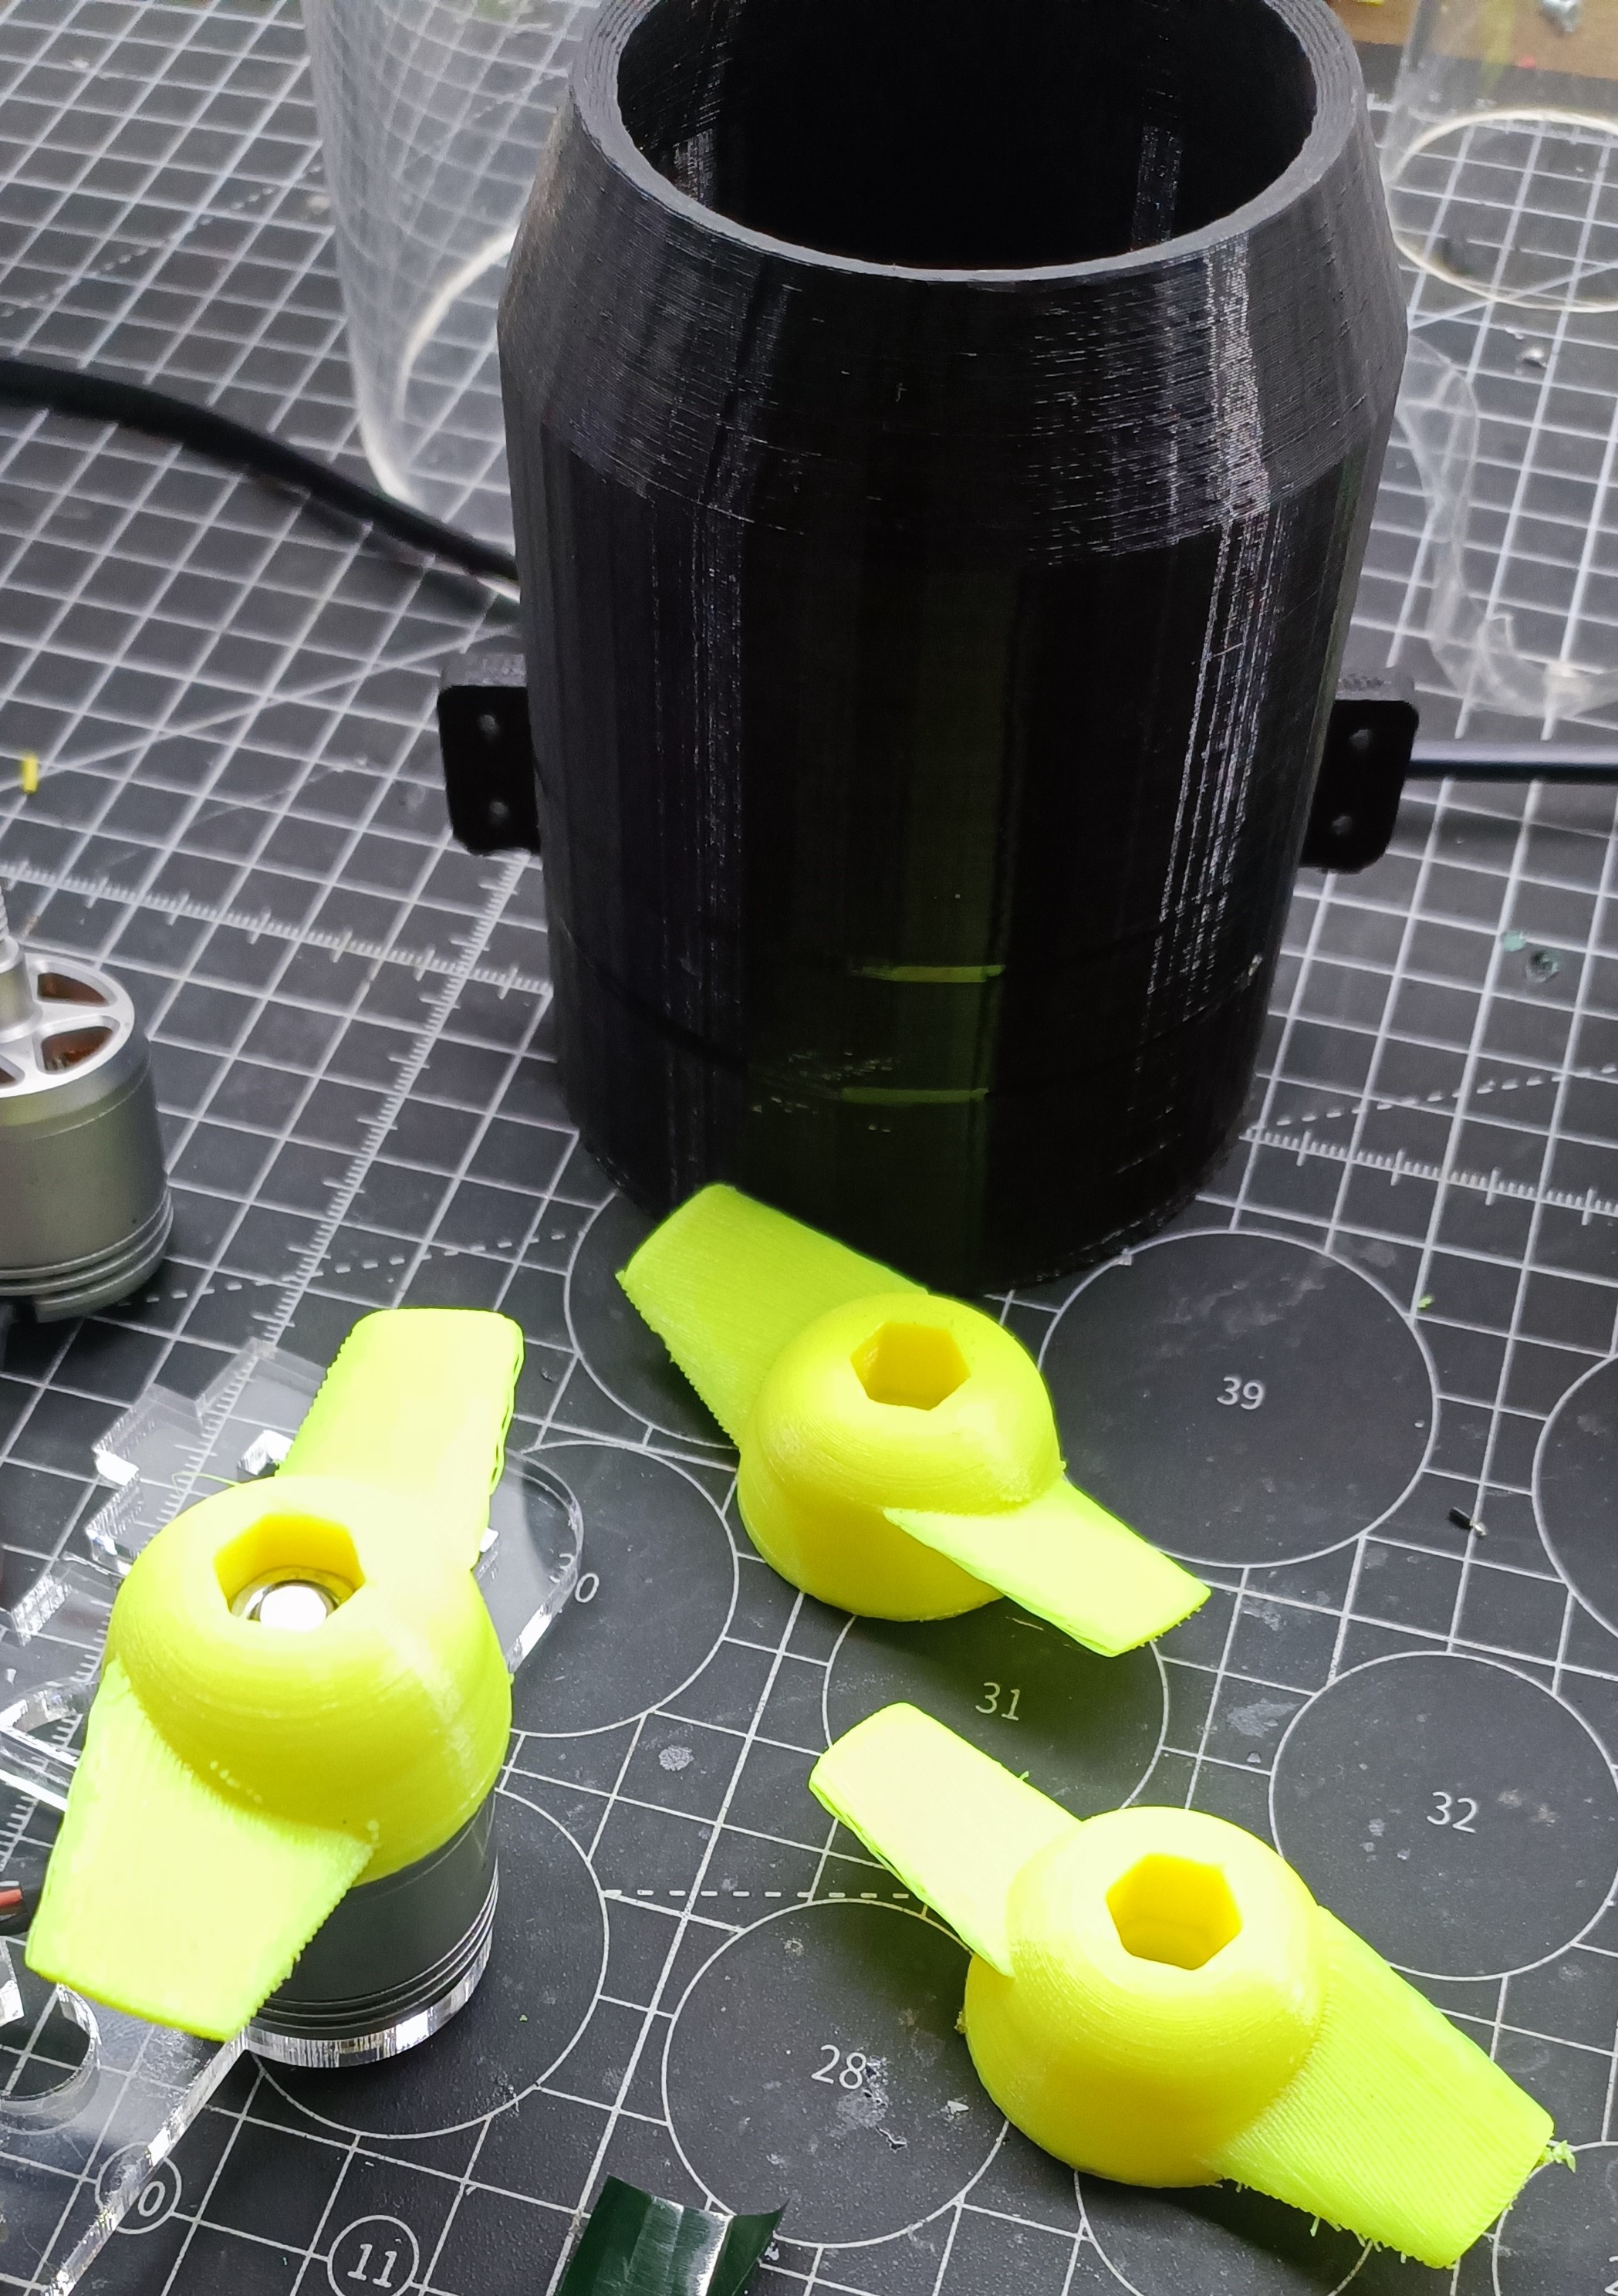
DJI Phantom Brushless motor 800kv we use in ROVWIZ. Previously we had done waterproof research on this motor, and it was proven to work well.
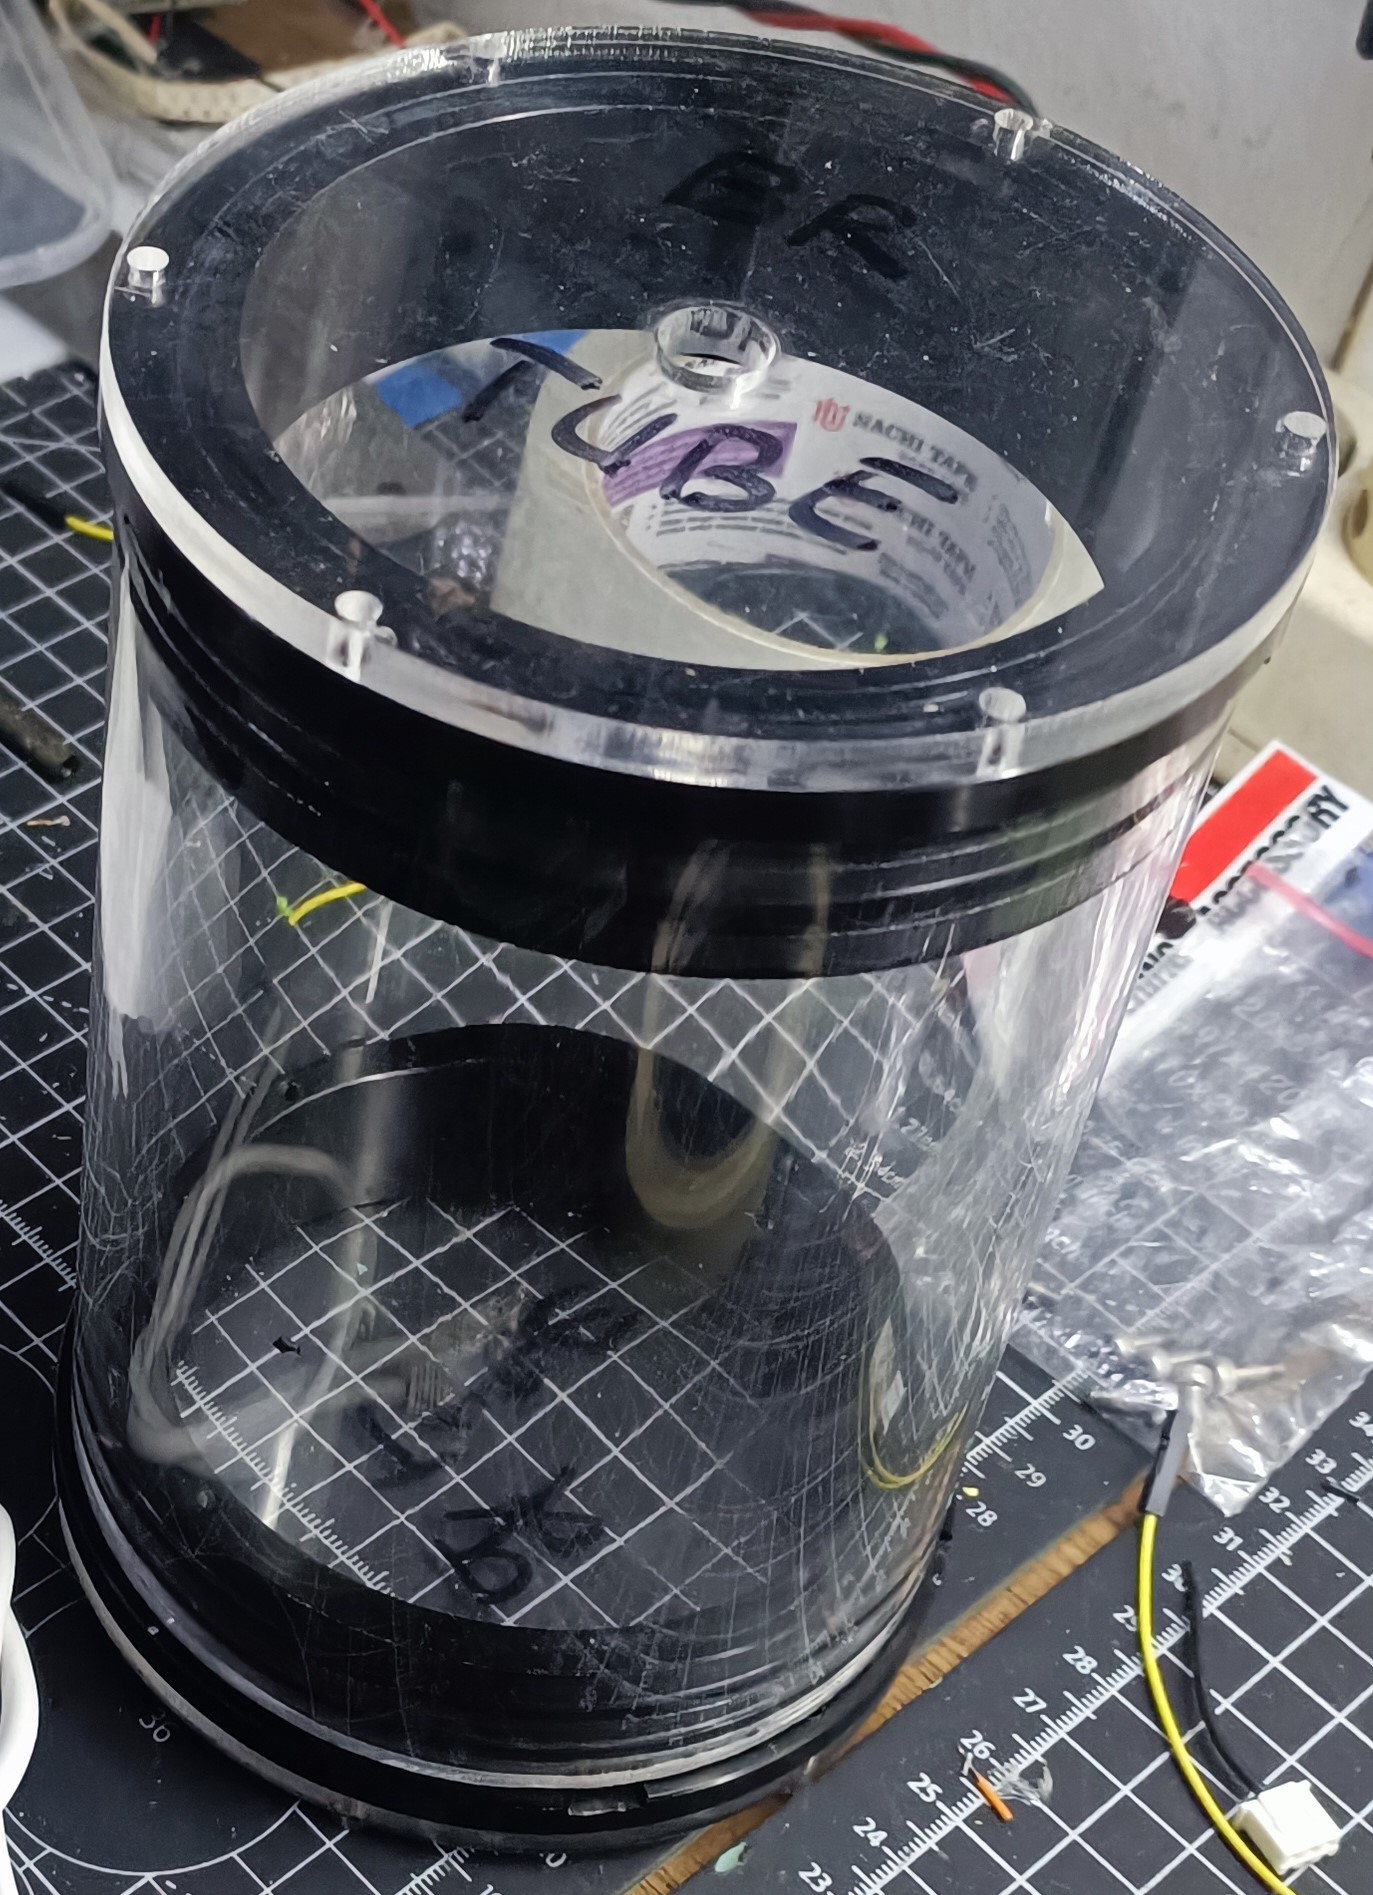
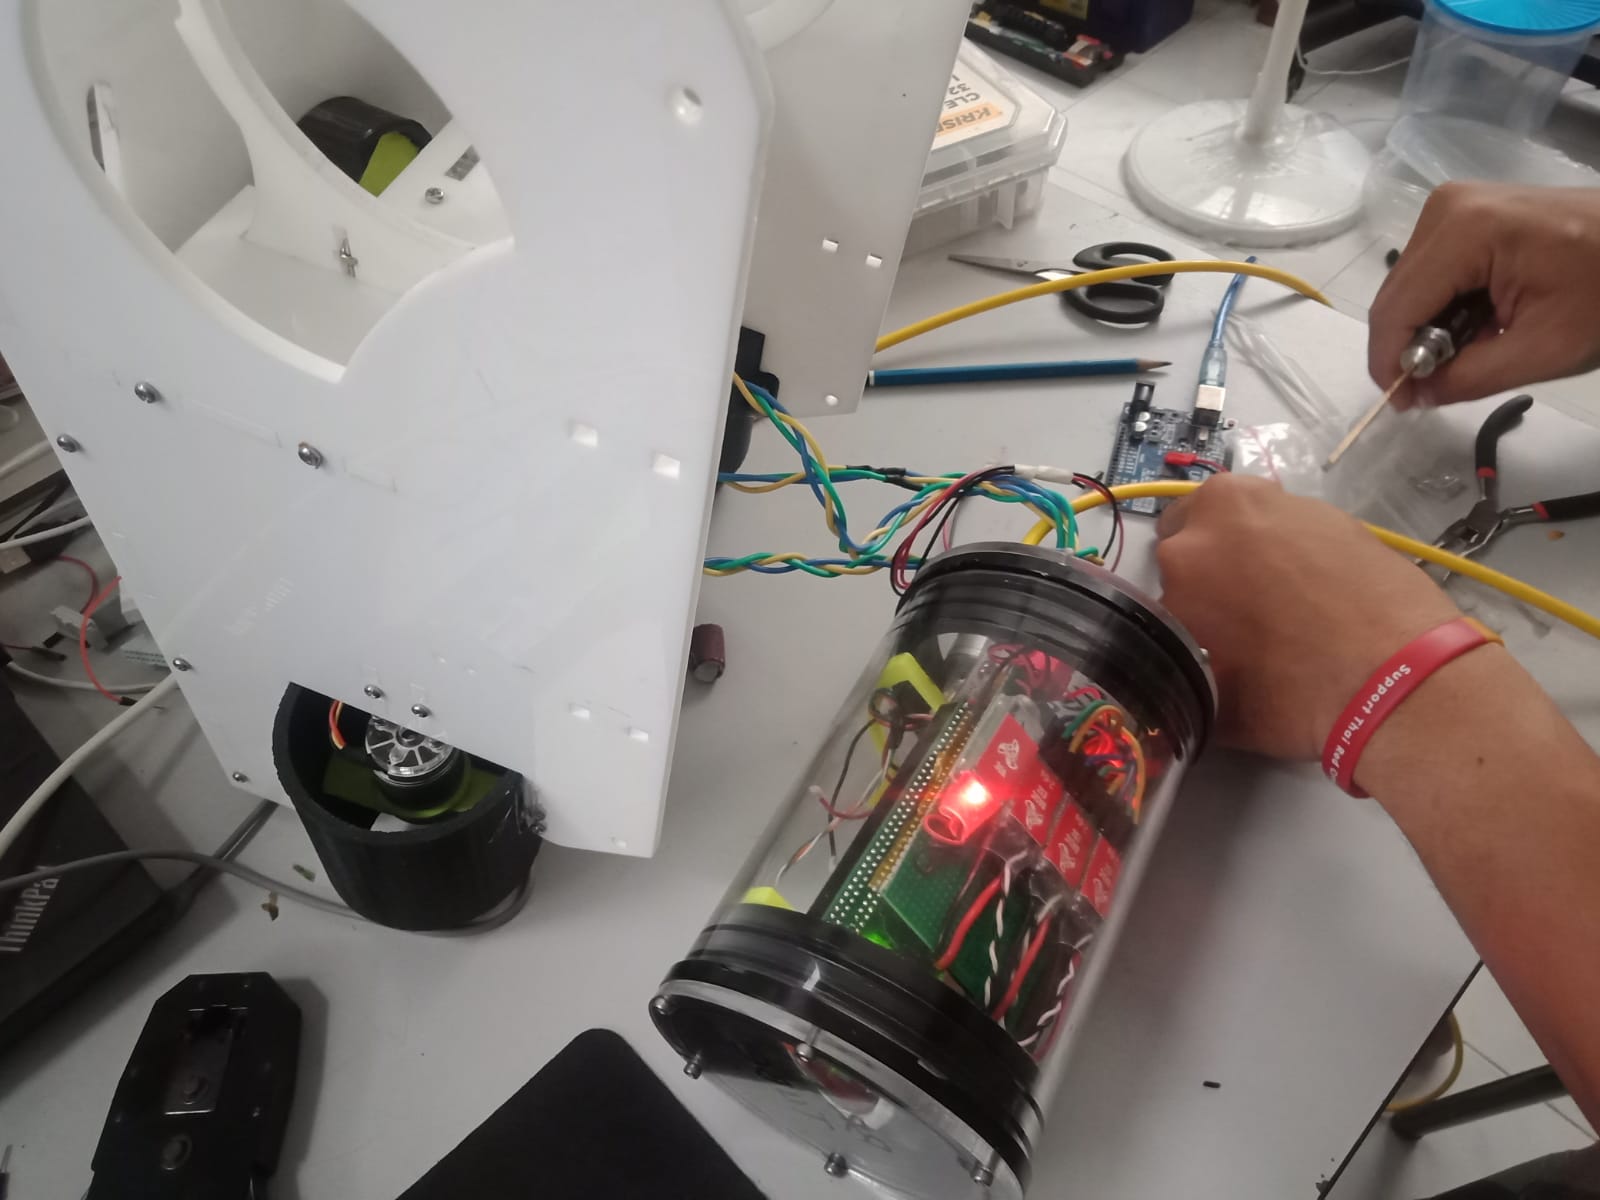
To make waterproof for component electronic we use acrylic tube. Utilizing an acrylic tube for waterproofing involves employing a transparent cylindrical structure made of acrylic material to create a water-resistant barrier. This method effectively shields against moisture, making it suitable for various applications such as sealing, encasing, or containing objects while maintaining visibility due to the transparent nature of acrylic.
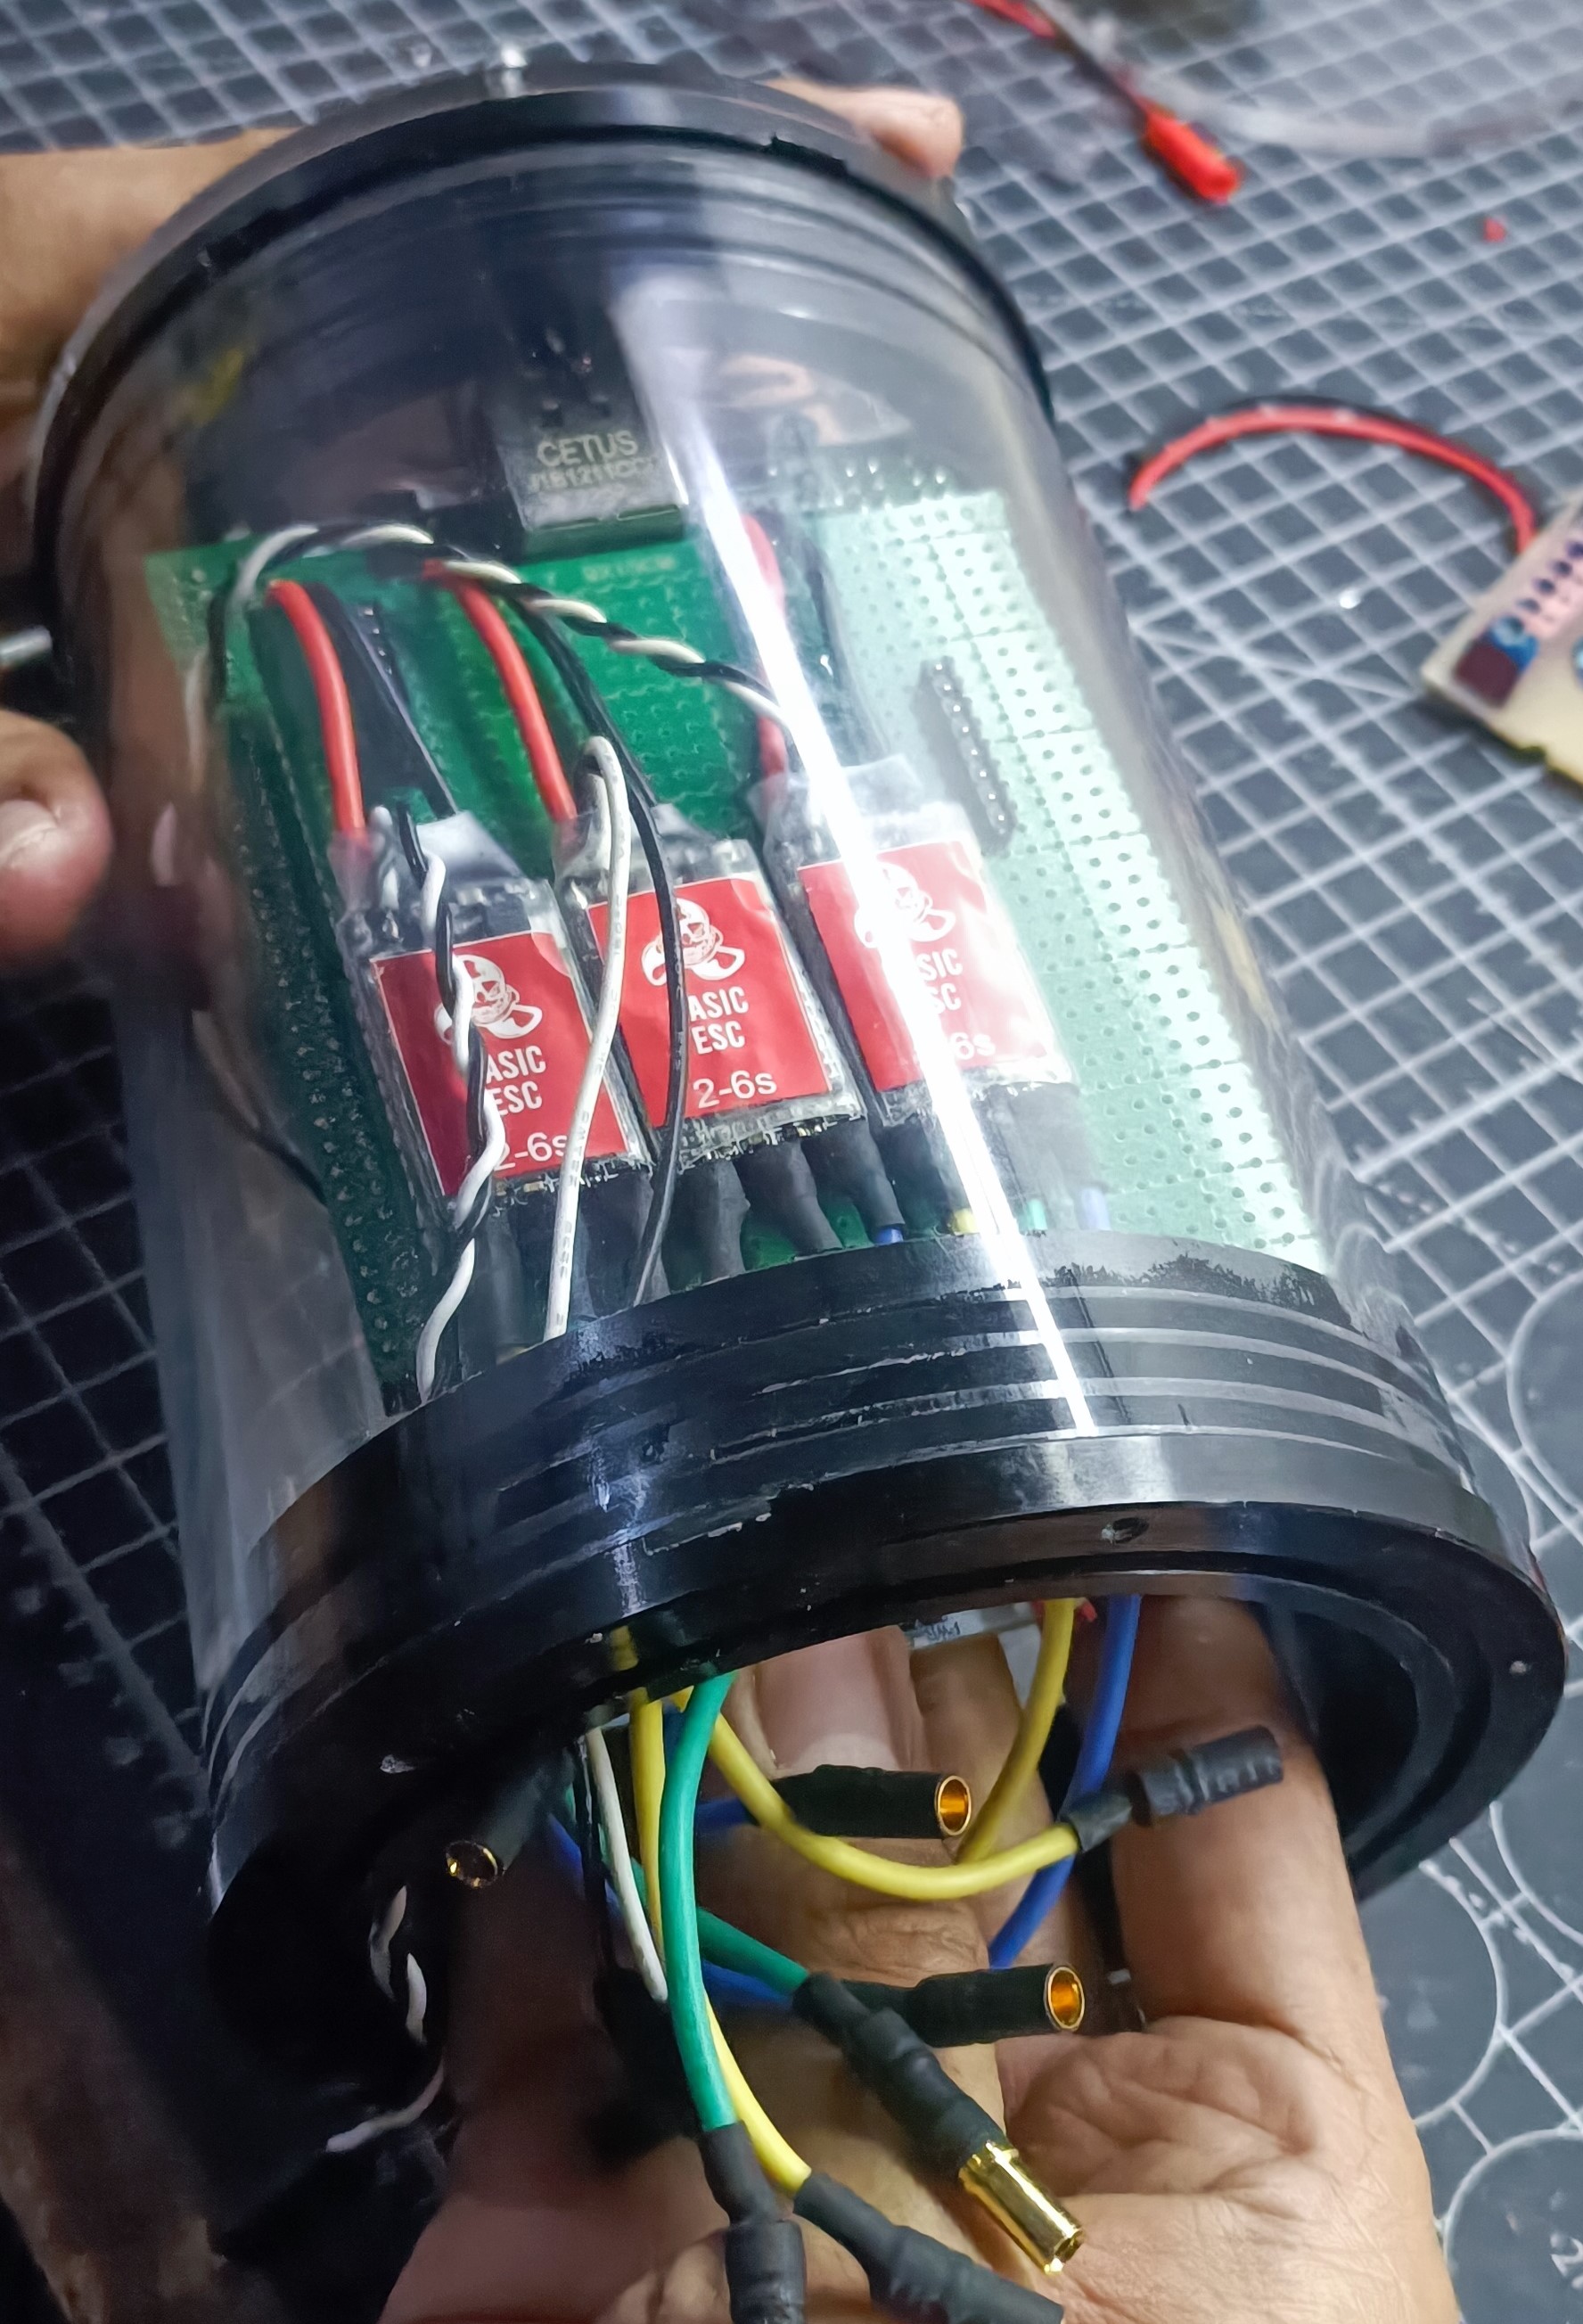
For management cable data we make waterproof to. We use epoxy glue. Epoxy adhesive, known for its strong bonding properties, serves as a reliable waterproof solution. When applied, it forms a resilient and impermeable seal that effectively prevents water from permeating surfaces. This makes epoxy ideal for various applications requiring water resistance, such as repairs, crafting, and construction projects.

Bouyancy Test. After assembly, we begin testing the balance of this ROV in the water. We conduct several experiments involving the addition of floats and even ballast.
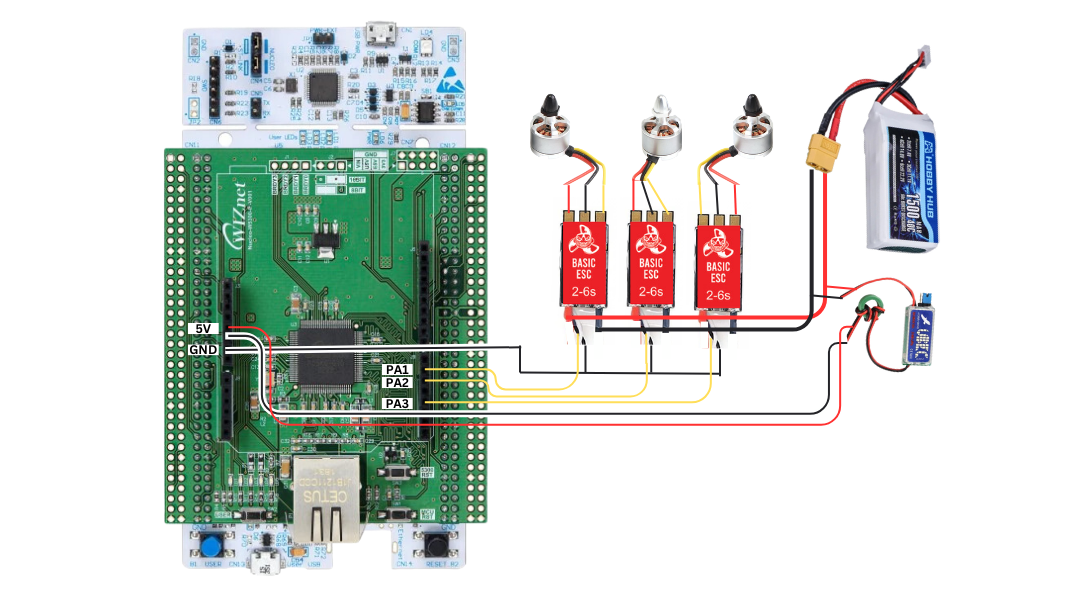
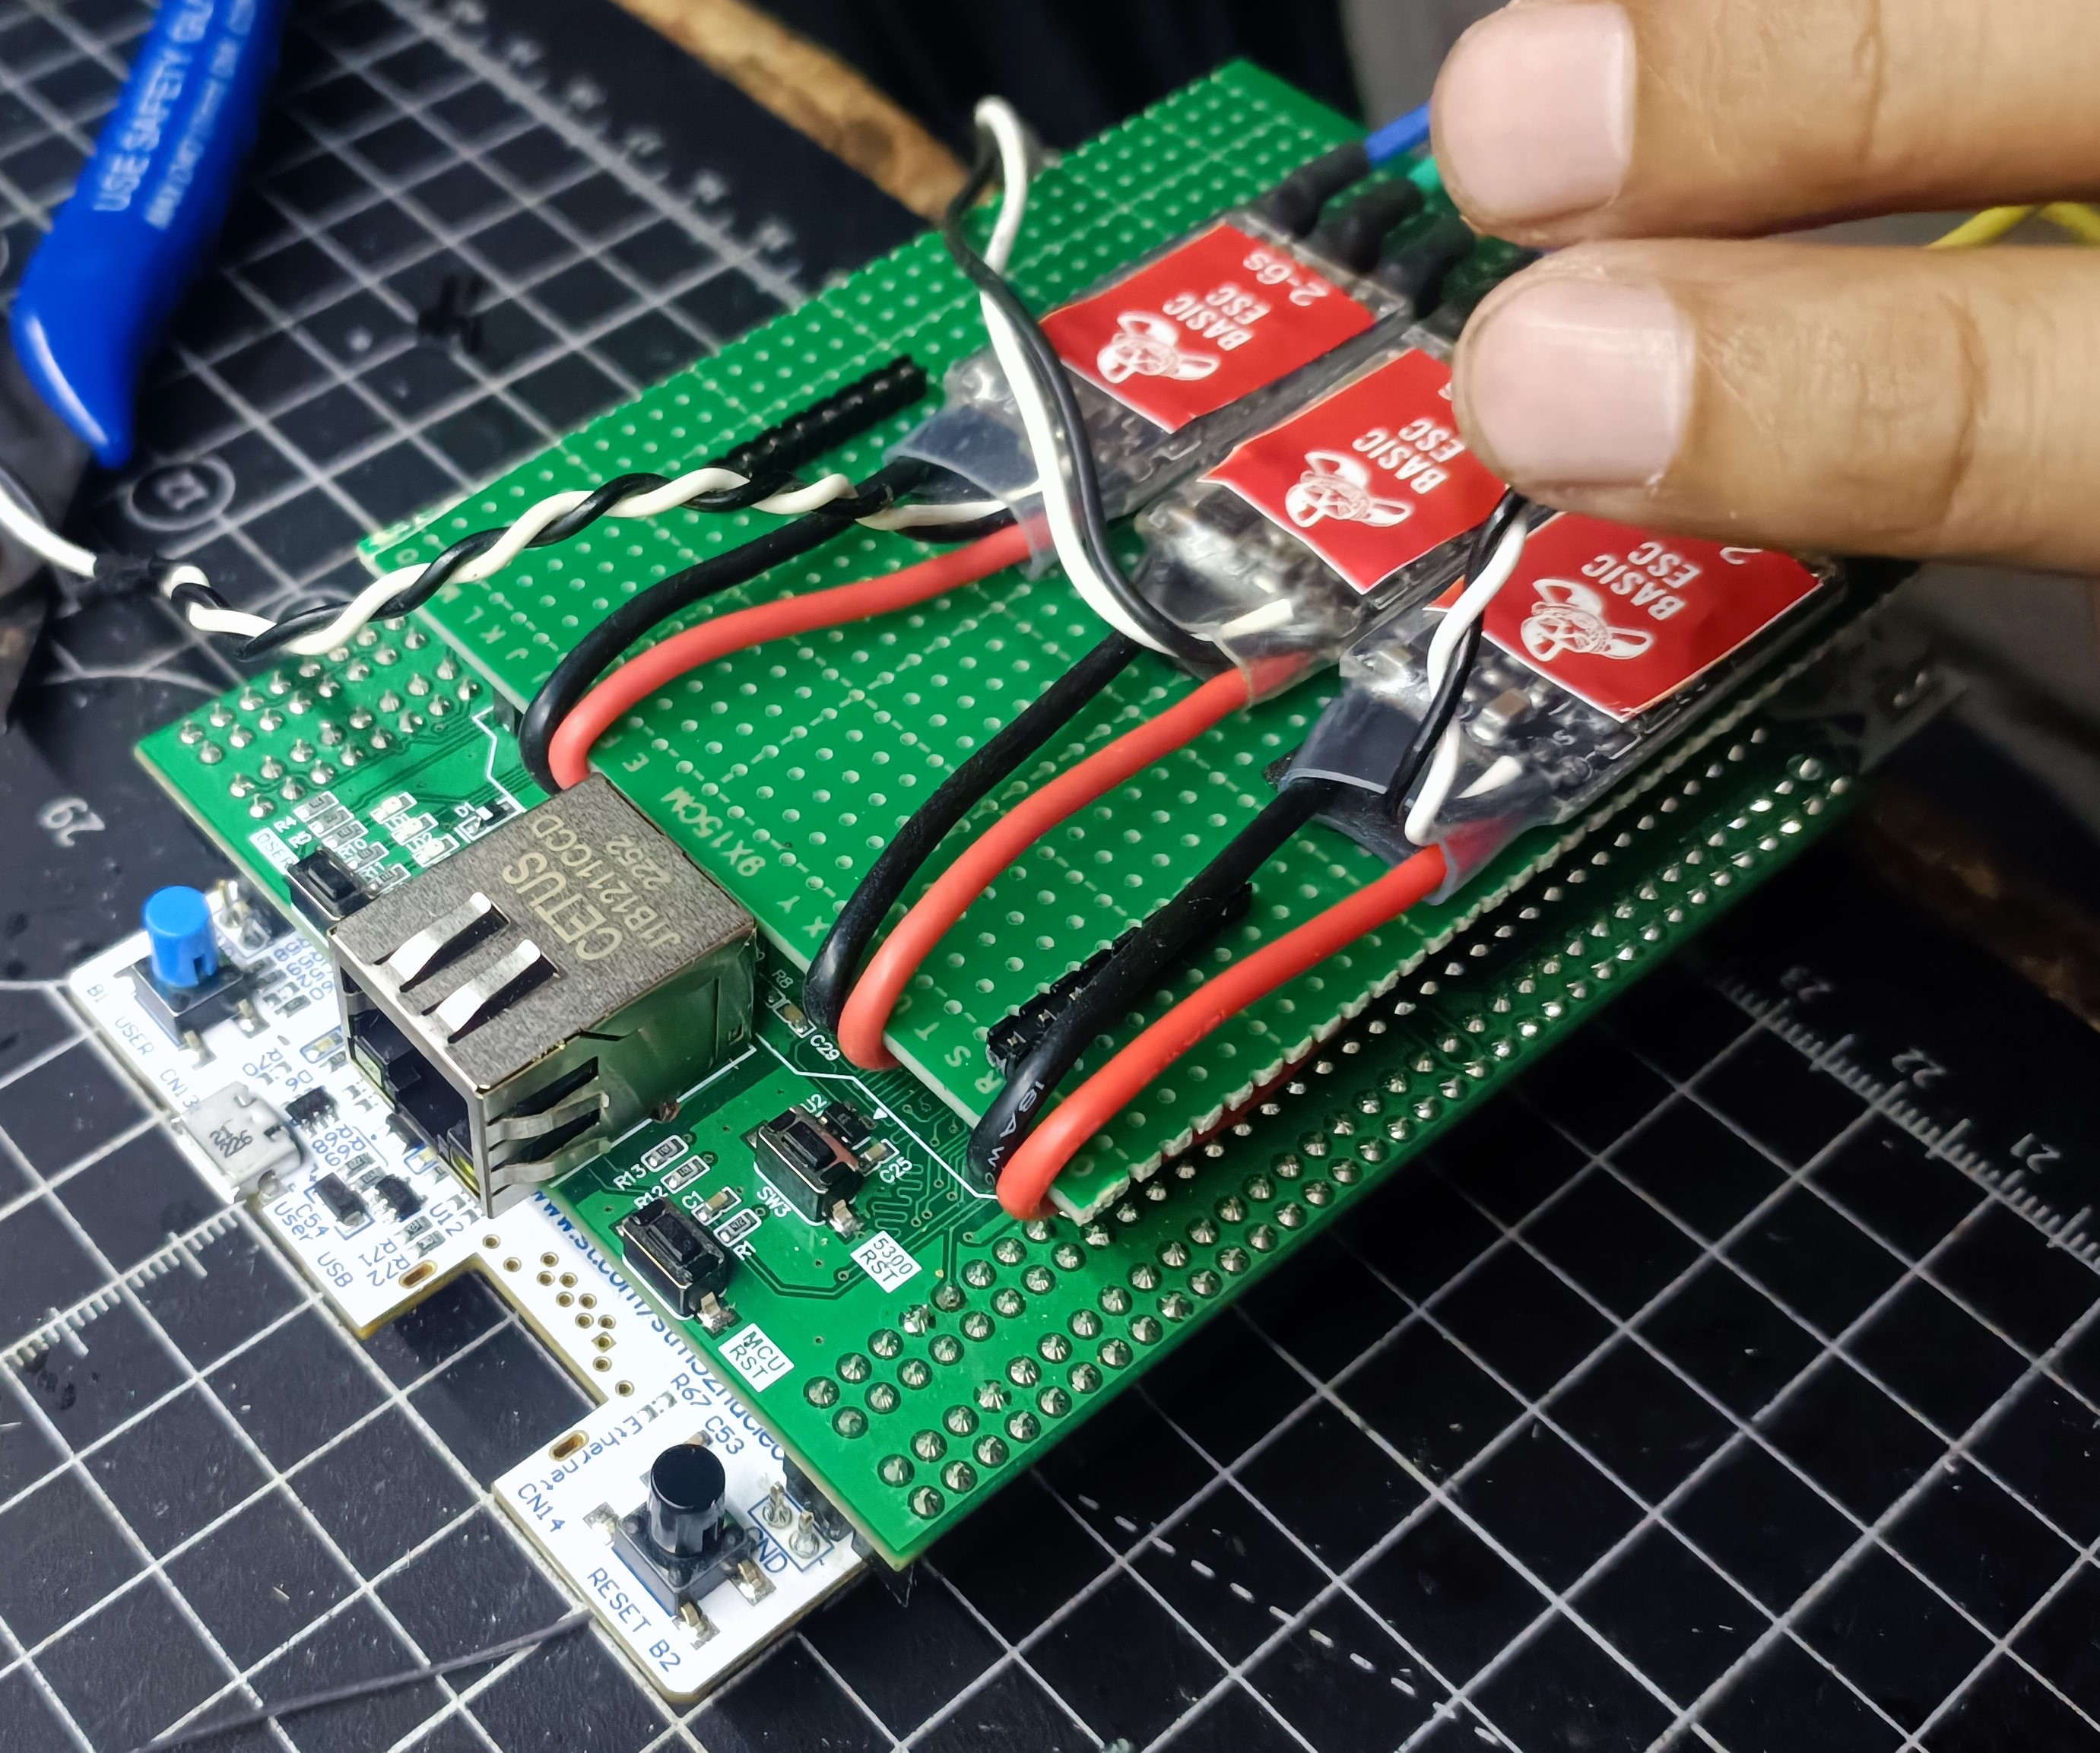
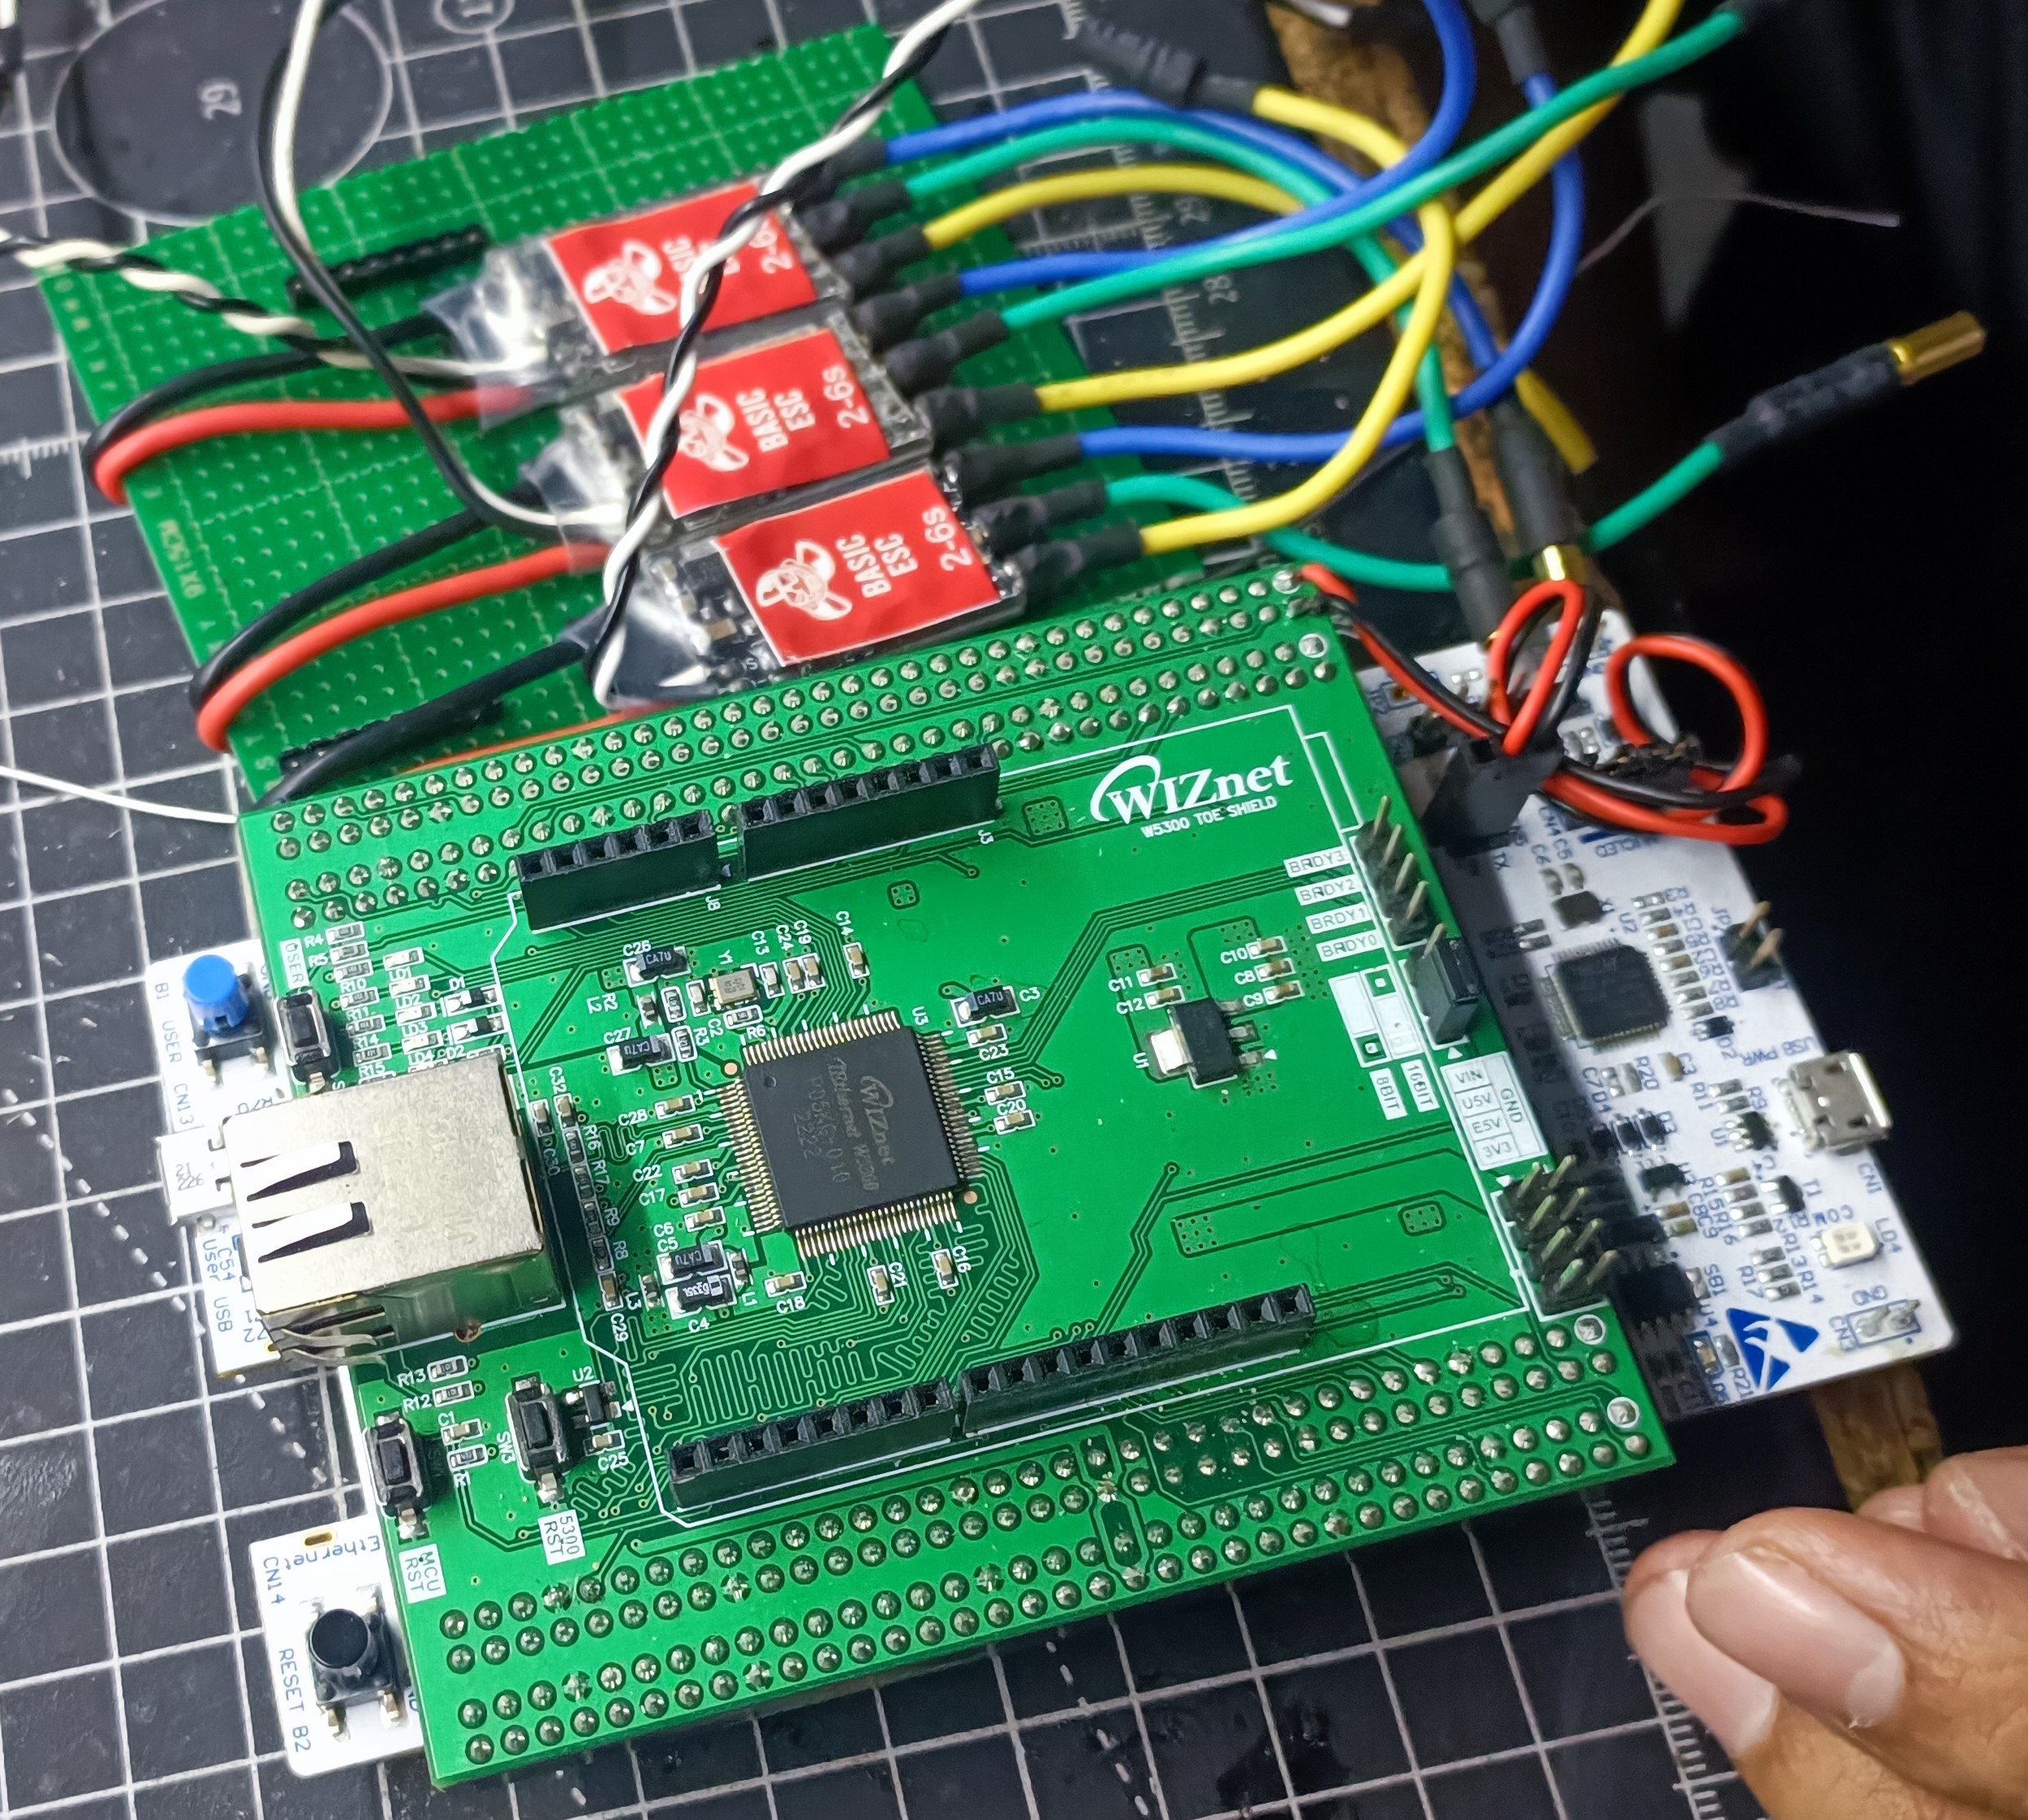
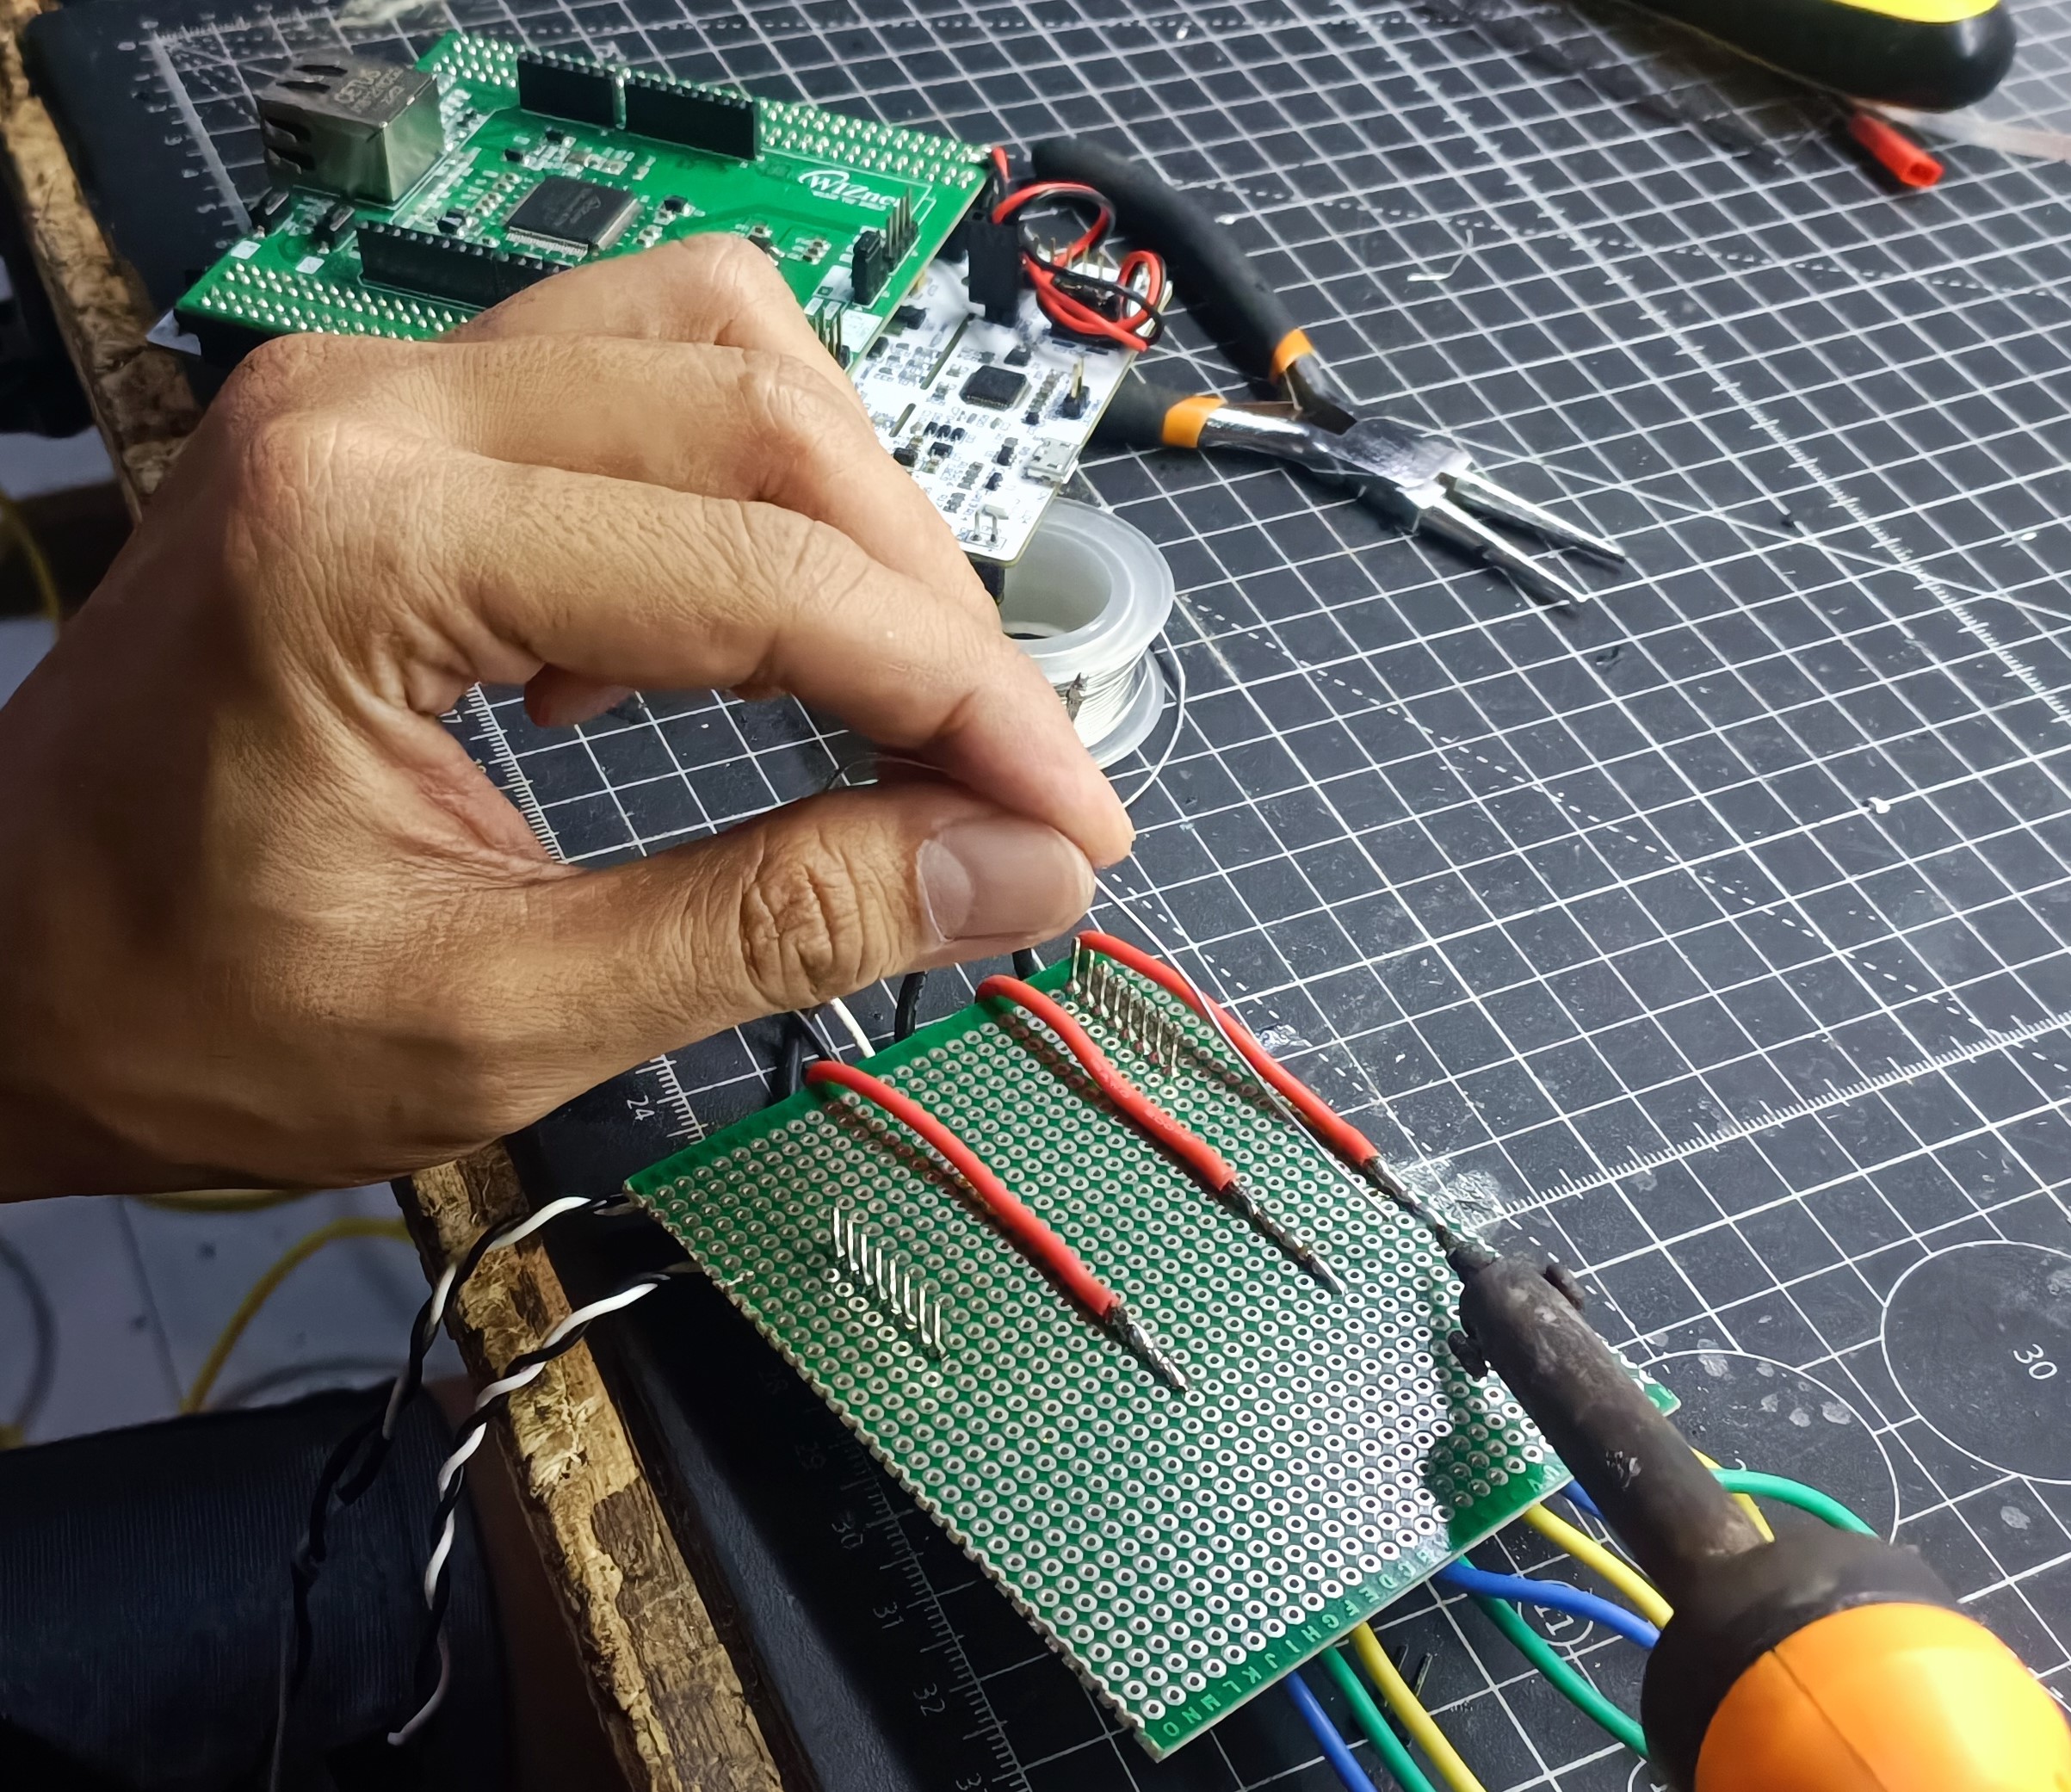
STEP 3: Controller Design

STEP 4 : PROGRAMMING
ROVWIZ developed based on Wiznet example from https://github.com/Wiznet/W5300-TOE-C . for esc pin i use TIM2 of my STM32F722ZE, because this pin is compatible with pin WIZNET TOE 5300. TIM2 is connected to PA0, PA1 and PA2.
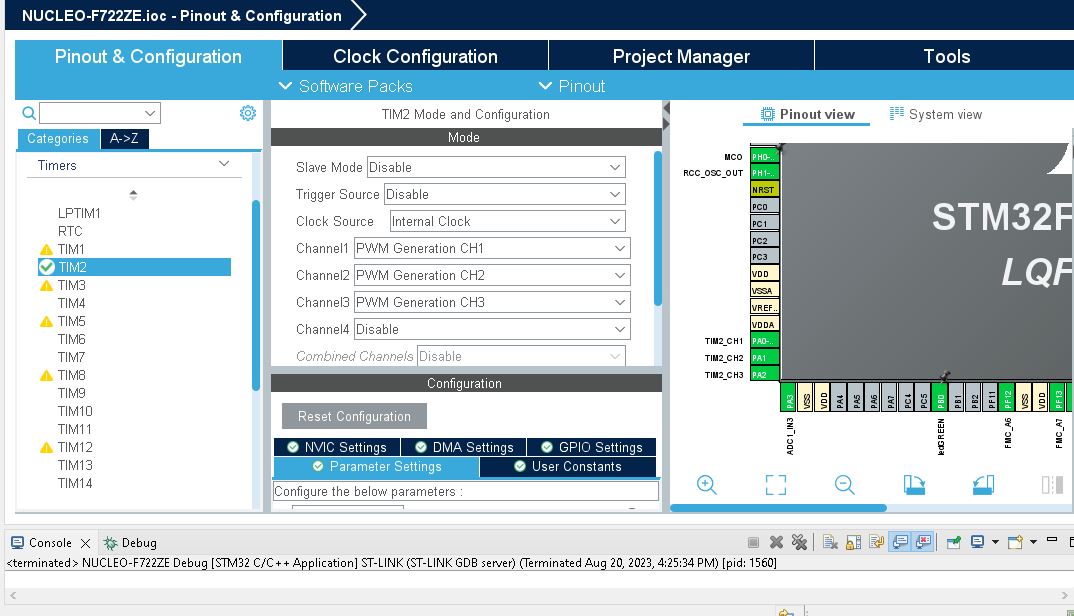
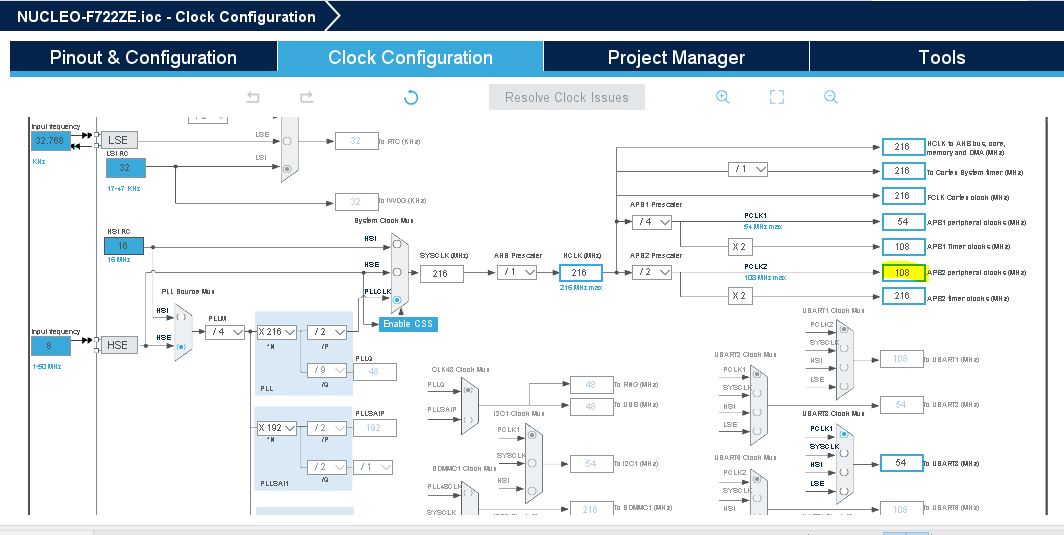
The board has been clocked by the 8 MHz crystal, and running the system at maximum 216 MHz clock. I need to enable the PWM to control the speed of the motor. brushless motor works on the same principal as a servo motor. Need to send a pulse of 20ms (50Hz) and then vary the width of the signal from 1ms to 2ms.
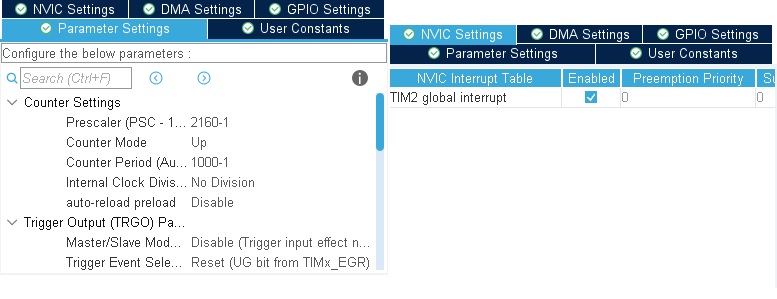
The prescaler is set to 2160 and the AutoRRegister is 1000.
next, inside main function need start the TIM in PWM Mode.
/* USER CODE BEGIN 2 */
  HAL_TIM_PWM_Start(&htim2, TIM_CHANNEL_1);
  HAL_TIM_PWM_Start(&htim2, TIM_CHANNEL_2);
  HAL_TIM_PWM_Start(&htim2, TIM_CHANNEL_3);
  /* USER CODE END 2 */
from the example, http server as example and modified the webpage. this project need 2 page, first for home/index page and second for remote control
#define index_page			"<html>"\
								"<head>"\
								"<title>Ground Control ROVWIZ 1.0</title>"\
								"<meta http-equiv='Content-Type' content='text/html; charset=utf-8'>"\
								"<style>"\
								"body {margin: 0;font-size: 1rem;color: #CFD8DC;background-color: #000000; text-align:center }"\
								".btn-primary {color: #11171a;background-color: #1de9b6;border-color: #1de9b6; }"\
								".btn-primary:hover {color: #ffffff;background-color: #14cc9e;border-color: #13c095; }"\
								".linkmenu a{color:#FFFFFF; text-align:center;}"\
								""\
								""\
								"</style>"\
								"</head>"\
								"<body>"\
									"<div>"\
									"<div>"\
									"<br/>"\
									"<br/>"\
									"ROVWIZ 1.0"\
									"</div>"\
									"<br/>"\
									"<div clas='linkmenu'><a href='dio.html'>REMOTE CONTROL</a></div>"\
									""\
								"</body>"\
							"</html>"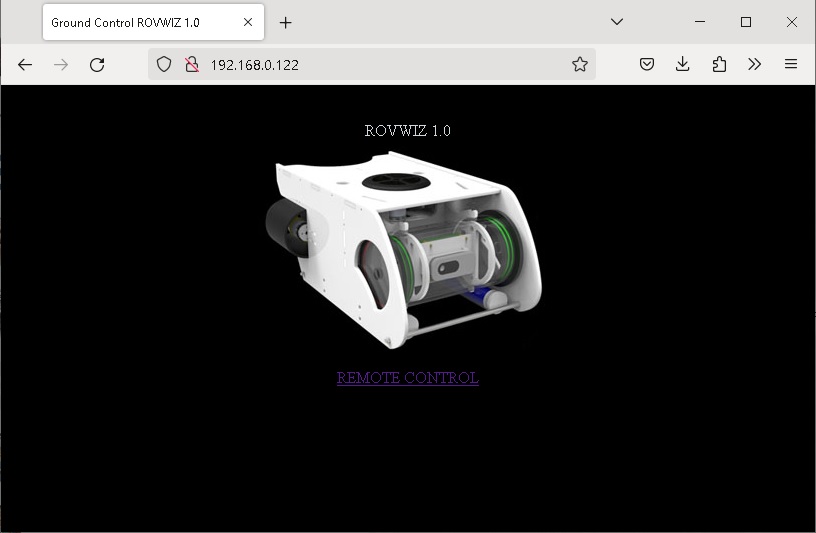
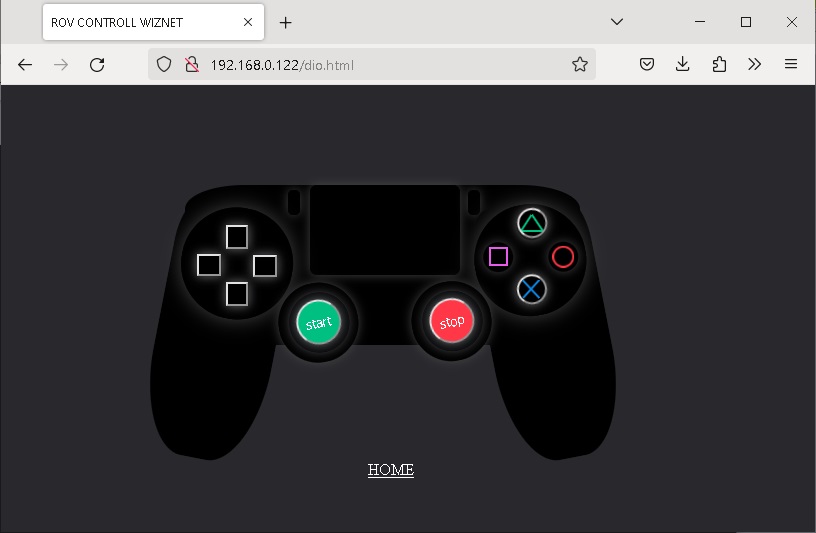
Test Button in remote
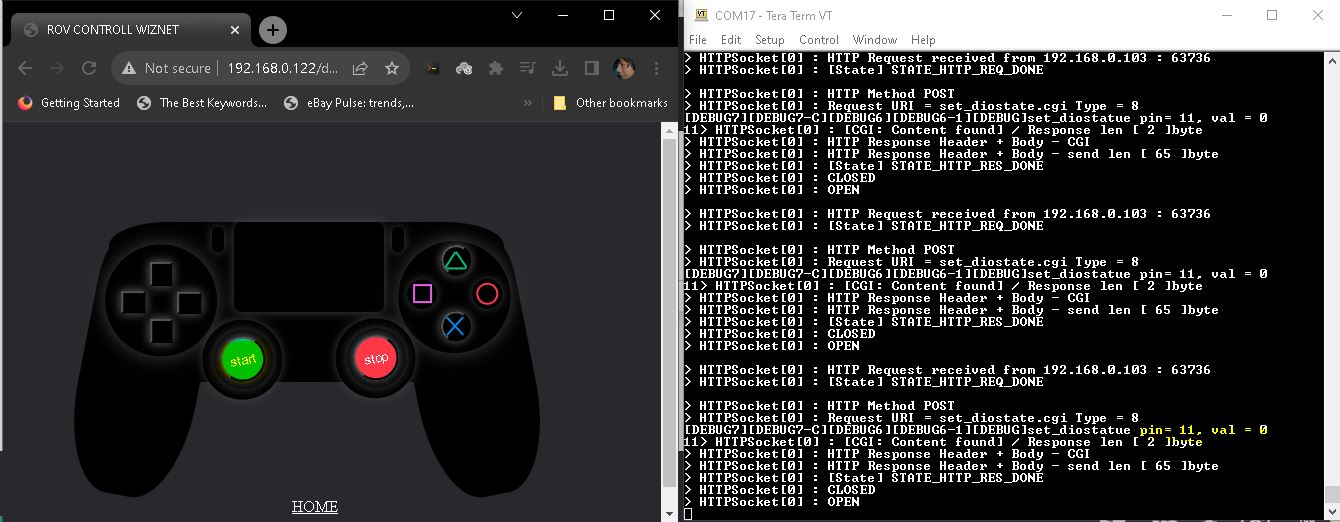
when press button in start, send data pin 11 and val = 0
<input type='button' class='start' value='start' pin='11' s= '0' onclick='setDiostate(this);'>main program is set to all brushless standby
printf("[DEBUG]set_diostatue pin= %d, val = %d\r\n", pin, val);
		if(val == 0)
		{
			if(pin == 11 )	// LED RED PB14
			{
				TIM2->CCR1=75;
				TIM2->CCR2=75;
				TIM2->CCR3=75;
			}
		}
and applies to all other button programs.
Final Test ROVWIZ
-
ROVWIZ Part
This Solidworks file assembly


-
ROVWIZSCHEMAtic
-
ROVWIZ