
Roobot-Over-IP
Roobot-Over-IP
RooBot Over IP (ROI): Network-Based Modular Robot Control System
Project Background: Battle-Tested Architecture from NASA Competition
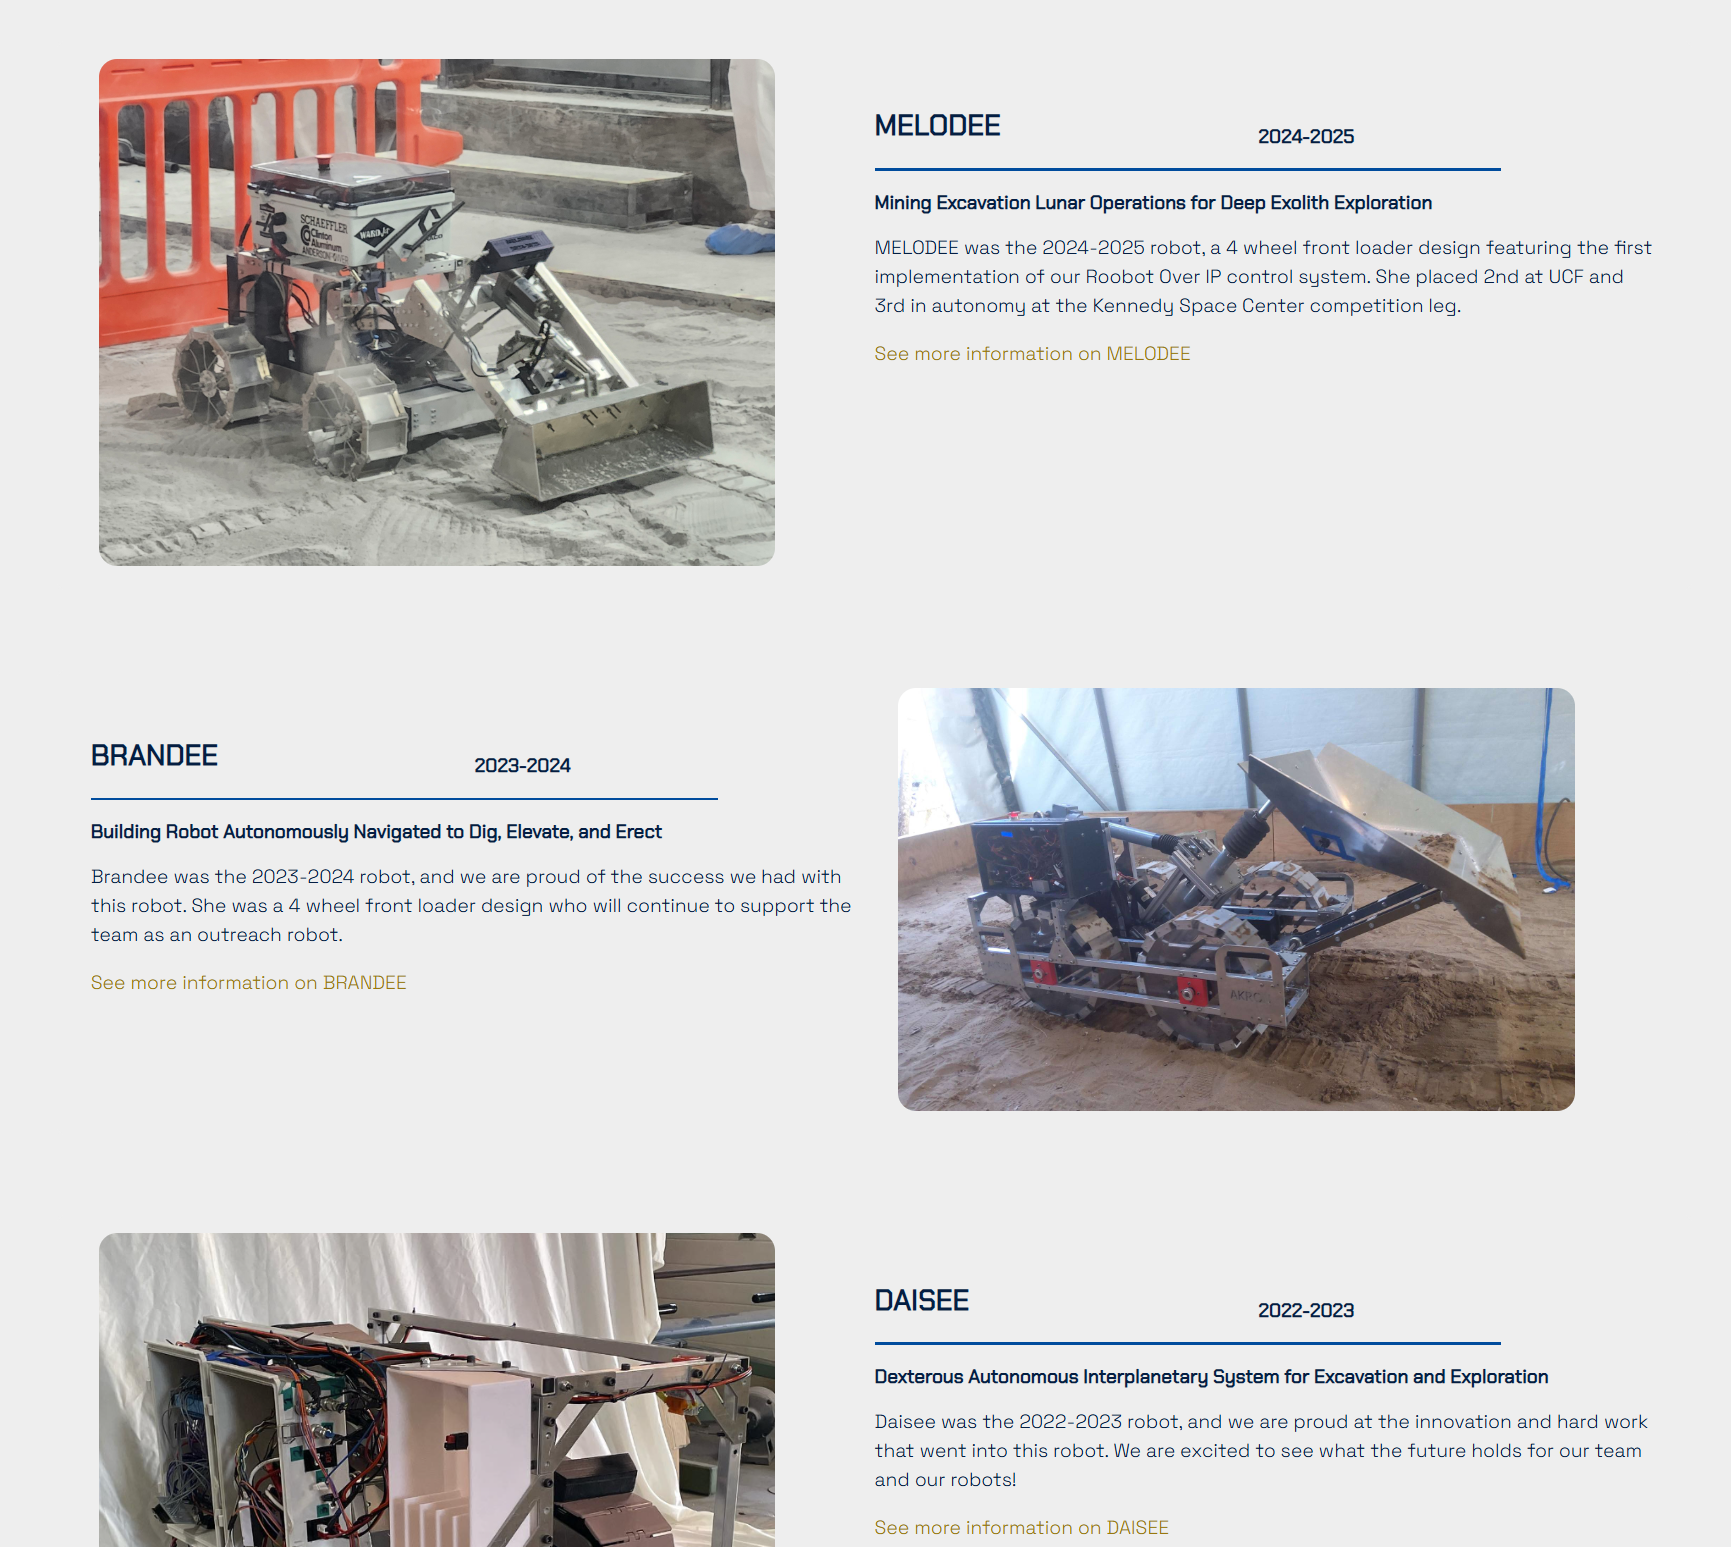
The University of Akron NASA Robotic Mining Team competes annually at Kennedy Space Center in a lunar mining robot challenge. Their 2024-2025 robot MELODEE was the first to deploy a revolutionary distributed control architecture called RooBot Over IP (ROI), achieving 2nd place at UCF and 3rd in autonomy at the Kennedy Space Center finals.
Core Idea: "Treat Your Robot as a Network System"
Traditional Robot Limitations
- All sensors/motors wired directly to one main board via GPIO/CAN
- Complex wiring, cable length constraints
- Single component failure requires full system inspection
- Adding features means hardware redesign
ROI's Solution
"Make every device an independent network node with its own IP address"
System Architecture

Key Components:
- Central Controller: Jetson Nano (ROS 2 Humble)
- Network Backbone: Gigabit PoE+ Switch
- Modules: Arduino/STM32 + WIZnet W5500 + Hardware
- Protocol: Lightweight UDP-based communication
WIZnet W5500: The Network Brain
ROI modules need a hardware TCP/IP stack to connect to Ethernet. The WIZnet W5500 chip (Arduino Ethernet Shield 2) handles this.
Why W5500?
- Hardware TCP/IP: Arduino doesn't need to process complex network protocols
- Simple SPI Interface: Connects with just 4 pins
- Industrial Reliability: Designed for 24/7 operation
- Low Power: Suitable for battery-powered robots
Real MELODEE Configuration (Example):
[PoE+ Switch]
├─ Port 1: Jetson Nano (192.168.1.10)
├─ Port 2: ODrive FL (192.168.1.101) - PoE
├─ Port 3: ODrive FR (192.168.1.102) - PoE
├─ Port 4: ODrive RL (192.168.1.103) - PoE
├─ Port 5: ODrive RR (192.168.1.104) - PoE
├─ Port 6: Actuator (192.168.1.105) - PoE
├─ Port 7: Camera (192.168.1.106) - PoE
└─ Port 8: WiFi Uplink (Operator)
3-Layer Architecture
Layer 1: Hardware Modules (Firmware)
// Arduino firmware compiled with PlatformIO
#include <ROI_Infra.h>
#include <Ethernet.h>  // WIZnet W5500 driver

void setup() {
    Ethernet.begin(mac);  // Initialize W5500
    infra.initialize();   // Start ROI system
}

void loop() {
    infra.tick();  // Handle UDP packets (must call!)
    // Module-specific logic...
}
Layer 2: Communication Protocol (UDP Packets)
[Subdevice ID: 16bit] - Individual device (e.g., Motor 0)
[Action Code: 16bit]  - Command type (set speed, goto position...)
[Checksum: 16bit]     - Data integrity check
[Payload: ~60 bytes]  - Command parameters
Why UDP? Low latency without TCP handshakes. For robot control, fresh data beats old guaranteed data.
Layer 3: ROS Integration (Digital Twin)
# Users interact with standard ROS interfaces
ros2 service call /odrive_fl/set_velocity \
    roi_ros/srv/ODriveSetVelocity "{velocity: 3.5}"

# Internally converted to UDP and sent via W5500
Each physical module appears as a Digital Twin node in ROS:
[Physical Module: ODrive FL]  ←─UDP/W5500─→  [ROS Node: /odrive_fl]
      IP: 192.168.1.101                         Runs on Jetson
Core Strengths: Fault Tolerance & Scalability
1. Module-Level Fault Recovery
Scenario: ODrive FL Module Fails
Traditional approach:
- Robot stops completely
- Inspect entire main board
- Reboot everything
ROI approach:
- ROS detects lost connection
- Switch to 3-wheel drive mode automatically
- Hot-swap the failed module
- System reconnects and resumes
2. Controller-Level Fault Recovery
Scenario: Jetson Nano Crashes
Traditional approach:
- Robot dead until manual reboot
ROI approach:
- Backup PC launches ROS nodes
- Nodes ask modules for their current state
- Modules send saved settings (PID values, etc.)
- Operation continues from where it left off
3. Zero-Downtime Expansion
Want to add a LiDAR sensor?
- Build module: Sensor + Arduino + Ethernet Shield 2
- Plug cable into switch (power comes via PoE)
- Launch ROS node:
rosrun roi_ros lidar --module_octet 110 - Use immediately:
ros2 topic echo /lidar/scan
No reprogramming. No robot downtime.
Competition Validation: Kennedy Space Center 2025
Real Issues During Competition
Problem 1: Jetson overheated and rebooted
- Solution: Operator's laptop took over ROS control via WiFi
Problem 2: ODrive rear-right connector failed
- Solution: Robot continued with 3-wheel drive
Problem 3: WiFi dropped
- Solution: Jetson ran autonomous mode locally
Result: All issues handled without stopping the robot, thanks to ROI's distributed design.
ROI vs Traditional Architecture
| Aspect | Traditional | ROI |
|---|---|---|
| Wiring | 20+ GPIO pins, CAN bus, UART... | Single Ethernet cable (PoE) |
| Range | CAN: 40m, GPIO: 2m | Ethernet: 100m |
| Add Module | Redesign circuit board | Plug in cable |
| Fault Recovery | Full system restart | Replace only failed module |
| Expansion | Hardware modification | Software configuration |
Tech Stack
Hardware:
- MCU: Arduino/STM32
- Ethernet: WIZnet W5500 (Arduino Ethernet Shield 2)
- Switch: Gigabit PoE+
- Controller: NVIDIA Jetson Nano
Software:
- Firmware: C++ (PlatformIO)
- Protocol: UDP (Custom)
- Middleware: ROS 2 Humble
- Interface: C++ (Nodes), Python (High-level)