
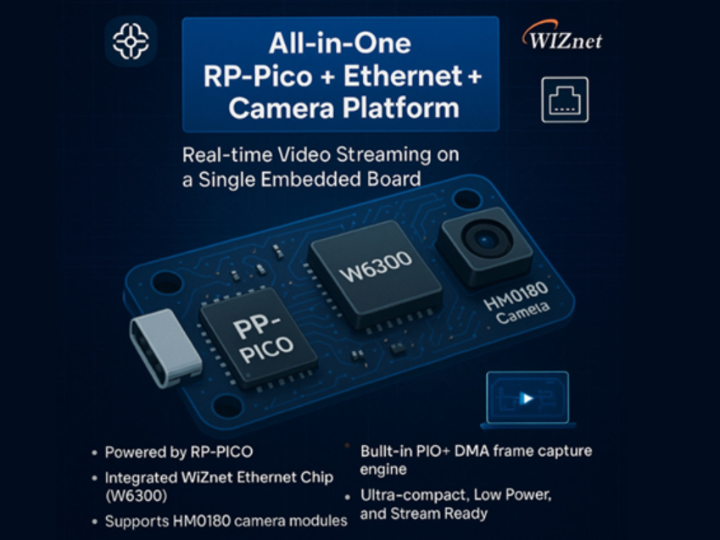
Real-Time Video Streaming with W6300 + RP2350 – Open Source Project
A single MCU board that handles everything from camera input to network streaming.
WIZnet - W6300-EVB-PICO2
x 1
"No need for STM or FPGA anymore!"
With just one Ethernet chip, one camera, and one RP-PICO board,
we’ve achieved real-time streaming.
Simple. Powerful. Now anyone can build it.
🔧 Project Overview
This open-source repository demonstrates an embedded video streaming platform using RP2350, HM01B0, and a WIZnet Ethernet chip.
It captures video frames at 320×240 resolution and streams them in real time over UDP.
📦 System Setup
| Component | Description |
|---|---|
| MCU | RP-PICO (RP2350 used; RP2040 is also supported) |
| Camera | Himax HM01B0 (QVGA, 8-bit DVP interface) |
| Ethernet | WIZnet W6300 (fully tested with W5100S as well) |
| Video Format | YUY2, 320×240, 160x120 |
| Transmission | UDP + 4-byte header + 1532-byte payload |
| Frame Capture | PIO + DMA for high-speed processing |
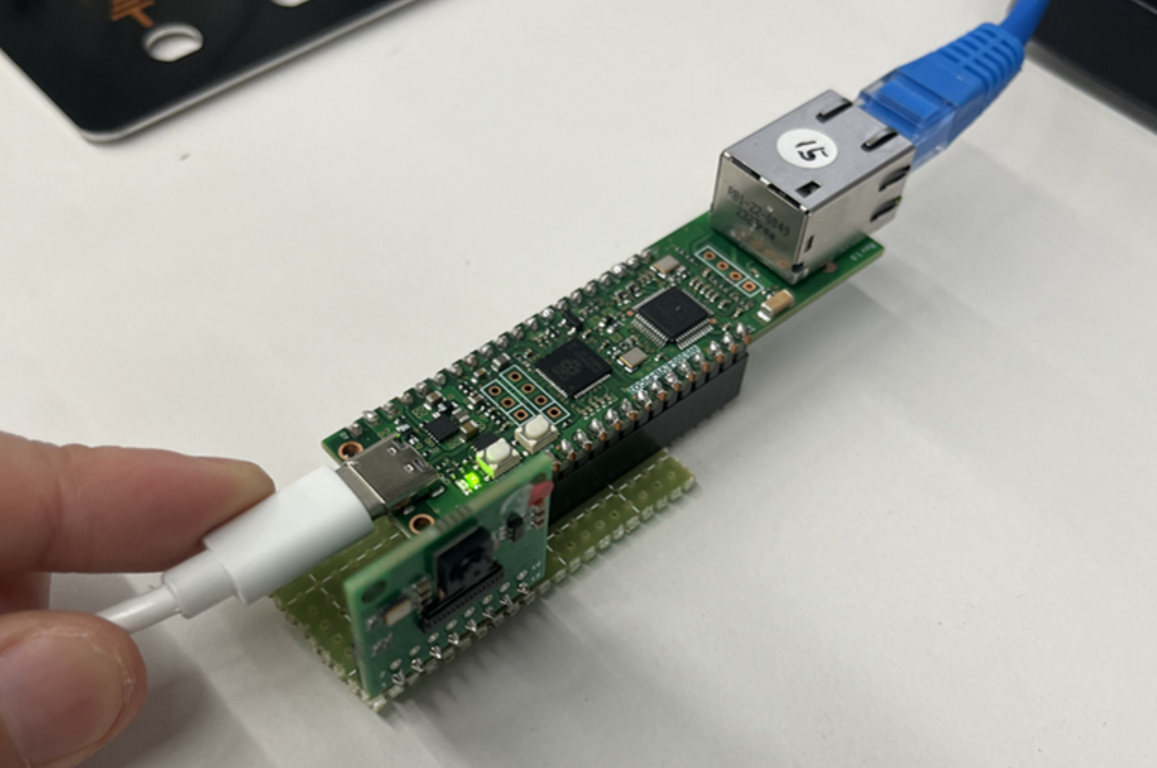
🔌 Hardware Pinout (RP-PICO)
| Pin Function | RP-PICO GPIO | Notes |
|---|---|---|
| VSYNC | GPIO 6 | Camera vertical sync |
| HSYNC | GPIO 7 | Camera horizontal sync |
| PCLK | GPIO 8 | Camera pixel clock |
| DATA[0] | GPIO 9 | DVP 1-bit data input (D0) |
| I2C SDA | GPIO 4 | Camera I2C data |
| I2C SCL | GPIO 5 | Camera I2C clock |
| VCC | 3.3V | Power supply for camera |
| GND | GND | Ground |
🔄 Operation Flow
1. HM01B0 Camera → Initialized via I2C + 24 MHz MCLK from PWM
2. RP2350 MCU → Captures YUY2 frame using PIO + DMA
3. W6300 or W5100S → Streams frame over UDP in chunks
4. PC Viewer → Reassembles and displays the image in real time
✅ Likely compatible with W5100S, W5500, W6100, and other WIZnet chips
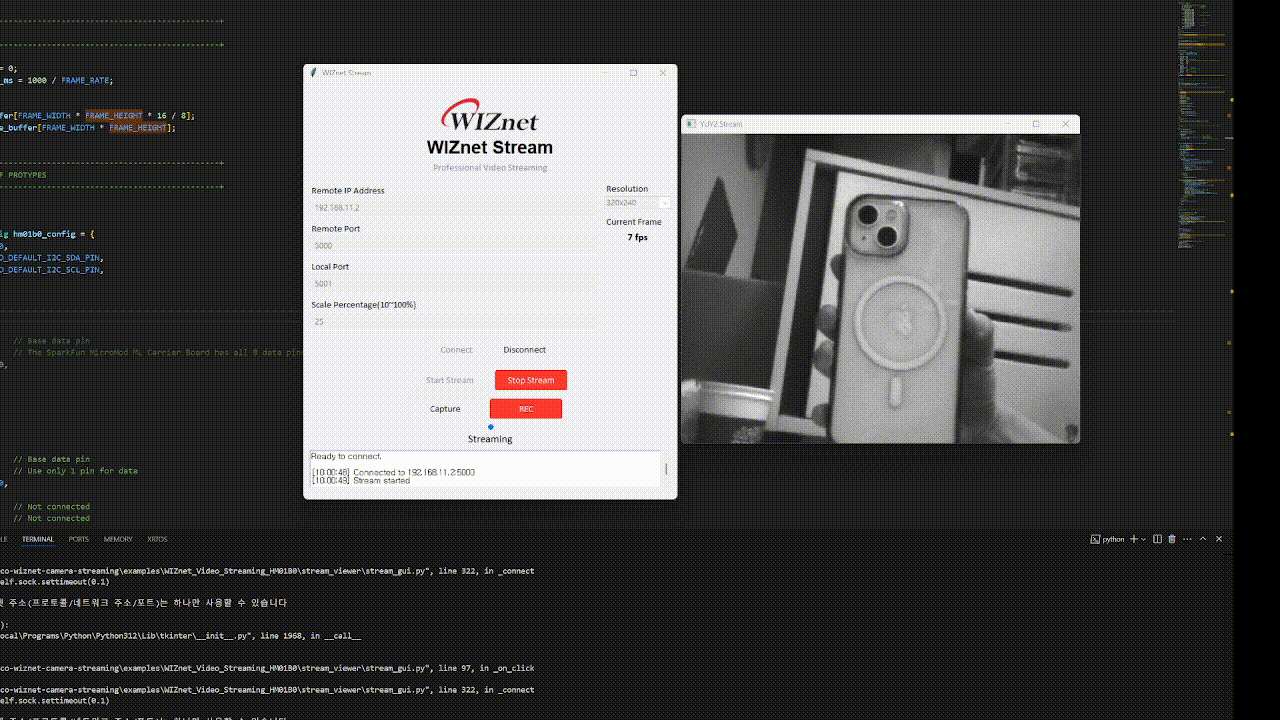
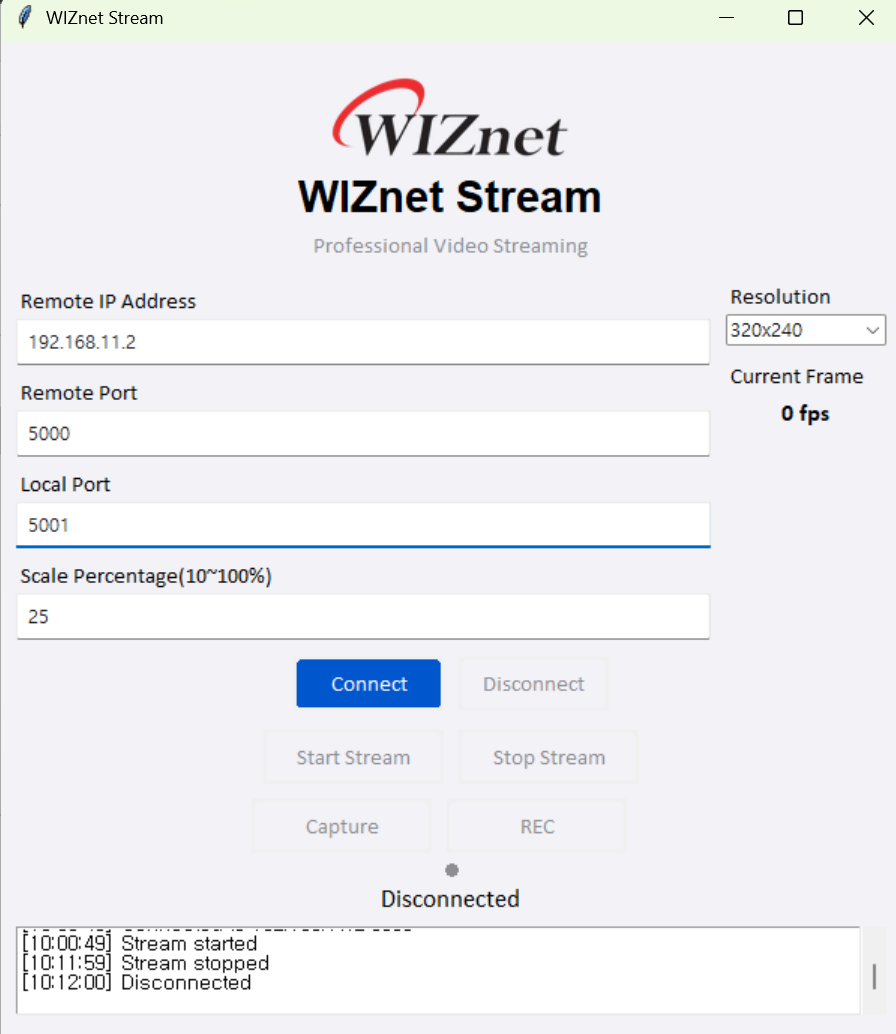
🖥️ Python GUI – WIZnet Stream Viewer
The included Python tool is not just a viewer – it's a fully featured desktop GUI with decoding, saving, and scaling functionality.
🔹 Key Features
| Feature | Description |
|---|---|
| Connect / Start / Stop | GUI buttons for easy control |
| Resolution Scaling | Scale % control (10% to 100%) inside the GUI |
| PNG Capture | Save the current frame with one click |
| MP4 Recording | Real-time video recording during streaming |
| YUY2 Decoding | Converts YUY2 to BGR and displays using OpenCV |
| UI Design | macOS-style buttons, SF Pro fonts, status dot indicators |
❗ Note:
Resolution settings in the Python GUI must match the resolution defined in the C code.
For example, if USE_FRAME_320X240 is set in main.c, the Python GUI should be set to 320x240.
⚙️ Firmware Sequence (C Code)
This project’s core logic revolves around enabling real-time camera capture + streaming on a single RP-PICO board. Here’s a breakdown of what the firmware does:
① System Initialization
Configures the system clock for stable PIO and DMA operation.
Initializes SPI and WIZnet Ethernet chip (e.g., W5500, W6300).
Sets network parameters (IP, MAC, etc.) and opens a UDP socket.
Configures HM01B0 camera over I2C and generates 24 MHz MCLK via PWM.
② Listening for UDP Commands
Waits for incoming UDP commands on port 5000.
On "START" → enters streaming mode.
On "STOP" → exits streaming mode.
③ Capturing Camera Frames
Captures grayscale frame from HM01B0 using DMA.
Converts grayscale to YUY2 format (Y=brightness, U/V=128 fixed).
Total frame size = 320×240×2 = 153,600 bytes.
④ UDP Frame Transmission
Splits the frame into 1532-byte chunks.
Each packet contains a 4-byte header:Frame ID, Packet ID, Total Packets, Final Packet Flag.
Sends all packets sequentially to the destination IP.
⑤ Real-Time Control
"STOP" command ends streaming.
Resolution is defined via macros in main.c and must match Python GUI.
Future formats like JPEG or MJPEG can be integrated easily.
📂 Folder Structure
✅ How to Use
1. Connect the board according to the pinout.
2. Select your board by uncommenting it in the top-level CMakeLists.txt.
# Set board
# set(BOARD_NAME WIZnet_Ethernet_HAT)
# set(BOARD_NAME W5100S_EVB_PICO)

...

...
# set(BOARD_NAME W6100_EVB_PICO2)
 set(BOARD_NAME W6300_EVB_PICO2) // uncommented my board
3.Go to examples/WIZnet_Video_Streaming_HM01B0/core/main.c and choose the resolution:
4. Build the project and flash the .uf2 file to your RP-PICO.
5. Run the Python GUI:
6.Press Connect → Start to stream.
Capture PNG or record MP4 directly via buttons.
🎓 Use Cases
🎓 Educational Demos – Learn embedded video streaming architecture
🧪 Debugging Tool – Measure packet loss, frame rate, and more
🔬 Prototype Base – Expand to JPEG, MJPEG, or TCP-based transmission
🧰 Maker Showcase – Demo with real hardware + live visualization
🔗 GitHub Repository
📌 Open Source Project:
👉 https://github.com/theoim/rppico-wiznet-camera-streaming
-
theoim
