
Interfacing FRDM-KL25Z with Arduino Ethernet Shield R3 on Processor Expert, SD Card
Using SD cards with Ethernet Shield(W5100) on Arduino Board
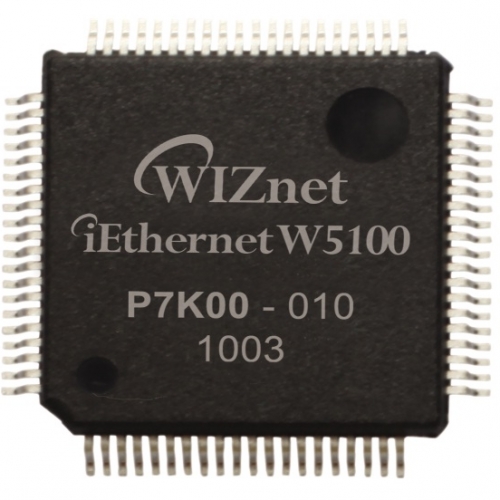
WIZnet - W5100
x 1
Arduino - Arduino 101
x 1
Interfacing FRDM-KL25Z with Arduino Ethernet Shield R3 on Processor Expert, Part 1: SD Card
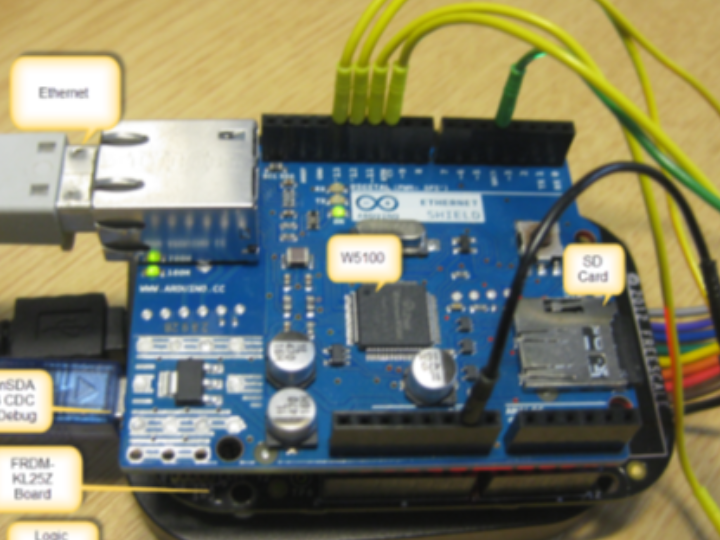
This tutorial discusses the integration of an Arduino Ethernet Shield R3 with a Freescale FRDM-KL25Z board, focusing on the usage of the Micro SD Card functionality.
Arduino Ethernet Shield Features:
The Arduino Ethernet Shield R3 offers two primary features:
Wiznet W5100 Ethernet Chip: This chip facilitates Ethernet connectivity for small microcontrollers. The W5100 includes an Ethernet PHY (Physical Layer) and allows a microcontroller to communicate over Ethernet using a simple socket API over SPI (Serial Peripheral Interface).
Micro-SD Card Socket: The SD card slot is connected to the same SPI bus as the W5100 chip. This SD card slot can be used for data logging or hosting web pages, among other things.
While there may be alternative and possibly more cost-effective methods to connect a microcontroller to the internet, the Arduino Ethernet Shield is a popular choice due to its affordability and ease of use. It can typically be found for less than $15 from various online vendors. Additionally, there's an option to add Power over Ethernet (PoE) functionality to the shield (although this option may not be available on all shields). You can find the schematics and Eagle files for the shield on the official Arduino website.
Hardware Modification:
Both the SD card and the W5100 Ethernet chip are connected to the microcontroller through the SPI interface. It's important to note that the SPI MISO/MOSI/CLK signals are not connected to the Arduino headers by default. To make it work with FRDM boards, you need to route these signals to the header manually.
Removal of SPI Programming Header: Start by removing the 2x3 SPI programming socket on the bottom side of the board.
Connecting SPI Signals to Header: Next, wire the SPI Signals MISO, MOSI, and CLK to the Arduino header pins as follows:
- Pin 13: CLK (SPI Clock) (to FRDM-KL2Z: PTD1)
- Pin 12: MISO (to FRDM-KL2Z: PTD3)
- Pin 11: MOSI (to FRDM-KL2Z: PTD2)
- Pin 10: ETH CS (Chip Select of W5100) (to FRDM-KL2Z: PTD0)
- Pin 4: SC CS (Chip Select of SD Card) (to FRDM-KL2Z: PTA4)
This modification ensures that all SPI signals are available on the header, allowing for easier integration with the FRDM board.
Application with SD Card Driver:
For the project, the author utilizes the FatFS file system with FreeRTOS. Multiple Processor Expert components are used to build the project seamlessly.
Concurrent Access to SPI Bus:
Since both the SD card and the W5100 share the same SPI bus, it's crucial to protect access to it using a critical section. The author employs a FreeRTOS semaphore for this purpose. The FATFS is configured for reentrant and protected access to the file system, which allows multiple tasks to access the file system without reentrancy issues. This configuration also generates events for activating/deactivating the bus, which can be routed to the W5100 driver to lock/unlock a semaphore for SPI bus access, ensuring data integrity.
Mounting File System:
As there is no 'card detect' pin available with the SD card socket, the author adds 'mount' and 'unmount' commands to the application's shell command handler. This enables the user to mount and unmount the SD card file system when needed.
In summary, this tutorial covers the integration of the SD card functionality of the Arduino Ethernet Shield with the FRDM-KL25Z board. The associated software project can be found on GitHub. The project also includes an initial version of the W5100 driver, which will be further explored in a future post.