Building a Network Bridge with Raspberry Pi and Wiz550io
Ethernet Traffic Monitoring, Blocking Specific IPs, and Custom Firewall Configuration for Network Management Applications

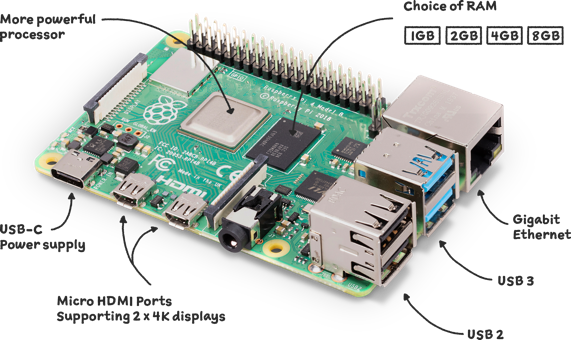
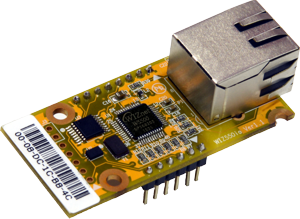
This project details the process of connecting the RPI4 and WIZ550io, configuring them as a network bridge, and implementing advanced security solutions. These include blocking specific IP addresses, allowing traffic only from designated IP ranges, and monitoring packets to enhance network management and security.
What is the network bridge?
A network bridge is a device or configuration that connects two separate network segments, allowing them to exchange data as if they were part of the same local network. This enables communication between different network devices and ensures smooth data transfer from one segment to another.
In this project, the Raspberry Pi 4 acts as a bridge between its built-in Ethernet port and the Wiz550io module, facilitating the flow of network traffic between the two.
Additionally, the bridge allows you to monitor all passing packets, block traffic based on specific conditions, or manipulate the traffic, making it a valuable tool for network management and analysis.
Bridge Setup Instructions
Connecting the RPi4 and Wiz550io
Configuring the Wiz550io on Raspbian
Run the following commands to update the Raspberry Pi’s system:
$ sudo apt-get update
$ sudo apt-get upgrade
Edit the /boot/firmware/config.txt file and add:
dtparam=spi=on
dtoverlay=w5500,speed=25000000
You can see that the connection and configuration of the RPI4 and Wiz550IO have been successfully completed.
Network Bridge Configuration
To set up a bridge between the RPi4’s built-in Ethernet port and the Wiz550io, follow these steps:
- Important: Using a bridge disables SSH access via Ethernet. Ensure you have alternate access via WiFi, or connect a monitor, keyboard, and mouse to the Raspberry Pi.
$ sudo brctl addbr br0
$ sudo brctl addif br0 eth0
$ sudo brctl addif br0 eth1
$ sudo ifconfig eth0 0.0.0.0
$ sudo ifconfig eth1 0.0.0.0
$ sudo ifconfig br0 up
$ sudo dhclient br0
To ensure the bridge persists across reboots, edit the network configuration file:
$ sudo vi /etc/network/interfacesAdd the following lines:
auto br0
iface br0 inet dhcp
   bridge_ports eth0 eth1
Restart the networking service:
$ sudo systemctl restart networking아래와 같이 브릿지 설정이 완료되었는지 확인한다.
The network bridge setup is now complete.
When a PC communicates over Ethernet, all packets will pass through the Raspberry Pi and Wiz550io. This configuration allows you to monitor all traffic, block specific IP addresses, or apply other customized traffic management methods.
Usage of the Network Bridge
Once the network bridge is configured, all traffic passes through the RPi4 and Wiz550io, enabling packet analysis, traffic filtering, and blocking specific IP addresses.
Monitoring Traffic with tcpdump
Capture and monitoring network packets:
sudo tcpdump -i br0To save the captured packets:
sudo tcpdump -i br0 -w Wiz550IO_RPI4_Bridge.pcap
Traffic Filtering and Firewall Rules
Block a specific IP (e.g., 192.168.11.44)
$ sudo ebtables -A FORWARD -p IPv4 --ip-src 192.168.11.44 -j DROP
$ sudo ebtables -A FORWARD -p IPv4 --ip-dst 192.168.11.44 -j DROP
Allow traffic only within a specific IP range (e.g., 192.168.11.1–192.168.11.15):
$ sudo ebtables -A FORWARD -p IPv4 --ip-src 192.168.11.1/28 -j ACCEPT
$ sudo ebtables -A FORWARD -p IPv4 -j DROP
Block specific ports or protocols (e.g., block HTTP traffic on port 80):
$ sudo iptables -A FORWARD -p tcp --dport 80 -j DROP
Advanced Applications
- Packet Manipulation: Modify packets for experimental or educational purposes.
- Traffic Inspection: Continuously monitor traffic for anomalies or potential threats.


