
W55RP20-S2E MQTTS(AWS) client Example (MicroPython)
This example demonstrates MQTTS(AWS) client on W55RP20 S2E via UART/SPI using MicroPython on a Raspberry Pi Pico (Master)
WIZnet - W55RP20
x 1
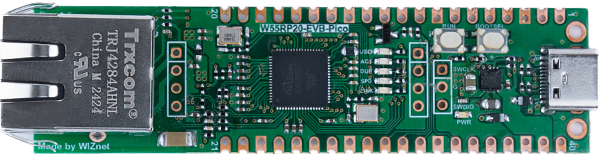
WIZnet - W55RP20-EVB-Pico
x 1
micropython - MicroPython
x 1
How to MQTTS (AWS IoT Core) Client Example (MicroPython)
This program demonstrates how to configure the W55RP20-S2E board as an MQTTS Client (OP=6) using a Raspberry Pi Pico (Host) via UART or SPI. It establishes a secure connection to AWS IoT Core using SSL/TLS certificates to publish and subscribe to messages.
Step 1: Prepare software
The following software is required to run and test the MicroPython example.
- Thonny : An integrated development environment for MicroPython. used to write, upload, and run code.
- AWS IoT Setup & Certificate Download:
- Please refer to the https://docs.wiznet.io/Product/Chip/MCU/Pre-programmed-MCU/W55RP20-S2E/mqtt-connection-guide-en#how-to-connect-to-aws-using-mqtt
- Following the link, you must create a "Thing" in the AWS IoT Console.
- Crucial: During the creation process, you must download the Device Certificate, Private Key, and the Amazon Root CA 1 file to your PC.
Step 2: Prepare hardware
1. Connect GPIO13 according to the selected UART/SPI mode of the W55RP20 EVB Pico, as illustrated below.
| GPIO13 Pin | Desc |
| LOW(GND) | UART mode (default) |
| HIGH(3.3V) | SPI mode |
2. Connect the Raspberry Pi Pico and the W55RP20 EVB Pico using jumper wires as shown below, depending on the selected UART/SPI mode.
- Important Note on Mode Switching: In this example setup, GPIO 13 of the W55RP20 EVB Pico is physically connected to GPIO 13 of the Raspberry Pi Pico. The Host Pico sets the mode (High/Low) automatically based on the software configuration.
- If you change the
MODEin the code (e.g., UART ↔ SPI): You MUST reset both boards (Raspberry Pi Pico and W55RP20 EVB Pico) to ensure the mode is switched and recognized correctly.
If UART mode :
| Raspberry Pi Pico | W55RP20 EVB Pico |
| GPIO4 (UART_TX) | GPIO5 (UART_RX) |
| GPIO5 (UART_RX) | GPIO4 (UART_TX) |
| GPIO13 (MODE_SEL) | GPIO13 (MODE_SEL) |
| GND | GND |
If SPI mode :
| Raspberry Pi Pico(Master) | W55RP20 EVB Pico(Slave) |
| GPIO2 (SPI_CLK) | GPIO2 (SPI_CLK) |
| GPIO3 (SPI_TX) | GPIO4 (SPI_RX) |
| GPIO4 (SPI_RX) | GPIO3 (SPI_TX) |
| GPIO5 (SPI_CS) | GPIO5 (SPI_CS) |
| GPIO26 (SPI_INT) | GPIO26 (SPI_INT) |
| GPIO13 (MODE_SEL) | GPIO13 (MODE_SEL) |
| GND | GND |
3. Connect the Raspberry Pi Pico to your PC (desktop or laptop) using a 5-pin Micro USB cable.
4. Connect the W55RP20 EVB Pico to your PC (desktop or laptop) using a USB Type-C cable.
Step 3: Setup Example
- Raspberry Pi Pico (Master) : Getting started with Raspberry Pi Pico (MicroPython)
Please refer to the link below to install the MicroPython firmware on the Raspberry Pi Pico.
- W55RP20 EVB Pico : Getting started with W55RP20 EVB Pico
Please refer to the link below for instructions on how to use the W55RP20 S2E.
- Configure Certificates in Example Code : Before running the example, you must manually input the downloaded certificate data into
09_mqtts_client.py.
- Open the downloaded certificate files (.pem or .txt) using a text editor (like Notepad).
- Copy the text and paste it into the corresponding variables in the code.
- Note: Ensure you include the
\r\nline breaks as shown in the template to maintain the correct PEM format.
# 09_mqtts_client.py - Certificate Section

# Paste 'AmazonRootCA1.pem' content here
AWS_CA_CERT = (
    "-----BEGIN CERTIFICATE-----\r\n"
    "..."
    "-----END CERTIFICATE-----\r\n"
)

# Paste 'xxx-certificate.pem.crt' content here
AWS_CLIENT_CERT = (
    "-----BEGIN CERTIFICATE-----\r\n"
    "..."
    "-----END CERTIFICATE-----\r\n"
)

# Paste 'xxx-private.pem.key' content here
AWS_PRIVATE_KEY = (
    "-----BEGIN RSA PRIVATE KEY-----\r\n"
    "..."
    "-----END RSA PRIVATE KEY-----\r\n"
)
Step 4: Upload Code
- Raspberry Pi Pico
Open Thonny IDE and connect to the Raspberry Pi Pico. Upload the following driver and example files to the Pico's storage.
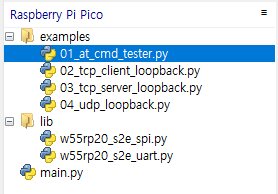
Required Files:
w55rp20_s2e_uart.py(Required for UART mode)w55rp20_s2e_spi.py(Required for SPI mode)
Example Application Files (Choose one to test):
09_mqtts_client.py(The main application)
Configuration: Before running an example, open the Python file you intend to use and modify the User Configuration section at the top.
# 09_mqtts_client.py
#
# MQTTS (AWS IoT Core) example (Supports both SPI and UART modes):
# - Configure the module as MQTTS client (OP=6) + DHCP
# - Upload Root CA / Client Certificate / Private Key via AT commands
# - Publish initial message and receive subscribed topic data
#
# Select mode by changing the MODE variable below.

import time

# -------------------------------------------------------------------------
# Configuration
# -------------------------------------------------------------------------
MODE     = "spi"  # Set to "spi" or "uart"
USE_DHCP = True    # True: DHCP (IM=1), False: Static IP (IM=0)

# AWS IoT Settings
BROKER_HOST = "YOUR_AWS_ENDPOINT"
BROKER_PORT = "8883"
CLIENT_ID   = "w55rp20_aws_client"
SUB_TOPIC   = "sdk/test/python"
PUB_TOPIC   = "sdk/test/python1"
PUB_MESSAGE = "Hello from W55RP20-S2E to AWS IoT"
KEEP_ALIVE  = 60

# Network Configuration
LOCAL_IP    = "192.168.11.100"  # Local IP (Used when USE_DHCP=False)
SUBNET_MASK = "255.255.255.0"   # Subnet Mask (Used when USE_DHCP=False)
GATEWAY     = "192.168.11.1"    # Gateway (Used when USE_DHCP=False)
DNS_SERVER  = "8.8.8.8"         # DNS Server (Used when USE_DHCP=False)
.
.
Step 5: Testing with Mosquitto (PC Side)
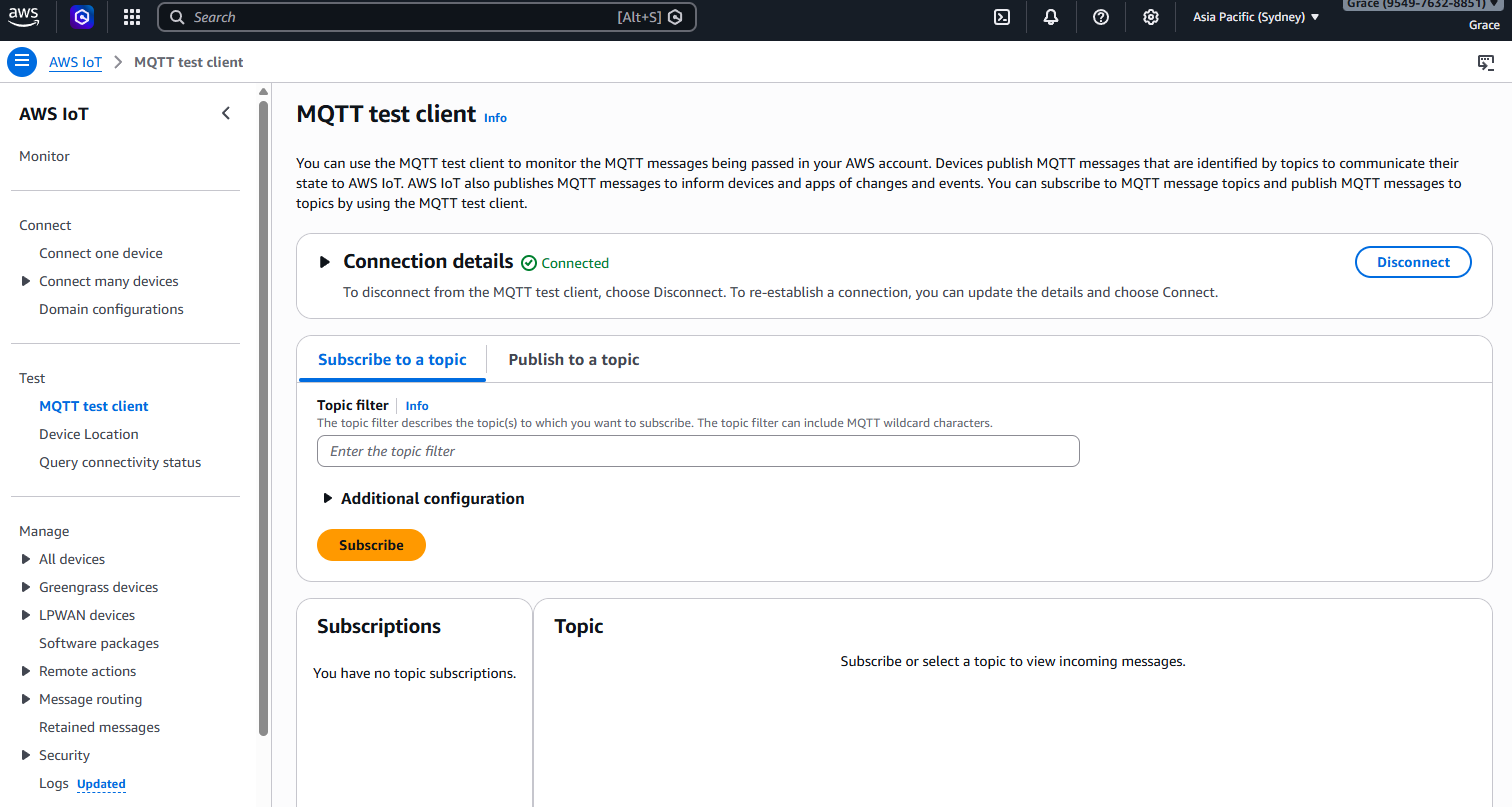
Log in to AWS IoT Console: Navigate to Test > MQTT test client.
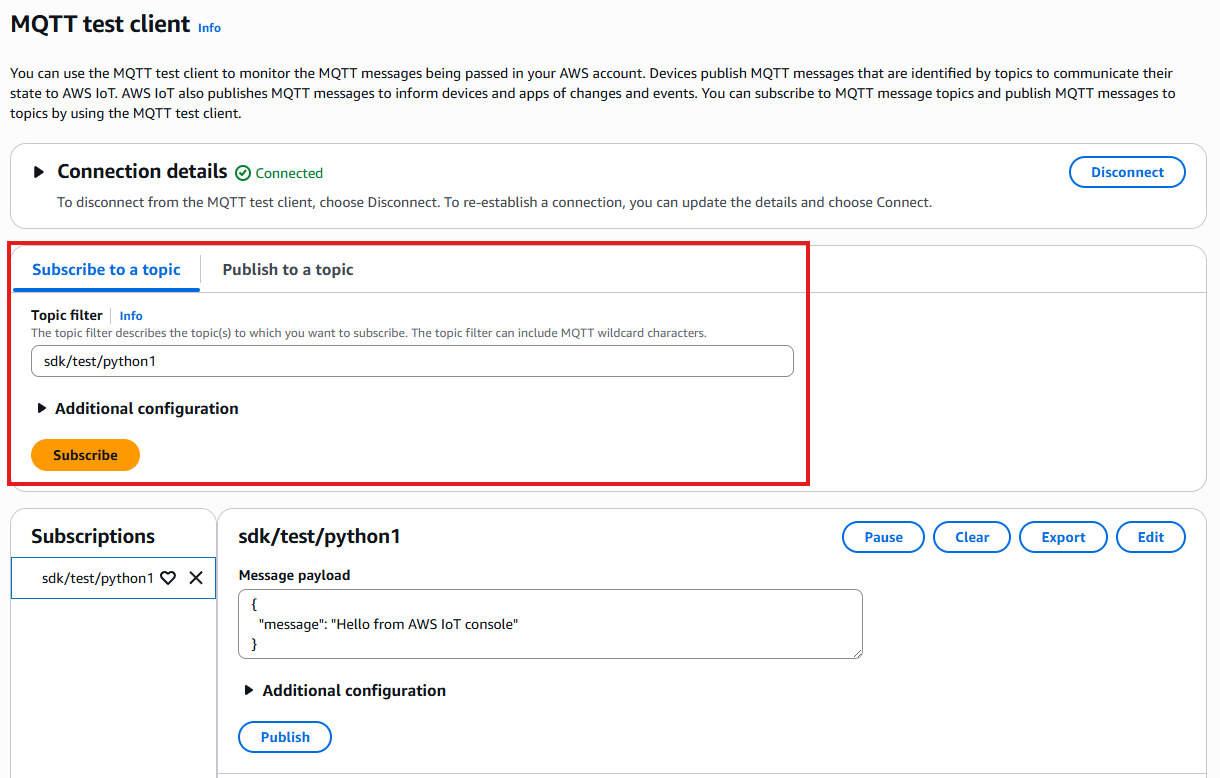
Monitor Incoming Messages:
- In the Subscribe to a topic tab, enter sdk/test/python1.
- Click Subscribe.
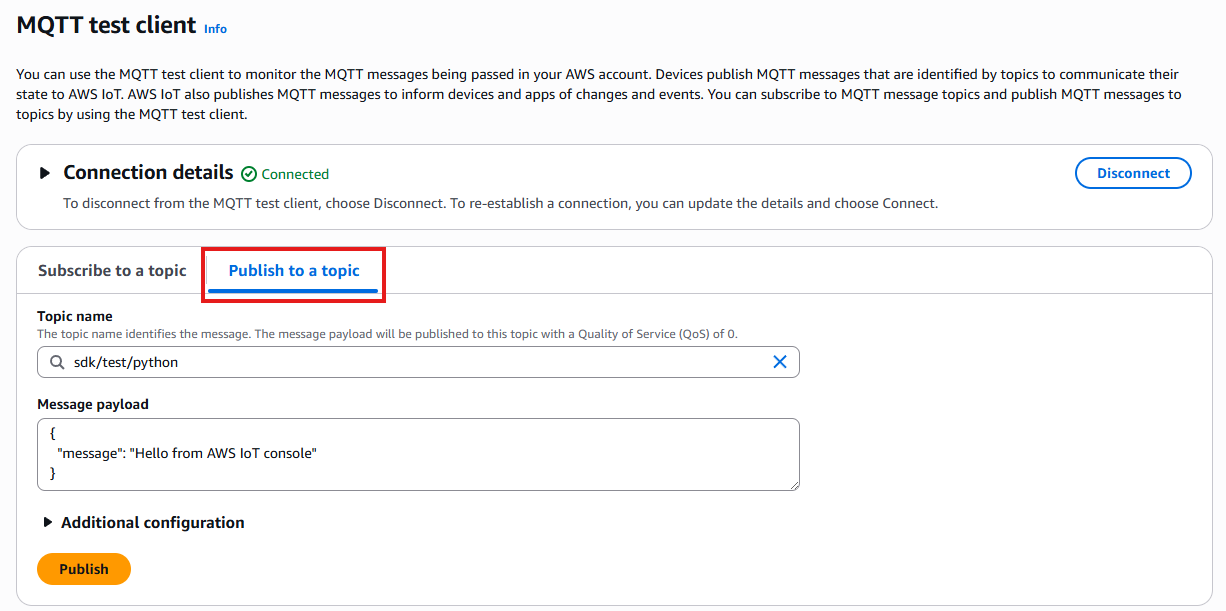
Prepare to Send Messages:
- In the Publish to a topic tab, enter sdk/test/python.
- Enter a message (e.g., {"message": "Hello from AWS IoT console"}).
# Send a message to the Pico
mosquitto_pub -h localhost -t w55rp20/sub -m "LED_ON"
Step 6: Run
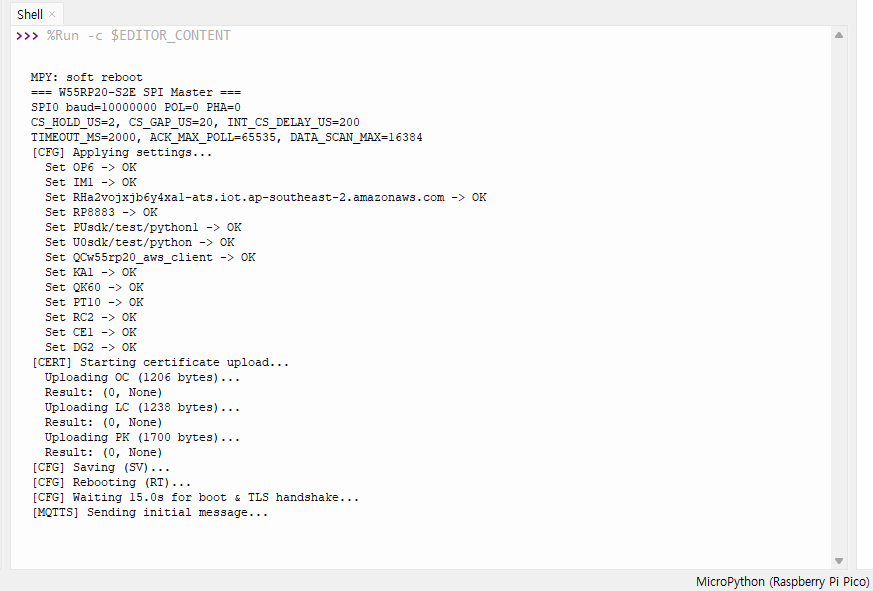
Pico (Thonny):
- Open
09_mqtts_client.py. - Run the script (F5).
- Wait for the TLS handshake (this takes longer than standard MQTT—about 15 seconds).
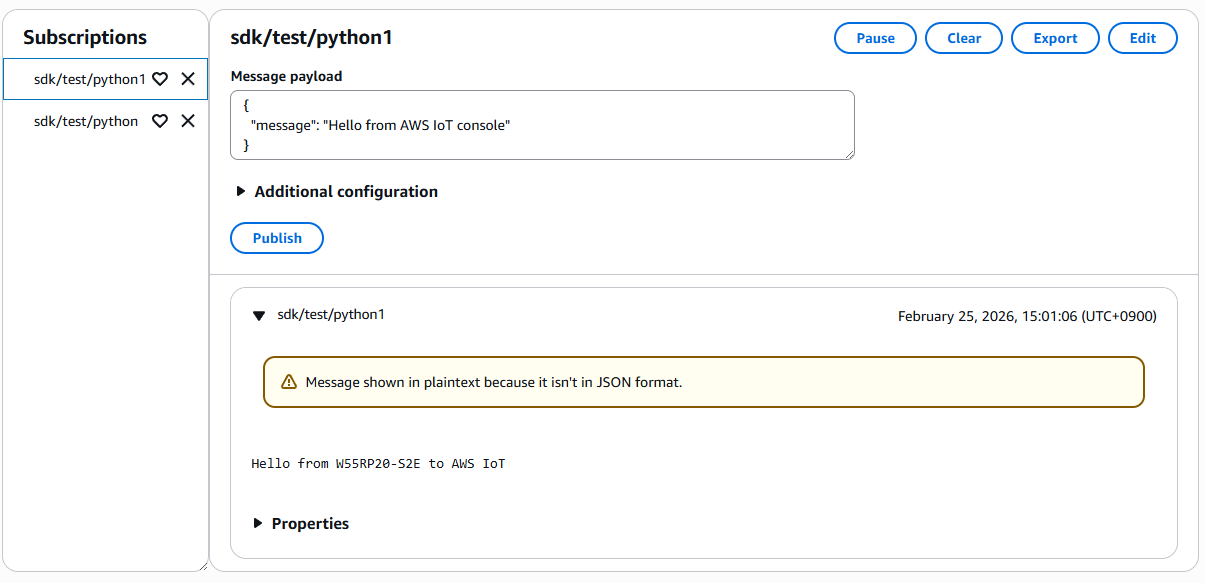
AWS IoT (Verify Publish):
- You should see
"Hello from W55RP20-S2E to AWS IoT"
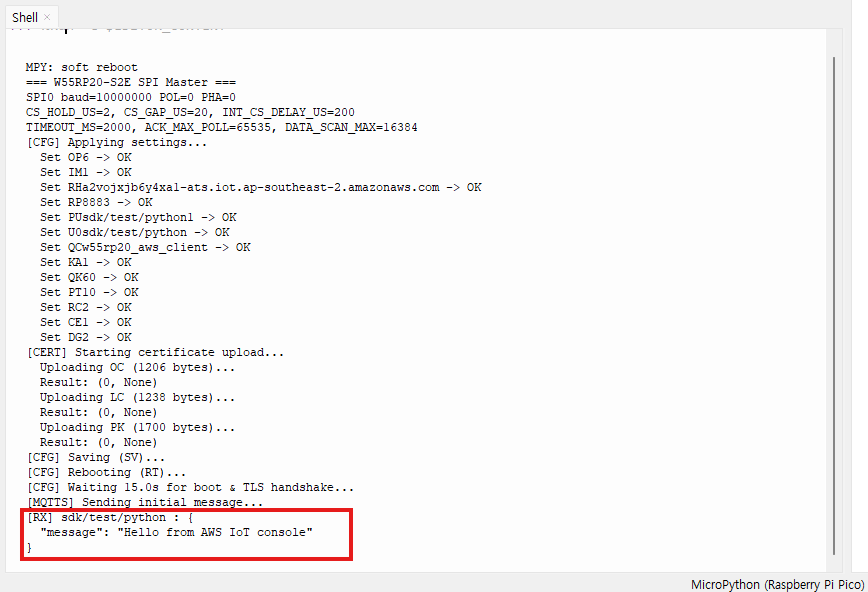
Pico (Thonny) : Verify Subscribe
- Publish a message from the AWS Console to
sdk/test/python. - You should see
[RX] sdk/test/python : {"message": "Hello from AWS IoT console"}in the Thonny shell.
-
GitHub : W55RP20-S2E_master_Micropython
