
How to Connect W55RP20 to AWS IoT Using the MQTT
This WCC includes methods for testing the W55RP20 with AWS IoT, as well as instructions for first-time users on how to use AWS IoT.
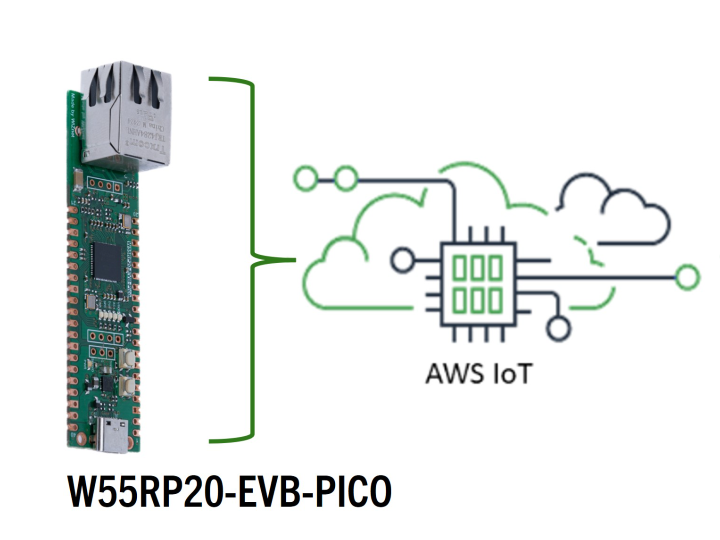
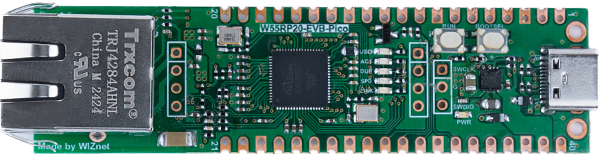
WIZnet - W55RP20-EVB-Pico
x 1
AWS IoT (Internet of Things) is a cloud service provided by Amazon Web Services (AWS) that allows various devices and sensors to connect to the internet to collect, analyze, and manage data.
The AWS IoT platform handles data transmission between devices and servers over the internet, primarily using protocols like MQTT and HTTPS that operate over the TCP/IP stack.
The W55RP20 chip is a SiP solution that integrates WIZnet's W5500 Ethernet controller and Raspberry Pi's RP2040 microcontroller, providing networking and processing capabilities for IoT devices and smart applications. The W5500 supports a hardware TCP/IP stack, simplifying network connectivity and communication management, while the RP2040 offers fast data processing and multitasking capabilities, enabling the simultaneous handling of multiple tasks.
Execute the aws_iot_mqtt.c code from the PICO-AWS-C examples.
https://github.com/WIZnet-ioNIC/WIZnet-PICO-AWS-C
Hardware Requirements
- W55RP20-EVB-PICO
- Desktop or Laptop
- USB Type-C Cable
Software Tools
- Visual Studio Code
- Serial Terminal : Tera Term
Setup board
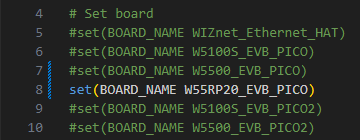
Need to set up the board in the 'WIZnet-PICO-C/CMakeLists.txt' file.
Activate the 8th line in this file by setting 'set(BOARD_NAME W55RP20_EVB_PICO)'.
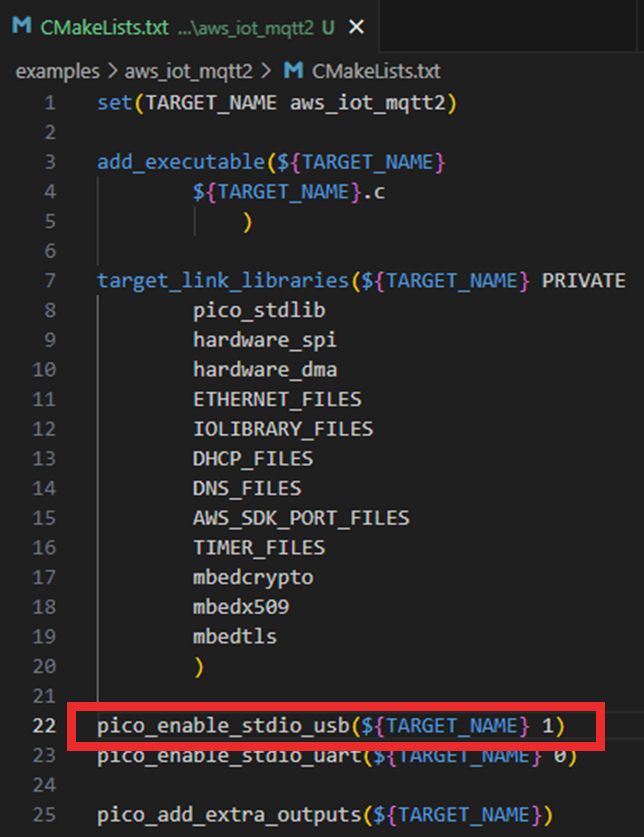
*If you want to view log messages via USB serial, modify the following file as shown below.
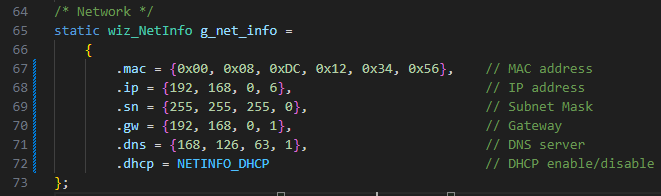
Setup Network Info
Set up the desired network information.
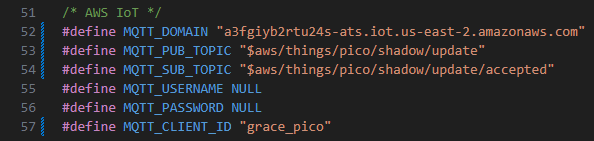
MQTT configuration
If you're using AWS IoT for the first time, refer to the '☞ How to use AWS IoT console' chapter at the bottom of this WCC.
- To use MQTT, you first need to set the following values.
- MQTT_DOMAIN : The address used when the device connects to AWS IoT(broker)
- MQTT_PUB_TOPIC : Define the topic where the device will publish messages
- MQTT_SUB_TOPIC : Define the topic for the device to receive messages
- MQTT_CLIENT_ID : Define the ID to identify the device
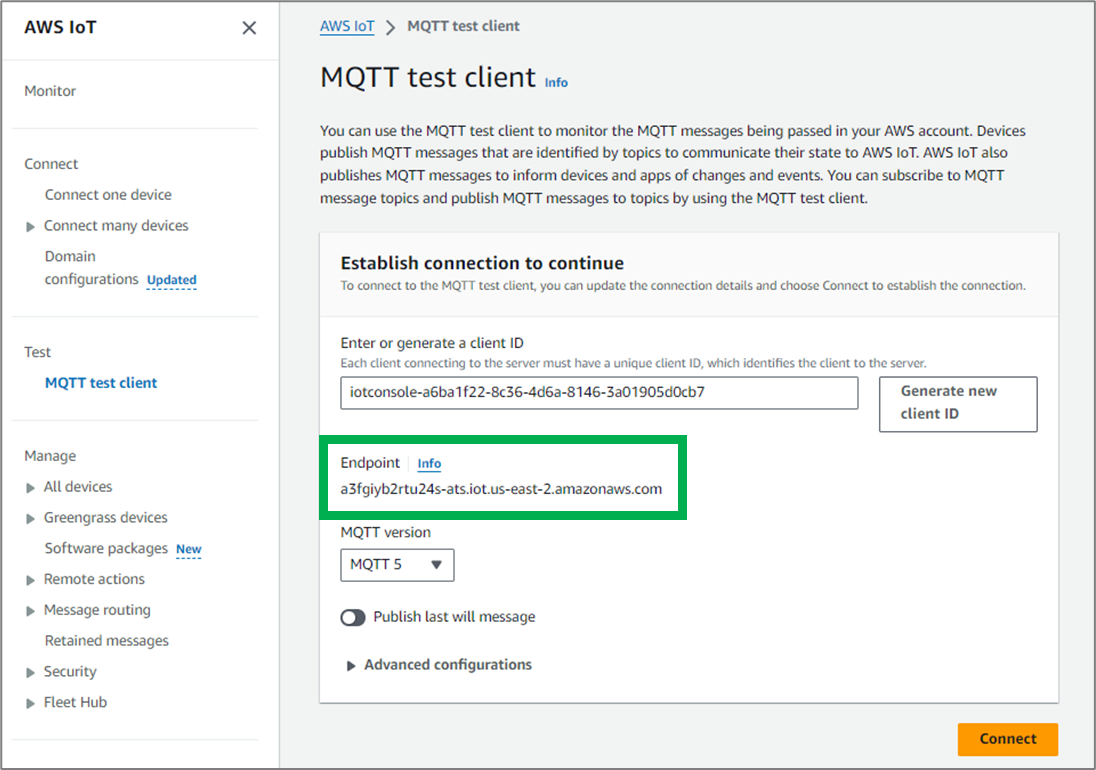
Device endpoint from AWS IoT 'MQTT test client' tab.
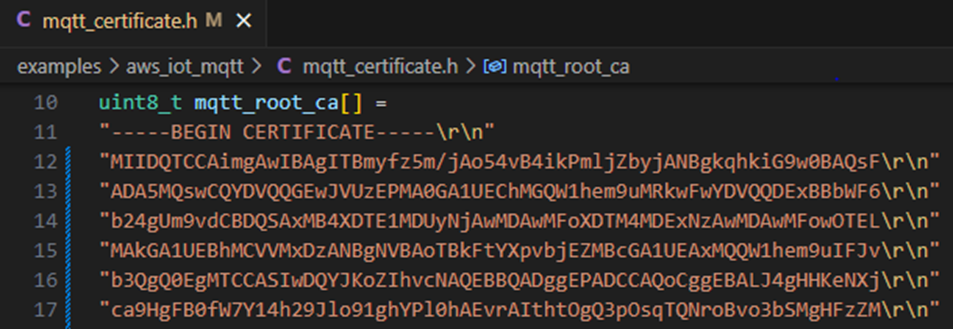
- In this example, you need to download that certificate files.
( Device certificate(.crt), private key file(.key), Amazon trust service endpoint(.pem) )
If you've downloaded the certificate, input it into the 'mqtt_certificate.h' file. AWS IoT will then verify the certificate and accept the connection request.
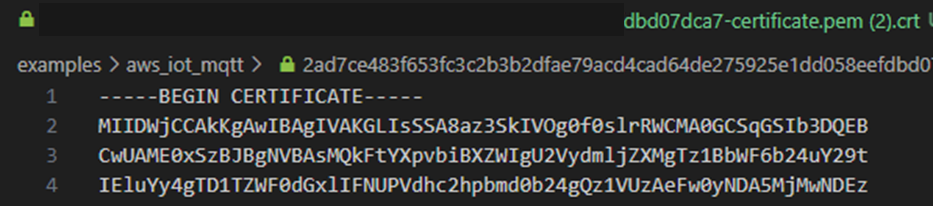
But you need to format the certificate files as shown in the image below. Each line should have double quotes and end with \r\n. Apply this format to all three files.
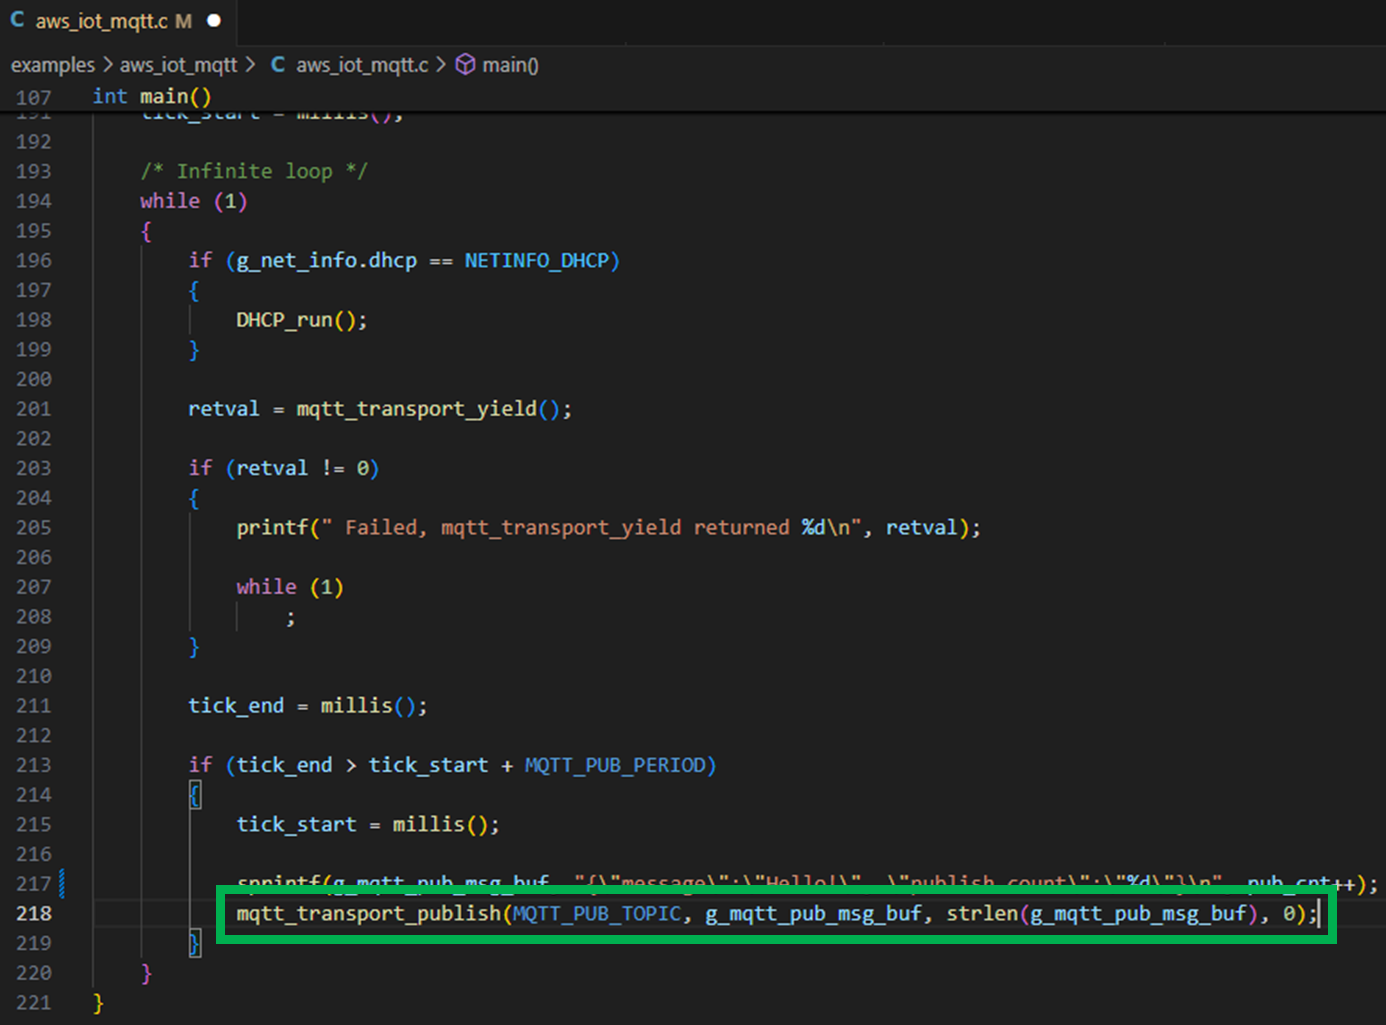
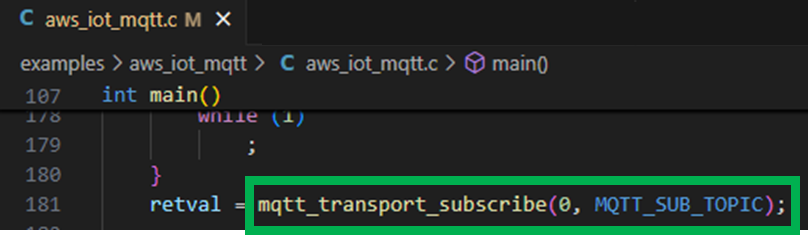
- The QoS for MQTT subscribe or publish can be changed when using these functions. It is currently set to 0.
Run
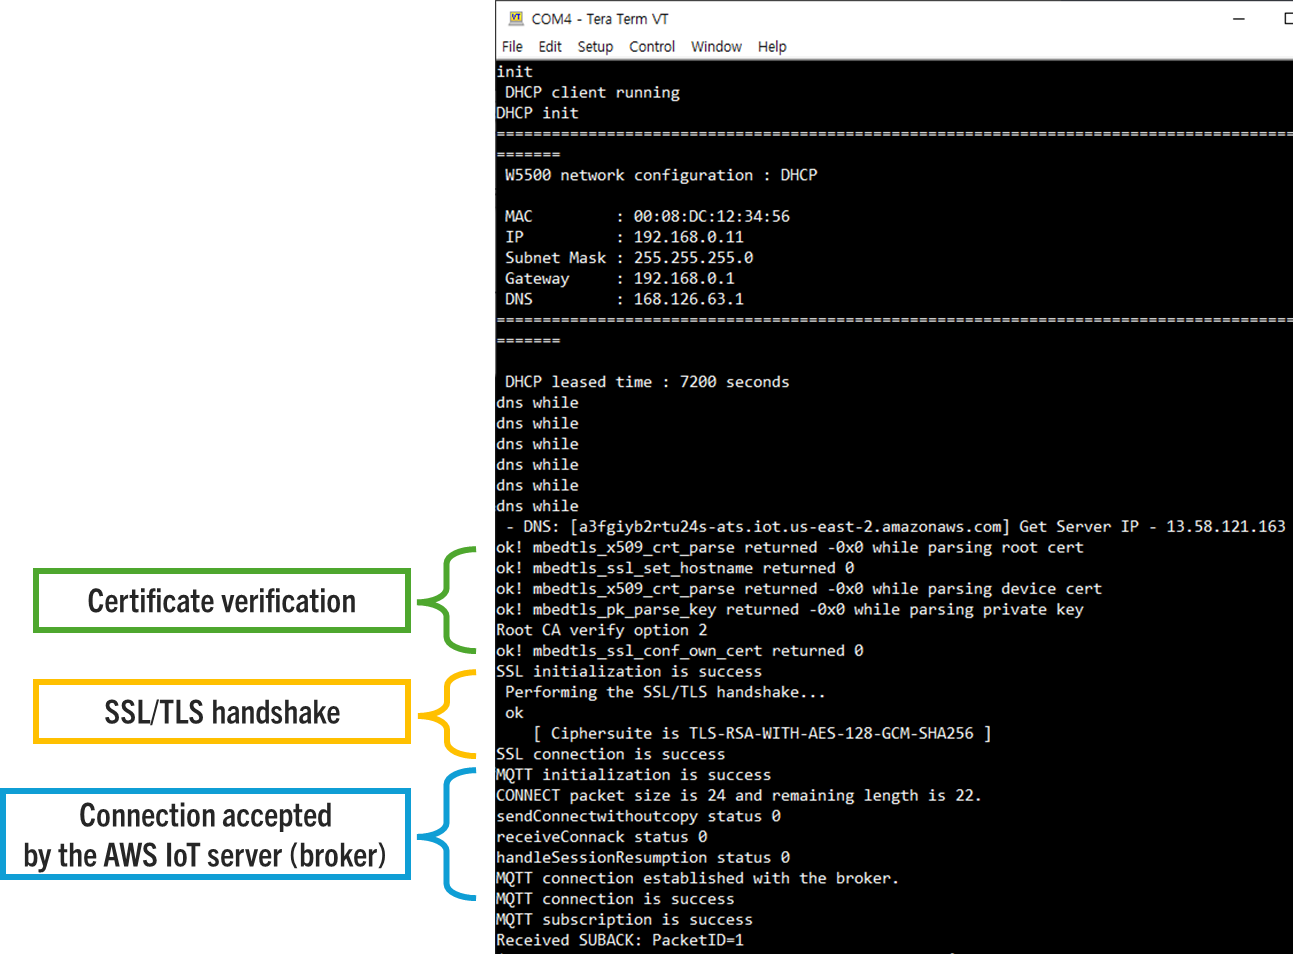
The execution screen is as follows.
The connection to AWS IoT(broker) is established through the following process.
You can subscribe/publish to a topic in the MQTT client provided by AWS IoT and verify it.
When the W55RP20-EVB-Pico publishes to a specific topic for a certain period, a message will appear as shown below.
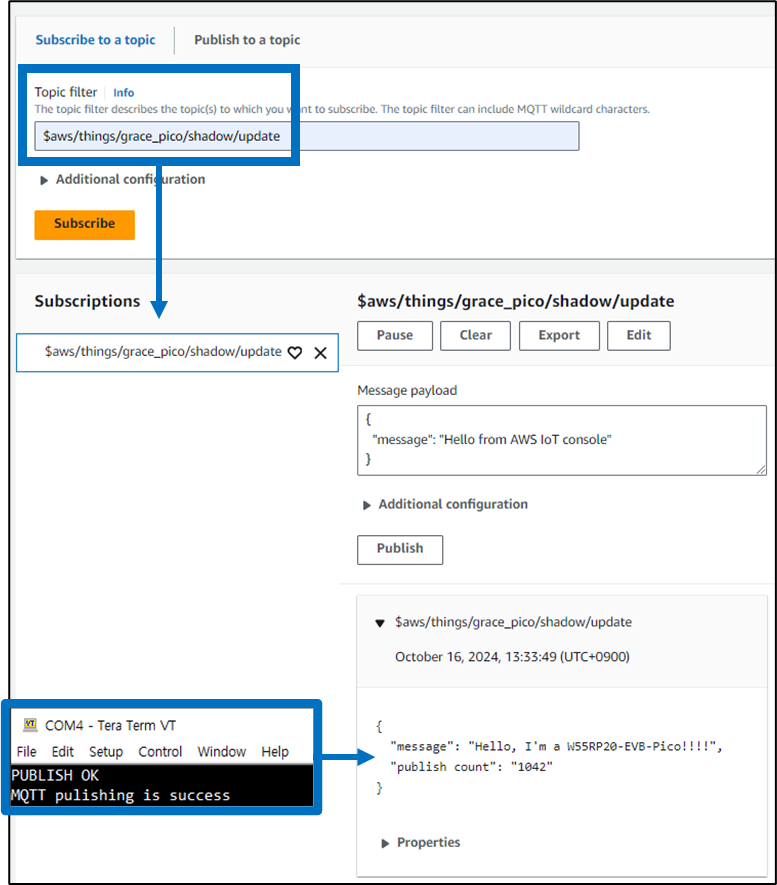
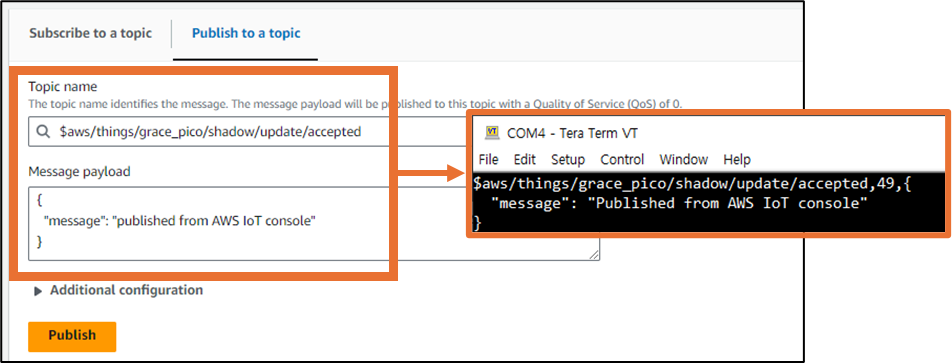
Conversely, if you publish a message to the topic subscribed by the W55RP20 in the AWS IoT MQTT client, you can confirm that the message is displayed as shown below.
☞ How to use AWS IoT console
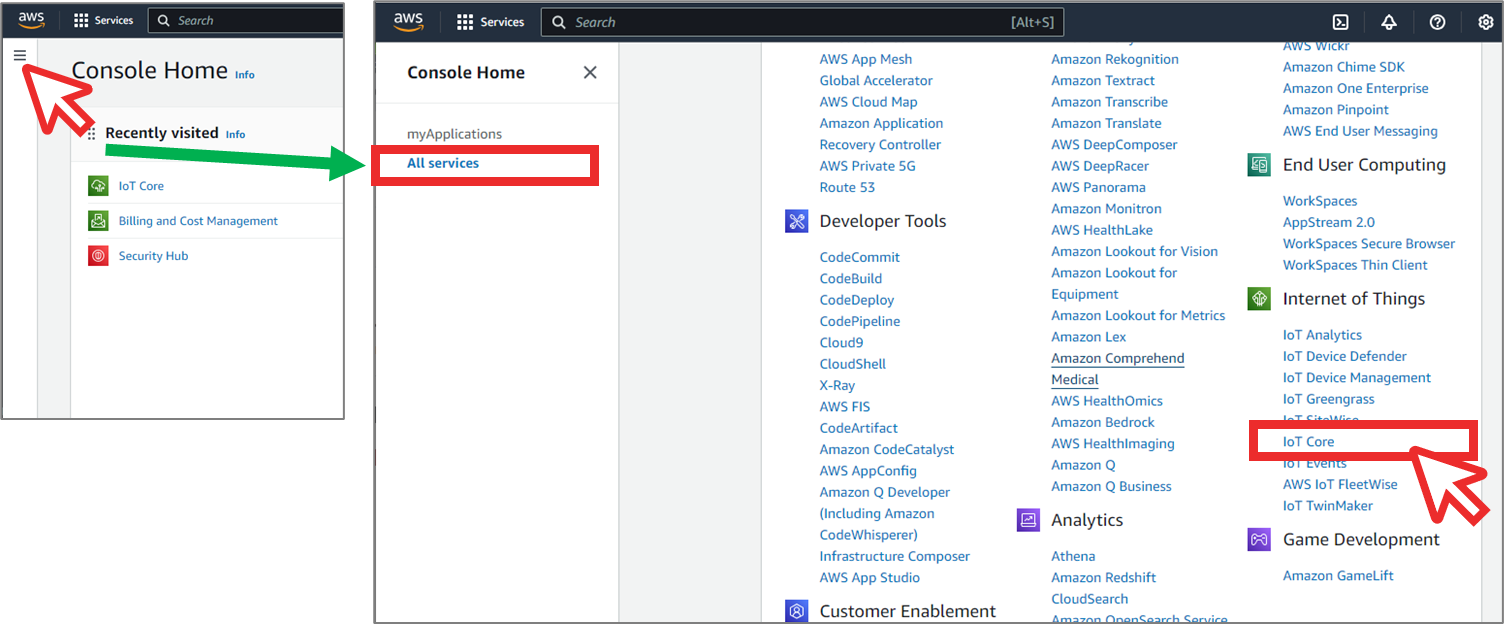
After creating an account and log in at https://aws.amazon.com/.
When you navigate to the Console as shown below, go to All Services > Internet of Things > IoT Core.
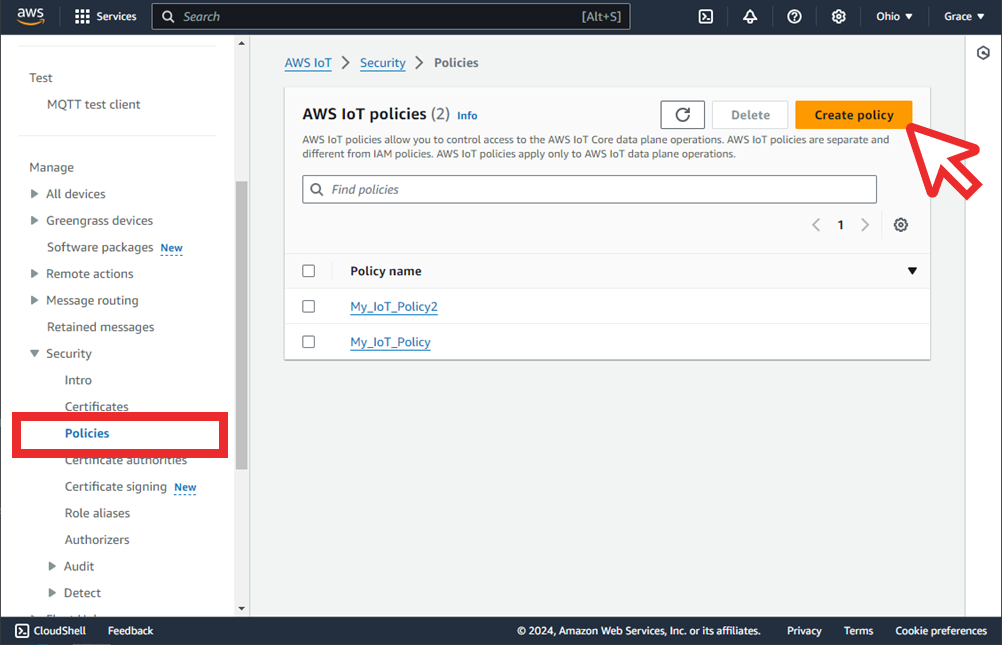
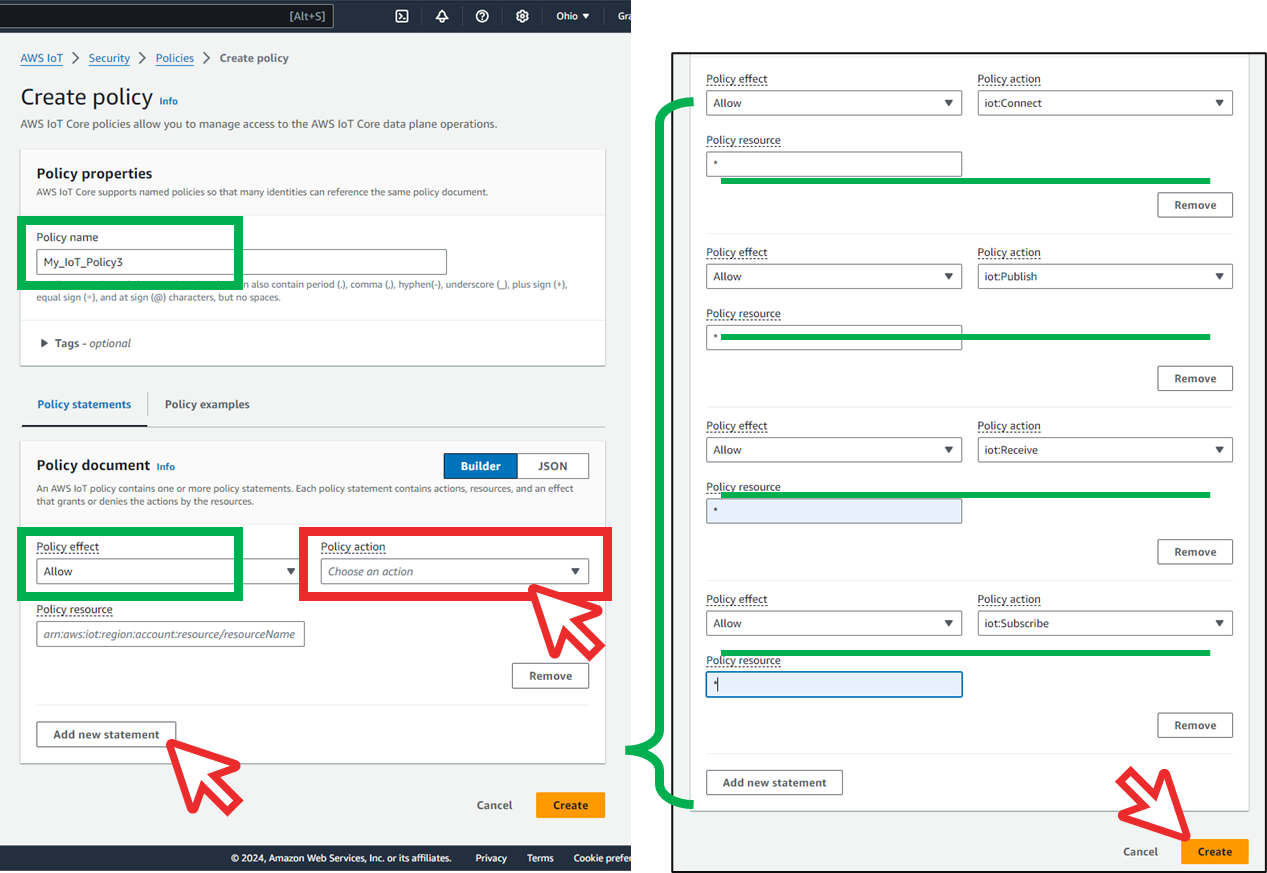
- To create and register a certificate for the device, you will first create a policy.
In the left tab of IoT Core, go to Manage > Security > Policies and create a new policy.
Now, you need to add statements to the new policy. In this example, the required policy actions are iot:Connect, iot:Receive, iot:Publish, and iot:Subscribe.
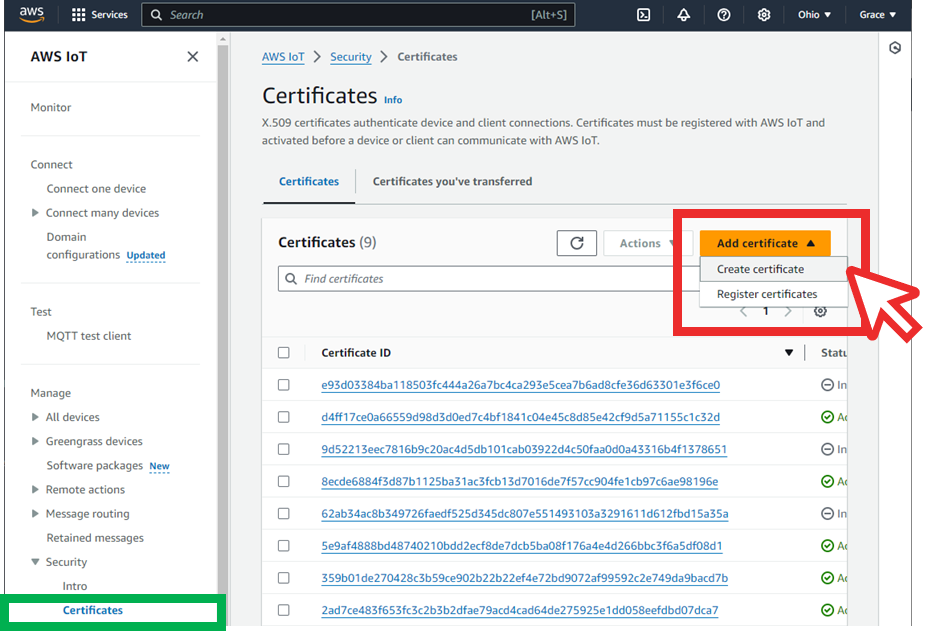
- Next, we will create a certificate. In the left tab, go to Manage > Security > Certificates, then click Add certificates > Create certificate.
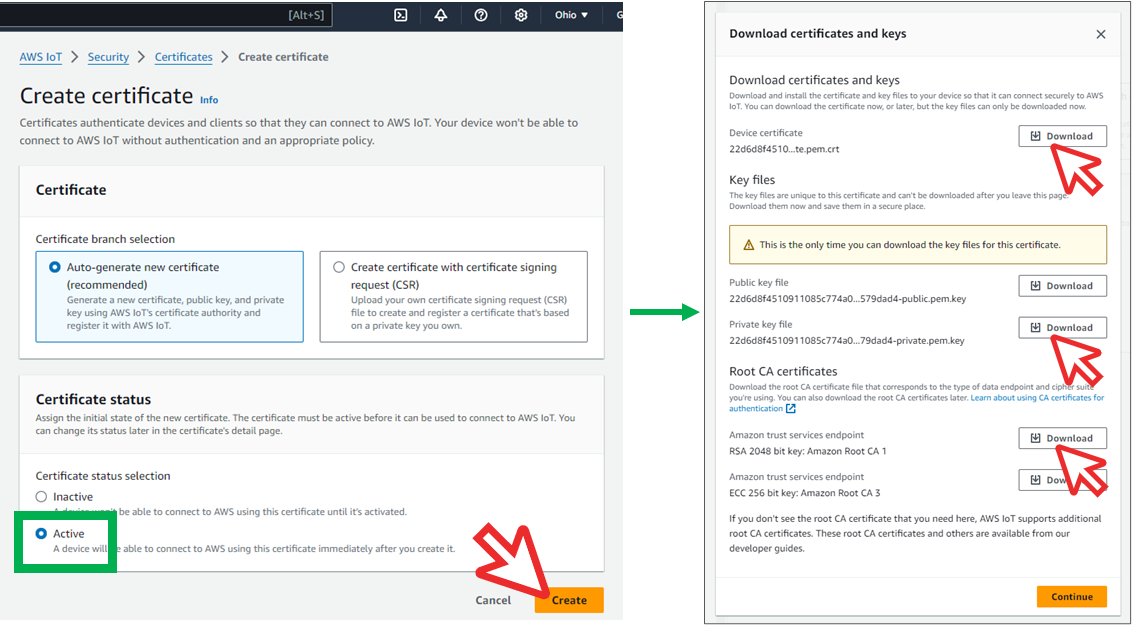
We will create a certificate by AWS IoT, so configure the settings as shown in the image on the left and proceed with the creation.
When you click the Create button, a popup will appear to download the certificate and keys. Make sure to download the files indicated in the image. Pay attention to the key files, as they can only be downloaded at the time of certificate creation.
( Device certificate(.crt), private key file(.key), Amazon trust service endpoint(.pem) )
- After creating the certificate, attach the policy that will be used with the certificate. Attach it as shown below.
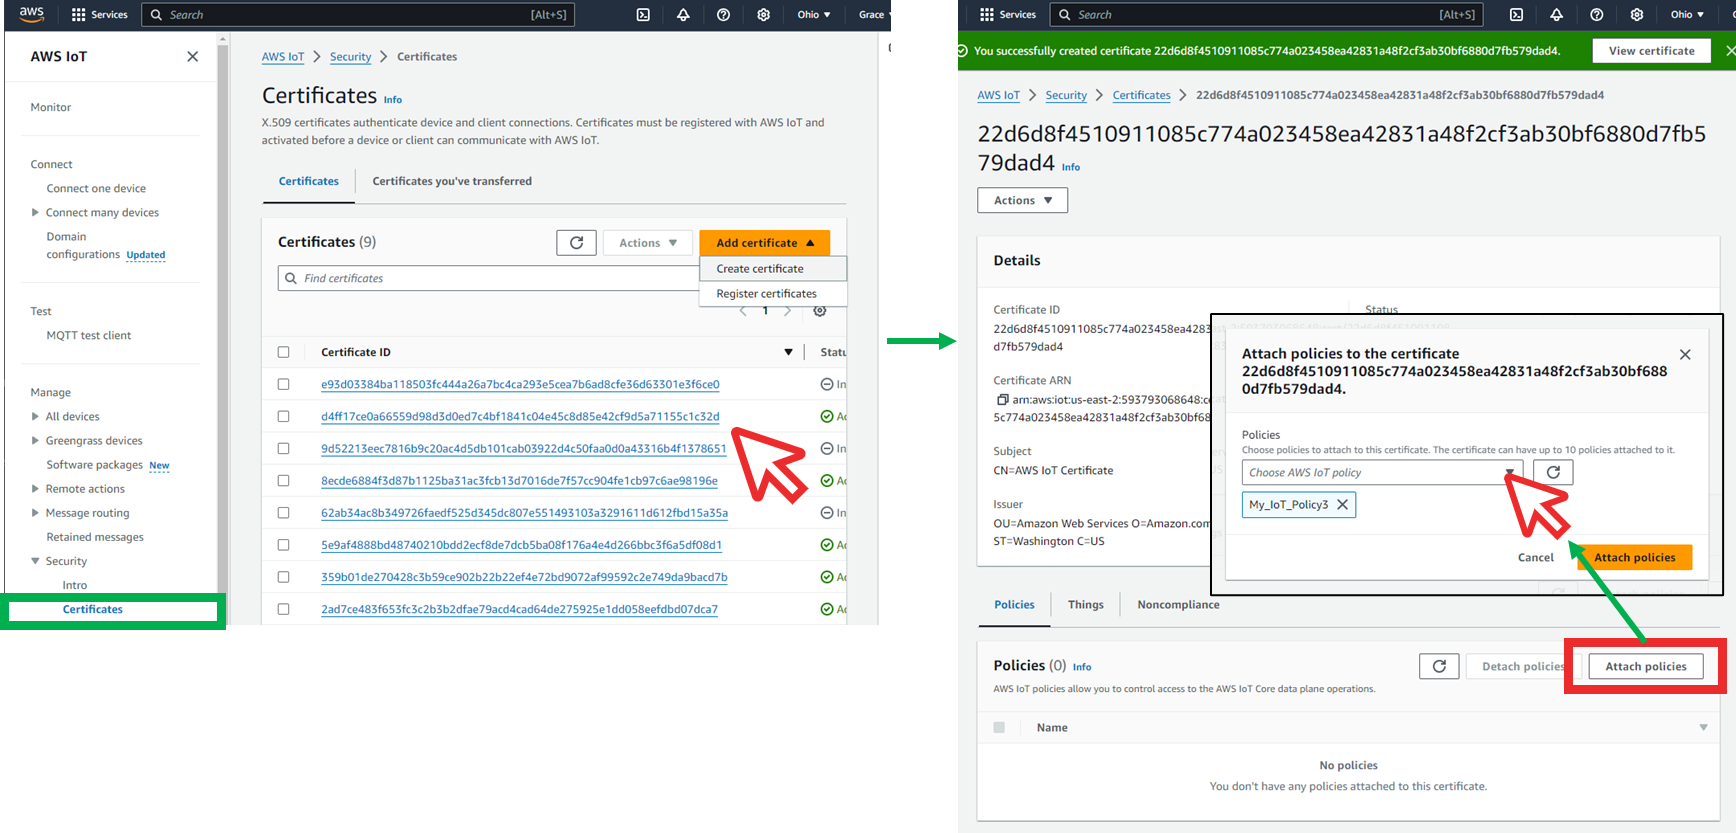
Once the certificate is created as shown above, you can register the certificate on the device and connect it to AWS IoT.
-
WIZnet-PICO-AWS-C
