W55RP20 : Serial to Ethernet Design
W55RP20: How to Use for Serial to Ethernet Conversion

Intro
The W55RP20 is a chip specialized for Serial to Ethernet operation. This is because it combines the W5500, which enables Ethernet functionality even with low-spec MCUs, and the powerful RP2040 MCU from Raspberry Pi.
Firmware for UART TTL, RS-232, RS-422, and RS-485 is already available for the W55RP20. This article covers PCB circuit design suitable for the firmware, usage of the tools, and instructions for firmware upload.
Pinout Design
The RST pin is for MCU reset and operates as Active Low.
The BOOT Mode pin is designed to control boot within the Serial to Ethernet internal firmware.
The AT Mode pin operates as Active Low; by controlling this pin, you can enter AT commands via serial to control the chip.
The RP BOOT pin is the reset pin for the internal flash memory, operating as Active Low and following the RP2040 boot sequence.
The 232/485 select pin functions based on its setting: when the chip first operates, if this pin is Low, it sets to RS-232; if High, it sets to RS-422 or RS-485.
The Factory RST resets the IP settings to default while keeping the firmware stored in the chip unchanged.
These pins are for communication.
The UART_RTS pin determines the mode: if it is floating when the chip operates, it will function as RS-485; if set to Low, it will operate as RS-422.
The RUN LED blinks every second. The LINK LED activates when the PHY link is established, and the TCP LED lights up when a TCP connection is made.
Although it’s not shown in the table above, depending on the situation, either USB or SWD must be disconnected. This is to facilitate the initial firmware writing.
Please refer to the following link for circuit reference.
W232N - W55RP20 / RS-232 to Ethernet Module
Firmware upload
Download the firmware from the link below.
W55RP20 Serial to Ethernet Firmware
There are three ways to upload firmware to the chip:
- USB - Direct access to flash memory; upload using a UF2 file.
- Ethernet - Upload using a BIN file through the Configuration Tool (boot upload not supported).
- SWD - Upload via J-Link; supports HEX and BIN files.
Uploading via the Ethernet port is the simplest method, but since boot cannot be uploaded this way, USB or SWD must be used for the initial firmware upload.
USB

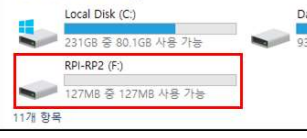
First, here’s how to upload the firmware via USB. With the USB connected, if you power on or reset the chip while the RP-BOOT pin is low, a drive named 'RPI-RP2' will appear. Simply drag and drop the Boot.uf2 file into this drive. Once the Boot.uf2 file is uploaded, reopen the drive by controlling the boot pin. Then, upload the app.uf2 file.
SWD
You can proceed just like updating the RP2040 firmware with a J-Link. The Hex file for the update is provided.
Ethernet
Configuration Tool User Manual
You can update the Bin file using the Configuration Tool. However, this method only updates the application portion, so it’s not suitable for the initial firmware upload. This method is intended for use after the initial firmware upload and MAC address configuration are complete, for any necessary firmware updates.
MAC upload
After uploading the initial firmware via USB or SWD, it’s time to upload the MAC address. Without a MAC address, the chip will not operate for Serial to Ethernet functionality.
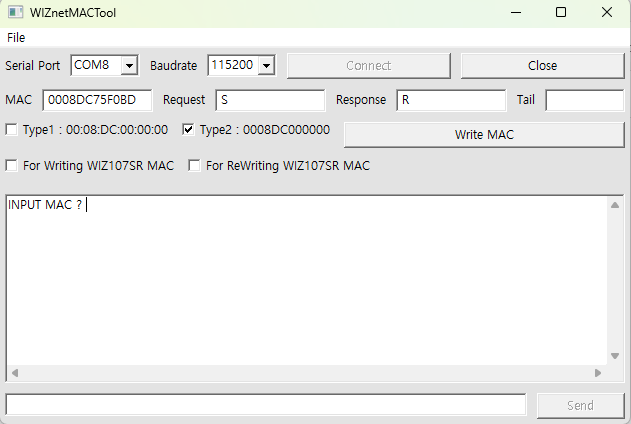
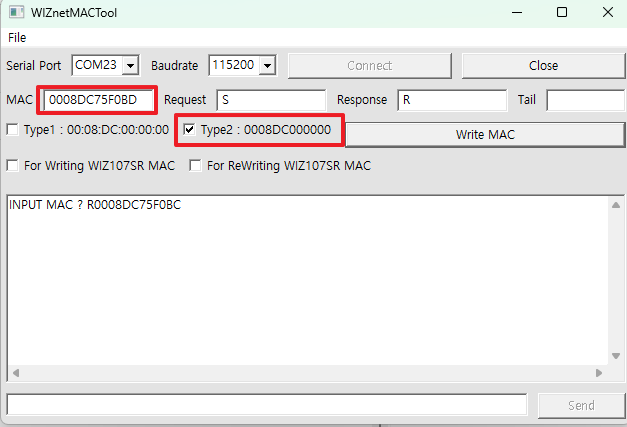
Connect the Serial Port, then select the corresponding port in the tool. The baud rate should be set to 115200.

When you reset the chip, a message saying 'INPUT MAC?' will appear.

Enter the desired MAC address as instructed, then click the 'Write MAC' button. If the MAC address is entered correctly, the inputted MAC address will be displayed again as confirmation.
(You will need to purchase a MAC address separately for use.)
Setting
You can perform various settings through Configuration by referring to the link above.
Please ensure to download and use the latest version of the Configuration Tool.
