
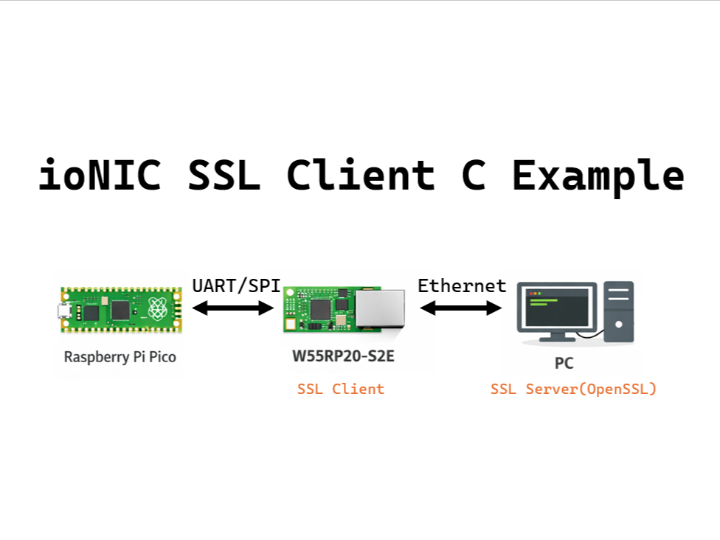
ioNIC SSL Client C Example
The W55RP20-S2E is configured in SSL client mode via the UART or SPI interface and operates to exchange data with an OpenSSL server running on a PC.
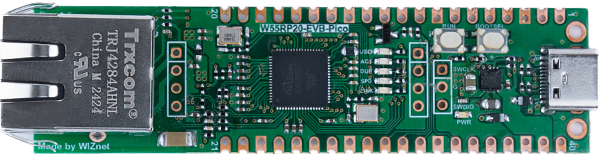
WIZnet - W55RP20-EVB-Pico
x 1
How to SSL Client Example
This example explains how the Raspberry Pi Pico transmits AT commands to the W55RP20-S2E board via the UART or SPI interface to configure it in SSL client mode.
When an OpenSSL server is executed on a PC and the server sends data, the W55RP20-S2E receives the SSL-encrypted data and forwards it to the Raspberry Pi Pico through UART or SPI.
The Raspberry Pi Pico processes the received data, generates response data, and sends it back to the W55RP20-S2E via UART or SPI. The W55RP20-S2E then encrypts the data using SSL and transmits the response message to the OpenSSL server.
Throughout this process, the Raspberry Pi Pico controls the configuration and data handling operations of the W55RP20-S2E.
Step 1: Prepare software
The following serial terminal programs are required for test, download and install from below links.
Step 2: Prepare hardware
1. Connect GPIO13 according to the selected UART/SPI mode of the W55RP20 EVB Pico, as illustrated below.
| GPIO13 Pin | Desc |
| LOW(GND) | UART mode (default) |
| HIGH(3.3V) | SPI mode |
2. Connect the Raspberry Pi Pico and the W55RP20 EVB Pico using jumper wires as shown below, depending on the selected UART/SPI mode.
If UART mode :
| Raspberry Pi Pico | W55RP20 EVB Pico |
| GPIO4 (UART_TX) | GPIO5 (UART_RX) |
| GPIO5 (UART_RX) | GPIO4 (UART_TX) |
| GND | GND |
If SPI mode :
| Raspberry Pi Pico | W55RP20 EVB Pico |
| GPIO2 (SPI_CLK) | GPIO2 (SPI_CLK) |
| GPIO3 (SPI_TX) | GPIO4 (SPI_RX) |
| GPIO4 (SPI_RX) | GPIO3 (SPI_TX) |
| GPIO5 (SPI_CS) | GPIO5 (SPI_CS) |
| GPIO26 (SPI_INT) | GPIO26 (SPI_INT) |
| GND | GND |
3. Connect the Raspberry Pi Pico to your PC (desktop or laptop) using a 5-pin Micro USB cable.
4. Connect the W55RP20 EVB Pico to your PC (desktop or laptop) using a USB Type-C cable.
Step 3: Setup SSL Client Example
Raspberry Pi Pico
Please refer to the link below for setting up the Raspberry Pi Pico development environment.
Getting started with Raspberry Pi Pico
We recommend the following versions for successful build and development:
- pico-sdk:
2.2.0 - ARM GCC Toolchain:
14.2.Rel1
To test the SSL Client example, minor settings shall be done in code.
Setup network configuration such as IP and Port etc... in 'ssl_client_uart/spi.c' in 'ssl/' directory.
// ssl_client_uart.c

// ======= Server Information =======
const char* SERVER_IP   = "192.168.11.100";  // PC(Server) IP
const char* SERVER_PORT = "443";             // PC(Server) Port

int main() {
    											...
    printf("\n--- Config W55RP20 with AT command(UART) ---\n");
    {
        enter_command_mode();                   // Send +++ command
        factory_reset();                        // Send Factory Reset command
        // If you send Reset or Factory Reset command, W55RP20 will reboot and enter to default gateway mode
        enter_command_mode();                   // Send +++ command
        at_set("OP", "4");                      // Set W55RP20 SSL client mode
        at_set("LI", "192.168.11.2");           // Set W55RP20's Local IP : 192.168.11.2
        at_set("SM", "255.255.255.0");          // Set W55RP20's Subnet mask : 255.255.255.0
        at_set("GW", "192.168.11.1");           // Set W55RP20's Gateway : 192.168.11.1
        at_set("DS", "8.8.8.8");                // Set W55RP20's DNS Address : 8.8.8.8
        at_set("LP", "5000");                   // Set W55RP20's Local Port : 5000
        at_set("RH", SERVER_IP);                // Set Remote IP(ex. PC)
        at_set("RP", SERVER_PORT);              // Set Remote Port
        at_set("SO", "5000");                   // Set SSL receive timeout
        at_set("SV", NULL);                     // Send Save command
        sleep_ms(100);
        device_reset();                         // Send Reset command
        uart_rx_flush();
    }
    											...
}
// ssl_client_uart.c
// ======= Server Information =======
const char* SERVER_IP = "192.168.11.100"; // PC(Server) IP
const char* SERVER_PORT = "443"; // PC(Server) Port
int main() {
...
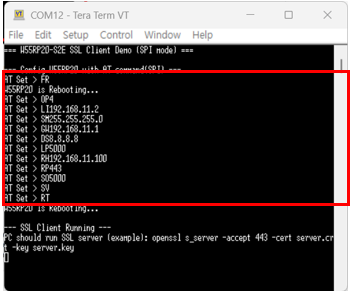
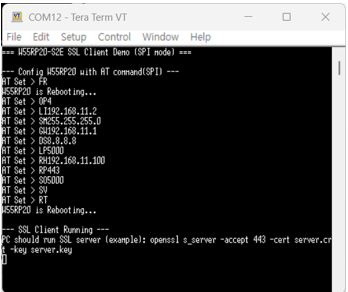
printf("\n--- Config W55RP20 with AT command(SPI) ---\n");
{
at_set("FR", NULL); // Send Factory Reset command
printf("W55RP20 is Rebooting...\n");
sleep_ms(3000);
at_set("OP", "4"); // Set W55RP20 SSL client mode
at_set("LI", "192.168.11.2"); // Set W55RP20's Local IP : 192.168.11.2
at_set("SM", "255.255.255.0"); // Set W55RP20's Subnet mask : 255.255.255.0
at_set("GW", "192.168.11.1"); // Set W55RP20's Gateway : 192.168.11.1
at_set("DS", "8.8.8.8"); // Set W55RP20's DNS Address : 8.8.8.8
at_set("LP", "5000"); // Set W55RP20's Local Port : 5000
at_set("RH", SERVER_IP); // Set Remote IP(ex. PC)
at_set("RP", SERVER_PORT); // Set Remote Port
at_set("SO", "5000"); // Set SSL receive timeout
at_set("SV", NULL); // Send Save command
at_set("RT", NULL); // Send Reset command
printf("W55RP20 is Rebooting...\n");
sleep_ms(3000);
spi_rx_pending = false;
}
...
}W55RP20 EVB Pico
Please refer to the link below for instructions on how to use the W55RP20 S2E.
Getting started with W55RP20 EVB Pico
PC(OpenSSL)
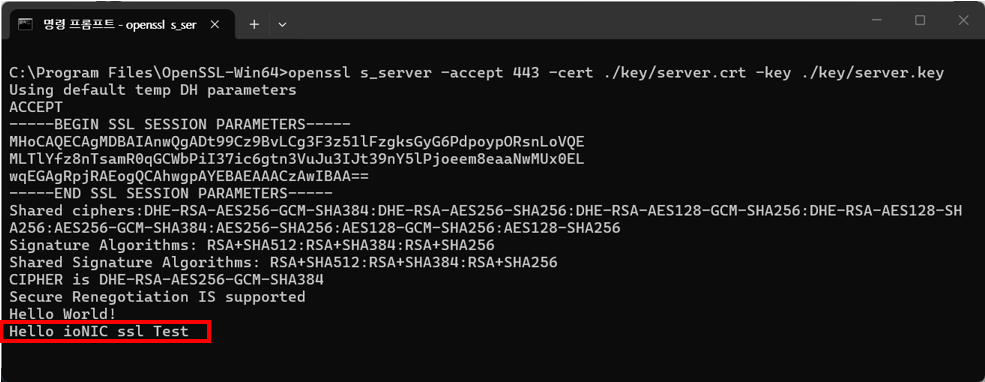
Create SSL server using openSSL by executing the following command. If the SSL server is created normally, the SSL server's IP is the current IP of your desktop or laptop, and the port is 443 by default.
## Windows cmd.exe

> cd ./{key_dir}
> openssl req -new -x509 -newkey rsa:2048 -nodes -keyout server.key -out server.crt -days 365
> openssl s_server -accept 443 -cert ./{key_dir}/server.crt -key ./{key_dir}/server.key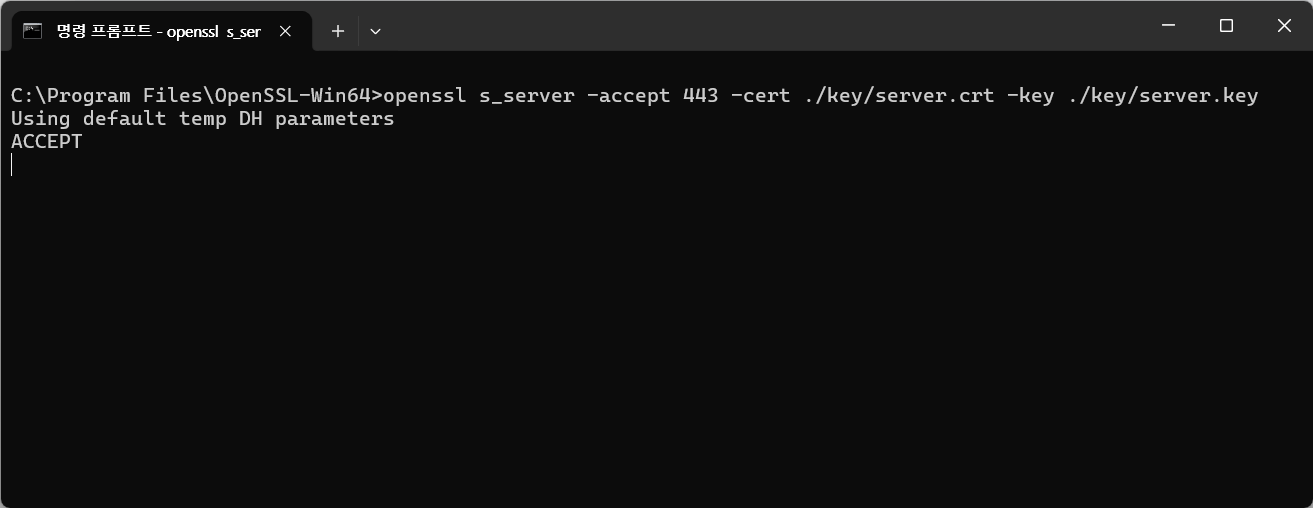
Step 4: Build and Download
Raspberry Pi Pico
To build the project in Visual Studio Code, select one of the three methods below:
1. Click Build in the bottom status bar
2. Press F7 on your keyboard
3. Run the following command in the Visual Studio Code terminal
$ mkdir build
$ cd ./build
$ cmake -G "NMake Makefiles" ..
$ nmake
When the build is completed, the '{example_name}_uart.uf2' file is generated for UART mode, and the '{example_name}_spi.uf2' file is generated for SPI mode in the {Repository}/build/ssl/ directory. Download the UF2 file to the Raspberry Pi Pico.
W55RP20 EVB Pico
Following Step 3 in the Getting Started Guide, program the W55RP20 EVB Pico with the UF2 file and write the MAC address to complete the setup.
Step 5: Run
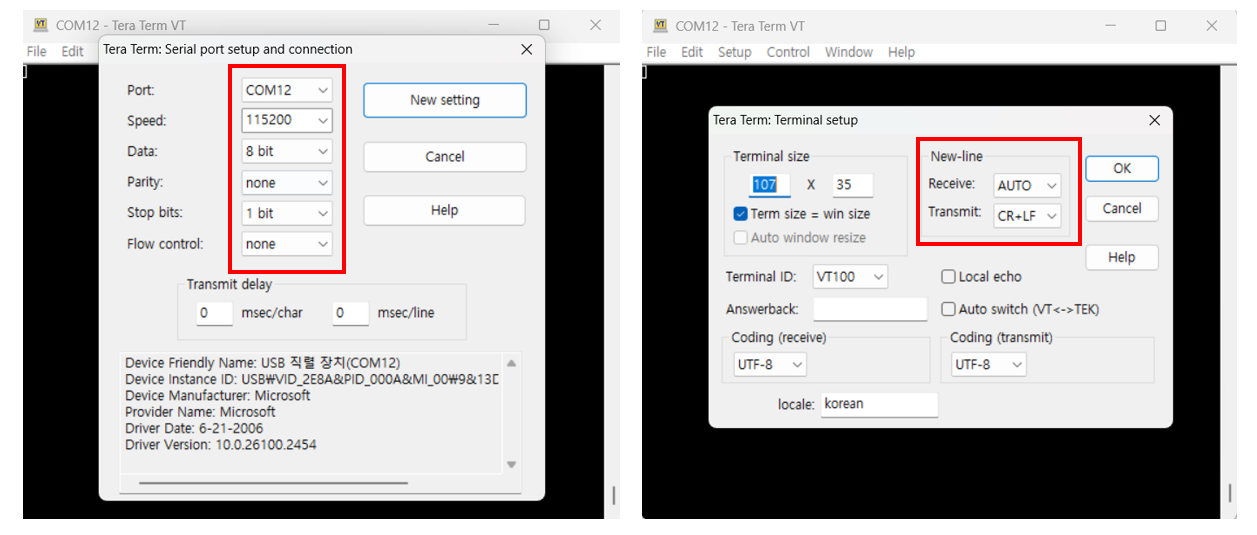
Connect to the serial COM port of the Raspberry Pi Pico using Tera Term.
Step 5.1: UART mode
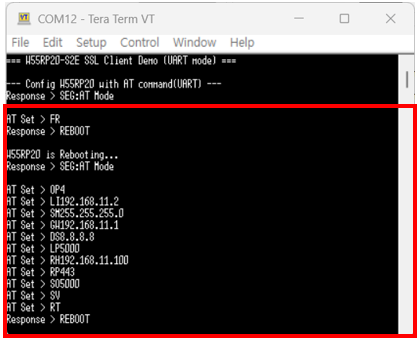
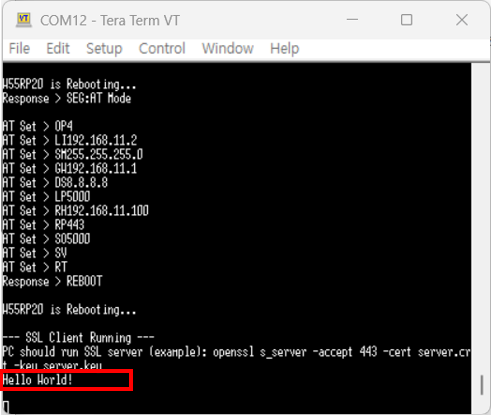
1. Configuring the W55RP20 S2E as a SSL Client and Setting Up the Network with AT command.
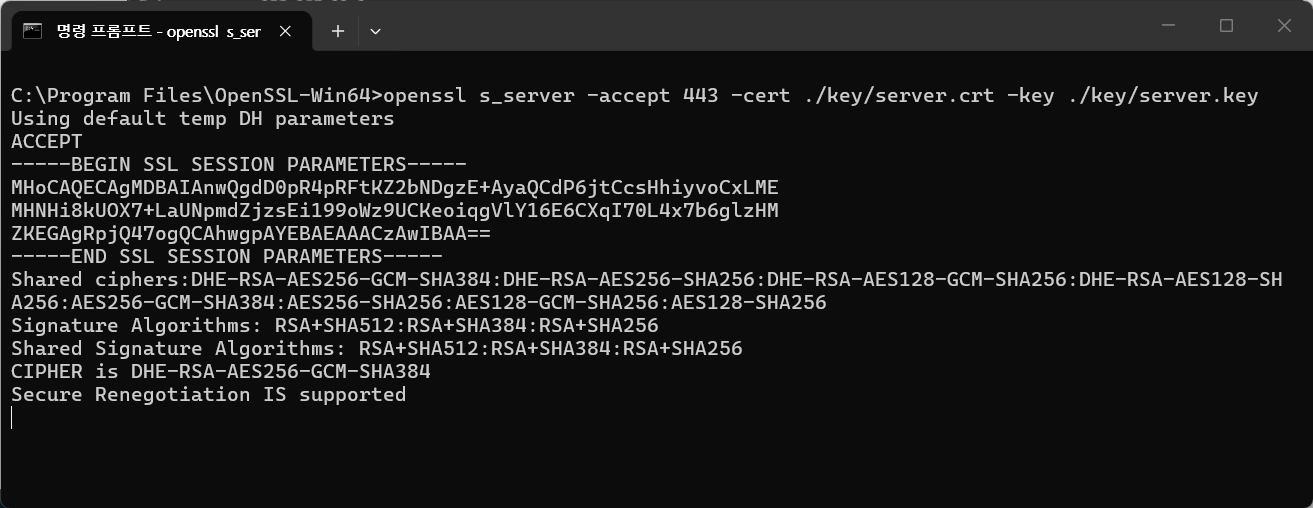
2. After the W55RP20-S2E is configured as an SSL client and the handshake with the SSL server is successfully completed, the Windows terminal displays a connection success message as shown below.
3. After executing the OpenSSL server on the PC, enter the data to be transmitted in the terminal window where the server is running (e.g., “Hello World!”). The OpenSSL server then sends the entered data to the W55RP20-S2E module over the SSL connection.
4. The W55RP20-S2E processes the received SSL-encrypted data and forwards it to the Raspberry Pi Pico via the UART interface.
The Raspberry Pi Pico prints the received data to a terminal, generates a response message, and sends it back to the W55RP20-S2E through UART.
5. The W55RP20-S2E then encrypts the received response data using SSL and transmits it to the OpenSSL server running on the PC.
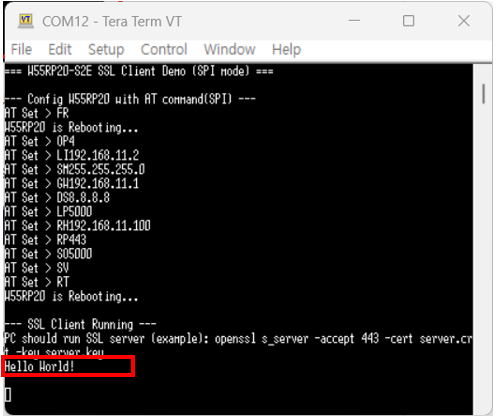
Step 5.2: SPI mode
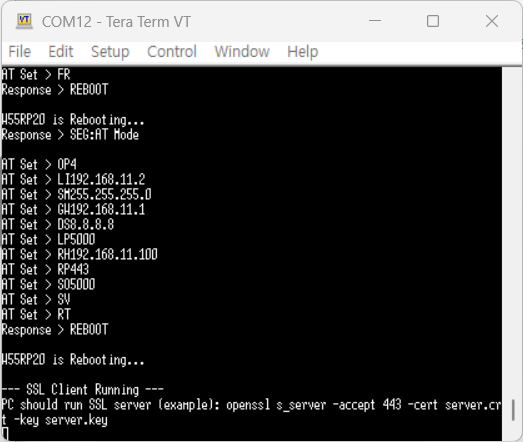
1. Configuring the W55RP20 S2E as a SSL Client and Setting Up the Network with AT command.
2. After the W55RP20-S2E is configured as an SSL client and the handshake with the SSL server is successfully completed, the Windows terminal displays a connection success message as shown below.
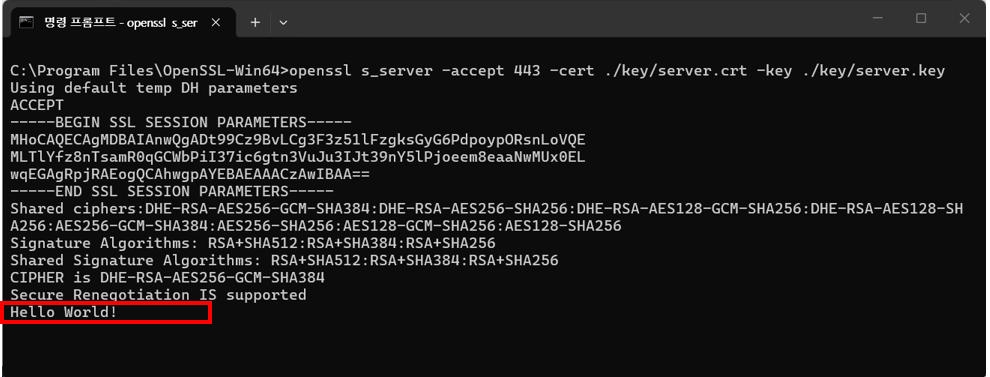
3. After executing the OpenSSL server on the PC, enter the data to be transmitted in the terminal window where the server is running (e.g., “Hello World!”). The OpenSSL server then sends the entered data to the W55RP20-S2E module over the SSL connection.
4. The W55RP20-S2E processes the received SSL-encrypted data and forwards it to the Raspberry Pi Pico via the SPI interface.
The Raspberry Pi Pico prints the received data to a terminal, generates a response message, and sends it back to the W55RP20-S2E through SPI.
5. The W55RP20-S2E then encrypts the received response data using SSL and transmits it to the OpenSSL server running on the PC.
-
ioNIC SSL Client C example
