
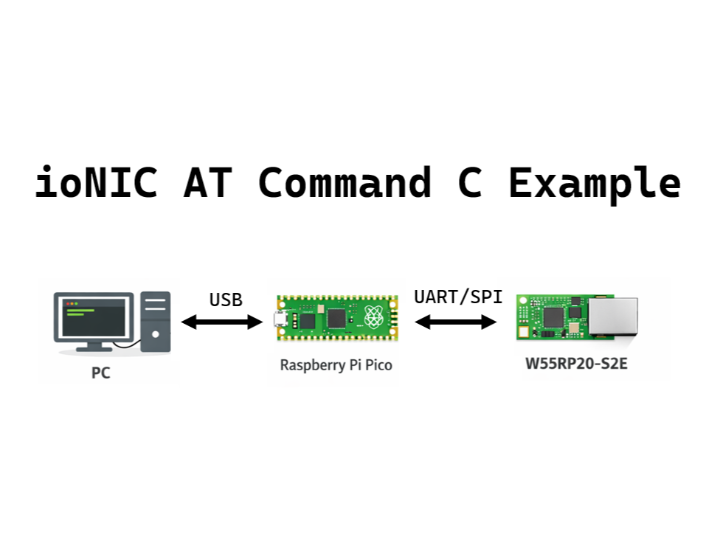
ioNIC AT command C Example
Example for configuring W55RP20-S2E by sending commands entered through USB serial from Pico via (UART/SPI)
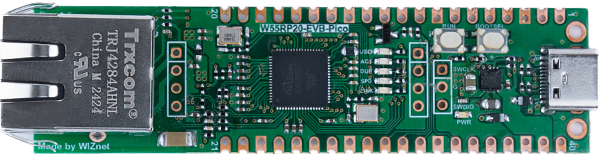
WIZnet - W55RP20-EVB-Pico
x 1
How to AT Command Example
This program is an example that sends AT commands to the W55RP20 S2E board via UART or SPI interface, based on serial data received through USB on the Raspberry Pi Pico.
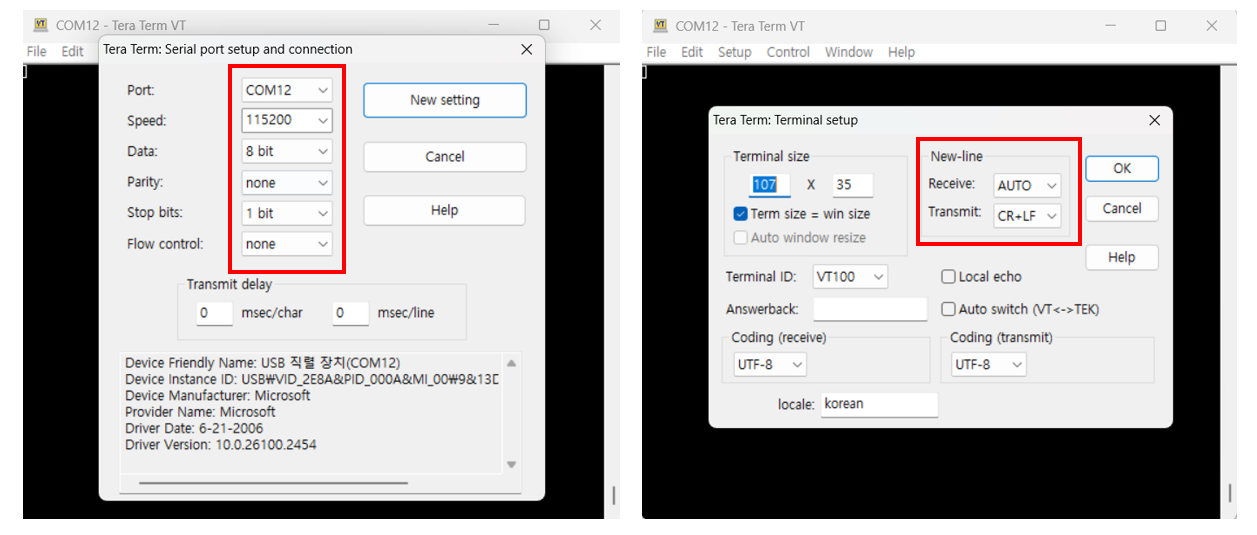
Step 1: Prepare software
The following serial terminal programs are required for AT command example test, download and install from below links.
Step 2: Prepare hardware
1. Connect GPIO13 according to the selected UART/SPI mode of the W55RP20 EVB Pico, as illustrated below.
| GPIO13 Pin | Desc |
| LOW(GND) | UART mode (default) |
| HIGH(3.3V) | SPI mode |
2. Connect the Raspberry Pi Pico and the W55RP20 EVB Pico using jumper wires as shown below, depending on the selected UART/SPI mode.
If UART mode :
| Raspberry Pi Pico | W55RP20 EVB Pico |
| GPIO4 (UART_TX) | GPIO5 (UART_RX) |
| GPIO5 (UART_RX) | GPIO4 (UART_TX) |
| GND | GND |
If SPI mode :
| Raspberry Pi Pico | W55RP20 EVB Pico |
| GPIO2 (SPI_CLK) | GPIO2 (SPI_CLK) |
| GPIO3 (SPI_TX) | GPIO4 (SPI_RX) |
| GPIO4 (SPI_RX) | GPIO3 (SPI_TX) |
| GPIO5 (SPI_CS) | GPIO5 (SPI_CS) |
| GPIO26 (SPI_INT) | GPIO26 (SPI_INT) |
| GND | GND |
3. Connect the Raspberry Pi Pico to your PC (desktop or laptop) using a 5-pin Micro USB cable.
4. Connect the W55RP20 EVB Pico to your PC (desktop or laptop) using a USB Type-C cable.
Step 3: Setup AT Command Example
Raspberry Pi Pico
Please refer to the link below for setting up the Raspberry Pi Pico development environment.
Getting started with Raspberry Pi Pico
We recommend the following versions for successful build and development:
- pico-sdk:
2.2.0 - ARM GCC Toolchain:
14.2.Rel1
W55RP20 EVB Pico
Please refer to the link below for instructions on how to use the W55RP20 S2E.
Getting started with W55RP20 EVB Pico
Step 4: Build and Download
Raspberry Pi Pico
To build the project in Visual Studio Code, select one of the three methods below:
1. Click Build in the bottom status bar
2. Press F7 on your keyboard
3. Run the following command in the Visual Studio Code terminal
$ mkdir build
$ cd ./build
$ cmake -G "NMake Makefiles" ..
$ nmake
When the build is completed, the 'at_command_uart.uf2' file is generated for UART mode, and the 'at_command_spi.uf2' file is generated for SPI mode in the {Repository}/build/at_command/ directory. Download the UF2 file to the Raspberry Pi Pico.
W55RP20 EVB Pico
Following Step 3 in the Getting Started Guide, program the W55RP20 EVB Pico with the UF2 file and write the MAC address to complete the setup.
Step 5: Run
For detailed information about the AT commands supported by the W55RP20 S2E, please refer to the document below.
Connect to the serial COM port of the Raspberry Pi Pico using Tera Term.
Step 5.1: UART mode
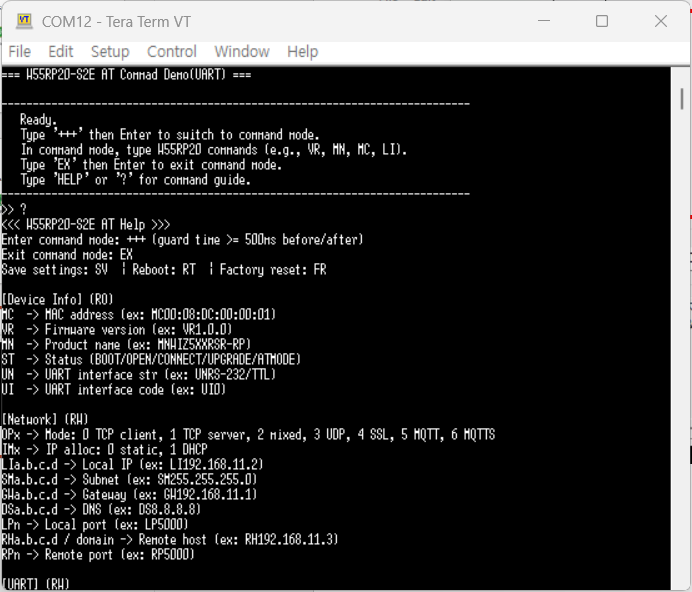
When the AT command UART mode example is successfully running on the Raspberry Pi Pico, the following message will appear on the terminal screen.
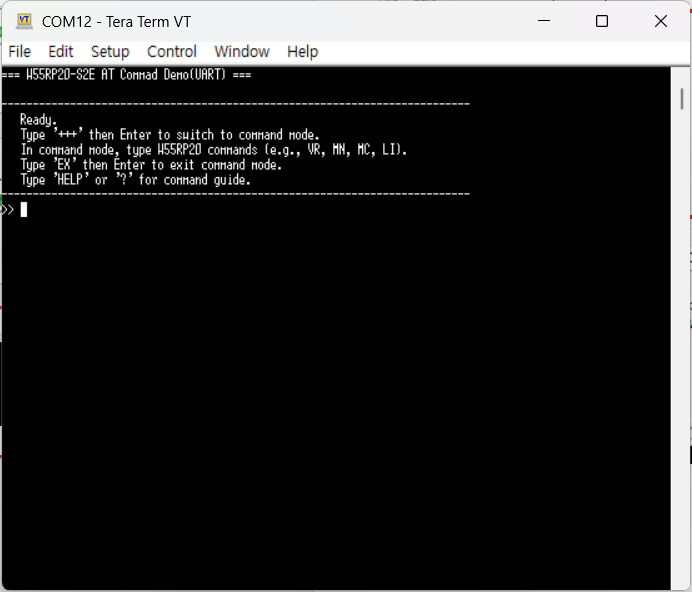
If you enter 'HELP' or '?', the usage instructions for the AT commands will be displayed.
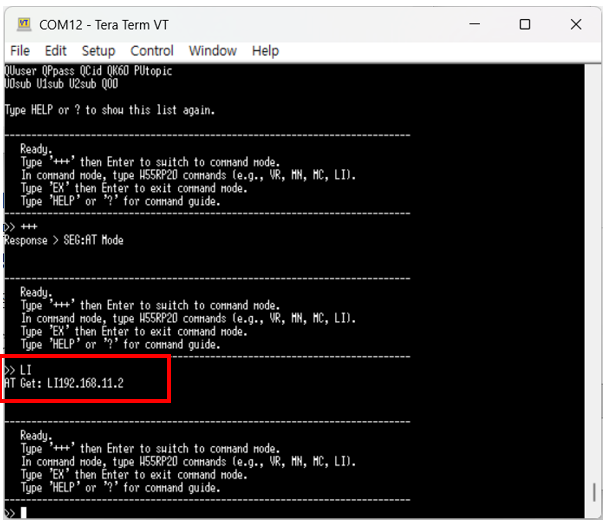
Enter '+++' to send the command to the W55RP20 S2E to enter AT mode.

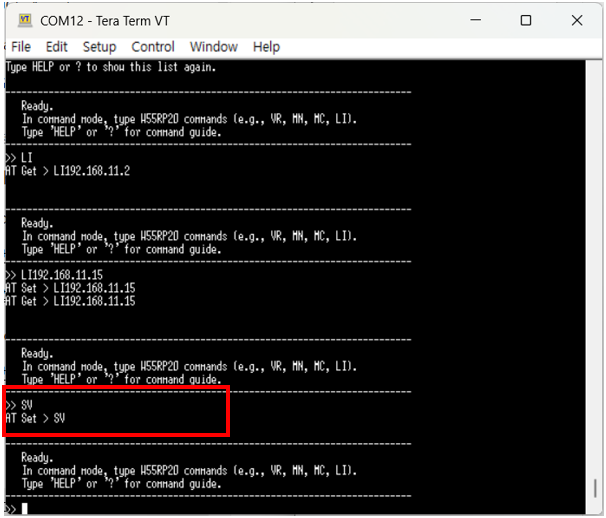
For example, enter the 'LI' command, which represents the Local IP value, to send it to the W55RP20 S2E and receive the Local IP address in response.
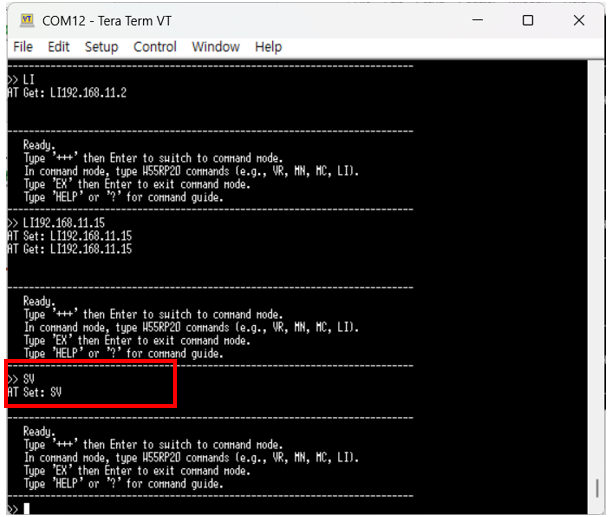
Enter the 'LI192.168.11.15' command to set the Local IP address on the W55RP20 S2E, and then verify that it has been configured correctly using an AT Get command.

For example, to save the configured command values, enter the 'SV' command and send it to the W55RP20 S2E.
To switch the W55RP20 S2E from AT Mode to GW Mode, enter the 'EX' command and send it to the W55RP20 S2E.
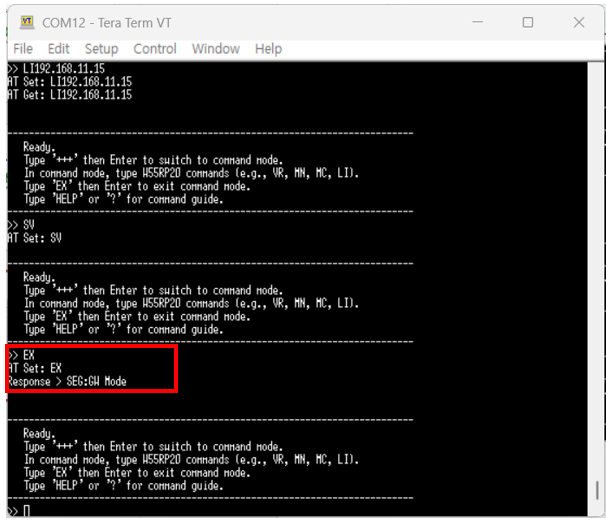
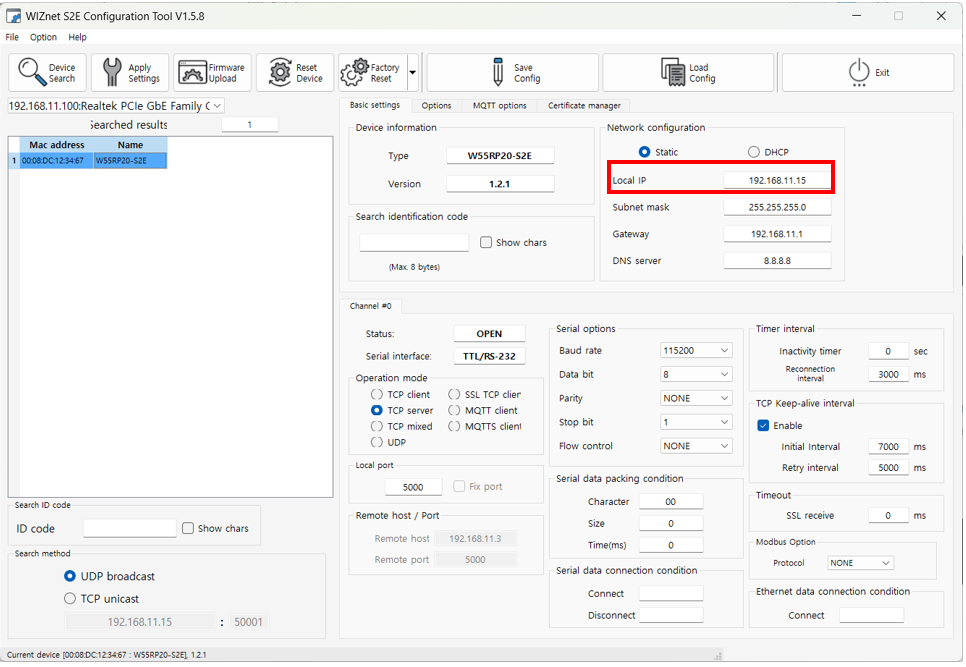
When you perform a search using the WIZnet Config Tool, you can confirm that the Local IP address of the W55RP20 S2E has been changed.
Step 5.2: SPI mode
When the AT command SPI mode example is successfully running on the Raspberry Pi Pico, the following message will appear on the terminal screen.
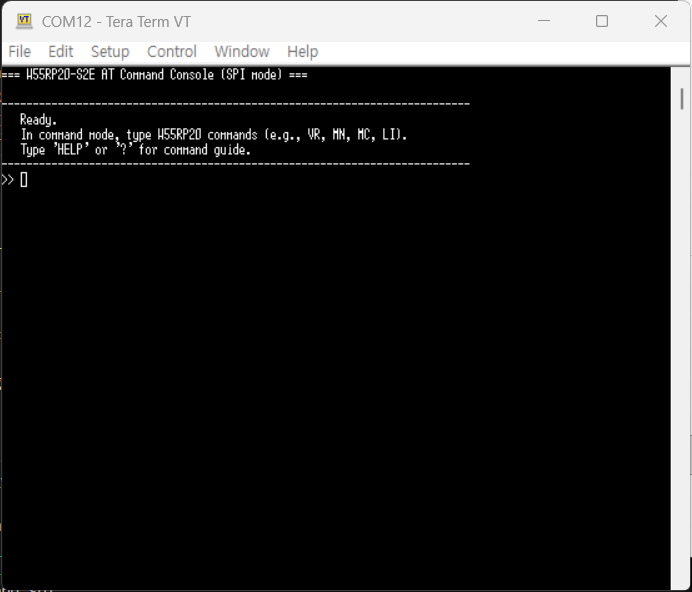
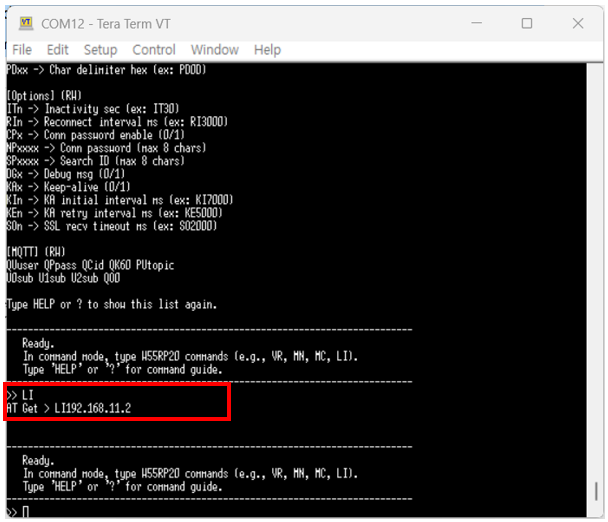
If you enter 'HELP' or '?', the usage instructions for the AT commands will be displayed.

(For SPI mode, the device can enter AT command mode immediately without requiring an additional command.)
For example, enter the 'LI' command, which represents the Local IP value, to send it to the W55RP20 S2E and receive the Local IP address in response.
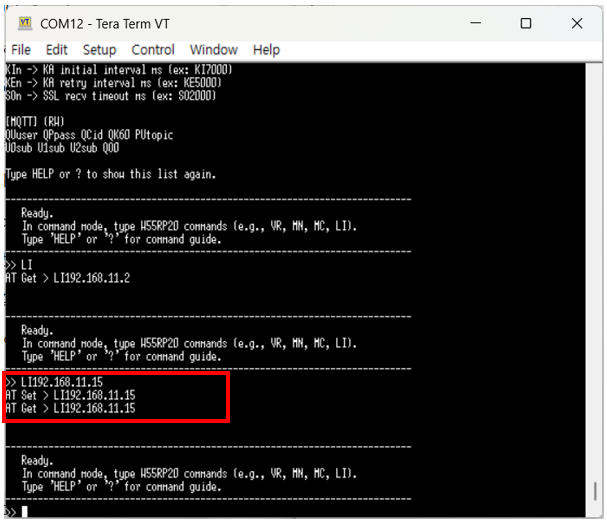
Enter the 'LI192.168.11.15' command to set the Local IP address on the W55RP20 S2E, and then verify that it has been configured correctly using an AT Get command.
For example, to save the configured command values, enter the 'SV' command and send it to the W55RP20 S2E.
When you perform a search using the WIZnet Config Tool, you can confirm that the Local IP address of the W55RP20 S2E has been changed.
-
ioNIC_AT_command_example
