Controlling an LED via Cloud with W5300 TOE Shield and Arduino IDE.
COMPONENTSHardware components
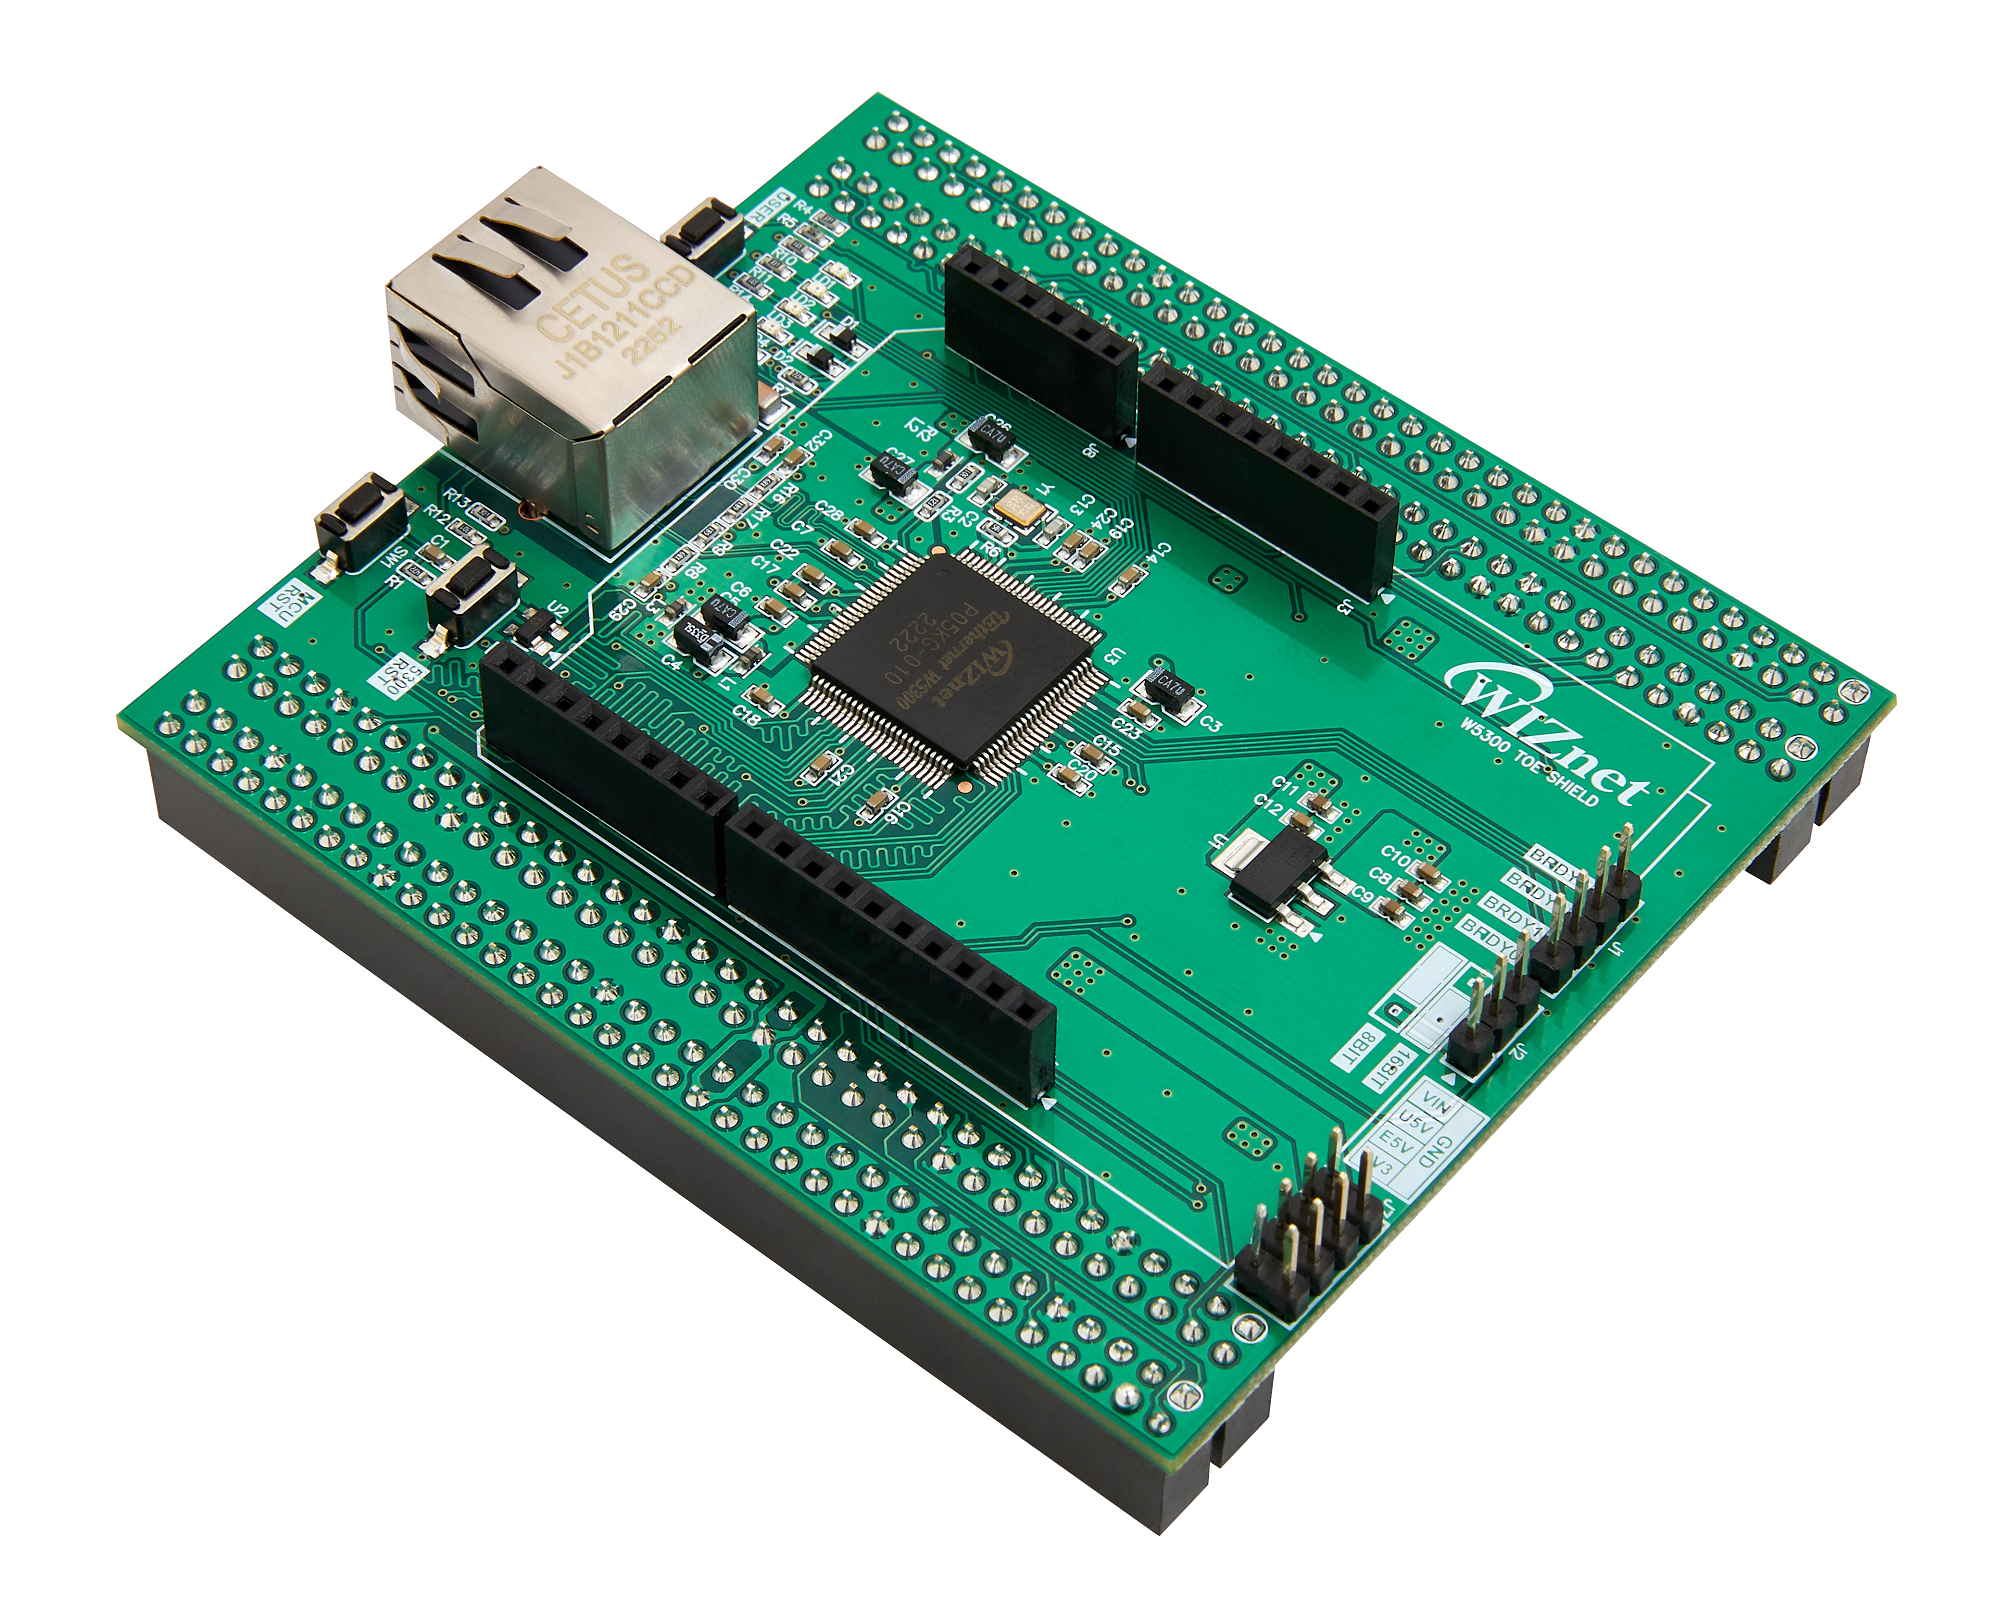
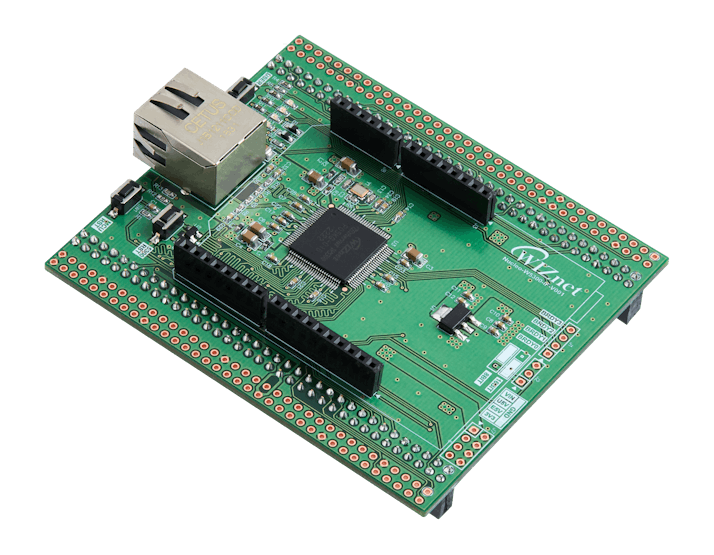
WIZnet - W5300-TOE-Shield
x 1
MULTICOMP PRO - Generic LED
x 1
Software Apps and online services
Arduino - Arduino IDE
x 1
PROJECT DESCRIPTION
0. Introduction
This article is a guide on how to use the W5300 TOE Shield with the Arduino IDE, specifically with the STM32 Nucleo-F429ZI board. In this article, we will provide a step-by-step tutorial on how to configure the Arduino IDE, connect the hardware and test the Ethernet functionality. Furthermore, we will show you how to connect the W5300 TOE Shield to the Beebotte cloud platform, which allows you to send and receive data from anywhere in the world.
The W5300 T0E shield is a hardware module used with Arduino-compatible boards to provide network connectivity. This specialized chip is designed to handle the low-level details of TCP/IP communication, enabling fast and efficient communication over Ethernet. On the other hand, Beebotte is a cloud-based platform that offers real-time data management and communication services for connected devices and applications. It enables developers to build and manage IoT applications that collect, process and act on data from sensors, actuators and other connected devices.
1. Component
To use the W5300 TOE Shield on Arduino IDE, you must use the STM Nucleo F429ZI board. Other boards are not yet compatible.
Hardware
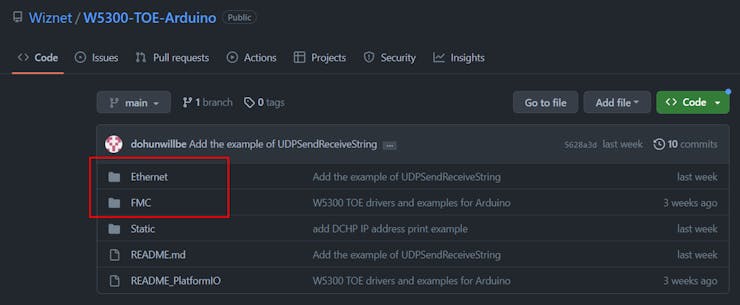
W5300 TOE Shield
STM32 Nucleo-F429ZI Board
LED
Software
Arduino IDE
Beebotte Cloud
2. How to use W5300 TOE shield in Arduino IDE
2.1. Configure Arduino IDE
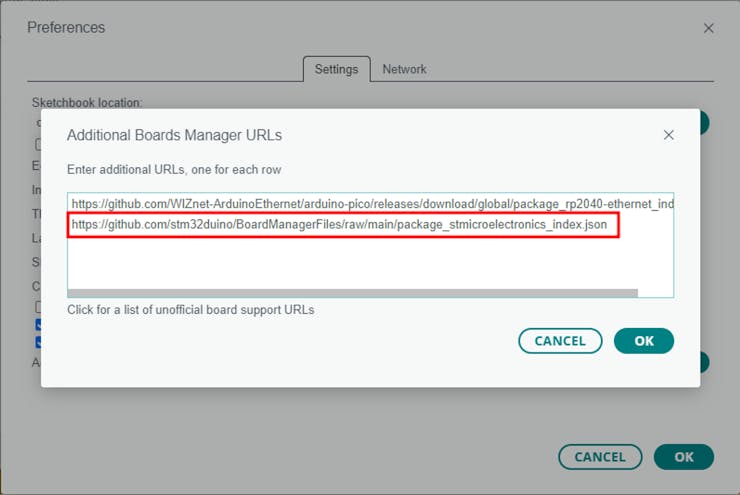
1) Add additonal boards manager URLs
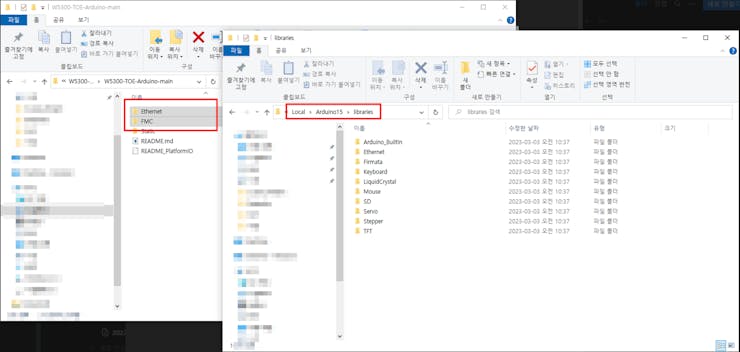
To access the "Additional Boards Manager URLs" in the Arduino IDE, navigate to File > Preferences. Here, you can find the option to add a new URL by copying and pasting the link provided below.
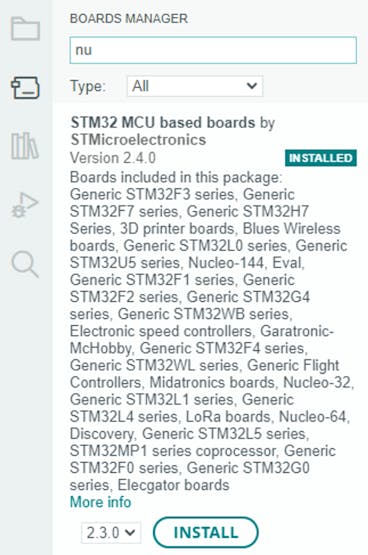
Install "STM32 MCU based boards" in the Board Manager of the Arduino IDE.
2.2. Test
This step is not essential but can be used to check if Ethernet is functioning properly. You may skip this step.
1) Connect hardware
Combine the W5300 TOE Shield with the Nucleo board. Connect the Nucleo board to the PC using a 5-pin cable, and connect the W5300 TOE Shield to an Ethernet cable.
2) Upload
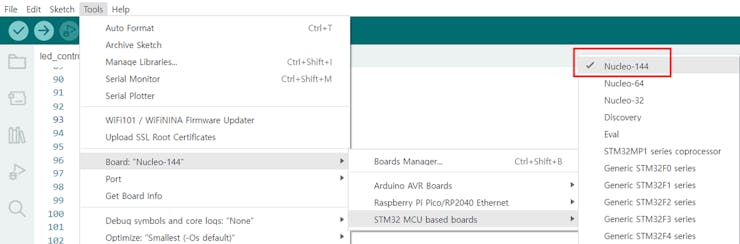
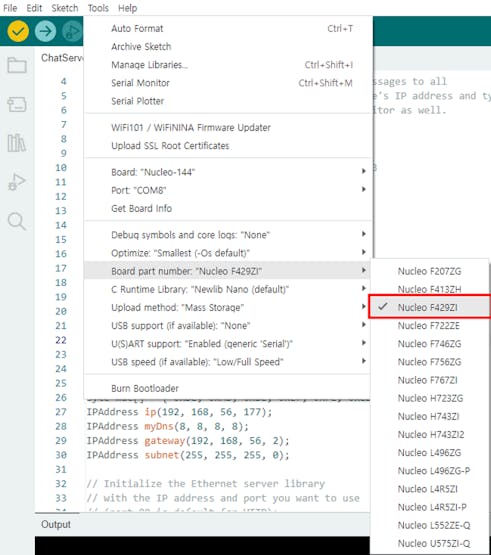
Navigate to Tools > Board and select "Nucleo-144" from the list of board options.
Next, go to Board part number and select "Nucleo-F429ZI" from the list.
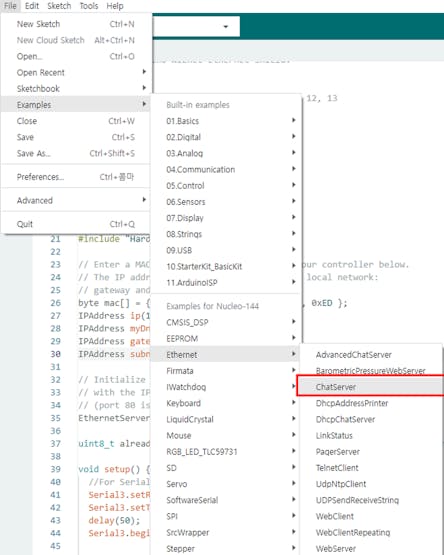
Once you have completed the above steps, you can find examples for the Nucleo-144 in the Examples section of the Arduino IDE. To confirm that Ethernet is functioning properly, we will load the simplest ChatServer example and test it.
In the example, you only need to change the network settings to match your own network environment. Set the values accordingly.
Now, navigate to Tools > Port and select the port connected to the board. Finally, upload the file.
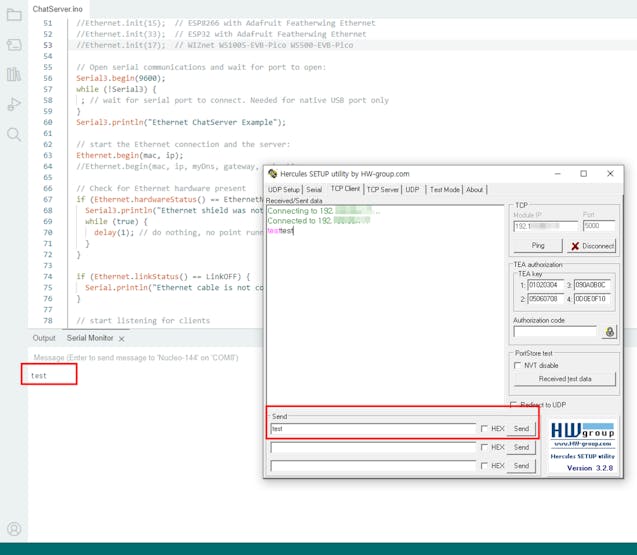
3) Test in Terminal program
You can test the connection using the Hercules terminal program. Open Hercules and navigate to the TCP Client tab, then enter the IP and port number you have set. If the connection is successful, you should be able to see an echo message in Hercules when you send a message, and you can also see the message you sent in the serial monitor.
3. Connect to Cloud
3.1. Create dashboard
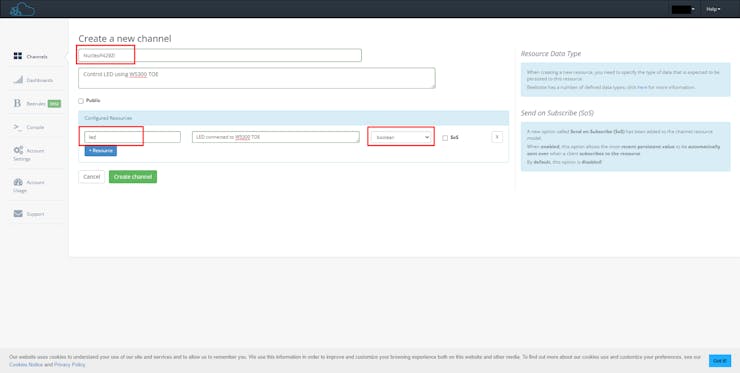
After connecting to Beebotte, click on the Create New button to go to the channel creation page. Set the board name, the name and type of the resource you want to use, and create the channel.
Once the channel is created, you can check the token of the channel. Copy and save it for future use.
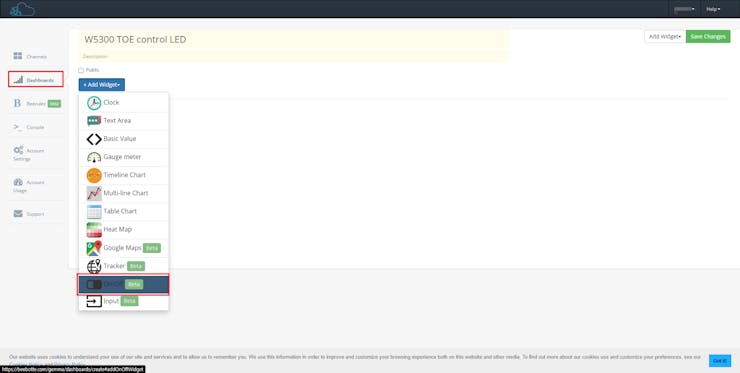
After creating the dashboard, add an ON/OFF widget. Select the resource of the widget as the LED of the NucleoF429ZI board.
3.2. Connect LED
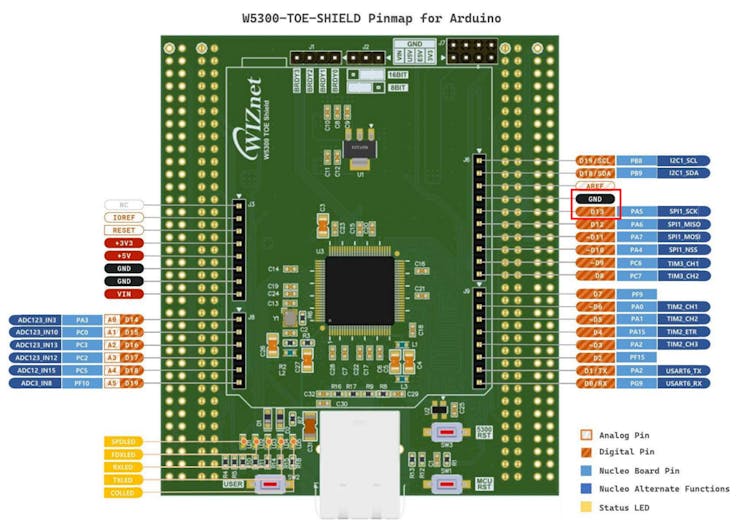
Connect the LED to the W5300 TOE Shield by connecting the positive (+) side of the LED to the D13 pin and the negative (-) side to the ground pin. Refer to the W5300-TOE-Shield's Arduino pinmap for more information.
3.3. Upload file
I referred to the code in the tutorial provided on the Beebotte website.
Change the LED pin number to 13 and replace the token with the token value copied from above. Also, replace the channel name with the channel name you created.
#define LEDPIN 13  // Pin which is connected to LED.

#define TOKEN "token_jw9p00M4f7b7pqxP"  // Set your channel token here

#define CHANNEL "NucleoF429ZI"  // Set your channel name
#define LED_RESOURCE "led"
The previous code used the Domain name of Beebotte MQTT, but since the DNS was not functioning properly, it was set to connect via IP. Replace all the values, except g_target_ip, with values that correspond to your own network settings.
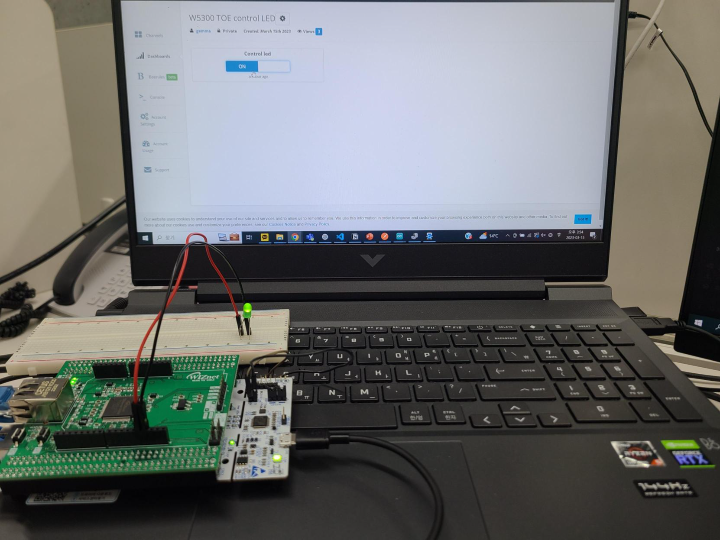
Once you upload the code to the board, you can control the LED status from the cloud. Below is a video of the operation. When you click the widget, you can see the LED turning on and off.