
Wifi Instant Camera for Thermal Printing
A wifi enabled camera that creates ready-to-print images instantly, optimized for thermal printers.

WIZnet - WizFi360-EVB-Pico
x 1
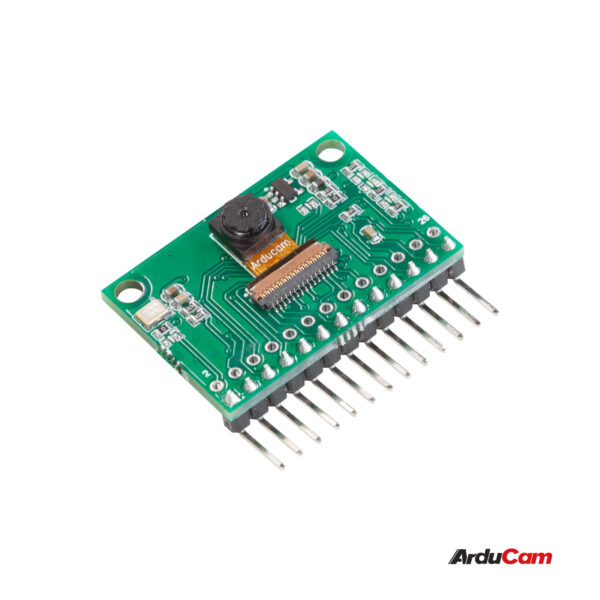
Arducam - HM0360 Camera Module
x 1

Arduino - Arduino IDE
x 1
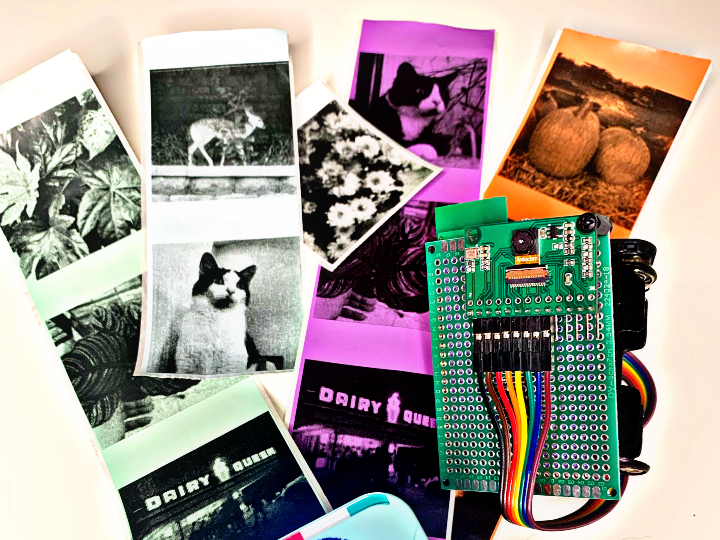
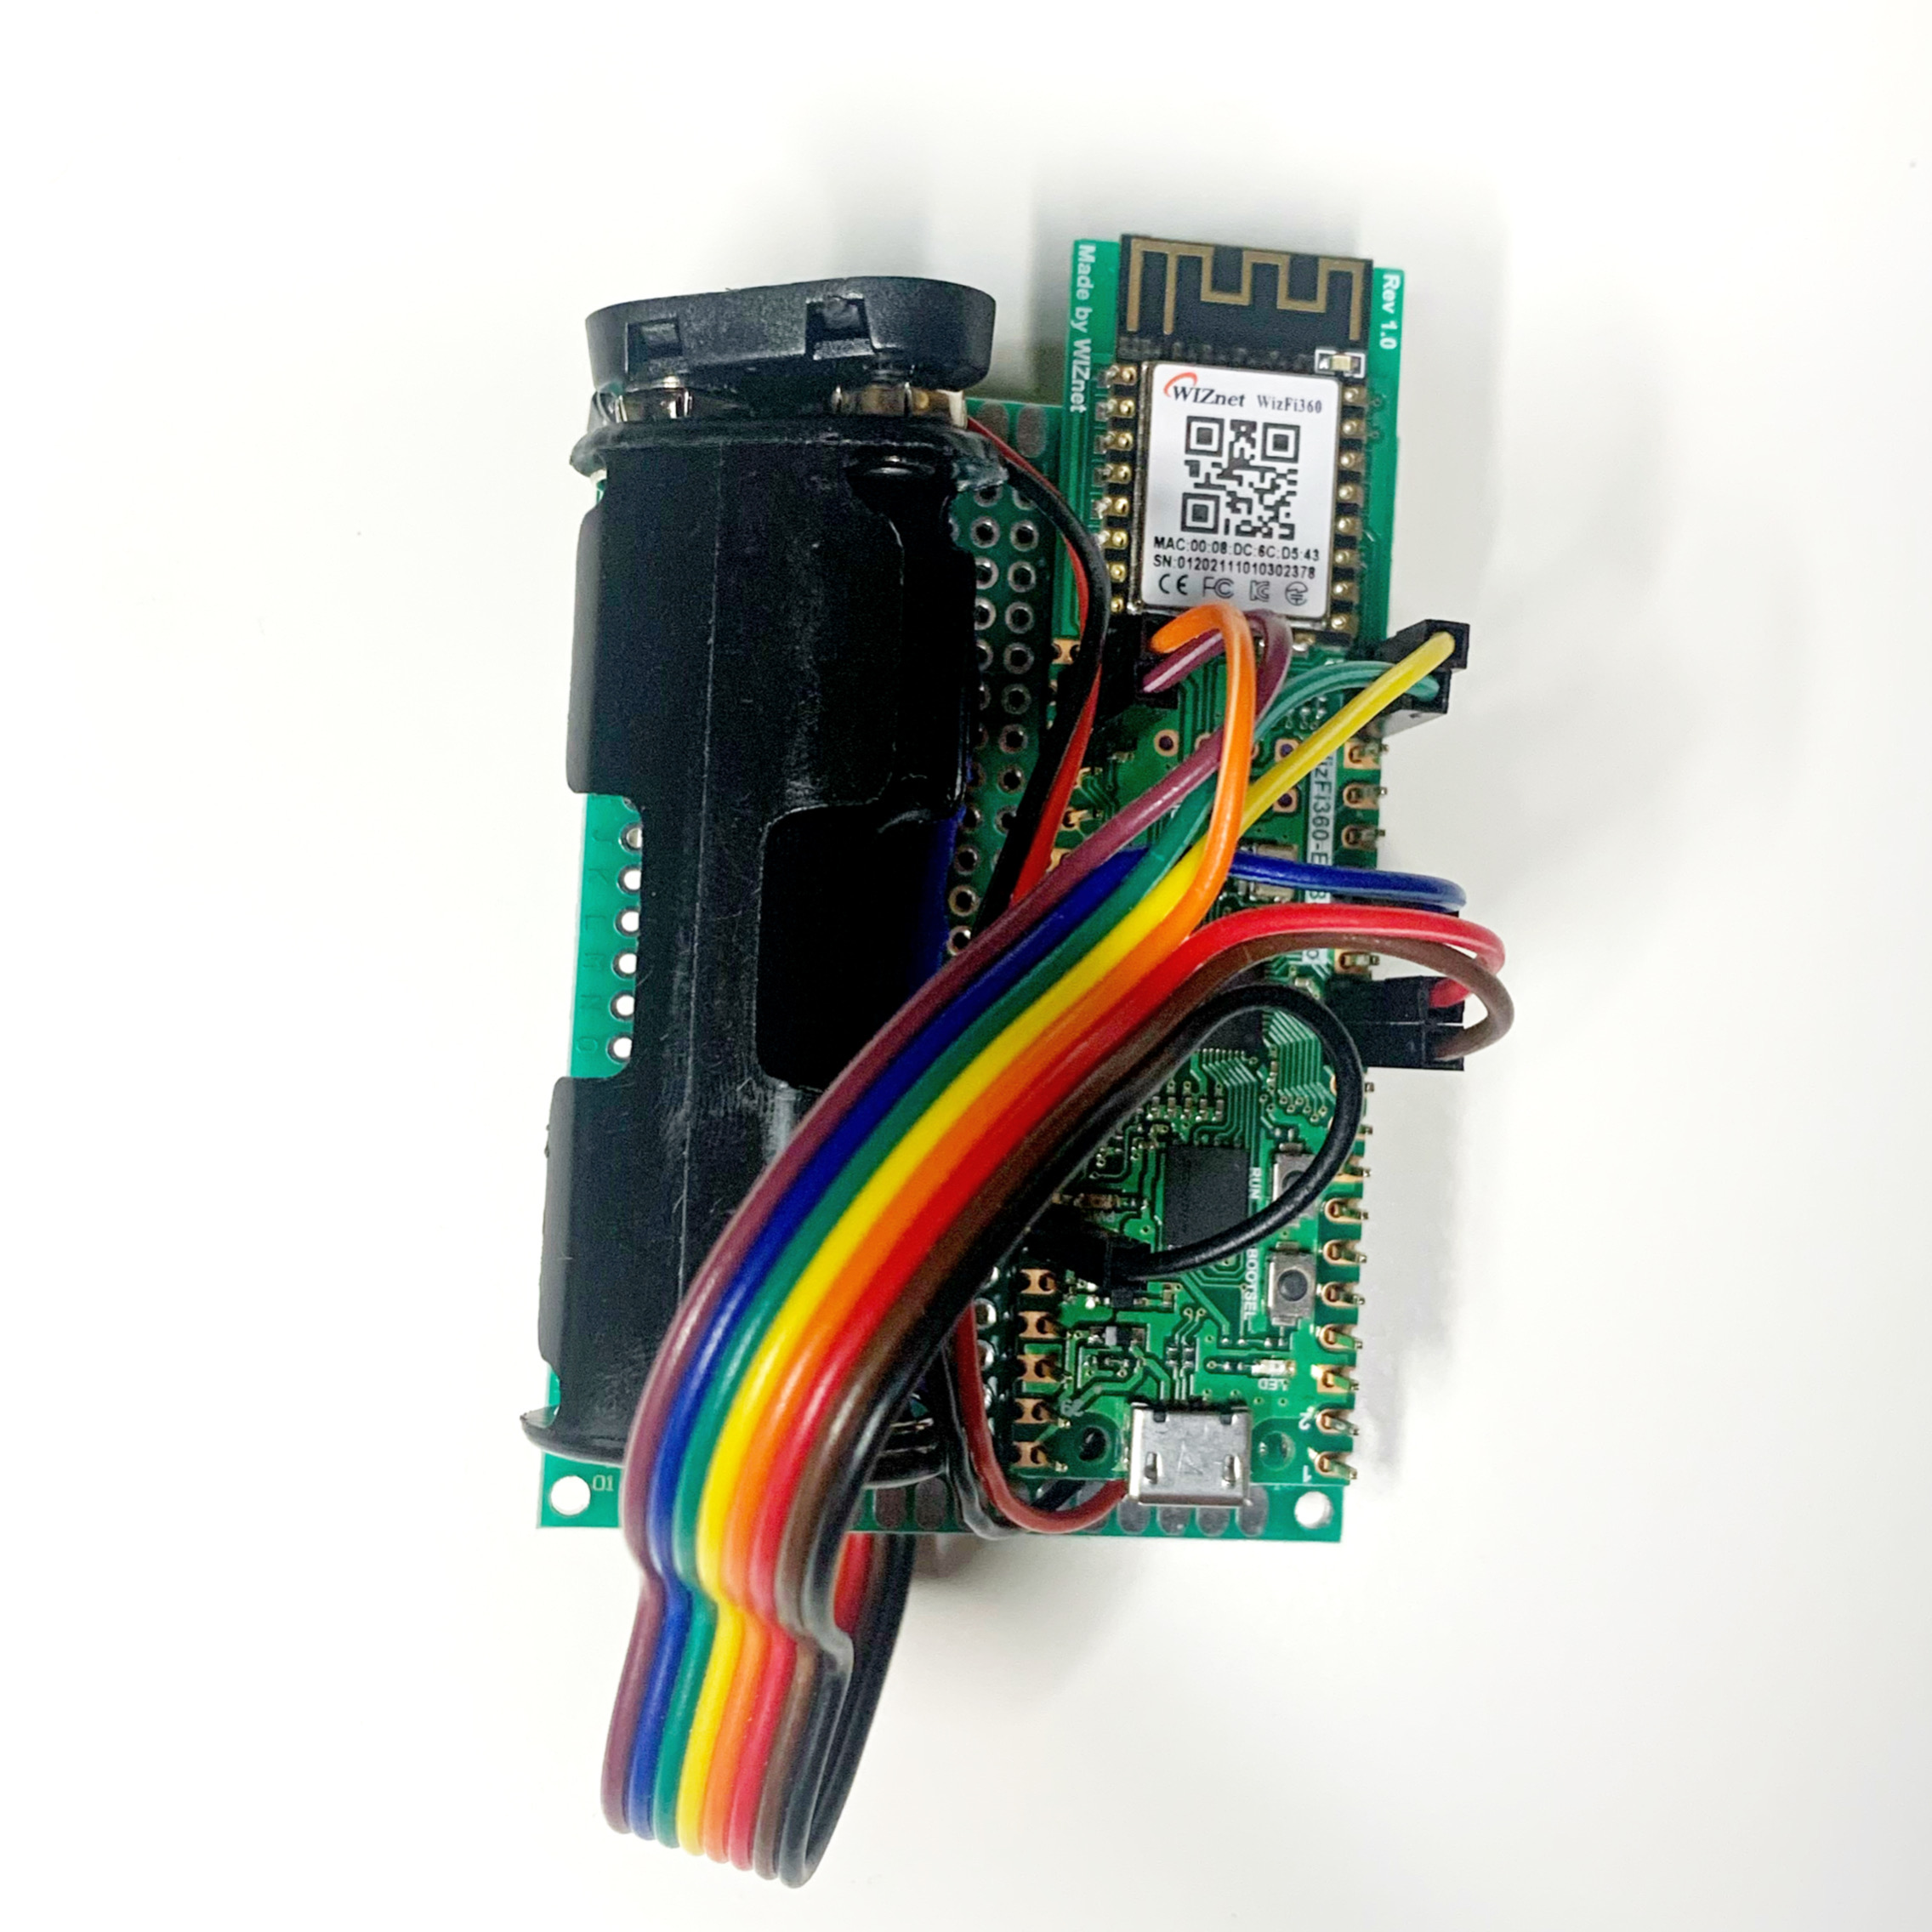
This project uses a WizFi-360-EVB-Pico and an Arducam module HM0360 to create an instant photo printer, in the tradition of cameras like Polaroid. The WizFi and Arducam modules are mounted together with a battery pack to make a little hand-held camera, and as long as they are on the same wifi network as a nearby phone or computer you can access the image in a web browser. This also works if the camera is connected to a cell phone hotspot - you can access the images on the hotspot providing phone or anything else connected to that hotspot.
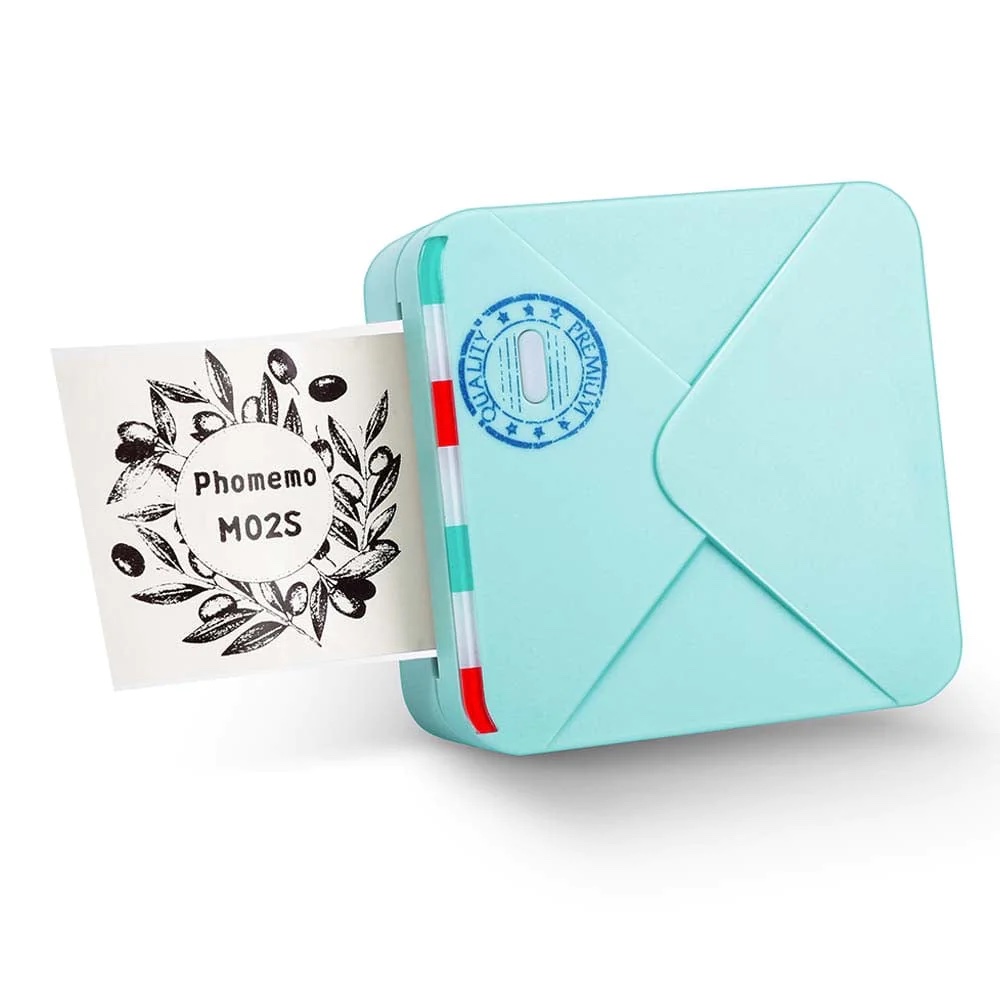
I had initially planned to make the camera automatically connect to a thermal printer connected to a raspberry pi, but when I started trying to buy a raspberry pi for the project I realized they were basically unavailable right now and that I had to consider alternatives. Fortunately there is a whole ecosystem of little portable thermal printers that have their own phone apps. After some consideration I realized this made the camera much more fun that it otherwise would be. These printers have all sorts of different sizes, styles, and colors of materials, and most of them print stickers as well. The camera creates a thermal printing ready image (grayscale with good contrast), and you can save any “good” photos, eliminating the waste of printing bad pictures and allowing you to print unlimited copies of any photo you like.
There’s also a bonus social aspect to this camera - anyone who is connected to the same wifi network/phone hotspot and has the web address can reload their browser and get an image of whatever the camera is pointed at. This means if you’re with friends or family, the camera is always “active” and can be picked up and used by anyone at any time.
All of that said, I need to offer a word of caution. This project is relatively difficult to get together, simply because of a lot of arduino libraries trampling on each other’s names (which is kind of difficult to diagnose and resolve), and that the Arducam module and Wizfi want to use some overlapping pins. Update all of your ardunio boards and libraries before you start, then not again until the project is finished. I’m providing replacement libraries that work for this project, but they can be overwritten if you update, and then all is lost until you replace them again.
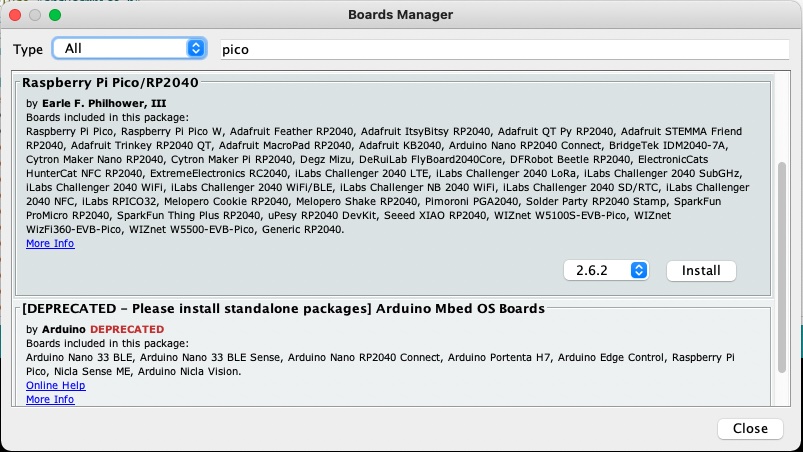
Start by downloading Arduino if you don’t have it installed already.
In Preferences, add this line to “Additional Boards Manager URLs”:
https://github.com/earlephilhower/arduino-pico/releases/download/global/package_rp2040_index.json
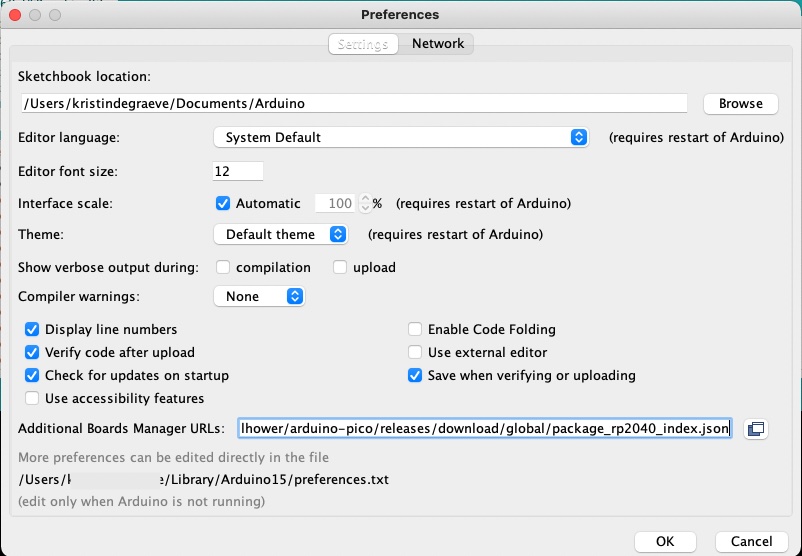
Note: Arducam provides their own version of this. They cannot coexist, they fight to the death and both die. If you want to switch from one to the other you need to go into prefs and delete this .json link, quit the program, find your user/Library/Arduino15/ folder, delete "rp2040", then relaunch the software and add the other url. I’ve already taken all the necessary parts from the Arducam version, so unless you’re building something similar but different I would just avoid this whole mess altogether.
You also need to add some libraries to Arduino. Find the Arduino Library folder on your computer - it will be in the folder where all of your sketches are saved. Download my folder of “Ardunio Libraries” from GitHub and put the contents in your library folder. If any of my libraries conflict with the names of libraries you already have, just put yours somewhere else for a while until you’re done with this, then move them back.
Open the sketch I included in my GitHub repository called “wizficamera.ino”. Go to Tools > Board > Raspberry Pi RP2040 > WIZnet WizFi360-EVB-Pico to select the correct board.
You will need to change the SSID and password to whatever yours is. I used my home wifi for setup and testing, but changed it to my phone’s hotspot before completing the project.
Hook up the Arducam module to the WizFi360 as shown. This is NOT the standard hookup included with the Arducam documents.I had to rearrange some pins to work around what’s build into the WizFi.
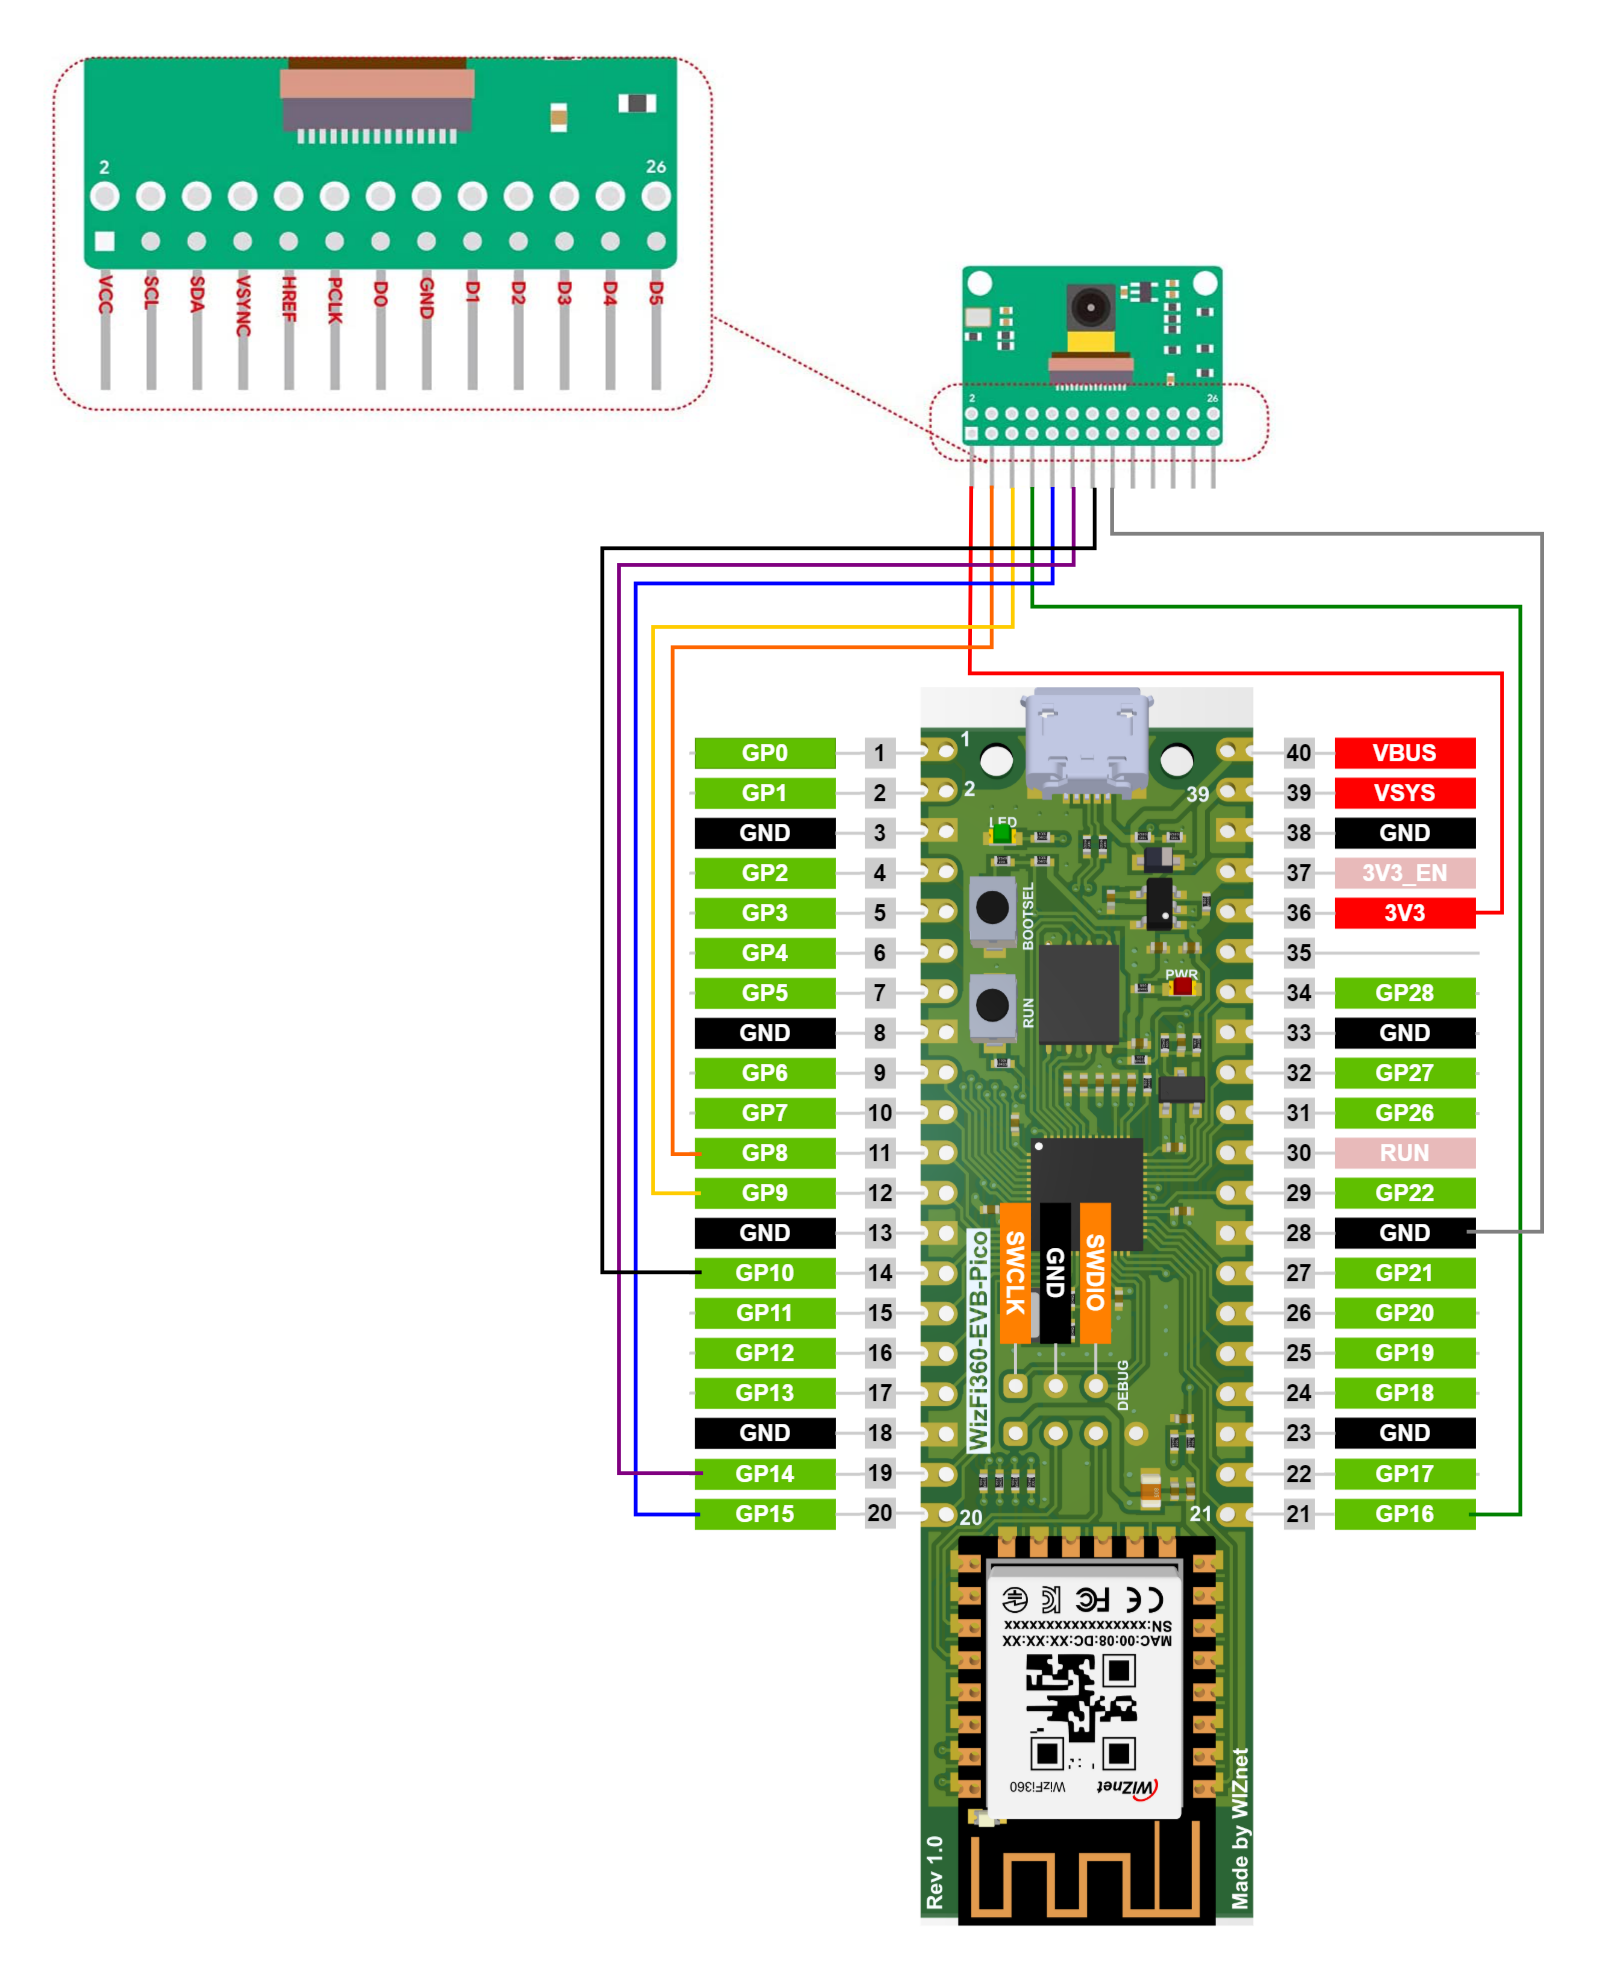
Pins:
VCC -> 3V3
SCL -> GP8
SDA -> GP9
VSYNC -> GP16
HREF -> GP15
PCLK -> GP14
DO -> GP10
GND -> GND
Before plugging in your board, look under Tools > Ports to see which already exist. Plug your pico board into your computer with a USB cable, and hold down the “bootsel” button while powering up to put it in programming mode. Under tools select the new port that wasn’t there before, (on my computer it automatically selects, so you might not have to do this.)
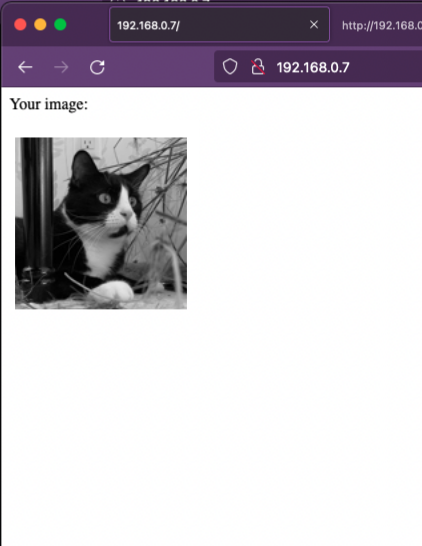
Compile and upload the program, then open the serial monitor. A number of things will print there, but the most important is the local IP. That’s the web address that you’ll go to to see your image. Now it's ready to test. Put that IP address in your browser url bar (with an http://, NOT HTTPS://) and it will show you whatever the camera sees at the moment you load the page. You can save that image if you like it, if not, just reload the page and try again!
When you have a picture you like, load it into the thermal printer app that came with your printer and print your image/sticker/whatever. I’ve already taken steps to give you good contrast for good printing, but depending on conditions you may want to adjust it a bit more for a better print.
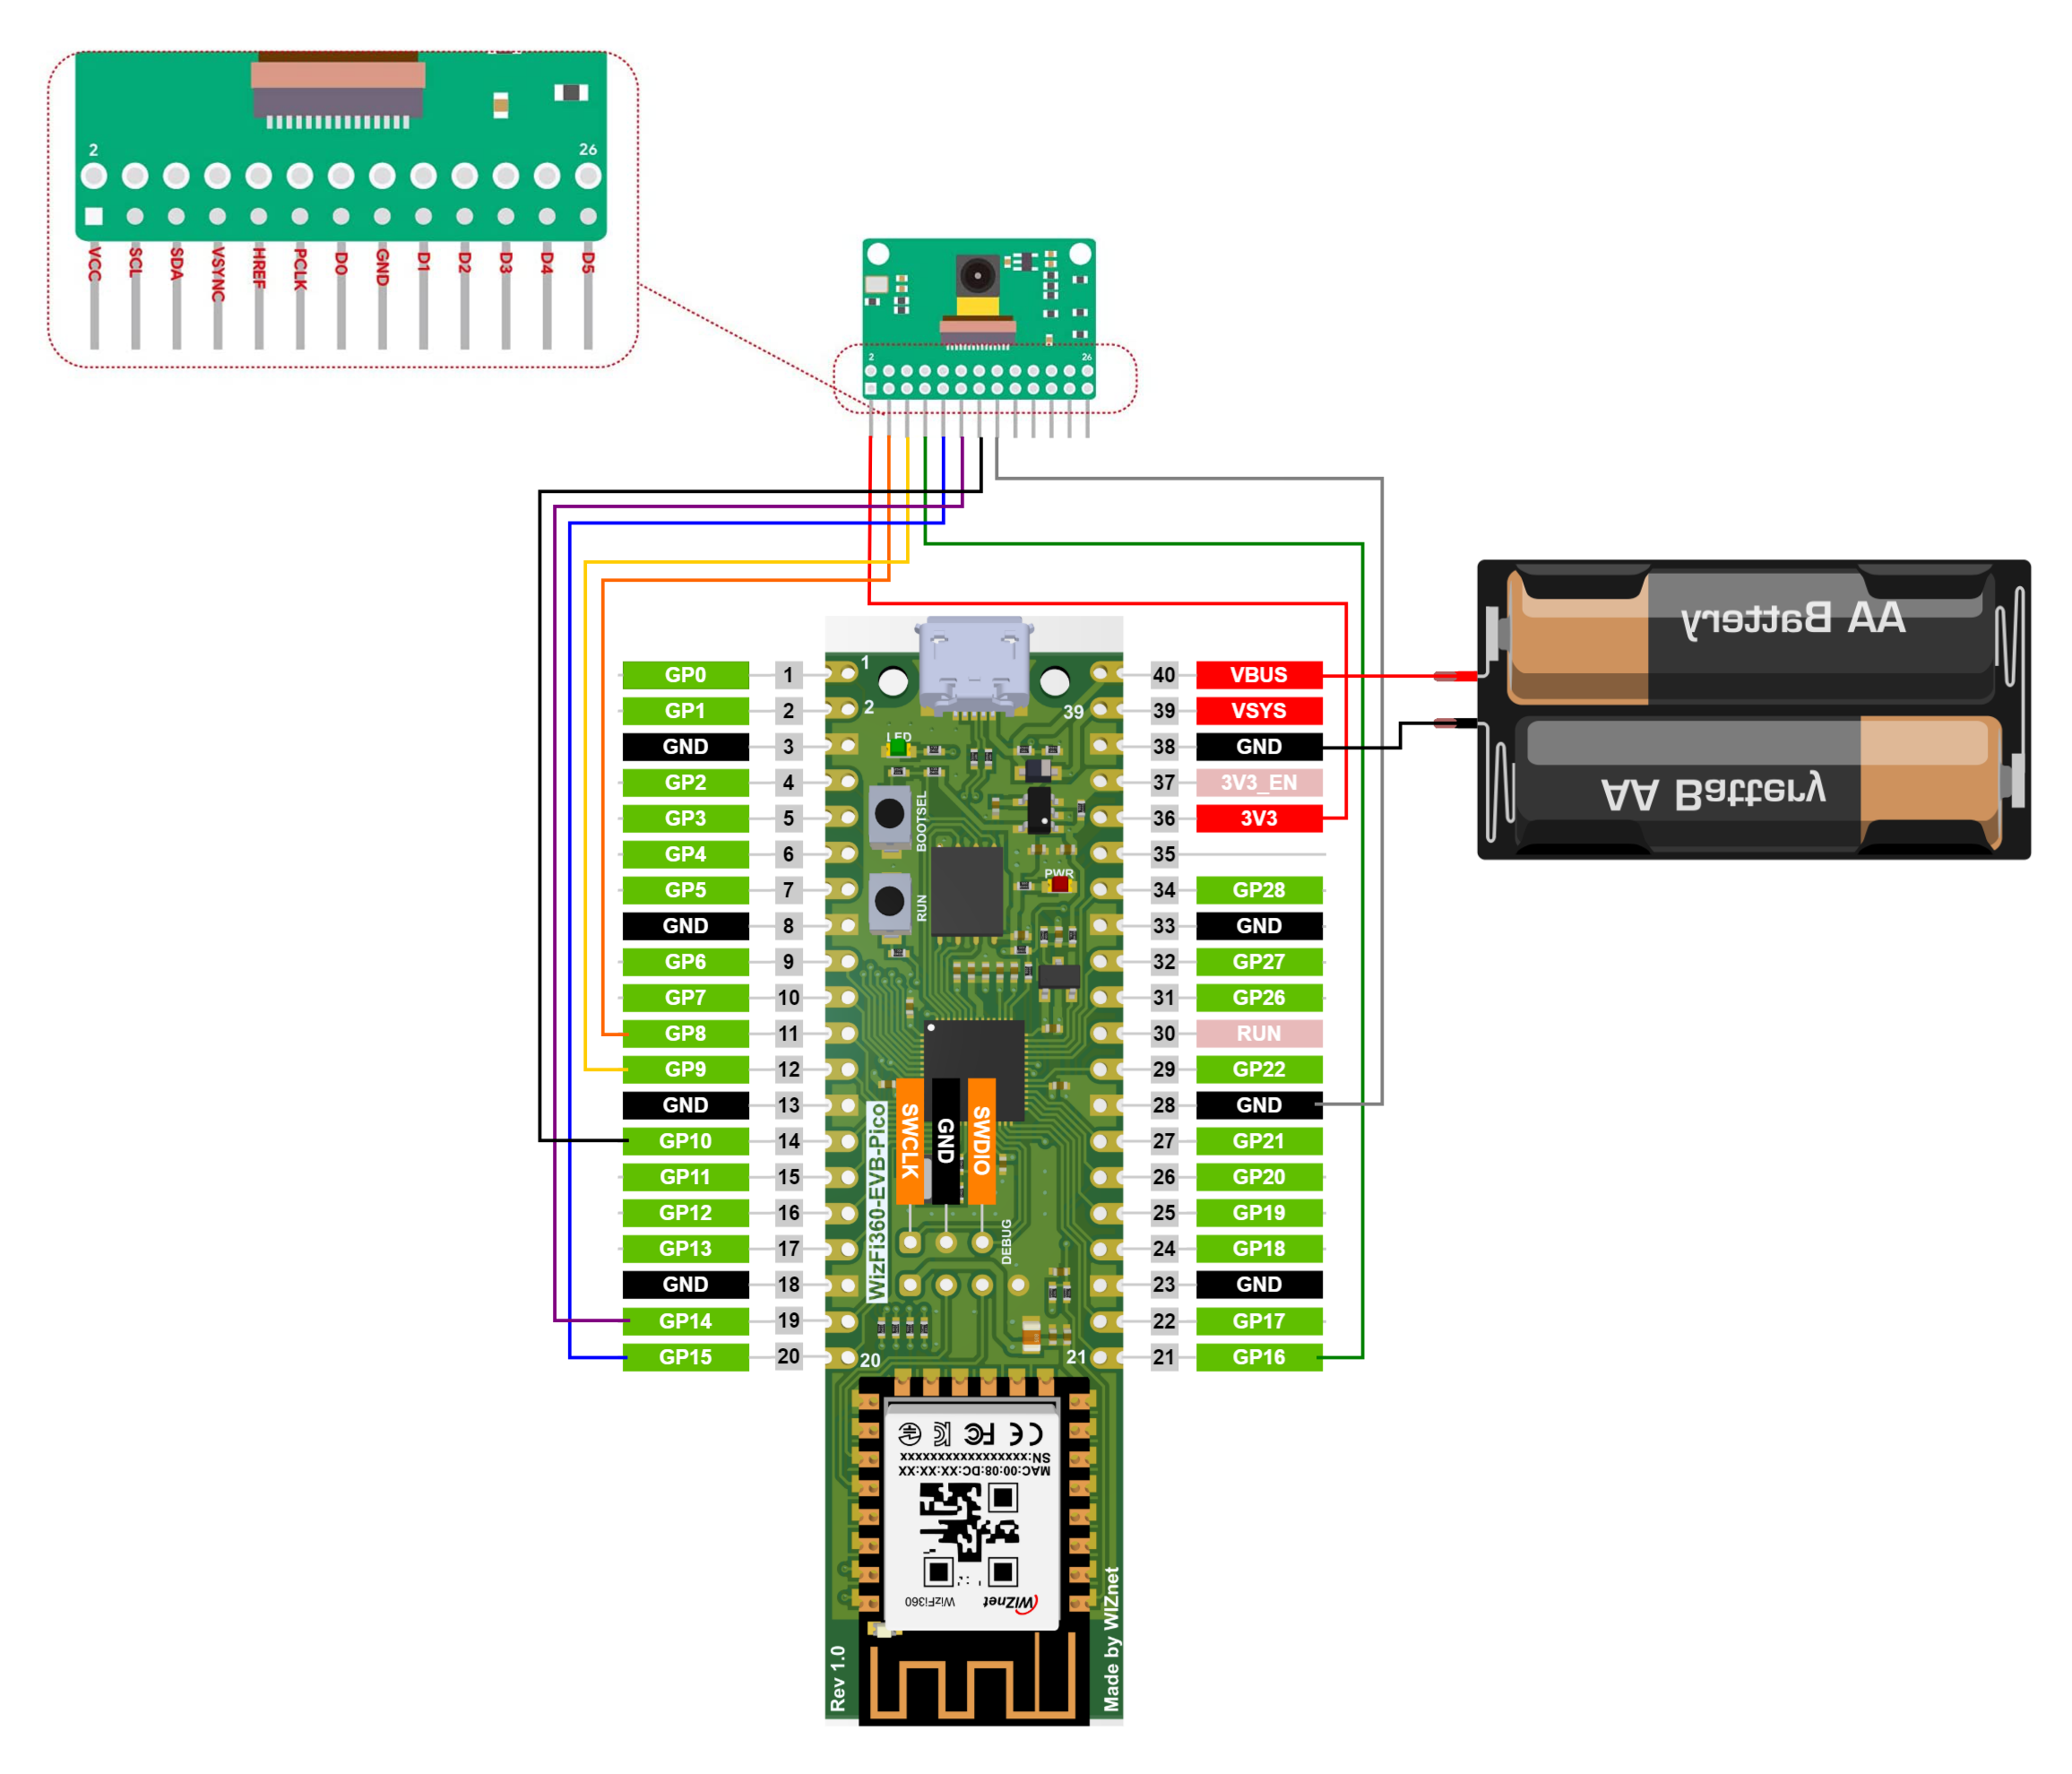
To actually build out a conveniently mobile camera, I used a sheet of protoboard, a battery pack, some wires, headers, nuts and bolts, solder, and some non-conductive double sided tape (most tape is non-conductive.) You really only need 2 AA batteries to run it, though if you’re planning a lot of use you might want to trade up to a 3 battery holder for longer runtime. I used the wire ribbon the Arducam came with because I like the look, but you could definitely minimize the wiring if you like that better. You could also add an on/off switch, I just didn’t have an appropriate one on hand so for now I just turn the camera off by taking out the batteries.

Change your SSID and password to your phone’s hotspot (if you want) upload the current version, and that’s it. If you can’t access your serial monitor conveniently, just google “what’s my local IP” and follow whatever directions are convenient for you, and that’s the url to put into your browser, just make sure you use http://, not httpS:// You have a camera ready to take lofi retro pictures for your notebooks, scrapbook, wall decor, and whatever else needs customizing!
-
Wizfi360 Camera for Thermal Printer
All the code requried is here.

-
Full Circuit
This pin arrangement is NOT the standard one that is suggested by Arducam. See my documentation for more details.
