
[AIoT] Voice Activated Smart Living
Smart Living [AIoT] is an IoT-based project in order to control home appliances through voice commands. IoT or the Internet of Things
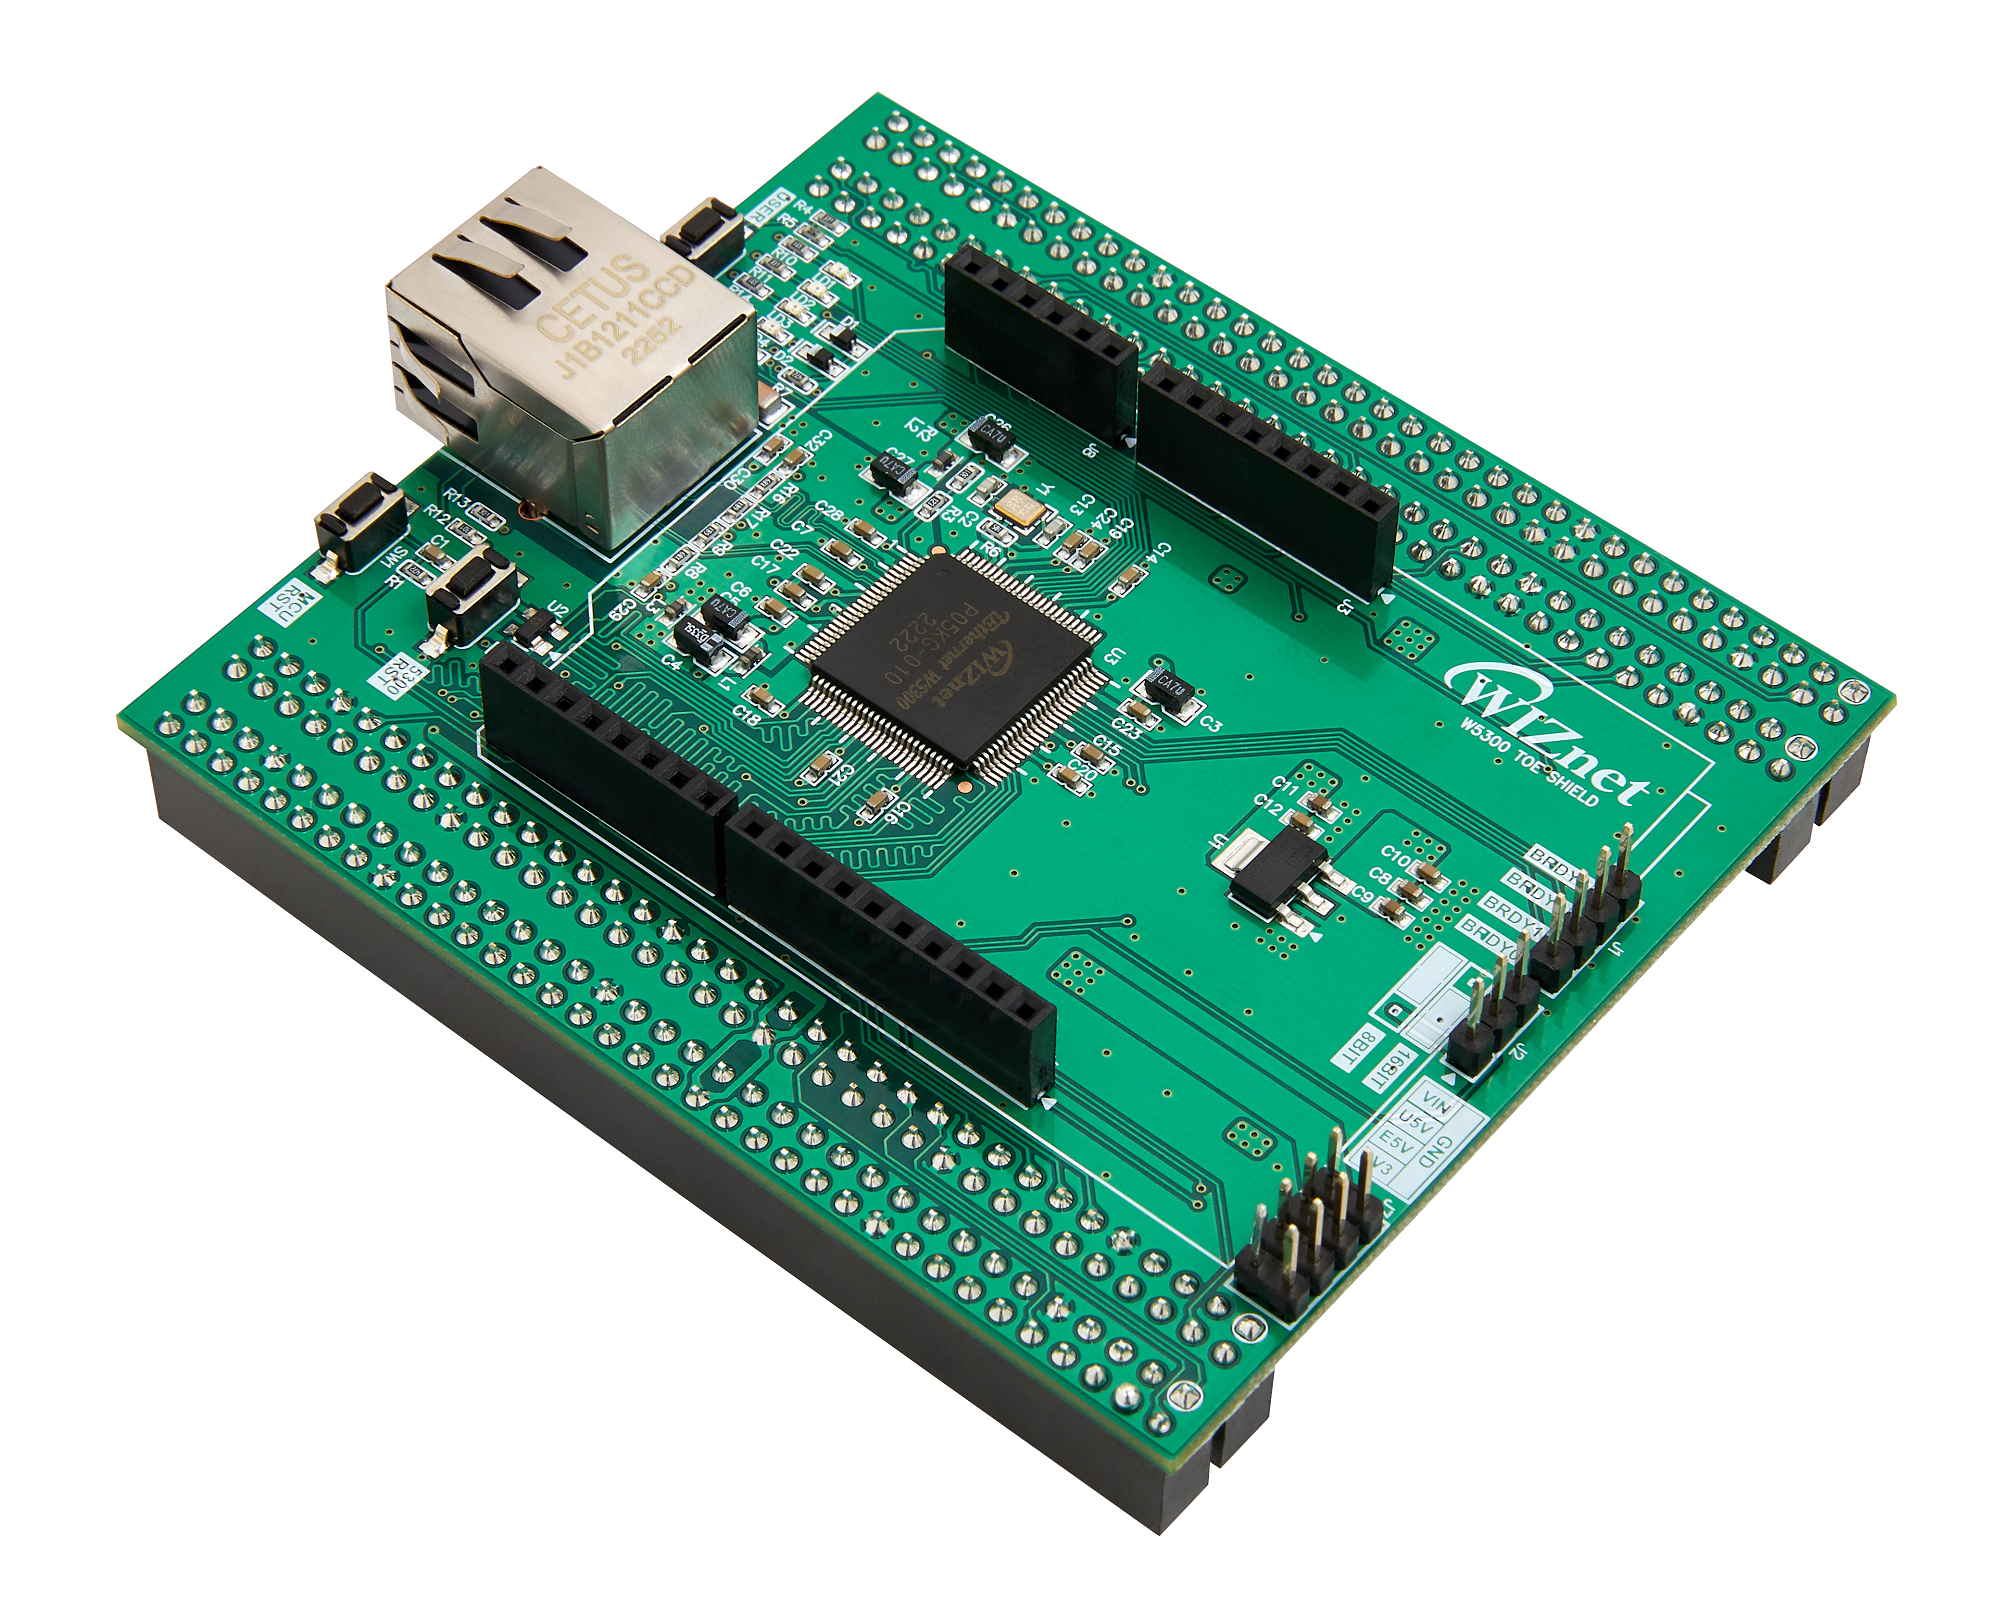
WIZnet - W5300-TOE-Shield
x 1
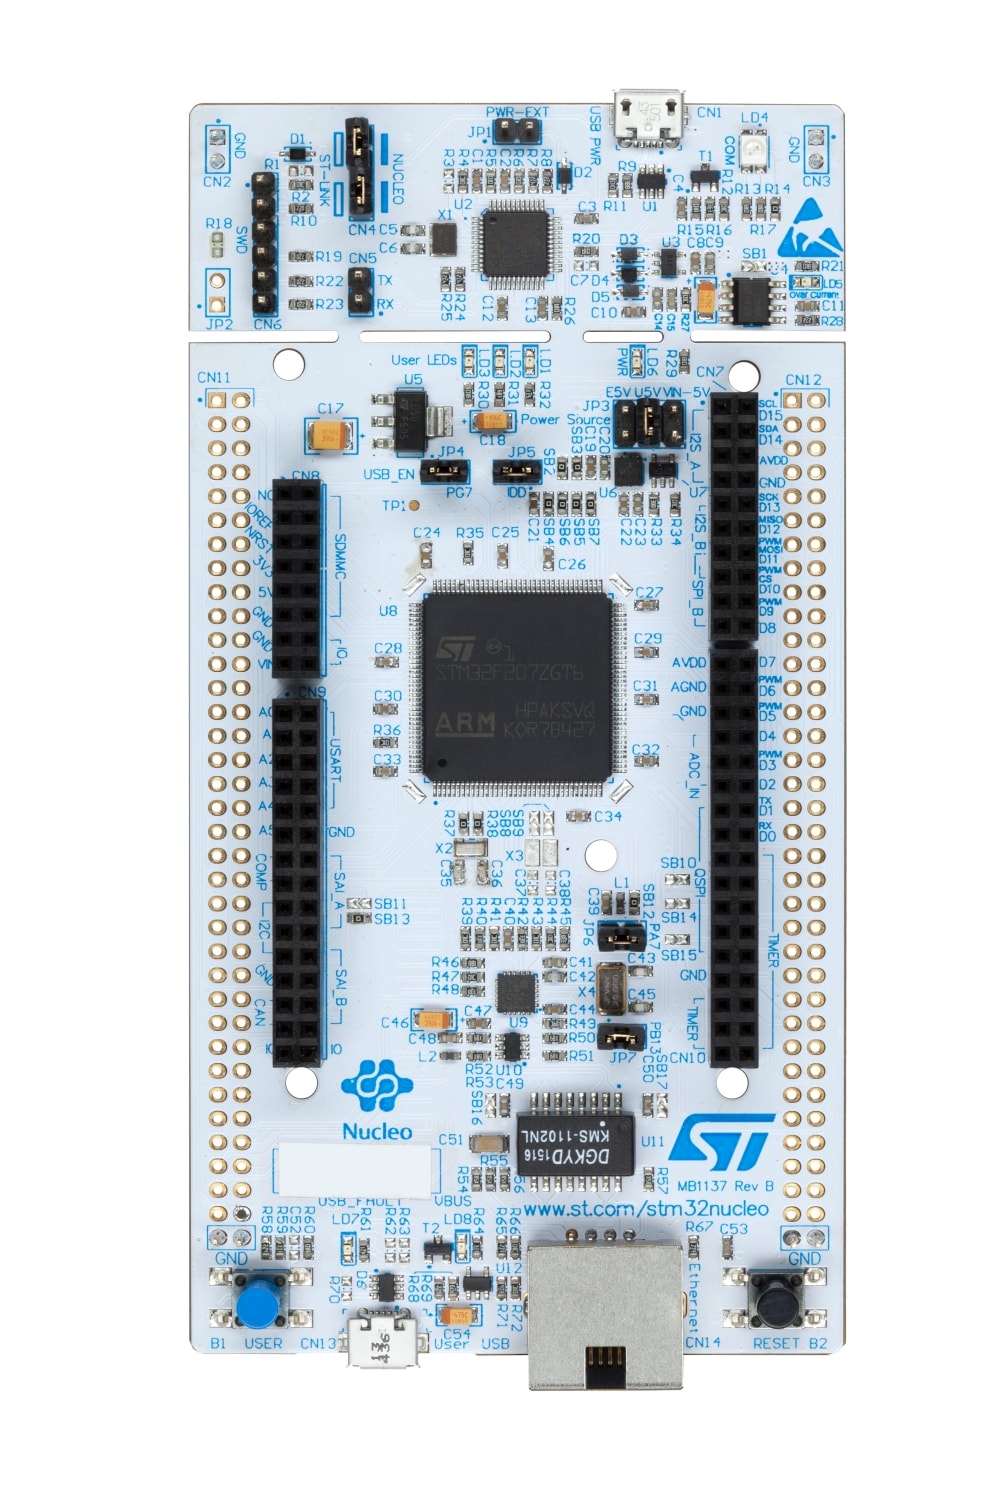
ST - NUCLEO-F429ZI
x 1
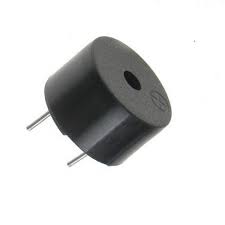
Robu - 5V Passive Buzzer
x 1

Arduino - Arduino IDE
x 1
Eclipse - Paho MQTT
x 1
PyCharm - Pycharm
x 1
[AIoT] SMART LIVING
PROJECT DESCRIPTION
- STORY
- COMPONENTS
- SOFTWARE
- PROBLEM STATEMENT
- Working
- SET UP INSTRUCTIONS
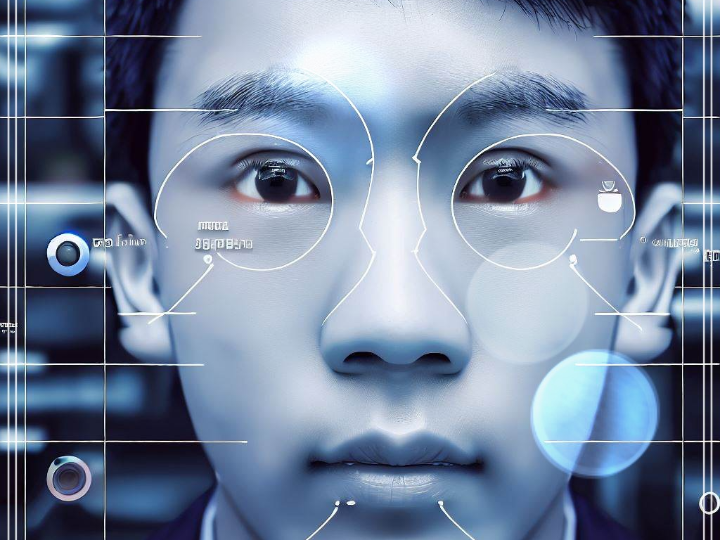
- IDENTIFYING FACES:
- SPEECH TO TEXT MODULE (JavaScript):
- CODE EXPLANATION
STORY
Smart Living [AIoT] is an IoT-based project in order to control home appliances through voice commands. IoT or the Internet of Things, is an upcoming technology that allows us to control hardware devices through the Internet. Here we propose to use IoT in order to control home appliances, thus automating modern homes through the internet using voice commands. Our user-friendly interface allows users to easily control lights, fans, TV, fridge,, and AC pump. The home security system has become vital for every house. It is important. Here we propose to use AI and IoT to assist users in improving of the door security of sensitive locations by using face detection and recognition.
COMPONENTS
- WIZnet-W5300 TOE SHIELD
- LEDs, Buzzer, Doors, fans, and any other electronic components
SOFTWARE
- PYCharm
- Arduino IDE
- MQTT Server
- Flask Web Application
PROBLEM STATEMENT
Making homes even smarter is the goal of voice-based home automation systems. Voice commands and cell phones will be used to operate small appliances in the house. It will be easier to get by as a result. According to their needs, customers will be able to add or remove additional electronic devices using web applications.
There is a growing need for efficient and reliable communication between various smart devices within a household. These devices, such as smart lights, smart appliances, and sensors, need to exchange data and control commands seamlessly to create an intelligent and interconnected home environment. However, the challenge lies in establishing a robust communication protocol that is lightweight, low-power, and can handle a multitude of devices without causing network congestion. As a solution, adopting the MQTT protocol in home automation enables devices to easily publish and subscribe to specific topics, allowing them to share real-time data and execute control commands effectively. MQTT's efficiency, simplicity, and support for various IoT platforms make it an essential and indispensable component in home automation systems, promoting a seamless and smarter living experience for homeowners.
COMPONENTS

●WIZnet-W5300 TOE SHIELD
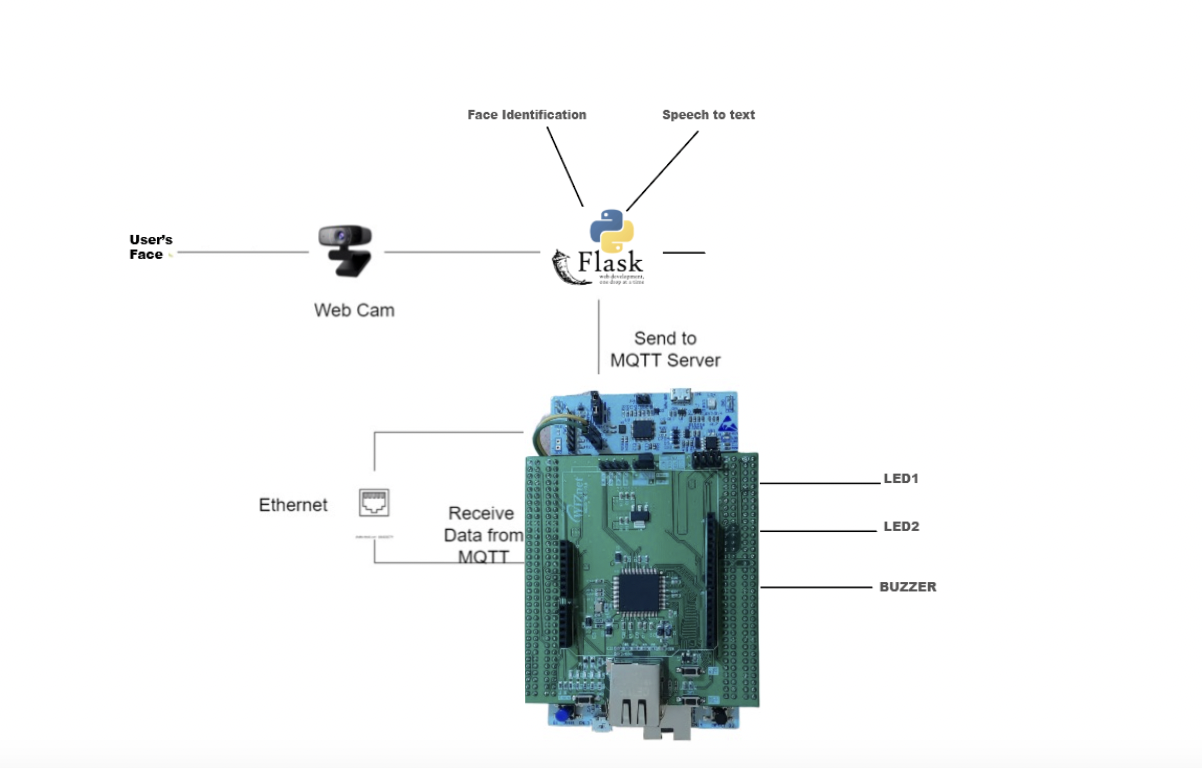
The combination of the WIZnet W5300 TOE Shield and STM32F429ZI board indicates a setup where the STM32F429ZI board is being used to interface with the W5300 TOE Shield, allowing the microcontroller to communicate over Ethernet. This is a Flask web application that allows users to control the electronic devices in their homes. The topic that the board is subscribed to in the MQTT server. The Pico board listens to messages posted by the server. The user will be able to turn the device on or off by giving voice commands through the web portal.
When the user sends a command to the server, It gets the information about the MQTT topic where the message to control the device is to be published,
LEDs

Buzzer -

Schematics -
BLOCK DIAGRAM -
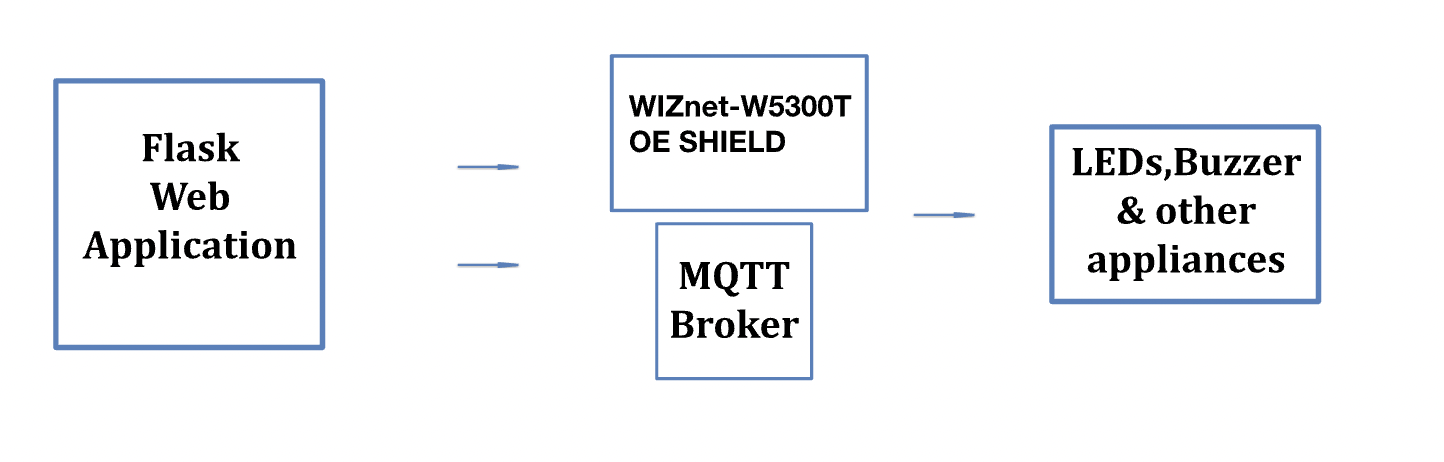
Working:
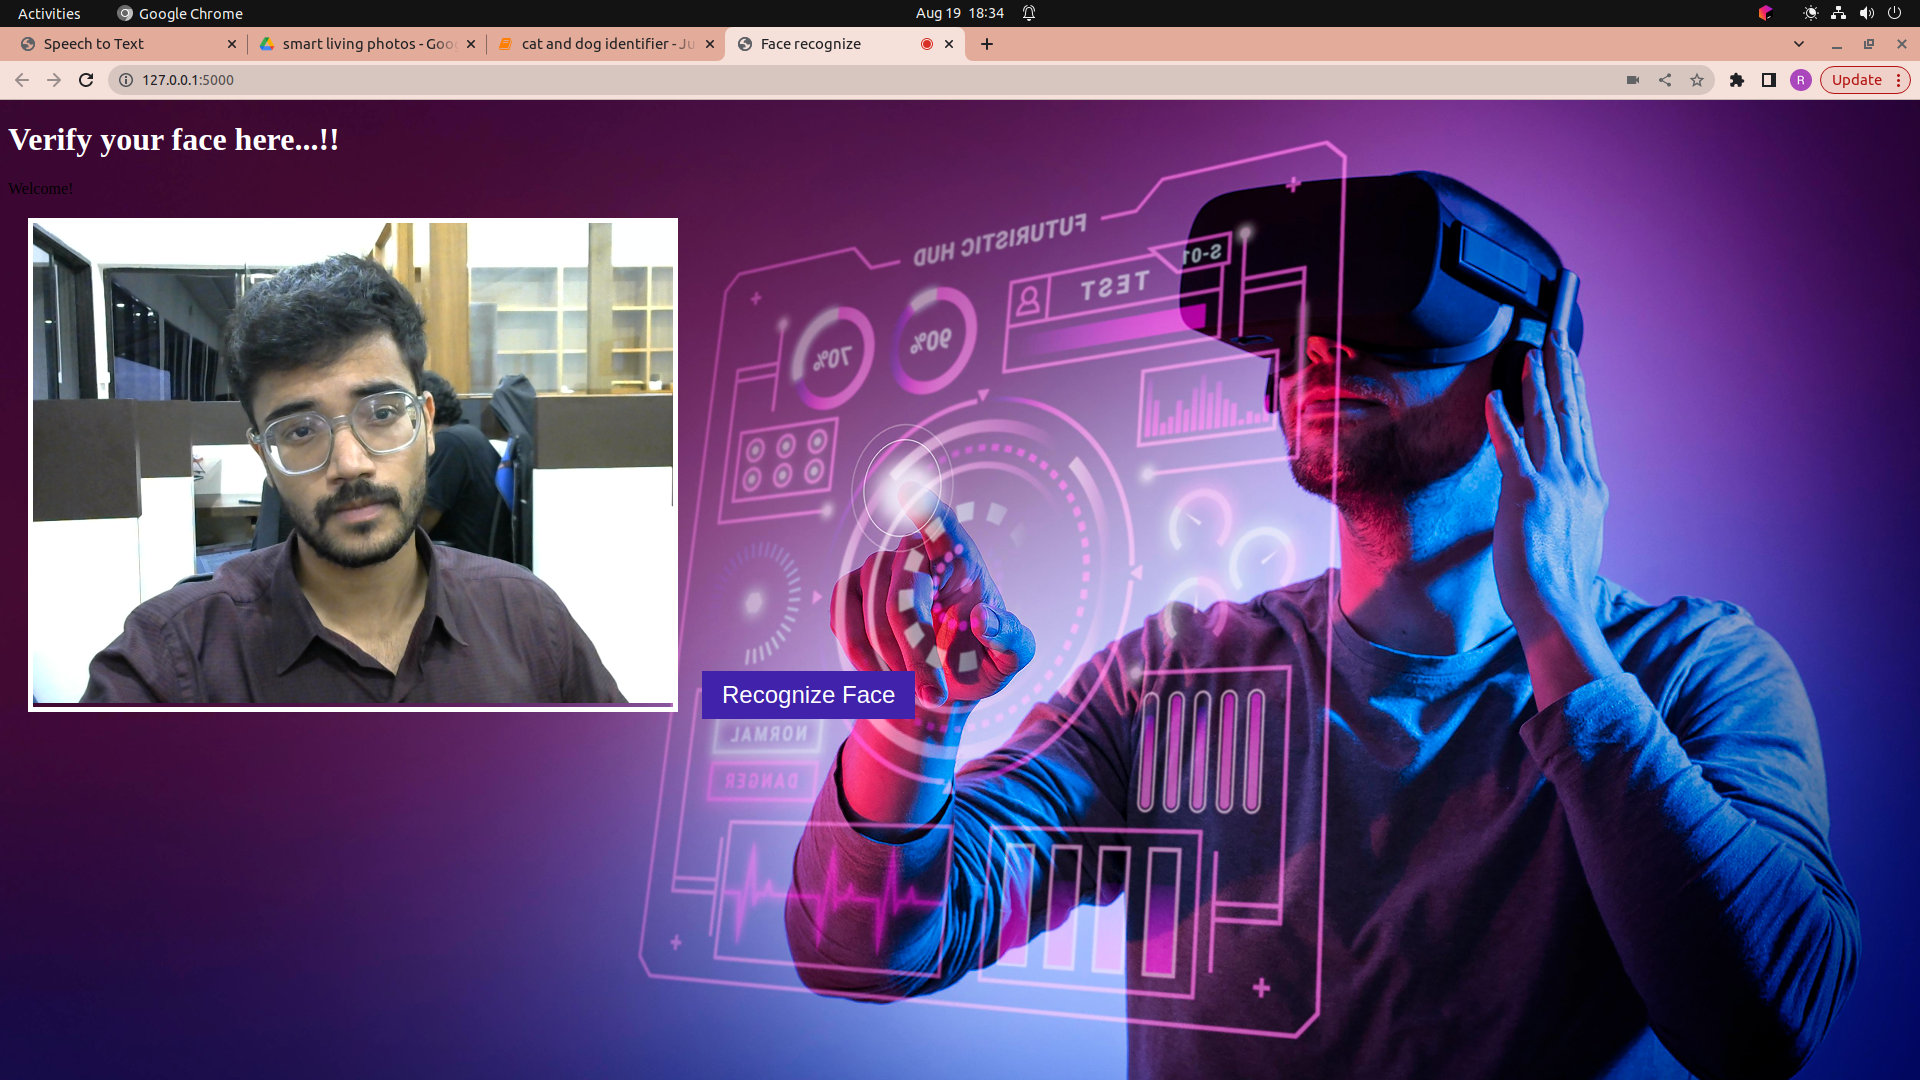
In this project, the Flask web server hosts a web application that allows users to control the electronic devices in their homes. When they verify a face on a webpage and it redirects, The web application, built using Flask and the face_recognition library, allows users to upload images for face recognition. The "Identifier" class in "app.py" performs face detection and recognition, redirecting users if a match is found. Additionally, the application features a "Speech to Text" module in JavaScript, enabling users to convert spoken words into written text via voice recognition or manual entry. The JavaScript code uses the Web Speech API to enable voice recognition, allowing users to speak into the text area. When the "Voice Input" button is clicked, the recognition starts, and the test result is displayed in the text area. The "Submit" button is used to send the text to the MQTT server using the Flask application.
SET UP INSTRUCTIONS
Software required: Windows, Anaconda, Arduino IDE, PYCharm, Git
Step 1: Clone the GitHub repository using the command git clone
Step 2: Open the repository https://github.com/1rudy/Smart_Living_AIoT/tree/main
Step 3: Install the packages Here are all the packages used in the provided Python Flask web application.
1. Flask:
Flask is a microweb framework for Python that allows you to build web applications. It's lightweight and provides the basics needed for web development. You can install Flask using the following command:
```
pip install Flask
```
2. render_template :
`render_template` is a function provided by Flask. It's used to render HTML templates, allowing you to create dynamic web pages by embedding Python code within HTML files.
3. request :
The `request` object in Flask helps you access the data sent by the client (usually a web browser) to the server. This includes data from forms, query parameters, cookies, and more.
4. jsonify :
The `jsonify` function in Flask converts a Python dictionary or object into a JSON response, which is commonly used for returning structured data from web APIs.
5. redirect :
The `redirect` function in Flask is used to perform a URL redirect, sending the client's browser to a different route or URL.
6. paho.mqtt.client :
The `paho.mqtt.client` module is part of the Paho MQTT Python client library. It provides functionalities to create MQTT clients that can publish and subscribe to MQTT topics. MQTT (Message Queuing Telemetry Transport) is a lightweight messaging protocol for communication between devices.
To install the Paho MQTT Python client, you can use the following command:
```
pip install paho-mqtt
```
7. MQTT:
MQTT (Message Queuing Telemetry Transport) is a messaging protocol that enables communication between devices over a network. It's commonly used for Internet of Things (IoT) applications. MQTT uses a publish-subscribe model, where devices (clients) can publish messages to specific topics, and other devices can subscribe to those topics to receive the messages.
To use these libraries in your Python code, you need to import them appropriately. Here's an example of how you might import and use some of these libraries in a Flask application:
```python
Step 4: Copy the given Arduino code and necessary libraries for Ethernet communication (<SPI.h>, <Ethernet.h>) and MQTT communication (<PubSubClient.h>).
Define Network and MQTT Parameters:
- The code should set the MAC address and IP address for the Ethernet shield.
- replace The IP address of the MQTT broker is specified as 00.00.00.00.
Step 5: Install and run MQTT broker and connect the computer which is running Flask Server, the WIZnet-W5300 TOE SHIELDto the same Ethernet network.
Step 6: replace MY_PHOTO.JPG to your .jpg/jpeg/png file for face identification you can add more faces
Step7: Run the flask server using the command pythonapp.py run server 0.0.0.0:5000
IDENTIFYING FACES:
The class Identifier in the app.py file contains the code to detect and recognize faces by using the face_recognition library. When the views call the check function and the image is passed, this function finds the faces in the image and the face encodings in the image. If the encodes match any of the encodings in images then the page will redirect to the next page. If none of the images match, the page will be the same.
SPEECH-TO-TEXT MODULE
This web page is for speech-to-text conversion. The page contains a background image, a heading ("SPEAK HERE"), and a text area where users can speak something and see the text representation. There are two buttons: "Submit" to send the entered text for processing (presumably to a server), and "Voice Input" to initiate speech recognition. The JavaScript code uses the Web Speech API to enable voice recognition, allowing users to speak into the textarea. When the "Voice Input" button is clicked, the recognition starts, and the text result is displayed in the textarea. The "Submit" button is used to send the text to the MQTT server using the Flask application.

CODE EXPLANATION -
1. HTML Structure:
- The `<html>` element encapsulates the entire webpage.
- The `<head>` section includes the page title and a `<style>` block for adding CSS styling.
- The `<body>` section contains the visible content of the webpage.
2. CSS Styling:
- The CSS styles define the appearance of the webpage's elements, such as background image, text alignment, font, and button styles.
3. Speech Recognition:
- The code uses the `SpeechRecognition` API, which allows web applications to capture spoken language and convert it into text.
- The `recognition` object is created using the `SpeechRecognition` constructor.
- The `continuous` property is set to `true`, allowing continuous speech recognition.
- The `onresult` event handler captures the transcribed speech and displays it in the `textArea` element.
- The `onerror` event handler logs any errors that occur during speech recognition.
- The `onend` event handler re-enables the voice button after the recognition session ends.
4. Event Listeners:
- The `submit button` element has an event listener that triggers when the "Submit" button is clicked. It captures the content of the `textArea` and publishes to a specified endpoint (`'/mqtt-publish'`).
- The `voice button` element has an event listener that triggers when the "Voice Input" button is clicked. It starts the speech recognition session and disables the button while recognition is ongoing.
<!DOCTYPE html>
<html>
<head>
   <title>Speech to Text</title>
   <style>
       body {
           background-image: url('/static/background-image.jpg');
           background-repeat: no-repeat;
           background-size: cover;
           font-family: Arial, sans-serif;
           text-align: center;
       }


       h1 {
           color: #ffffff;
       }


       .container {
           margin-top: 50px;
       }


       .text-area {
           width: 400px;
           height: 100px;
           padding: 10px;
           font-size: 16px;
           border: 2px solid #333;
           border-radius: 5px;
           resize: none;
       }


       .btn-container {
           margin-top: 20px;
       }


       .btn {
           display: inline-block;
           padding: 10px 20px;
           font-size: 16px;
           border: none;
           border-radius: 5px;
           background-color: #125;
           color: #fff;
           cursor: pointer;
       }


       .btn:hover {
           background-color: #424;
       }
   </style>
</head>
<body>
   <h1>SPEAK HERE</h1>
   <div class="container">
       <textarea id="text" class="text-area" placeholder="Speak something..."></textarea>
       <div class="btn-container">
           <button id="submit-btn" class="btn">Submit</button>
           <button id="voice-btn" class="btn">Voice Input</button>
       </div>
   </div>


   <script src="https://code.jquery.com/jquery-3.6.0.min.js"></script>
   <script>
       function publishText(text) {
           $.ajax({
               url: '/mqtt-publish',
               type: 'POST',
               data: { text: text },
               success: function(response) {
                   console.log(response);
                   // Do something with the response if needed
               },
               error: function(error) {
                   console.error(error);
               }
           });
       }


       // Speech Recognition
       var SpeechRecognition = window.SpeechRecognition || window.webkitSpeechRecognition;
       var recognition = new SpeechRecognition();
       var textArea = document.getElementById('text');
       var submitButton = document.getElementById('submit-btn');
       var voiceButton = document.getElementById('voice-btn');


       recognition.continuous = true;


       recognition.onresult = function(event) {
           var currentResultIndex = event.resultIndex;
           var transcript = event.results[currentResultIndex][0].transcript;
           textArea.value = transcript;
       };


       recognition.onerror = function(event) {
           console.error('Speech recognition error occurred: ' + event.error);
       };


       recognition.onend = function() {
           voiceButton.disabled = false;
       };


       submitButton.addEventListener('click', function() {
           var text = textArea.value;
           publishText(text);
       });


       voiceButton.addEventListener('click', function() {
           recognition.start();
           voiceButton.disabled = true;


       });
   </script>
</body>
</html>
This HTML document creates a web page with speech-to-text functionality. Users can enter or speak text in a textarea. The entered text is sent to a server using MQTT for processing. The page is styled with a background image, heading, textarea, and buttons. JavaScript enables speech recognition through the Web Speech API, converting spoken words into text and displaying it in the textarea. The submit button sends the entered text to the server, while the voice button starts speech recognition and disables itself during recognition. The page also includes the jQuery library for handling events and interactions. In essence, the page offers a simple interface for users to input text via typing or speaking, utilizing MQTT and speech recognition capabilities.
PYTHON CODE
The web application is built using Flask, a Python web framework, allowing it to receive HTTP requests and respond with data or web pages. It consists of three main web routes: the "/" route displays the "index.html" page with a user message stored in the "message" variable, the "/speech_to_text" route shows the "speech_to_text.html" page with the same "message" content, and the "/save_image" route processes image data received via HTTP POST request and performs face recognition. This process involves decoding the base64 image data, saving it as "captured_image.jpg" in the "images" folder, and calling the "recognise.face()" function for face recognition. The function returns "LOGIN SUCCESSFUL" if the recognition succeeds or False otherwise, updating the "message" variable accordingly. The application is configured to run on all available network interfaces and in debug mode during development. It also integrates an MQTT broker for MQTT communication, with an additional "/mqtt-publish" route that listens for POST requests containing text data and sends them as MQTT messages to the "speech-to-text" topic on the broker. This comprehensive setup enables seamless handling of web requests, image processing, face recognition, and MQTT communication in the application.
import os
import base64
import time
import recognise
from flask import Flask, render_template, request, jsonify, redirect
import paho.mqtt.client as mqtt

app = Flask(__name__)

# Specify the specific folder path for saving images
file_save_path = 'images'  # Removed the leading slash to make it a relative path


# Initialize the global message variable
global message
message = ''

def capture_and_recognize():
   # Implement a loop to keep capturing and recognizing until a face is matched
   # while True:
   data = request.get_json()
   image_data = data['image_data'].split(",")[1]


   # Decode the base64 image data and save it as a file
   filename = 'captured_image.jpg'
   file_path = os.path.join(app.root_path, file_save_path, filename)


   with open(file_path, 'wb') as f:
       f.write(base64.b64decode(image_data))


   result = recognise.face(file_path)  # Perform face recognition on the saved image
   print(result)


   if result == "LOGIN SUCCESSFUL":
       return True
       # return render_template('index.html', text_to_print=result)
   else:
       return False
       # time.sleep(2)  # Wait for a few seconds before capturing the next image


@app.route('/save_image', methods=['POST'])
def save_image():
   global message


   try:
       # Call the capture_and_recognize function to continuously capture and recognize the face
       if capture_and_recognize():


           message = "Face Matched"
           return jsonify('speech_to_text.html')


       else:
           return render_template('index.html')


   except Exception as e:
       return jsonify({'error': 'Error saving the image.'}), 500


@app.route('/')
def index():
   return render_template('index.html', message=message)


@app.route('/speech_to_text')
def speech_to_text():
   return render_template('speech_to_text.html', message=message)


# Configure MQTT broker connection
mqtt_broker = '44.195.202.69'
mqtt_port = 1883


# Define MQTT on_connect event handler
def on_connect(client, userdata, flags, rc):
   print('Connected to MQTT broker')
   client.subscribe('MY')


# Define MQTT on_publish event handler
def on_publish(client, userdata, mid):
   print('Message published to MQTT broker')


# Create MQTT client and configure event handlers
mqtt_client = mqtt.Client()
mqtt_client.on_connect = on_connect
mqtt_client.on_publish = on_publish
mqtt_client.connect(mqtt_broker, mqtt_port, 60)


# Define Flask route for MQTT publish
@app.route('/mqtt-publish', methods=['POST'])
def mqtt_publish():
   text = request.form.get('text')
   text = text.replace(" ", "")
   mqtt_client.publish('speech-to-text', text)
   return 'Message published to MQTT server'


if __name__ == '__main__':
app.run(host="0.0.0.0", debug=True)
   mqtt_client.loop_start()
Arduino code - Arduino board equipped with an Ethernet shield and an MQTT server, showcasing both publishing and subscribing functionalities. The code is divided into several parts, beginning with the inclusion of essential libraries for Ethernet communication and MQTT functionality. Network and MQTT parameters, such as MAC address, IP addresses for both the Arduino and the MQTT server, and the server's port, are defined and should be customized to match the specific network setup. The `setup()` function initializes the hardware, including LEDs and a buzzer, sets up Serial communication for debugging, configures the Ethernet shield, creates the MQTT client, and assigns a callback function to handle incoming MQTT messages. The code establishes the Ethernet connection and allows time for hardware stabilization.
//Importing Libraries:


#include <SPI.h>
#include <Ethernet.h>
#include <PubSubClient.h>


//Defining Network and MQTT Parameters:
byte mac[]    = {  0xDE, 0xED, 0xBA, 0xFE, 45, 0xED };
IPAddress ip(172, 16, 0, 100);
IPAddress server(44, 195, 202, 69);


//Initializing Hardware:


int led1=2;
int led2=3;
int buzzerpin=5;


//Callback Function:
void callback(char* topic, byte* payload, unsigned int length) {
  String message = "";


  for (int i = 0; i < length; i++) {
    message += (char)payload[i];
  }
  Serial.println(message);
   if (message.equals("turnonbedroomlight")) {
    // Code to turn on the bedroom light
    digitalWrite(led1, HIGH);
  }else if (message.equals("turnoffbedroomlight")) {
    // Code to turn off the bedroom light
    digitalWrite(led1, LOW);
  }else if (message.equals("turnonkitchenlight")) {
    // Code to turn on the kitchen light
    digitalWrite(led2, HIGH);
    }else if (message.equals("turnoffkitchenlight")) {
    // Code to turn off the kitchen light
    digitalWrite(led2, LOW);
    }else if (message.equals("turnonalllights")) {
    // Code to turn on the all lights
    digitalWrite(led1, HIGH);
    digitalWrite(led2, HIGH);
    }else if (message.equals("turnoffalllights")) {
    // Code to turn off the all lights
    digitalWrite(led1, LOW);
    digitalWrite(led2, LOW);
    }else if (message.equals("startmachine")) {
    // Code to start buzzzer
      tone(buzzerpin,1000);


    }else if (message.equals("stopmachine")) {
    // Code to to stop buzzer
      noTone(buzzerpin);

     }else {
    // Invalid command or unrecognized message
    Serial.println("Invalid command or unrecognized message.");
  }
}


/*The callback() function is executed when the Arduino receives a message from the MQTT broker
It converts the received payload (message) into a String and then checks the content of the message
Depending on the received message, it will take appropriate actions such as turning on/off LEDs or
starting/stopping the buzzer.*/


EthernetClient ethClient;
PubSubClient client(ethClient);


void reconnect() {
  // Loop until we're reconnected
  while (!client.connected()) {
    Serial.print("Attempting MQTT connection...");
    // Attempt to connect
    if (client.connect("arduinoClient45")) {
      Serial.println("connected");
      // Once connected, publish an announcement...
      client.publish("outTopic","hello world");
      // ... and resubscribe
      client.subscribe("speech-to-text");
    } else {
      Serial.print("failed, rc=");
      Serial.print(client.state());
      Serial.println(" try again in 5 seconds");
      // Wait 5 seconds before retrying
      delay(5000);
    }
  }
}


void setup()
{
  pinMode(led1, OUTPUT);
  pinMode(led2, OUTPUT);
  pinMode(buzzerpin,OUTPUT);
  Serial.begin(57600);
  Ethernet.init(17);
  client.setServer(server, 1883);
  client.setCallback(callback);


  Ethernet.begin(mac);
  // Allow the hardware to sort itself out
  delay(1500);
}
/*The setup() function initializes the Arduino's digital pins for LED and buzzer as outputs,
starts the Serial communication
for debugging purposes, initializes the Ethernet shield with a specific MAC address,
sets up the MQTT client to connect to the defined server and port, and sets the callback
function to handle incoming MQTT messages.*/
void loop()
{
  if (!client.connected()) {
    reconnect();
  }
  client.loop();
}


/*The loop() function runs continuously. It checks if the MQTT client is connected to the broker;
if not, it calls the reconnect() function to re-establish the connection.
The client.loop() method is used to handle MQTT-related tasks and ensure communication with the broker.*/
The `callback()` function processes received MQTT messages, turning LEDs on/off and starting/stopping the buzzer based on the message content. The `reconnect()` function ensures the MQTT client reconnects to the broker if the connection fails. In the main loop,The code checks the MQTT client's connection status, attempts reconnection if needed, and handles MQTT-related tasks using the `client.loop()` method. Periodically, the code publishes the message "hello world" to the topic "outTopic" when connected to the MQTT broker. Overall, the code serves as a basic foundation for implementing MQTT communication with Ethernet-connected Arduino devices and provides a starting point for building more complex IoT applications that involve multiple devices and interactions with an MQTT broker.communication channels.
Demo Video
-
source code
