
TinyML Based Bird watcher
A bird detection system to monitor the activity of birds in a geodesic dome using w5300 ethernet module and stm32F4 Discovery
WIZnet - W5300-TOE-Shield
x 1

STMicroelectronics - STM32F411RE
x 1

Seeedstudio - Grove Vision AI module
x 1

Arduino - Arduino IDE
x 1
Tangerang is one of the metropolitan city in Indonesia. It has a lot of thematic park in order to make the city more comfortable for its citizen. One of the thematic park is Taman Burung Perak or Perak Bird Park.

It has a few species of birds such as parrot, magpie, dove, etc. They are maintained with careful and given enough food every day. But sometimes the employees of the bird park having difficult time when it comes to count the amount of birds and their position.
So in this time I will create a tinyml based bird watcher.
Preparation
The Bird park already has an integrated internet/network connection so I will use the W5300 ethernet module combine with STM32F4 discovery microcontroller module as its main brain.
As for the detection sensor I am gonna use the Grove Vision AI from seeedstudio with custom data model.
Create a bird detection data model
For the grove vision AI module I already create a custom data model that you can find here, if you don't want to hassle with creating a custom data model. After you download the data model follow these step:

Step 3. Double-click the boot button on Grove - Vision AI Module to enter mass storage mode

After this you will see a new storage drive shown on your file explorer as GROVEAI

But if you still want to create a custom data model of your own, I already create a full tutorial from previous project that you can check here. The difference is on the roboflow part you need to include a different dataset. You can find various birds dataset on roboflow
Arduino Setup
For this tutorial I'll be using an older version of Arduino IDE
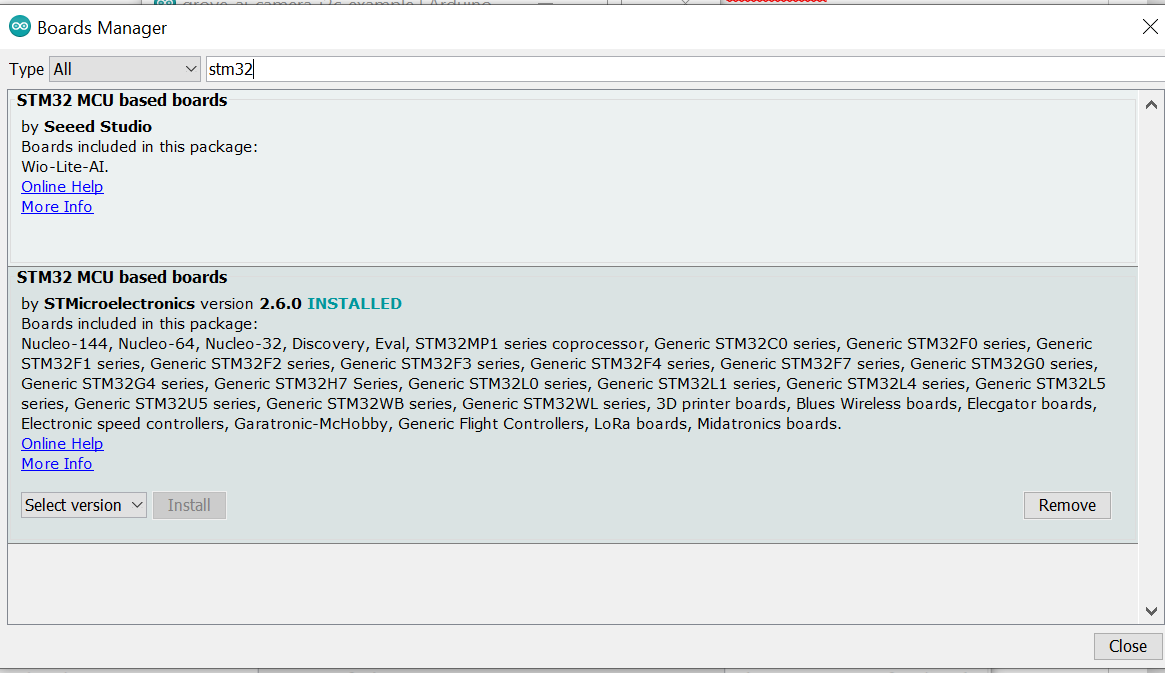
In order to be able to use the STM32F4 Discovery in arduino IDE you need to add the following url on the addtional board URL
https://github.com/stm32duino/BoardManagerFiles/raw/main/package_stmicroelectronics_index.json
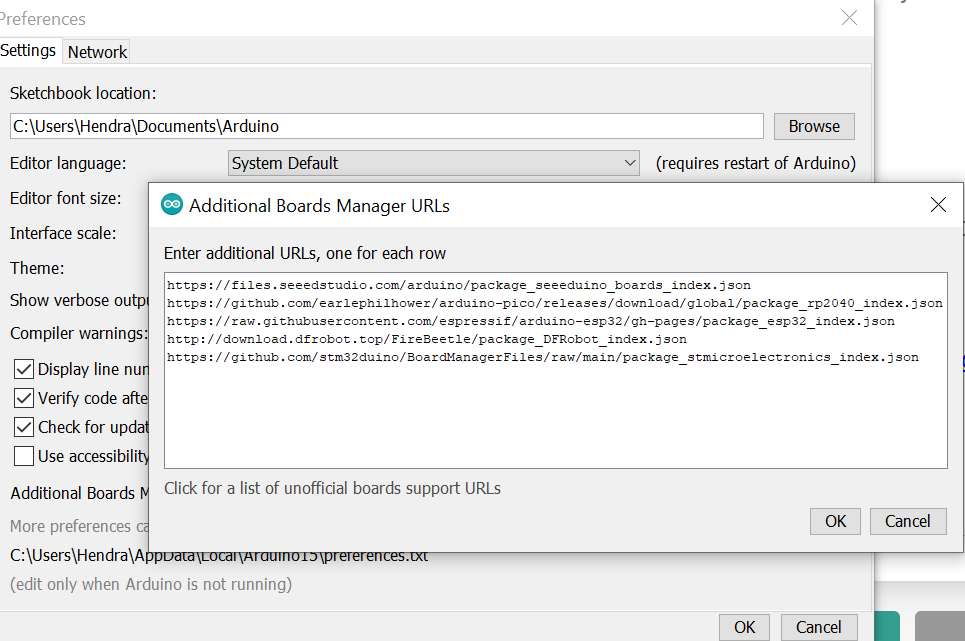
then go to board manager and install the STM32 board definition
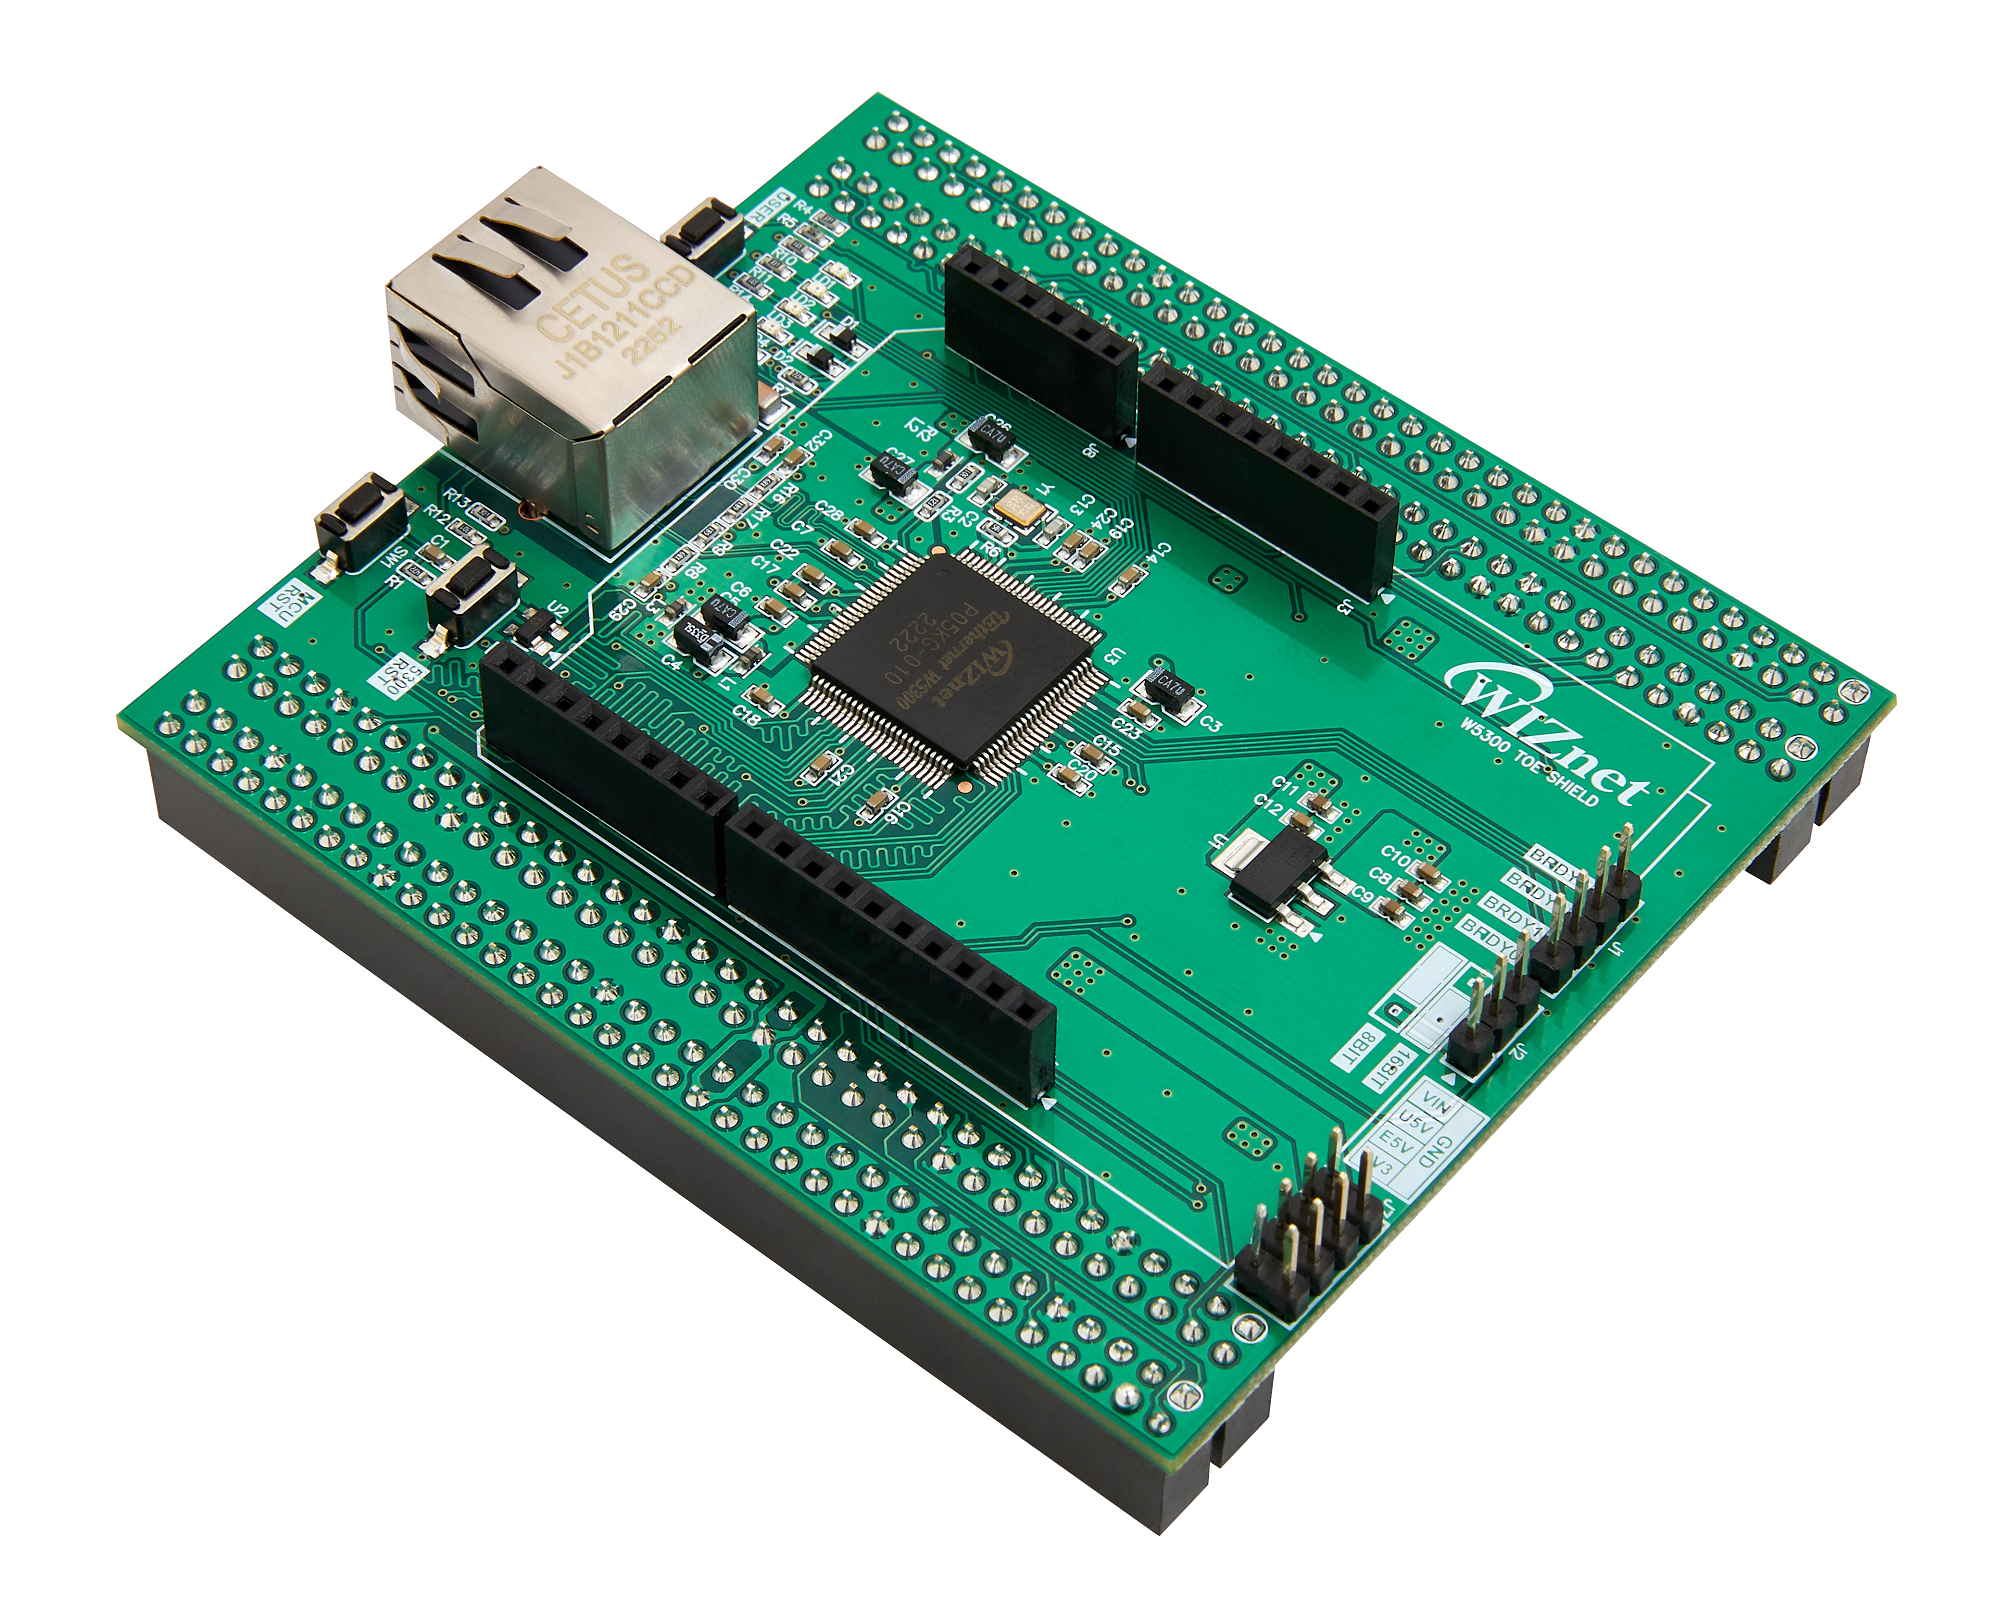
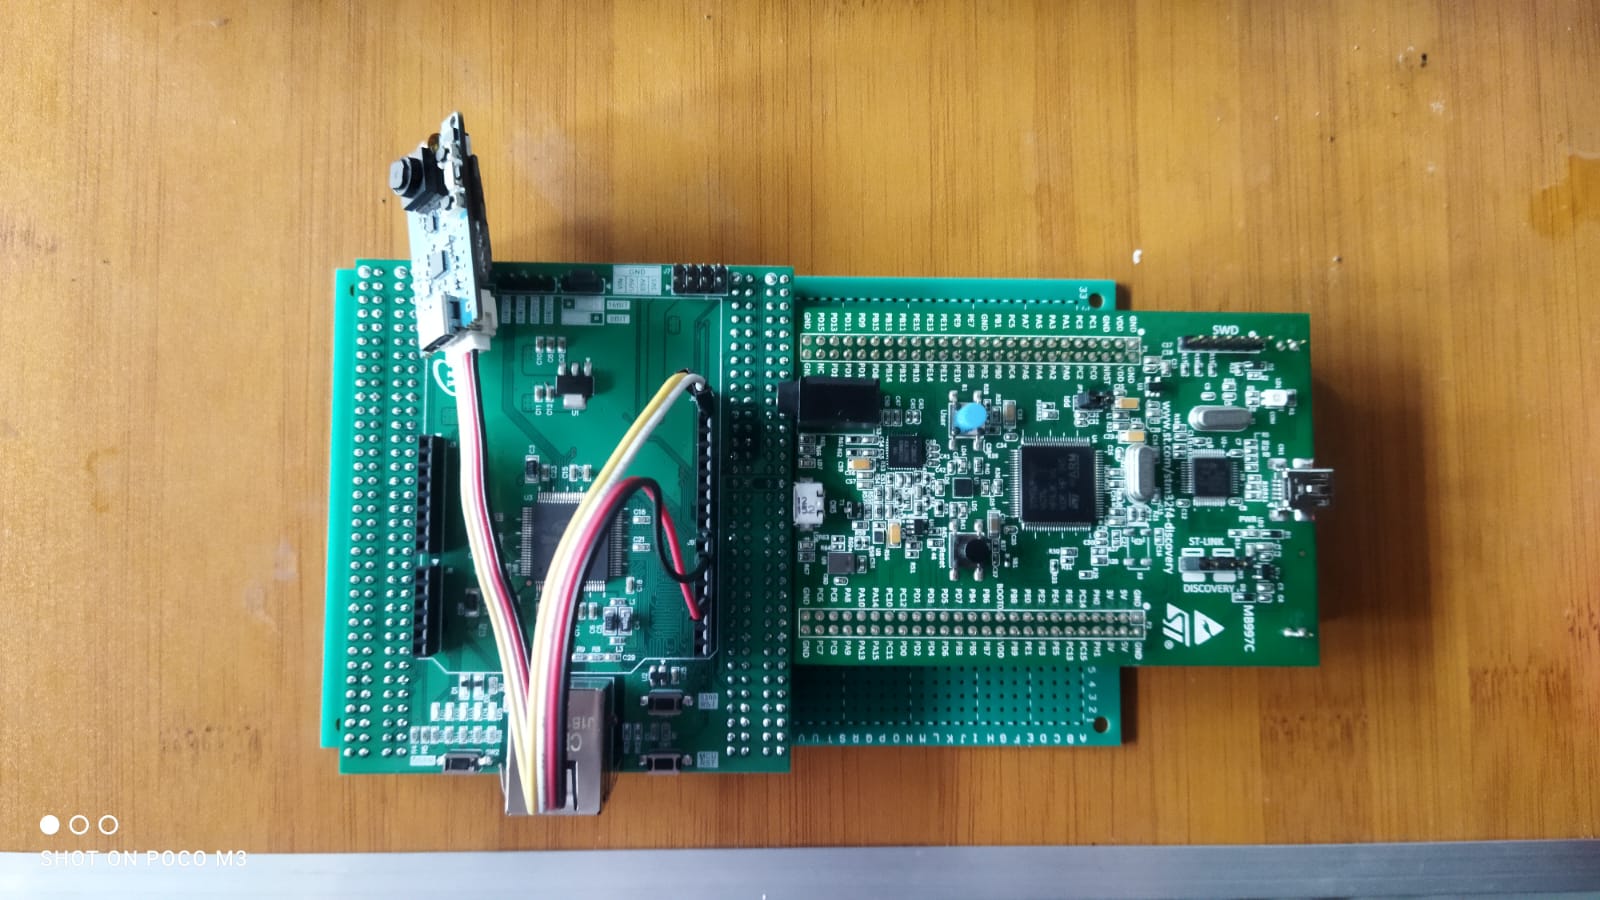
After the boards manager is installed connect the grove vision AI module to the STM32 board like this picture below

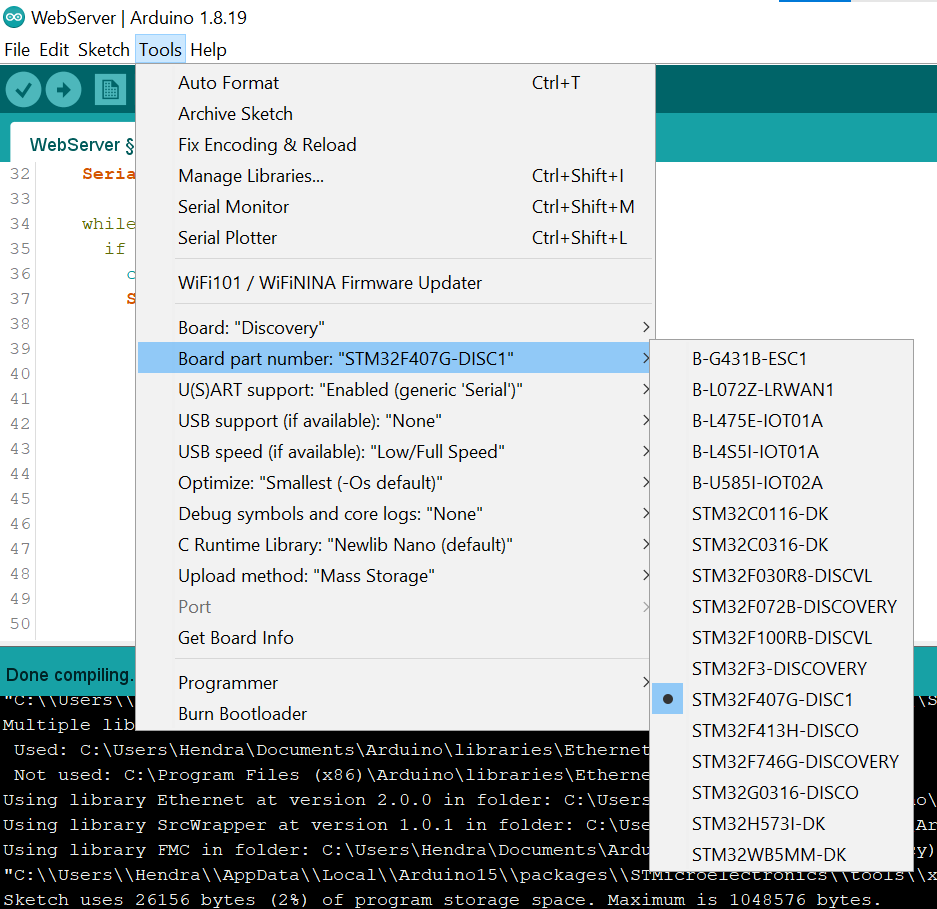
Make sure to choose the board definition correctly using stm32F407 Disc1
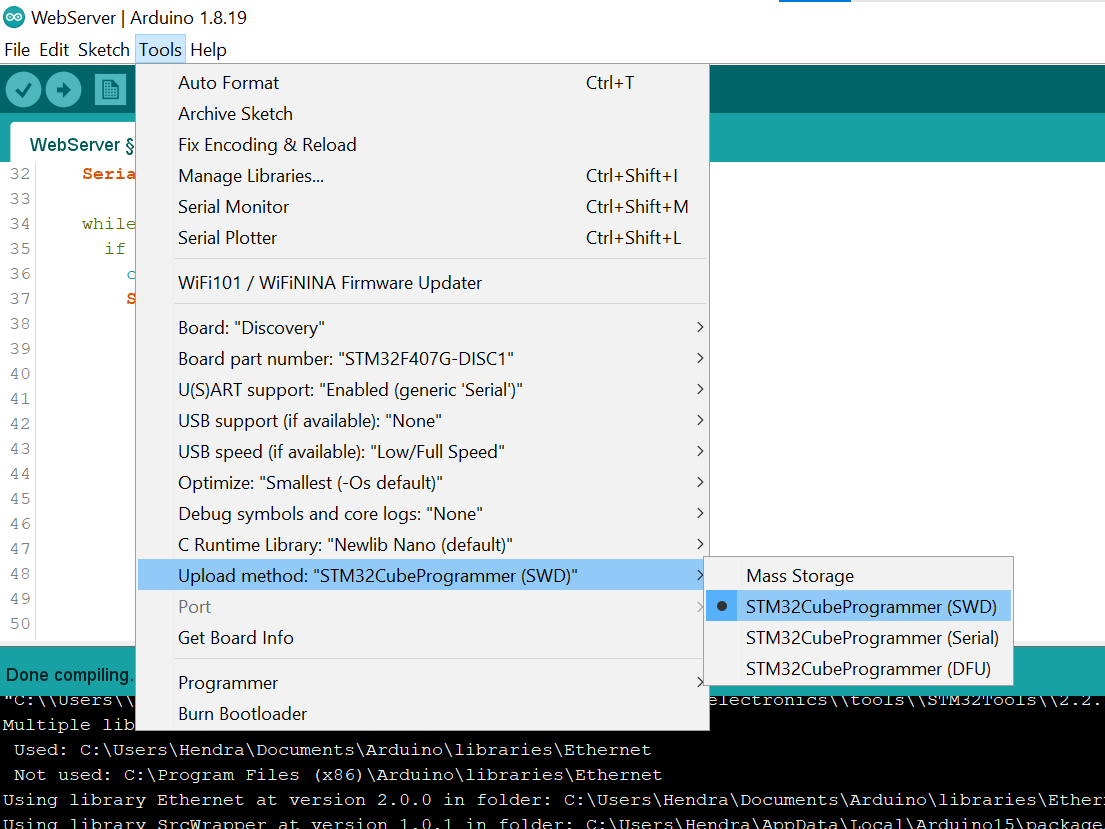
And choose the upload method using the SWD option
Before testing the data model we need to add the grove vision AI library to the arduino IDE. you can grab the library here.
After the library is downloaded you can test if the data model is working or not using the example code from the library. Upload the code the open up a bird picture on a browser and open serial monitor like this picture below
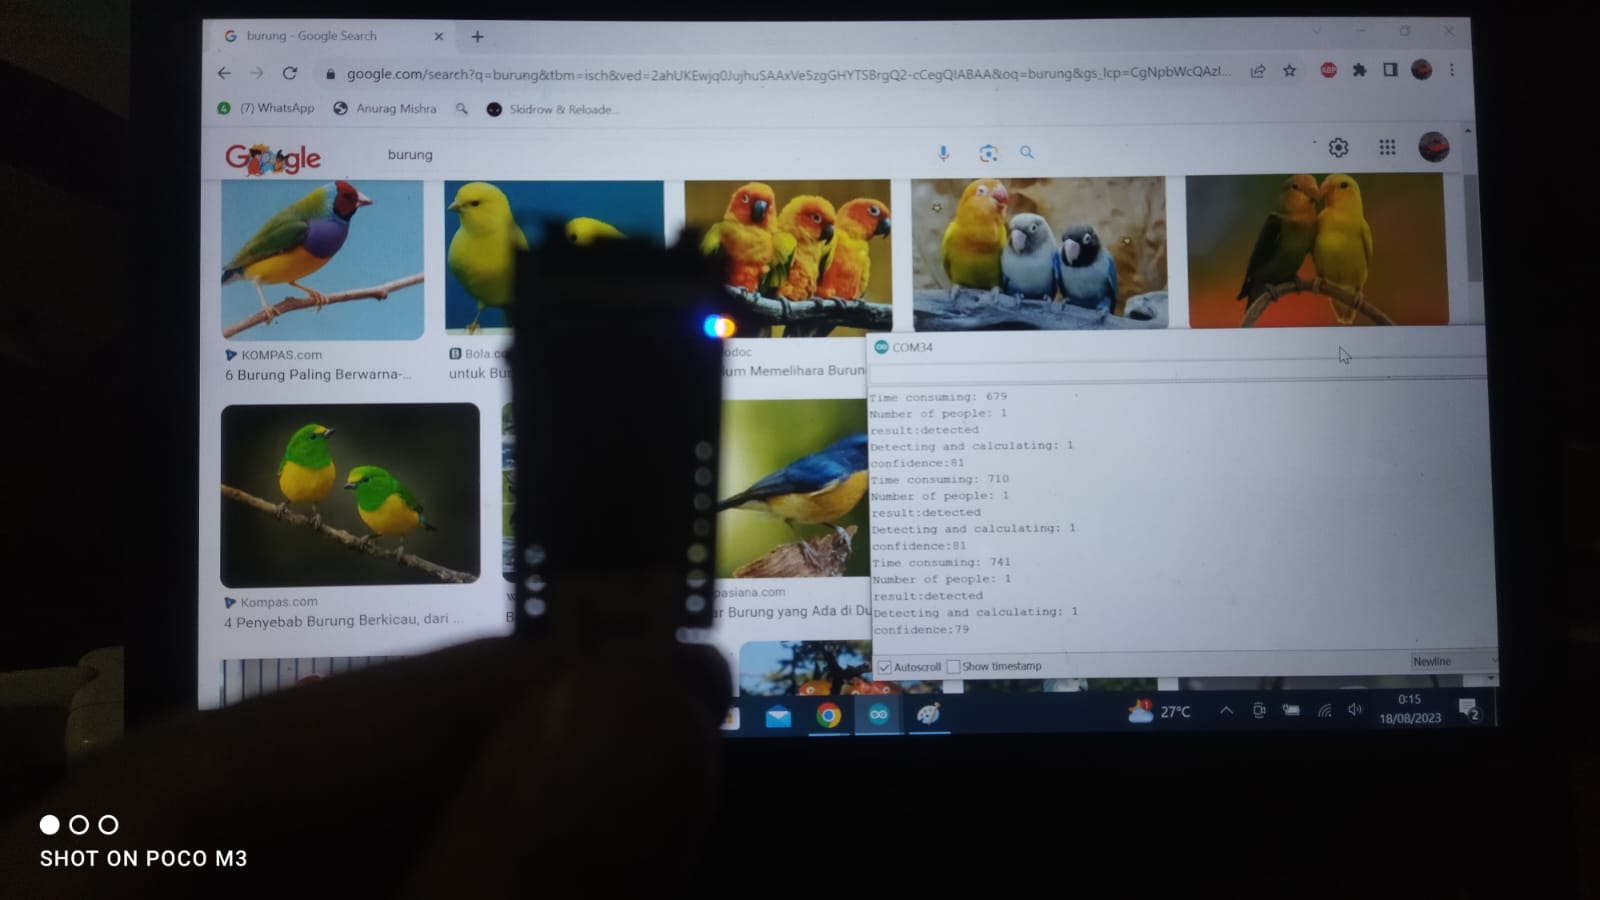
If something shows up in the serial monitor then the data model is working correctly.
One of the main challenge on using w5300 ethernet module is the documentation only supports for the stm32 nucleo board, and I find it difficult to locate and buy the board on my local online store. Fortunately I have an STM32F4 Discovery and working on modifying the w5300 arduino library to work on my STM32F4 Discovery board.
add the library to your arduino IDE from the link above then locate the GxIO_STM32F4_FMC.cpp and made some changes.
add two new variable
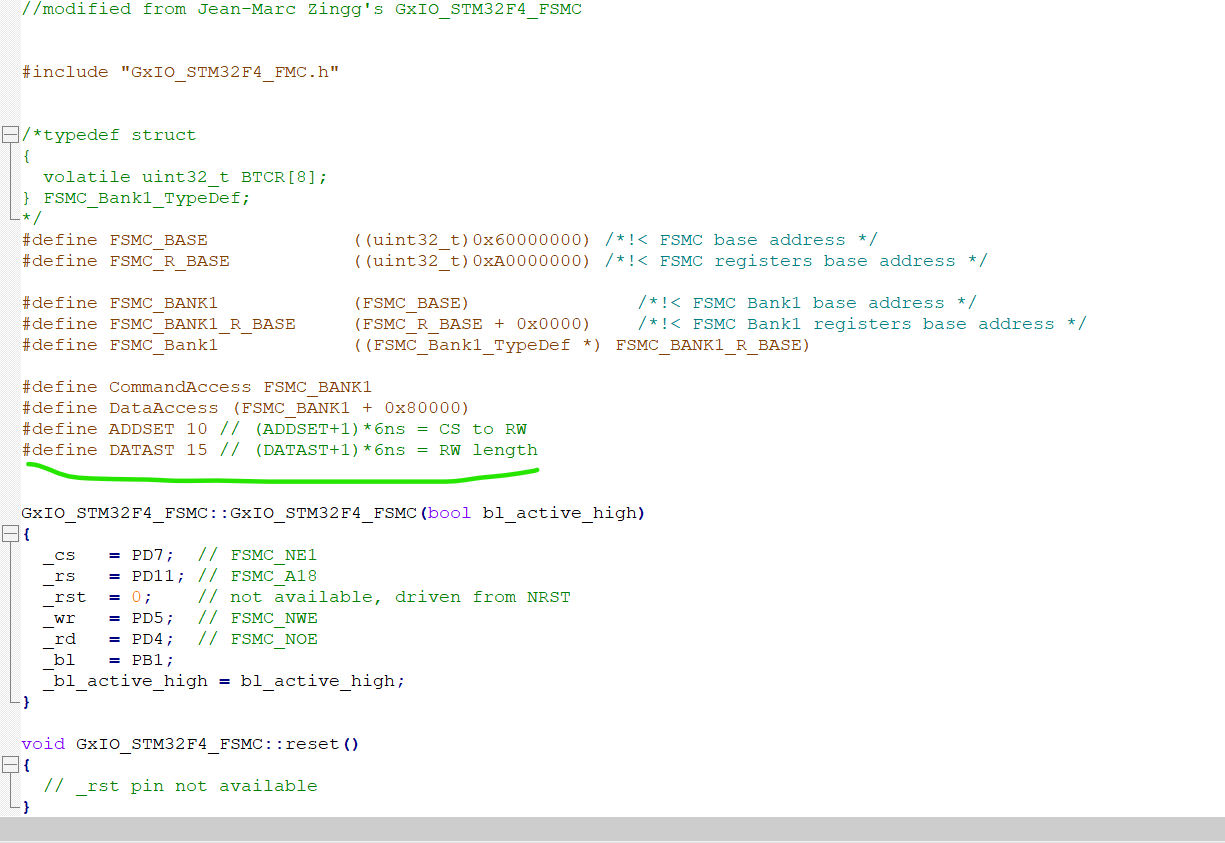
and uncomment this part since I am using the STM32F407 microcontroller
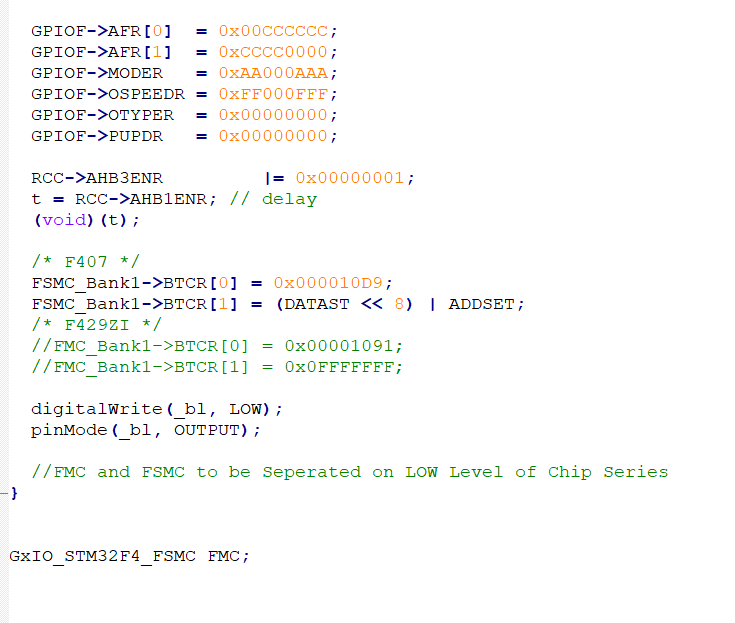
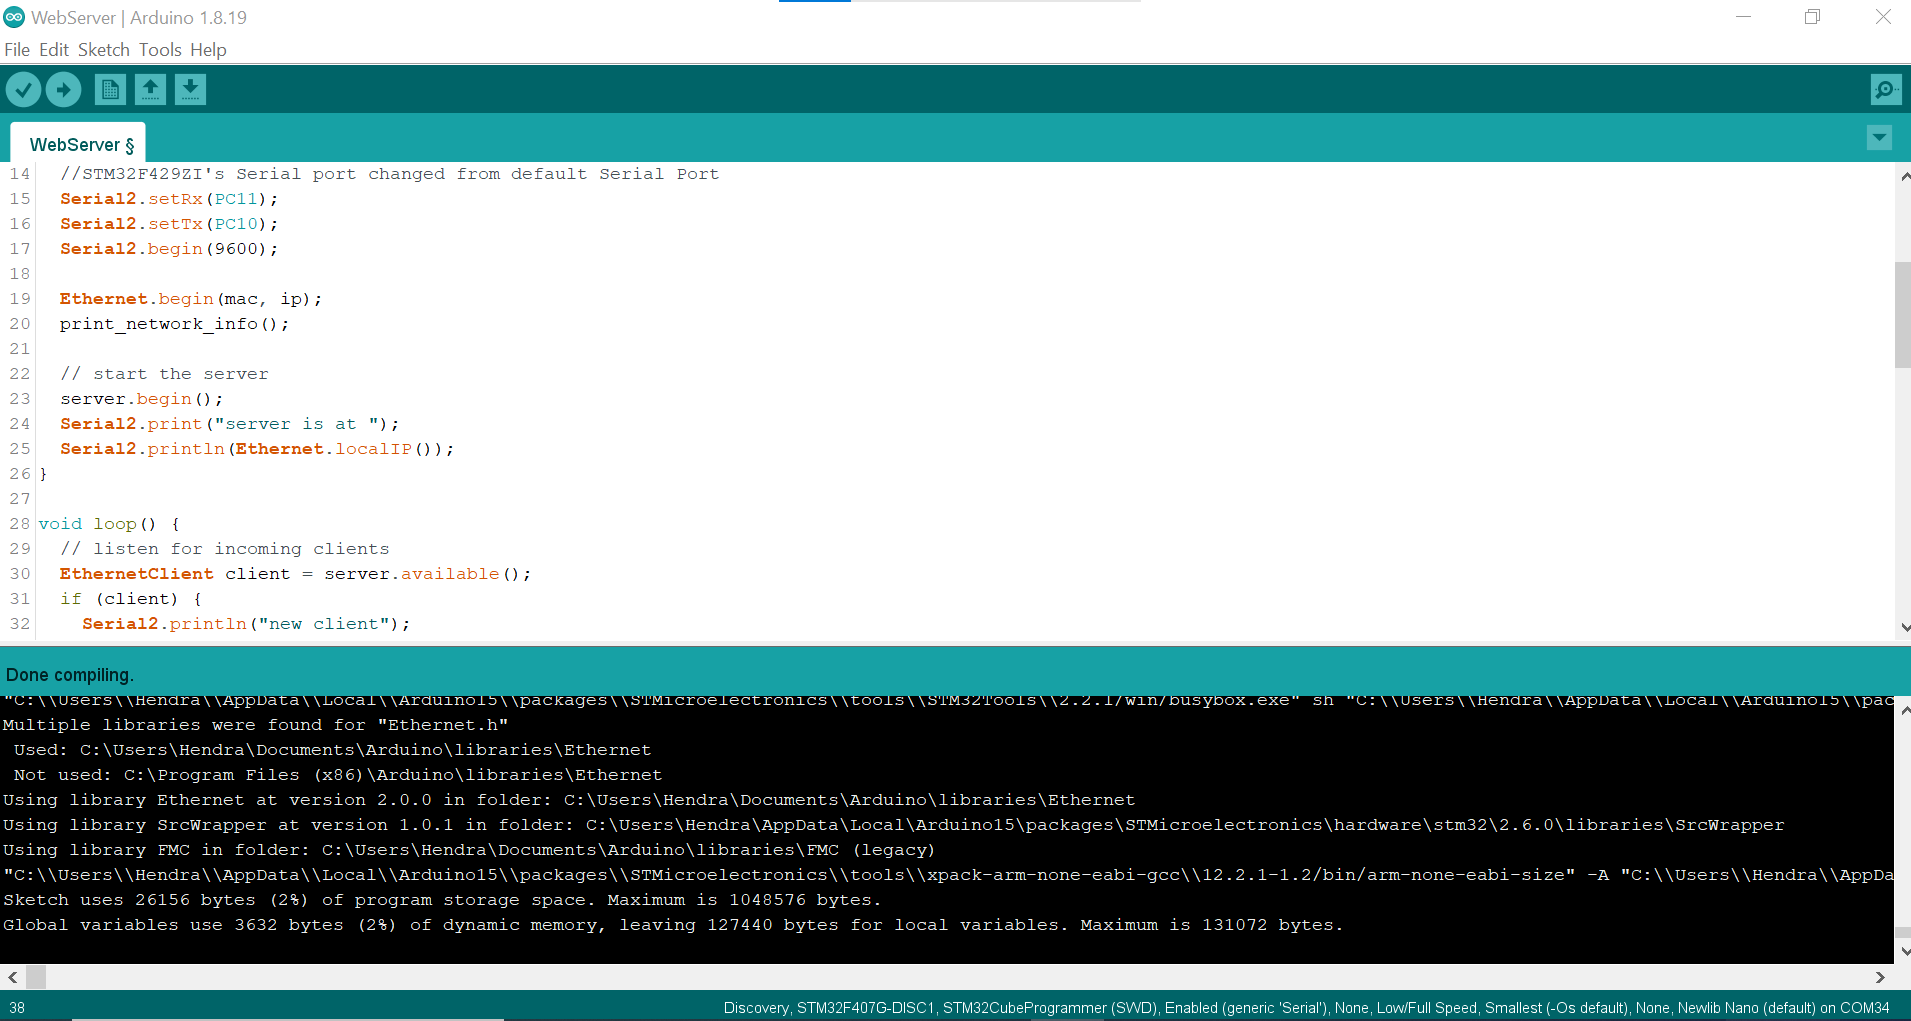
Now we need to test if the modification could compile successfully by choosing the web server examples
adjust the hardware position in anyway you like then solder the connection below the pcb
Make a local web server
To make the detection data available to the local network, I will create a simple web server based on the web server example. Simply upload the code below and change the IP address based on your network
#include <Arduino.h>
#include "Ethernet.h"
#include "Seeed_Arduino_GroveAI.h"
#include <Wire.h>#define SERVER_PORT 80
GroveAI ai(Wire);
uint8_t state = 0;
// Enter a MAC address and IP address for your controller below.
// The IP address will be dependent on your local network:
byte mac[] = {
0xDE, 0xAD, 0xBE, 0xEF, 0xFE, 0xED
};
IPAddress ip(192, 168, 1, 177);// Initialize the Ethernet server library
// with the IP address and port you want to use
// (port 80 is default for HTTP):
EthernetServer server(SERVER_PORT);void setup() {
//STM32F429ZI's Serial port changed from default Serial Port
Serial2.setRx(PC11);
Serial2.setTx(PC10);
Serial2.begin(9600);
Serial.println("Ethernet WebServer Example");// start the Ethernet connection and the server:
Ethernet.begin(mac, ip);
print_network_info();
// Check for Ethernet hardware present
if (Ethernet.hardwareStatus() == EthernetNoHardware) {
Serial.println("Ethernet shield was not found. Sorry, can't run without hardware. :(");
while (true) {
delay(1); // do nothing, no point running without Ethernet hardware
}
}
if (Ethernet.linkStatus() == LinkOFF) {
Serial.println("Ethernet cable is not connected.");
}
// start the server
server.begin();
Serial2.print("server is at ");
Serial2.println(Ethernet.localIP());
Wire.begin();Serial.println("begin");
if (ai.begin(ALGO_OBJECT_DETECTION, MODEL_EXT_INDEX_1)) // Object detection and pre-trained model 1
{
Serial.print("Version: ");
Serial.println(ai.version());
Serial.print("ID: ");
Serial.println( ai.id());
Serial.print("Algo: ");
Serial.println( ai.algo());
Serial.print("Model: ");
Serial.println(ai.model());
Serial.print("Confidence: ");
Serial.println(ai.confidence());
state = 1;
}
else
{
Serial.println("Algo begin failed.");
}
}
void loop() {
// listen for incoming clients
EthernetClient client = server.available();
if (client) {
Serial.println("new client");
// an http request ends with a blank line
boolean currentLineIsBlank = true;
while (client.connected()) {
if (client.available()) {
char c = client.read();
Serial.write(c);
// if you've gotten to the end of the line (received a newline
// character) and the line is blank, the http request has ended,
// so you can send a reply
if (c == '\n' && currentLineIsBlank) {
// send a standard http response header
client.println("HTTP/1.1 200 OK");
client.println("Content-Type: text/html");
client.println("Connection: close"); // the connection will be closed after completion of the response
client.println("Refresh: 5"); // refresh the page automatically every 5 sec
client.println();
client.println("<!DOCTYPE HTML>");
client.println("<html>");
client.println("<HEAD>");
client.println("<meta name='apple-mobile-web-app-capable' content='yes' />");
client.println("<meta name='apple-mobile-web-app-status-bar-style' content='black-translucent' />");
client.println("<link rel='stylesheet' type='text/css' href='https://randomnerdtutorials.com/ethernetcss.css' />");
client.println("<TITLE>TinyML Bird Watcher</TITLE>");
client.println("</HEAD>");
client.println("<BODY>");
client.println("<H1>Reading Result</H1>");
// output the value of each analog input pin
if (state == 1)
{
uint32_t tick = millis();
if (ai.invoke()) // begin invoke
{
while (1) // wait for invoking finished
{
CMD_STATE_T ret = ai.state();
if (ret == CMD_STATE_IDLE)
{
break;
}
delay(20);
}uint8_t len = ai.get_result_len(); // receive how many people detect
if(len)
{
int time1 = millis() - tick;
Serial.print("Time consuming: ");
Serial.println(time1);
client.print("Number of birds: ");
client.print(len);
Serial.print("Number of birds: ");
Serial.println(len);
object_detection_t data; //get datafor (int i = 0; i < len; i++)
{
Serial.println("result:detected");
Serial.print("Detecting and calculating: ");
Serial.println(i+1);
ai.get_result(i, (uint8_t*)&data, sizeof(object_detection_t)); //get result
Serial.print("confidence:");
Serial.print(data.confidence);
Serial.println();
}
}
else
{
Serial.println("No identification");
client.print("No identification");
}
client.println("<br />");
}
else
{
delay(1000);
Serial.println("Invoke Failed.");
}
}
else
{
state == 0;
}
client.println("</html>");
break;
}
if (c == '\n') {
// you're starting a new line
currentLineIsBlank = true;
} else if (c != '\r') {
// you've gotten a character on the current line
currentLineIsBlank = false;
}
}
}
// give the web browser time to receive the data
delay(1);
// close the connection:
client.stop();
Serial.println("client disconnected");
}
}void print_network_info(void){
byte print_mac[] ={0,};
Serial.println("\r\n-------------------------------------------------");
Serial.printf("MAC : ");
Ethernet.MACAddress(print_mac);
for (byte i = 0; i < 6; i++) {
Serial.print(print_mac[i], HEX);
if (i < 5) {
Serial.print(":");
}
}
Serial.println();
Serial.printf("IP : ");
Serial.print(Ethernet.localIP());
Serial.printf(": %d\r\n", SERVER_PORT);
Serial.println("-------------------------------------------------");
}
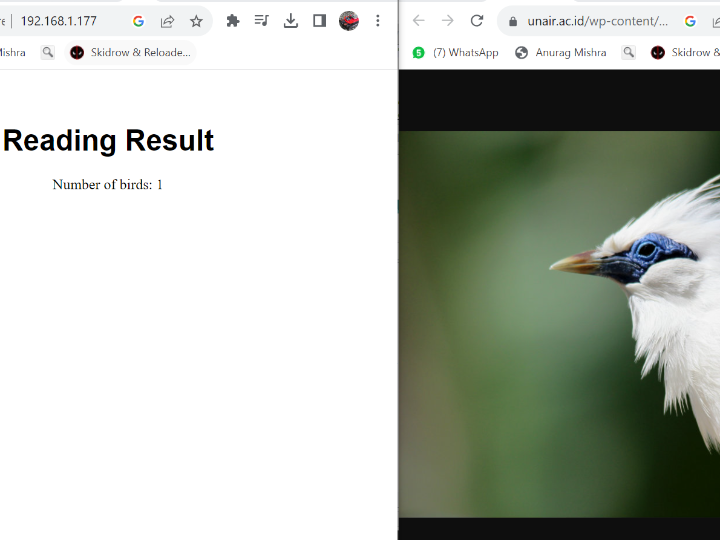
then test it out with the camera
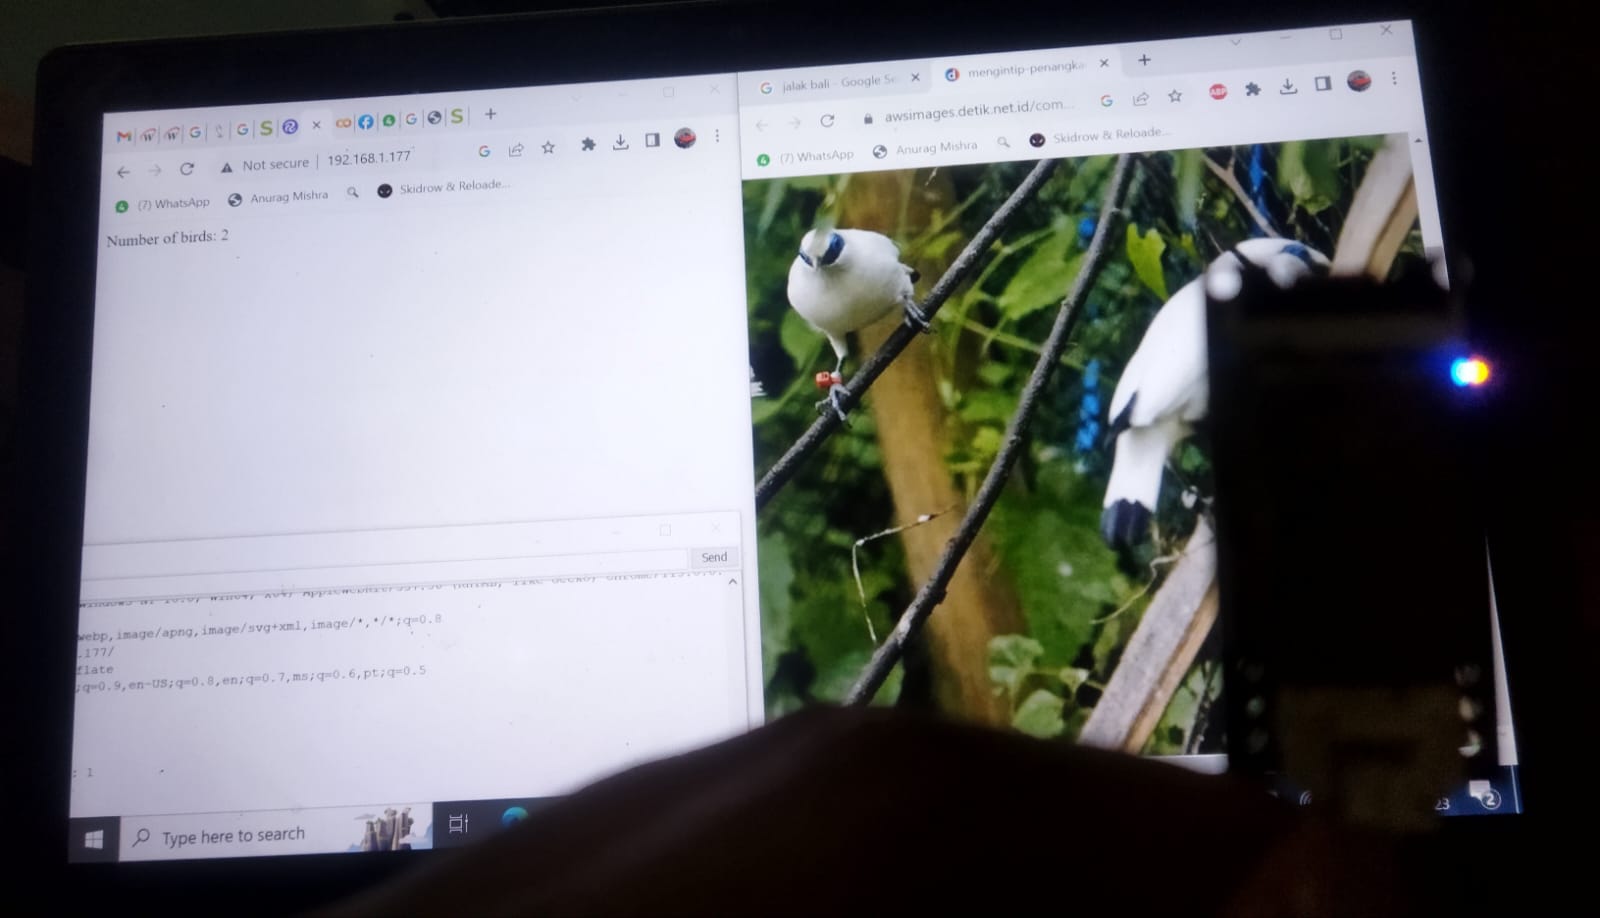
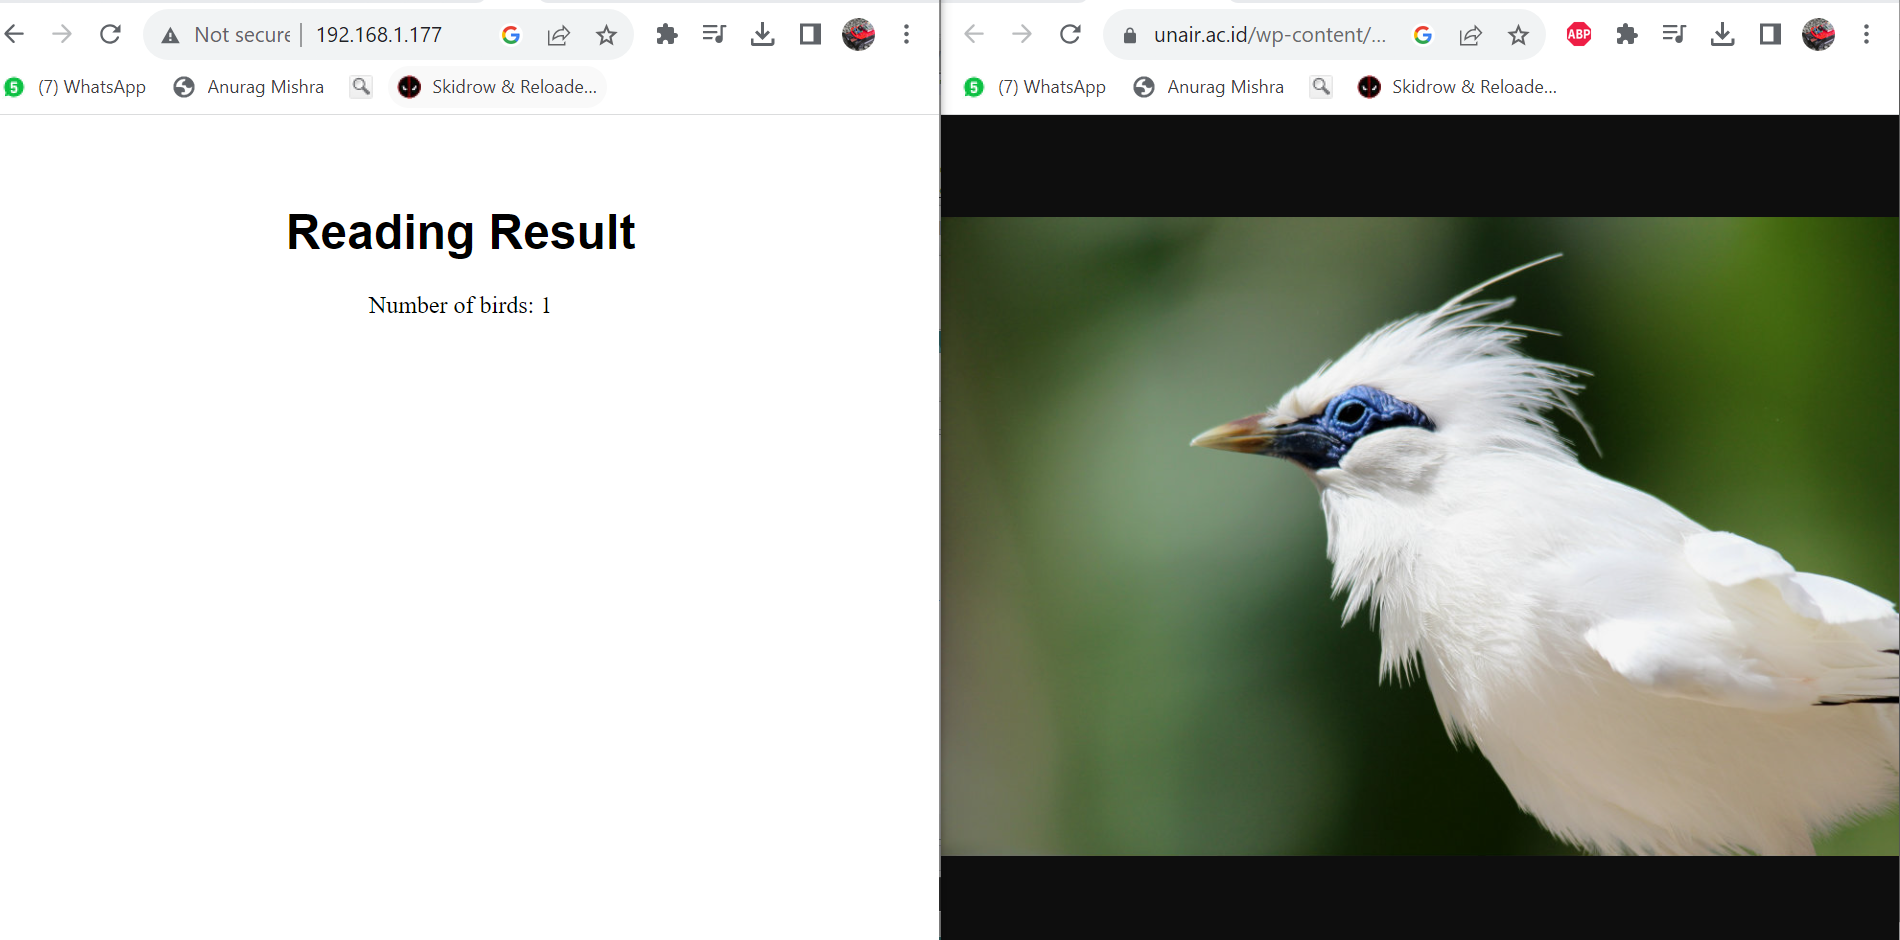
open the IP address that you set before and see the result on a web page

I add a little bit of html code to make the web page a bit more centered
Final Thought
This project is still need a lot of improvement on the web side. I spent most of the time figuring out on how to interface the w5300 module to the stm32F4 Discovery board, which quite a fun challenge to me. Hope in the future I will have more to finish and polish this project
-
data model and source code
