Skintellect: AI+IoT based skincare system
Get comprehensive skin analysis report & personalized skincare solutions using AI technology with W5300, Camera, Sensors, Display.
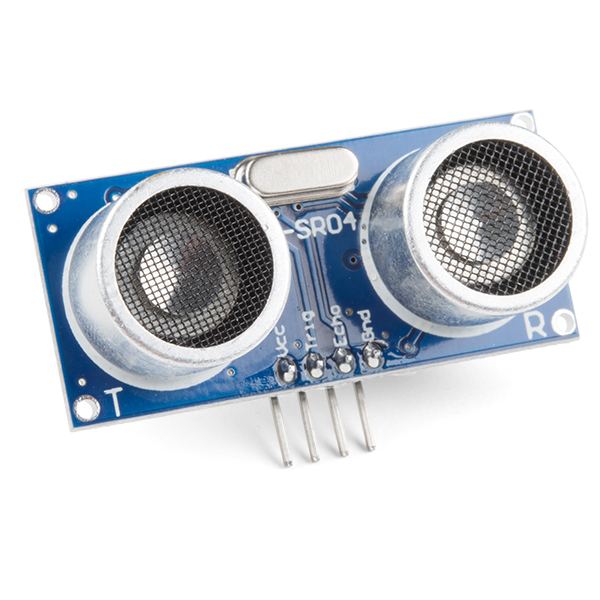
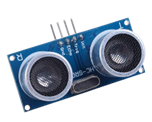
sparkfun - Ultrasonic Sensor - HC-SR04
x 1

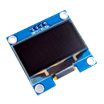
seeed - Grove - OLED Display 1.12'' V2
x 1

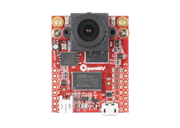
OpenMV - OpenMV Cam H7
x 1
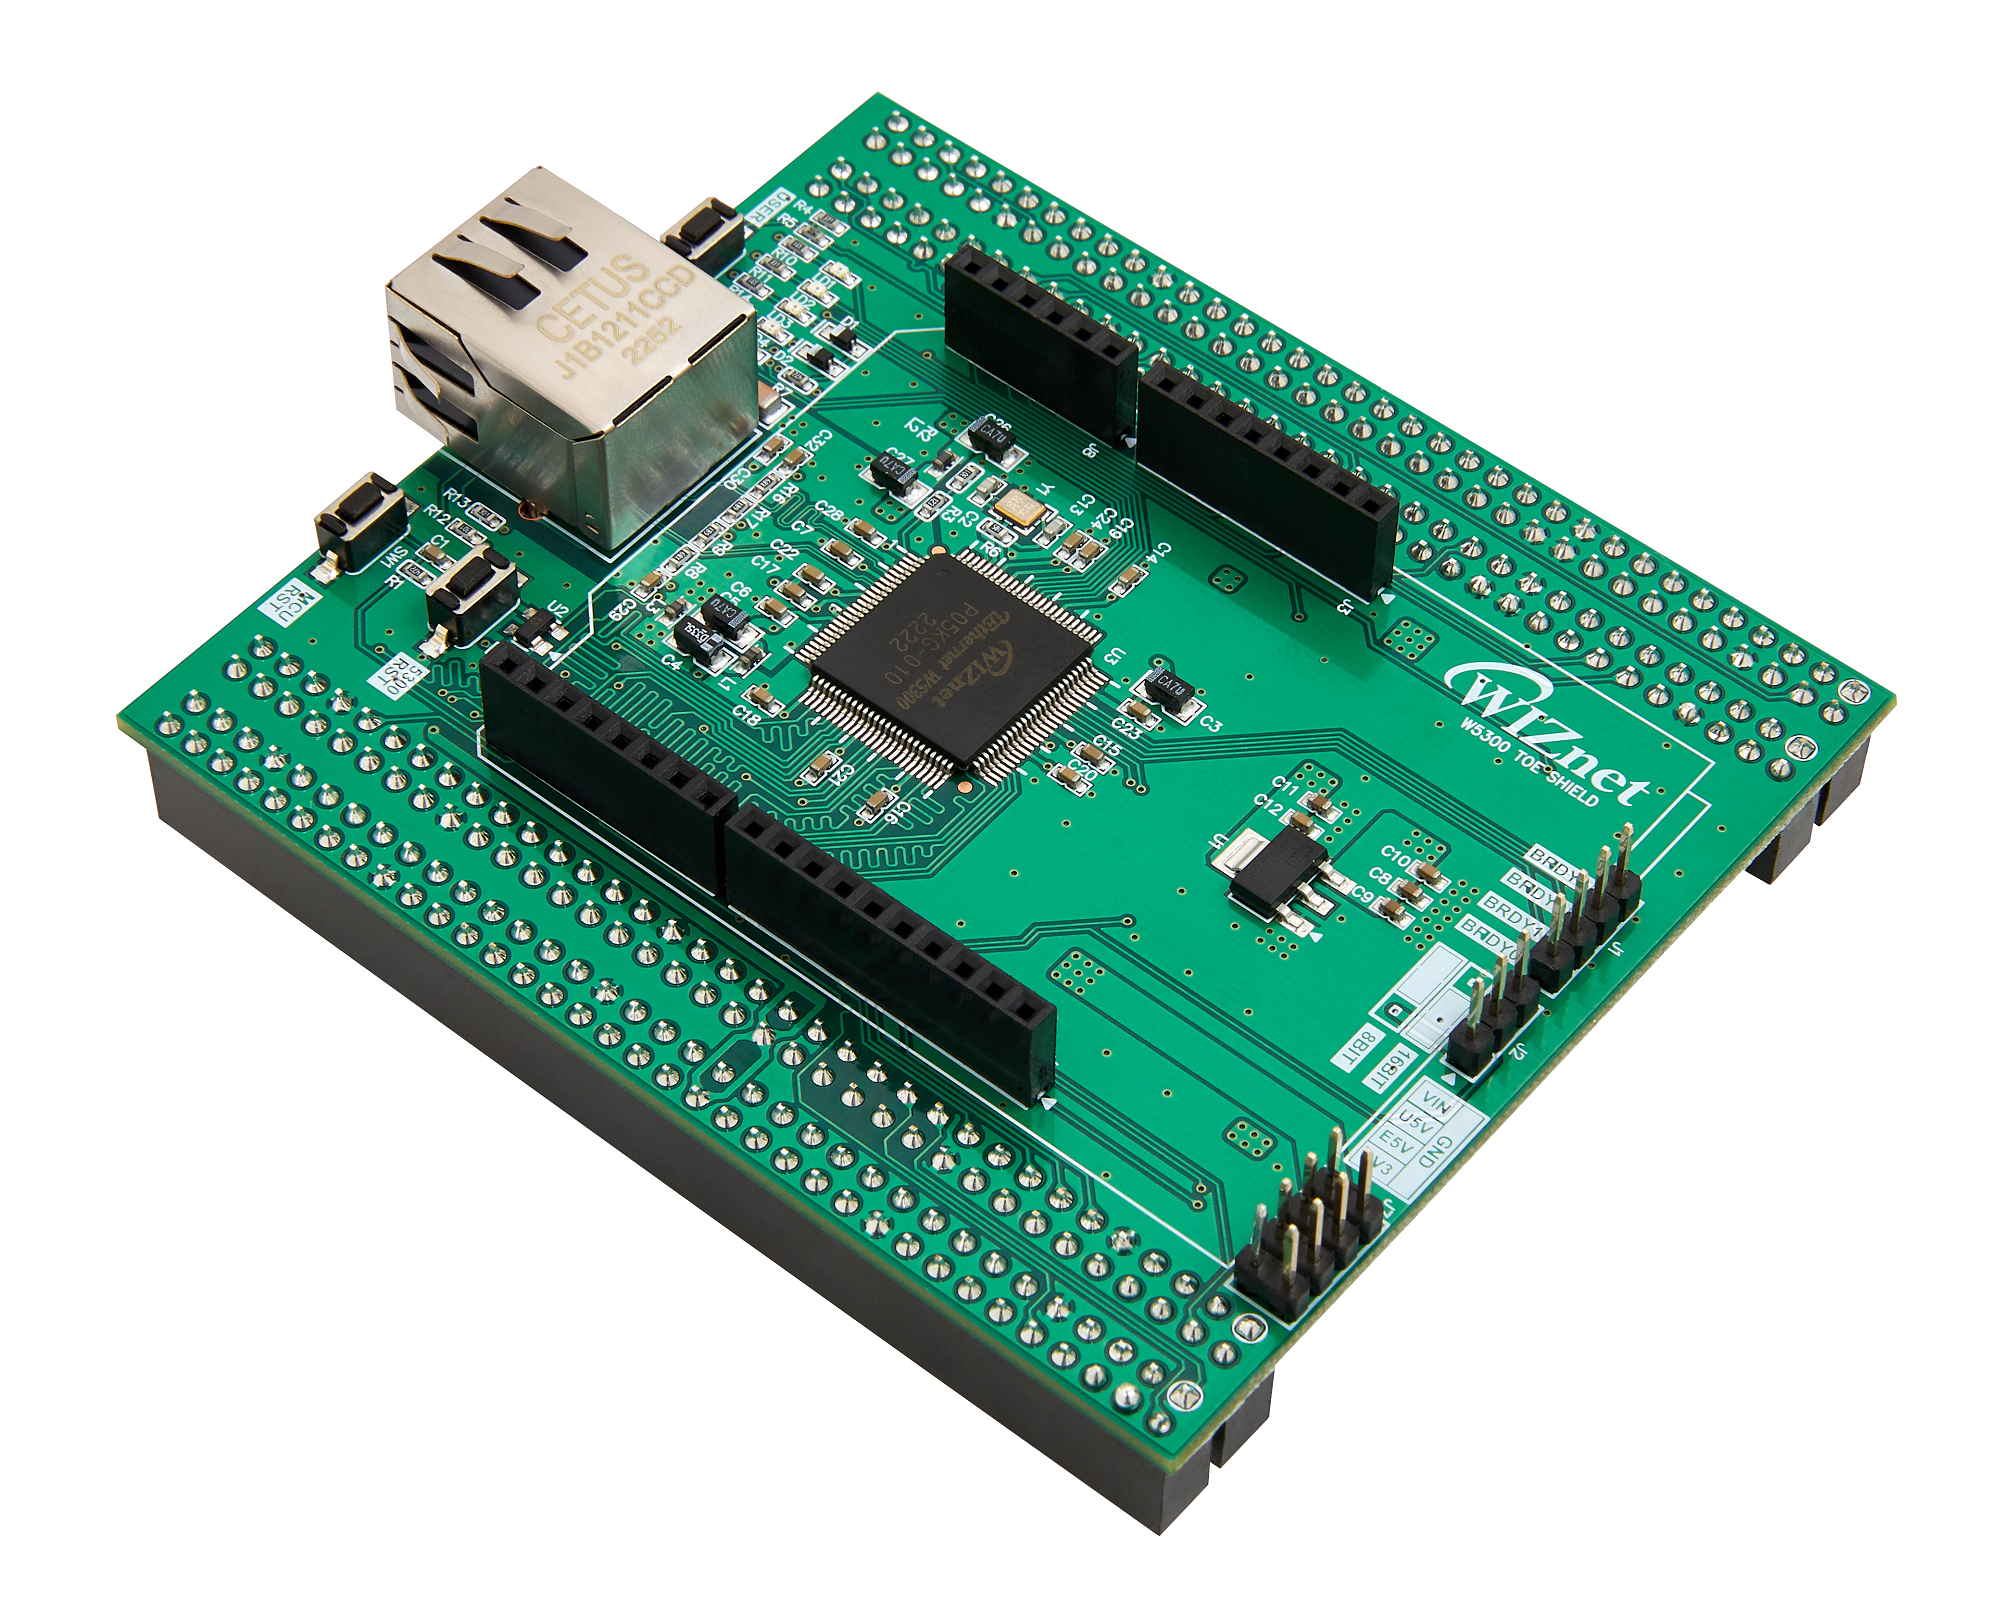
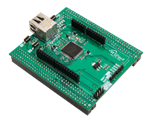
WIZnet - W5300-TOE-Shield
x 1
twilio - SMS Messaging API
x 1
OpenAI - ChatGPT
x 1
OpenCV - OpenCV
x 1
Eclipse - Paho MQTT
x 1
SKINTELLECT: AI + IOT BASED SKIN ANALYSIS & RECOMMENDATIONS SYSTEM
STORY
In the past, obtaining a comprehensive skin analysis was a cumbersome and time-consuming process, impacting people's daily lives in various ways. The journey often began with individuals recognizing the need to assess their skin health due to concerns or changing skin conditions. To get their skin analyzed, individuals had to schedule appointments with dermatologists or specialized skin clinics, juggling busy work schedules and personal commitments to make time for these visits. The first obstacle was navigating through traffic and commuting to the clinics, which consumed valuable time and added stress to an already hectic lifestyle. Once at the clinic, patients often faced long wait times before meeting the dermatologist.
During the initial consultation, the dermatologist conducted a basic examination of the skin. However, for a more detailed analysis, additional specialized tests were often recommended, requiring separate appointments and further waiting for test results. The process of visiting the clinic multiple times for different tests meant days and even weeks of waiting for comprehensive results, leading to anxiety and uncertainty, causing further frustration. For individuals with demanding careers and busy personal lives, taking time off for multiple clinic visits was not only inconvenient but also challenging, balancing professional commitments with the pursuit of skin health became a daunting task.
Upon receiving the skin analysis report, patients often found the recommendations to be generic and lacking personalization, realizing that a more tailored approach to skincare was necessary for optimal results. However, this historical narrative underwent a paradigm shift with the advent of modern solutions that revolutionized skincare analysis. The introduction of technology, artificial intelligence, and innovative concepts marked a transformative era in skincare.
The integration of artificial intelligence empowered individuals to take charge of their skin health like never before, providing personalized care that addressed their specific skin conditions. This transformative shift marked a profound change, freeing people from the burden of time-consuming clinic visits and granting them the power to make informed skincare choices on their terms. Modern solutions opened new possibilities, allowing individuals to effortlessly integrate skincare analysis into their busy lives. With personalized benefits, individuals could embark on a journey of skincare with confidence, knowing that optimal results were within reach - all through a simple, efficient, and modern solution.
INTRODUCTION
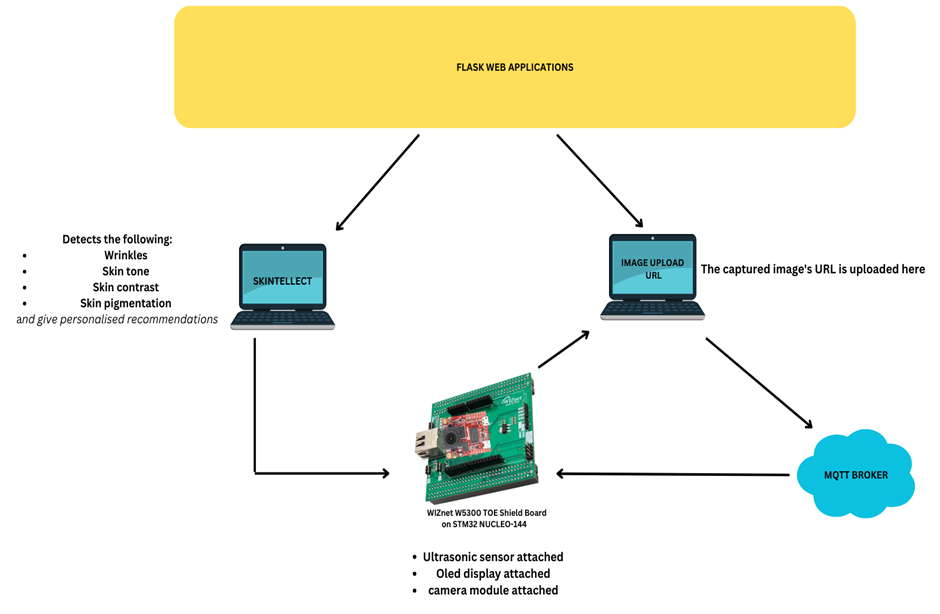
This innovative project is designed to revolutionize the process of obtaining a comprehensive skin analysis and personalized skincare recommendations. By leveraging advanced technologies such as the W5300-MQTT-CAM and QRCode based system with a small display screen, artificial intelligence, and data-driven analysis, it offers a seamless and user-friendly experience.
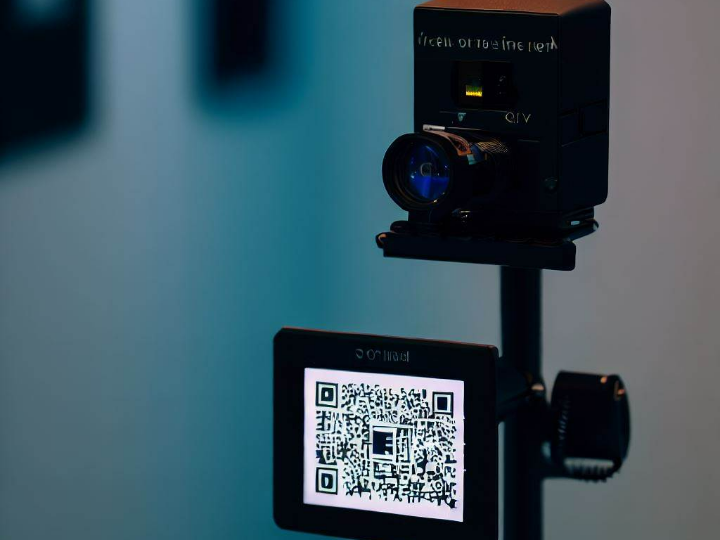
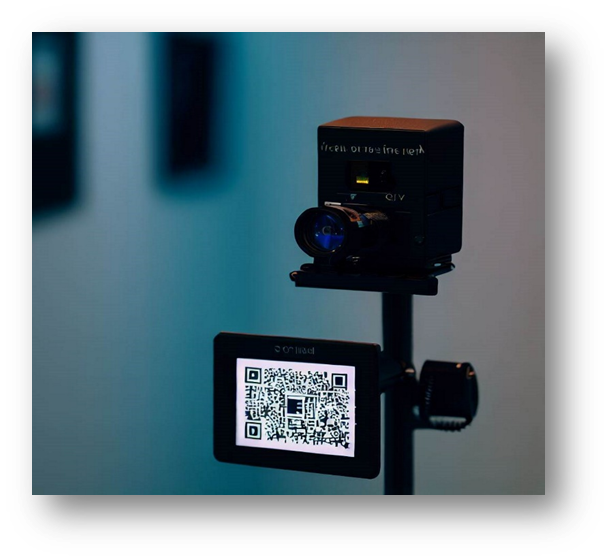
Users can approach the booth and view a small display screen that shows a QR code for scanning. The moment a person comes within 1-meter range of the booth, the display screen activates and presents the QR code for scanning. If no one is in the proximity, it displays an inviting message, "Try SKINTELLECT!".
Once the user scans the QR code using their smartphone, the skin analysis process is initiated. They are then prompted to input their email id, phone number, age, and gender, which is collected and stored for further communication.
The W5300-MQTT-CAM module captures the user's picture, and the image is processed in the background using AI algorithms for skin pigmentation, skin tone, wrinkles, and skin contrast analysis.
The AI module generates values for various skin parameters, creating a detailed skin analysis report. This report includes insights into the presence of wrinkles, skin tone, skin texture, and pigmentation, along with personalized recommendations. The results are sent to the user's email id and phone number via email and SMS.
Additionally, this project includes Telegram notifications, where an automated message is sent to the administrator's Telegram account after the report is generated.
Moreover, this project offers personalized product recommendations powered by OpenAI (GPT 3.5), tailored to each individual's specific skin needs and concerns based on their analysis results.
By eliminating the need for multiple visits to dermatologists or clinics and reducing waiting periods for results, this project empowers users to take charge of their skincare journey conveniently and efficiently, making informed decisions for healthier and radiant skin. It also benefits skincare professionals and booths by enhancing customer experiences with detailed skin analysis and tailored product recommendations.
With a user-friendly interface and data-driven approach, this project promises to revolutionize skincare analysis, offering a seamless and personalized skincare experience for all users. It unlocks the true potential of every individual's skin health, making it an indispensable tool in the skincare industry. The future of skincare analysis is brighter than ever with this innovative project, offering a new era of personalized care.
WHY SKINTELLECT?
- Advanced technology: IoT, AI, and data-driven analysis.
- Personalized skincare recommendations based on individual analysis.
- Convenient and efficient - QR code scanning for analysis.
- Secure data handling for privacy protection.
- Enhanced customer experience with detailed reports.
- Hassle-Free Setup and Usage
LIBRARIES, SOFTWARE COMPONENTS AND ONLINE SERVICES USED
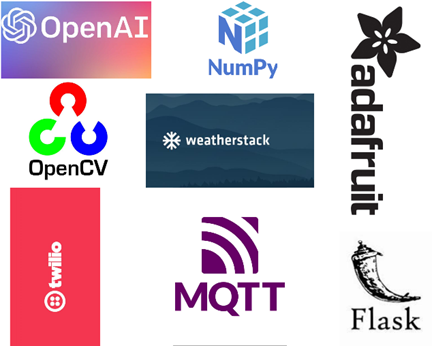
Here's the list of software components used in the project:
1. Flask
2. MQTT broker
3. mtcnn
4. OpenCV
5. Adafruit SSD130
6. Twilio API
7. smtplib
8. requests
9. jsonify
10. Weatherstack API
11. OpenAI (GPT 3.5)
12. Telegram Bot API
HARDWARE COMPONENTS USED
Here's the list of hardware components used in the project:
Ultrasonic sensor (HC-SR04)
OLED display (Adafruit SSD1306)
WIZnet W5300 TOE Shield Board
OpenMV H7 camera module
Jumper wires
Breadboard

PROGRAMMING LANGUAGES USED
Here's the list of programming languages used in this project:
- Python
- HTML
- CSS
- JAVASCRIPT
- C/C++
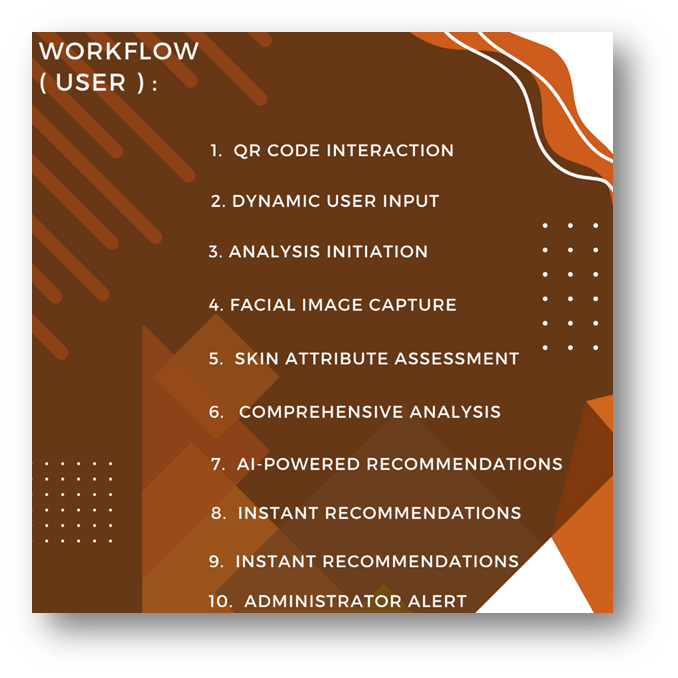
WORK FLOW (USER SIDE)
From the user's perspective, the overall working of the SKINTELLECT project can be explained as follows:
1. QR Code Interaction: Users approach the SKINTELLECT booth with an integrated small screen and camera. A QR code is displayed on the screen when a user is within a 1-meter range, encouraging them to scan it using their smartphone's camera.
2. Dynamic User Input: After scanning the QR code, users are prompted to input their email address, phone number (with country code), age, and gender. Valid inputs are required for further analysis.
3. Analysis Initiation: Once the required details are provided, users tap the "Start Analysis" button. This triggers JavaScript to collect and send the data to the server for processing.
4. Backend Processing: Using Flask, the server communicates with MQTT. It sends a command via MQTT to capture the user's facial image through the attached W5300-MQTT-CAM device.
5. Facial Image Capture: The W5300-MQTT-CAM captures the user's facial image, which undergoes computer vision analysis. MTCNN identifies if a face is present.
6. Skin Attribute Assessment: Skin analysis begins if a face is detected:
- Wrinkle Detection: The number of edges on the face indicates wrinkle presence.
- Skin Tone Analysis: LAB colour space assesses skin tone.
- Skin Texture Analysis: GLCM calculates contrast and dissimilarity for texture.
- Pigmentation Analysis: HSV colour space isolates pigmented regions.
7. Comprehensive Analysis: Collected data, analysis results, and user inputs compile into a detailed skin analysis report.
8. AI-Powered Recommendations: The report prompts OpenAI. AI generates personalized skincare suggestions based on analysis results and user data.
9. Instant Recommendations: Users receive skincare recommendations via email and SMS, delivered by Gmail SMTP and Twilio APIs.
10. Administrator Alert: The administrator gets a Telegram notification when a report is generated. This can aid further product analysis.
This innovative update enhances user engagement by displaying a QR code on a screen for proximity-based interaction, streamlining the process and making personalized skincare accessible in a touchless manner.
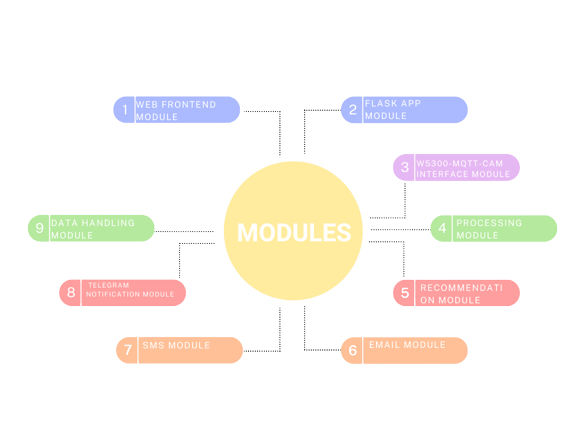
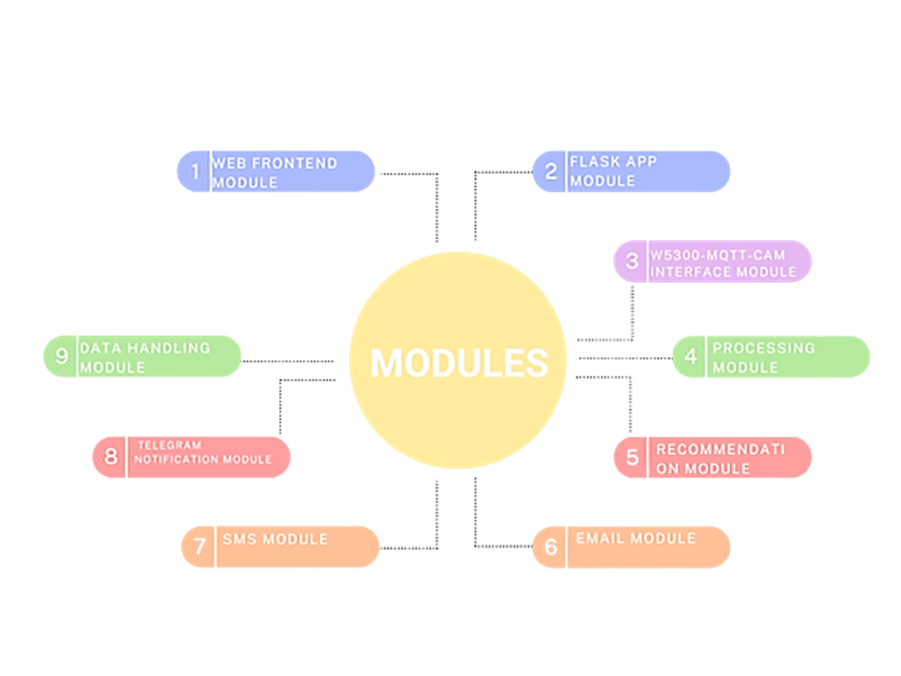
MODULES
Here's a detailed explanation of each module in a step-by-step manner:
1. Web Frontend Module:
- This module creates the user interface for the SKINTELLECT web application.
- It displays a header with the title "SKINTELLECT" and a subheading "Intelligent Skin Analysis."
- It includes input fields for the user to enter their email address, phone number, gender, and age.
- The user clicks the "Start Analysis" button to initiate the skin analysis process.
2. Flask App Module:
- The Flask app module handles incoming requests from the web frontend.
- When the user clicks the "Start Analysis" button, the app collects the entered data, including email, phone number, gender, and age.
- It then sends a request to the MQTT Module to trigger image capture by the W5300-MQTT-CAM device.
- Once the image is uploaded, it is stored and an HTTP URL is generated.
- This URL offers a direct path for any internet-connected device to access the image.
3. W5300-MQTT-CAM Interface Module:
- WIZnet W5300-TOE-Shield: This module is intricately connected to the STM32 Nucleo-144 (F429ZI) boards, acting as the linchpin for internet connectivity. With its high-speed data transmission capability, the shield ensures real-time or near-real-time transmission of images, depending on the chosen resolution.
- Upon receiving the request from the Flask app, it sends a command to the W5300-MQTT-CAM to capture the user's facial image.
- The OpenMV camera module captures high-quality images on command
- The captured image is then saved for further processing.
4. Image Processing Module:
- The Image Processing module processes the captured facial image to analyze skin attributes.
- It uses the MTCNN algorithm for face detection to locate the user's face in the image.
- After detecting the face region, it calculates the number of wrinkles based on the edges in the face region.
- It analyses the colour and texture of the skin to determine skin tone and skin contrast.
- Additionally, it identifies skin pigmentation by isolating pigmented regions in the image.
5. Recommendation Module:
- The Recommendation module generates personalized skincare recommendations based on the user's skin analysis results and other input data.
- It sends the skin analysis results to the OpenAI API to request detailed skincare suggestions.
- The OpenAI model processes the input and generates personalized recommendations.
- The generated recommendations are received and extracted from the OpenAI API response.
6. Email Module:
- This module sends the personalized skincare recommendations to the user's email address.
- It uses the Gmail SMTP server for sending the email.
- The email includes the skin analysis results, along with the generated skincare suggestions.
7. SMS Module:
- The SMS Module sends personalized skincare recommendations to the user's phone number via SMS.
- It integrates with the Twilio API for sending SMS messages.
- The SMS includes the skin analysis results and the skincare suggestions.
8. Telegram Notification Module:
- This module sends a notification to the user's Telegram app to inform them that the SKINTELLECT report has been generated.
- It utilizes the Telegram bot API for sending the notification.
- The notification message includes a prompt for the administrator that a report has been generated for someone (providing no other information, for privacy).
- This is mainly for administrative purpose for better analysis of how product is being used etc.…
9. Data Handling Module:
- The Data Handling module is responsible for securely storing and retrieving user data, including email addresses, phone numbers, and skin analysis results.
- It ensures that user data is properly handled and protected.
BACKEND PROCESS (DEVELOPER SIDE)
Backend Process of SKINTELLECT:
1. Web Frontend Interaction and Proximity Detection:
- When a user is within a 1-meter range of the SKINTELLECT device, they can access the SKINTELLECT web application by scanning a QR code (that gets displayed on oled screen attached only when user is in 1 meter range: ultrasonic sensor otherwise shows “Try Skintellect!!” message) and opening a web browser on their device.
- They are greeted with a header displaying the title "SKINTELLECT" and a subheading "Intelligent Skin Analysis."
- Input fields are provided for the user to enter their email address, phone number (including the country code), gender, and age.
- To initiate the skin analysis process, the user clicks the "Start Analysis" button.
2. Flask App Communication:
- The Flask app module is activated when the user clicks the "Start Analysis" button after filling in their details.
- The Flask app collects the entered data, including the user's email address, phone number, gender, and age.
- This data is then packaged into a request to be sent to the MQTT module.
3. W5300-MQTT-CAM Image Capture:
- The request from the Flask app module reaches the W5300-MQTT-CAM interface module.
- Upon receiving the request, this module communicates with the W5300-MQTT-CAM device.
- A command is sent to the W5300-MQTT-CAM device to capture the user's facial image.
- The captured image is then stored for further processing.
4. Image Processing and Analysis:
- The captured facial image undergoes analysis in the Image Processing module.
- The MTCNN algorithm is used for face detection, accurately locating the user's face within the image.
- The module calculates the number of wrinkles by analyzing the edges in the facial region.
- Skin tone and skin contrast are determined by analyzing the colour and texture of the skin.
- Pigmentation regions are identified by isolating specific colours in the image using the HSV color space.
5. Data Integration with OpenAI:
- After skin attributes are analyzed, the Recommendation module comes into action.
- The skin analysis results, along with other input data, are sent to the OpenAI API.
- The OpenAI model processes this input and generates personalized skincare recommendations tailored to the user's skin analysis and other factors.
6. Sending Recommendations via Email and SMS:
- The personalized skincare recommendations are sent to the user via both email and SMS.
- The Email module uses the Gmail SMTP server to send an email containing the skin analysis results and skincare suggestions.
- The SMS module integrates with the Twilio API to send an SMS message to the user's phone number, including the same information.
7. Telegram Notification for Admin:
- Additionally, the Telegram Notification module provides administrative oversight.
- A notification is sent to the administrator's Telegram app, indicating that a report has been generated.
- This notification helps administrators keep track of the reports generated and usage trends without compromising user privacy.
8. Secure Data Handling:
- Throughout this process, the Data Handling module ensures the proper handling and protection of user data.
- User information, such as email addresses, phone numbers, and skin analysis results, are securely stored and retrieved as needed.
GET STARTED
Let's walk through the detailed steps to set up and run the SKINTELLECT application on a different machine, incorporating the ultrasonic sensor and Adafruit OLED screen. This comprehensive guide covers hardware setup, software configuration, API integration, and more:
Arduino Environment:
To configure Arduino environment for STM32 Nucleo-144 (F429ZI), you need to follow the instructions of WIZnet official website.
LINK: https://github.com/Innovation4x/W5300-MQTT-CAM#arduino-environment
Hardware Setup:
1. W5300-MQTT-CAM Device Setup:
- Connect the W5300-MQTT-CAM device to the machine using the appropriate interface (e.g., USB).
- Ensure the device is recognized by the operating system. Install any required drivers or libraries
for the W5300-MQTT-CAM to function properly.
2. Ultrasonic Sensor and Adafruit OLED Setup:
- Connect the ultrasonic sensor to the machine's GPIO pins according to its specifications.
- Connect the Adafruit OLED screen to the machine's GPIO pins as well.
- Make sure both the ultrasonic sensor and OLED screen are correctly recognized by the system.
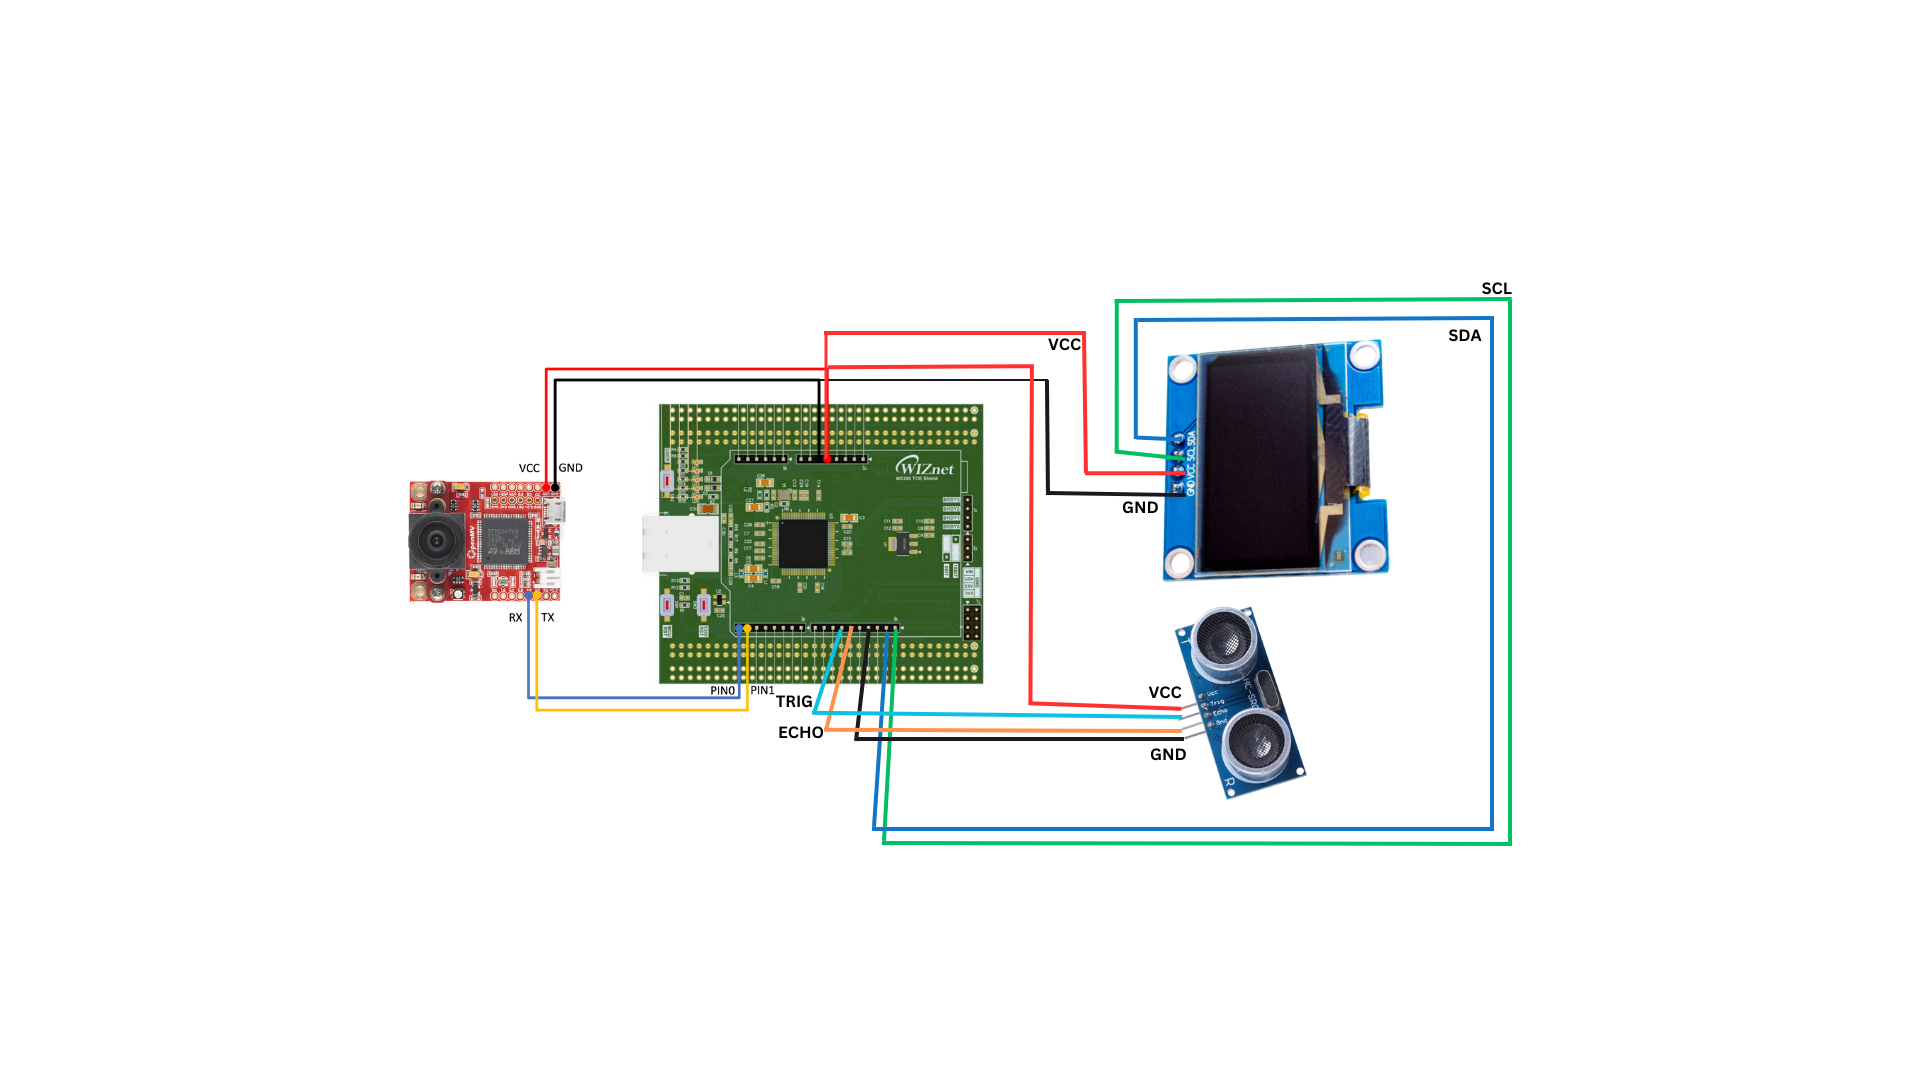
PIN CONFIGURATION:
Ultrasonic Sensor Pin Board Pin
Pin1 (Vcc) | 3.3V |
Pin 2 (Ground) | GND |
Pin3 (SCL) | GPIO PIN (15) |
Pin4 (SDA) | GPIO PIN (14) |
OLED Display Pin Board Pin
(Vcc) | 5V |
(Trigger) | GPIO PIN (11) |
(Echo) | GPIO PIN (12) |
(Ground) | GND |
CIRCUIT DIAGRAM:
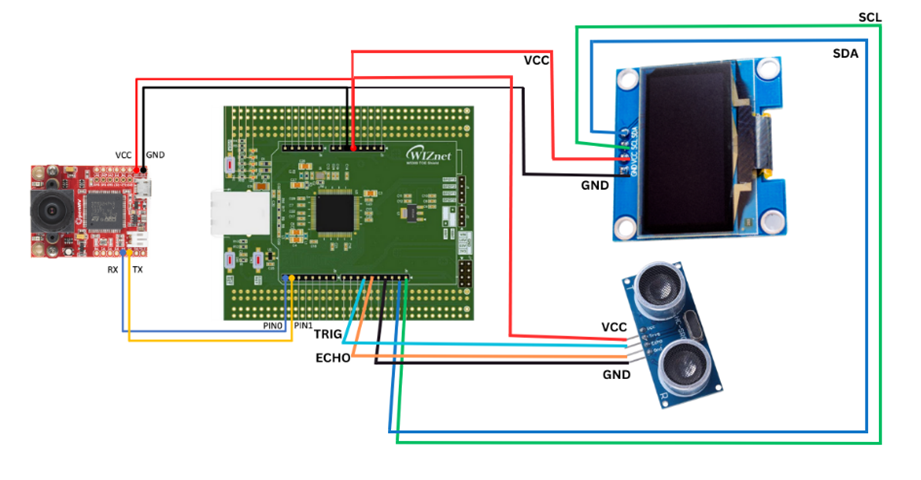
HARDWARE CONFIGURATION FOR OPENMV CAMERA MODULE AND STM32 NUCLEO-144 BOARD:
Prepare Both Modules:
- Ensure both the STM32 Nucleo-144 board and the OpenMV camera module are powered off to prevent any accidental shorts or damage.
- Lay out both modules on a non-conductive surface.
Serial Connection:
- Connect the TX pin (pin 1) of the STM32 Nucleo-144 board to the UART3_RX (P5) pin of the OpenMV camera module. This will allow the Nucleo-144 board to transmit data which the OpenMV camera module will receive.
- Connect the RX pin (pin 0) of the STM32 Nucleo-144 board to the UART3_TX (P4) pin of the OpenMV camera module. This setup ensures the Nucleo-144 board can receive data transmitted by the OpenMV camera module.
Power Connection:
- Connect the GND (Ground) pin of the OpenMV camera module to the GND pin of the STM32 Nucleo-144 board. This establishes a common ground between the two devices.
- Connect the VCC pin of the OpenMV camera module to the VCC (or an appropriate power supply pin, depending on the voltage requirements of the OpenMV) pin of the STM32 Nucleo-144 board. This will power the camera module.
Software Setup:
3. Python Installation:
- If Python is not already installed on the machine, download and install the latest version from the official Python website: https://www.python.org/downloads/
4. Environment Setup:
- Open a terminal or command prompt and navigate to the project directory.
- Create a virtual environment (recommended) to isolate project dependencies:
python -m venv skintellect-env
- Activate the virtual environment:
- On Windows: `skintellect-env\Scripts\activate`
- On macOS and Linux: `source skintellect-env/bin/activate`
5. Install Dependencies:
- Install required Python packages and libraries using pip:
pip install Flask paho-mqtt requests numpy opencv-python matplotlib scikit-image openai
6. Install MTCNN:
- MTCNN (Multi-task Cascaded Convolutional Networks) is a popular face detection and alignment library in Python.
Steps:
- Open a terminal or command prompt.
- Run the following command to install the MTCNN library: pip install mtcnn
API Integration and Configuration:
6. API Key Acquisition:
- Obtain API keys and tokens for the following APIs:
- Weatherstack API: For fetching temperature and humidity data.
Steps:
1. Visit: https://weatherstack.com/
2. Click on "SIGN UP FREE"
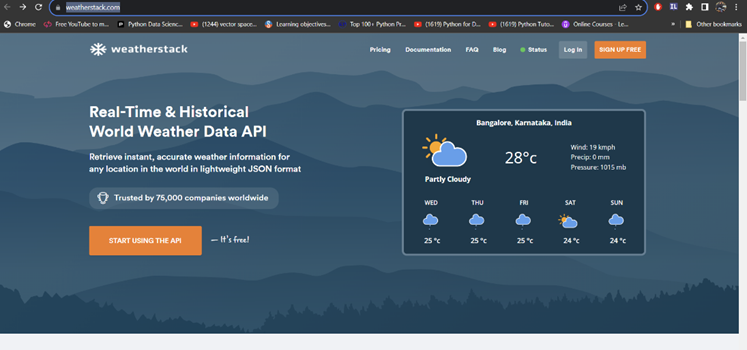
3. Select "SIGN UP FREE ACCOUNT"
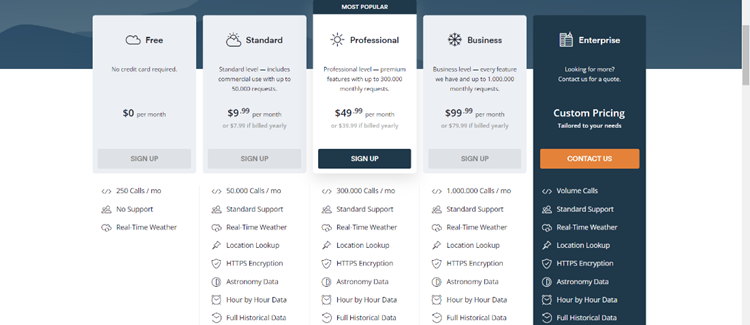
4. Navigate to your DASHBOARD
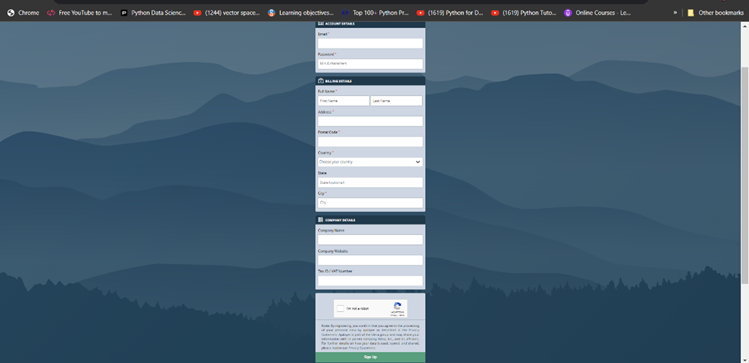
5. Your API ACCESS KEY WILL BE SHOWED THERE
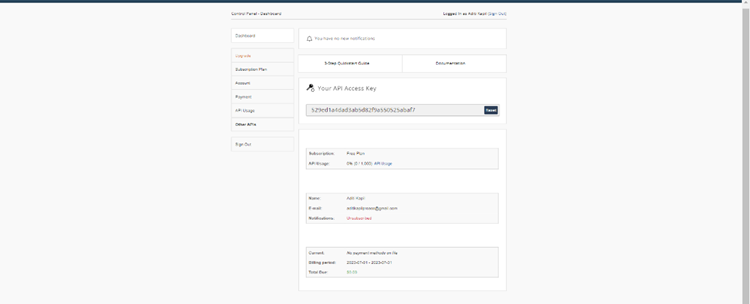
6. Copy it and use it in the python code
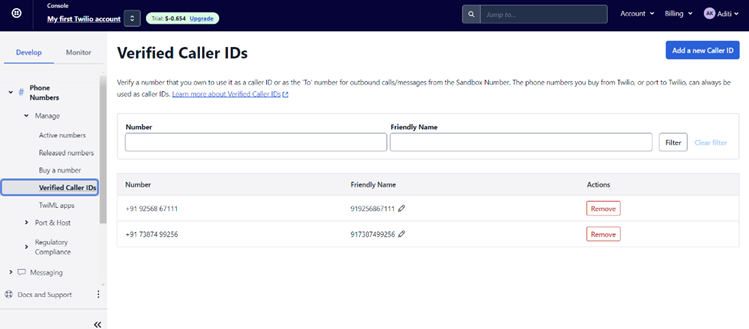
- Twilio API: For sending SMS notifications.
Steps:
1. Visit: https://www.twilio.com/en-us
2. Login/sign up
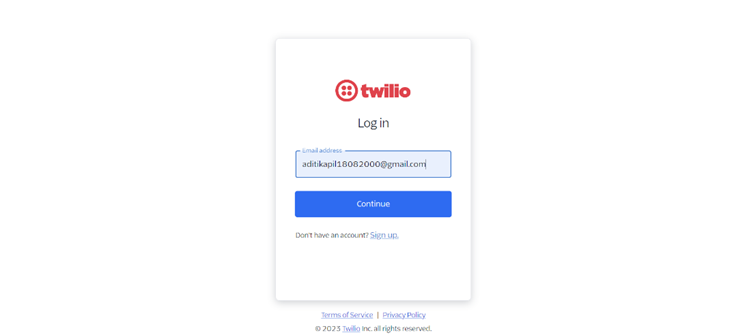
3. Your DASHBOARD will open
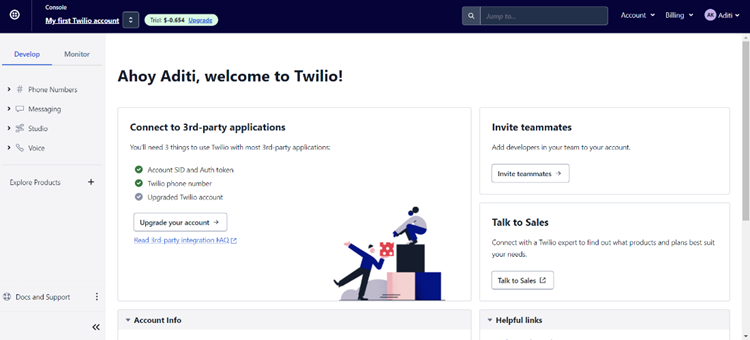
4. Navigate down, you will find account SID, Auth Token, My Twilio phone number
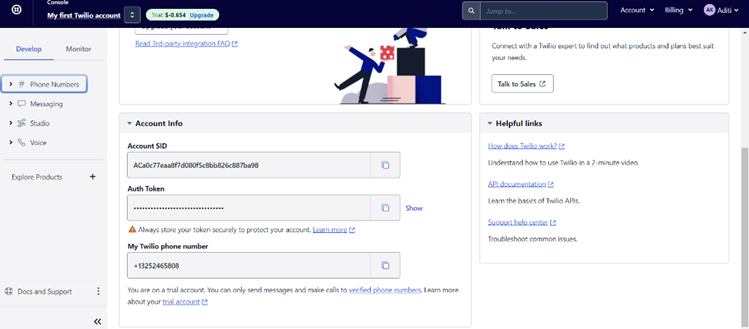
5. Copy and use them in python code for sending SMS
6. Remember, you can only send SMS to registered phone numbers
7. For that, click on " Phone Numbers" in left of DASHBOARD -> MANAGE -> Verified Caller IDs -> Register the numbers you want to send SMS to
- Telegram Bot API: For sending Telegram notifications.
Steps:
1. Visit: Your Telegram App
2. Search for "BotFather"
3. send "/newbot" message
4. Enter a name for bot you want to create
5. Choose a username
6. Your bot will be created
7. Copy the API TOKEN given in last message of "BotFather"

8. Start chatting with your bot (send a few messages)
9. Paste the API Token in python code file "getchat_id", run it
10. It will print the chat id
11. Copy the chat Id and paste it wherever asked
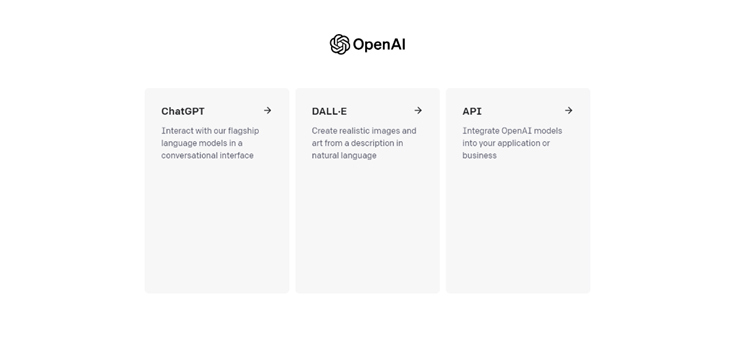
- OpenAI API: For generating personalized skincare recommendations
Steps:
1. Visit: https://openai.com/
2. Click on Sign in/Log in
3. Select "API"
4. Your DASHBOARD will open
5. Click on "PERSONAL"
6. Select "View API keys"
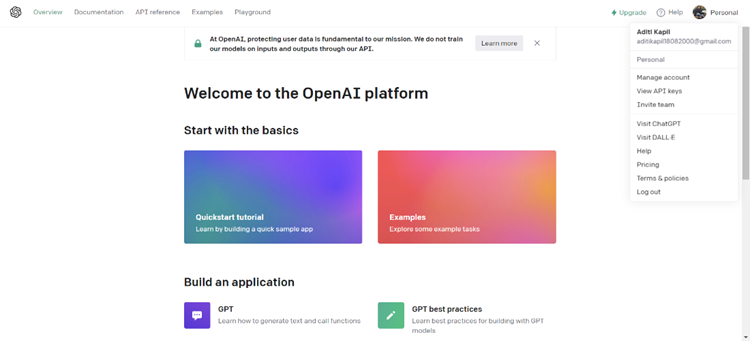
7. Copy API KEY given/ create yours and use it in your code

API Key Integration:
- In the relevant code files (`twilio_module.py`, `telegram_module.py`, `openai_module.py`), replace placeholder strings (e.g., 'YOUR_API_KEY', 'YOUR_TELEGRAM_BOT_TOKEN') with your actual API keys.
MQTT Broker Setup:
8. Install and Configure MQTT Broker:
- If you don't have an MQTT broker, consider using MQTTX or another suitable option.
- Install and configure the MQTT broker according to your machine's specifications.
9. Update Flask App Code:
- In the `app.py` file, ensure the MQTT broker's address and port are correctly set in the `broker_address` and `broker_port` variables.
Web Frontend and UI Customization:
10. Frontend Customization:
- Customize the web frontend using HTML, CSS, and JavaScript files in the `templates`(should be under Python folder) directory.
- Modify the layout, styles, and UI components to match your preferences.
Email Configuration:
12. Email Settings:
- If using Gmail for sending emails:
- Replace `sender_email` and `sender_password` placeholders in the `email_module.py` file with your Gmail credentials.
- Adjust the email configuration if you're using a different email provider.
Final Configuration:
13. Adjust Paths and Parameters:
- Update paths, filenames, and other parameters in the code to match your machine's directory structure and configuration.
Running the Application:
14. Start Flask App:
- Two flask web apps are being used in this project:
1. FOR ACCESSING SKINTELLECT and
- Open a terminal or command prompt.
- Navigate to the project directory.
- Activate the virtual environment if you created one.
- Run the Flask apps: python app.py(port number: 5000) and cam_app.py(port number: 5001)
- The apps will start, and you'll see output indicating that it's running, likely something like
"Running on http://127.0.0.1:5000/".
15. Access the Application:
- Open a web browser and enter the URL shown in the output (e.g., http://127.0.0.1:5000/) to access the SKINTELLECT application.
16. Use the Application:
- On the web interface, enter your email address, phone number, gender, and age.
- Interact with the ultrasonic sensor to trigger the display of information on the OLED screen based on user proximity.
- The W5300-MQTT-CAM device will capture your facial image, and the system will process the image to analyze various skin attributes.
- The personalized skincare recommendations will be sent to your email and phone number via SMS. Additionally, a notification will be sent to your Telegram app.
Important Considerations:
- Ensure all APIs, services, and devices are set up and functioning correctly before running the code.
- Implement data handling and security measures to protect user information and comply with relevant data privacy regulations.
By following these comprehensive steps, you can successfully set up and run the SKINTELLECT application on a different machine, complete with the ultrasonic sensor and Adafruit OLED screen integration, hardware setup, software configuration, and API integrations. This detailed guide ensures a seamless process for analyzing skin attributes and providing personalized skincare recommendations.
-
[Python] app.py


-
[Python]botchatid.py
-
[Python]cam_app.py
-
[Python] combine.py
-
[Python] mailsend.py
-
[Python] recommend.py
-
[Python] smsSend.py
-
[Python]temp.py
-
[Python] WrinkleDetection.py
-
[Arduino] qrcodegen.c
-
[Arduino] qrcodegen.h
-
[Arduino] skintellect2.ino
-
[HTML] index.html
-
Circuit Diagram
-
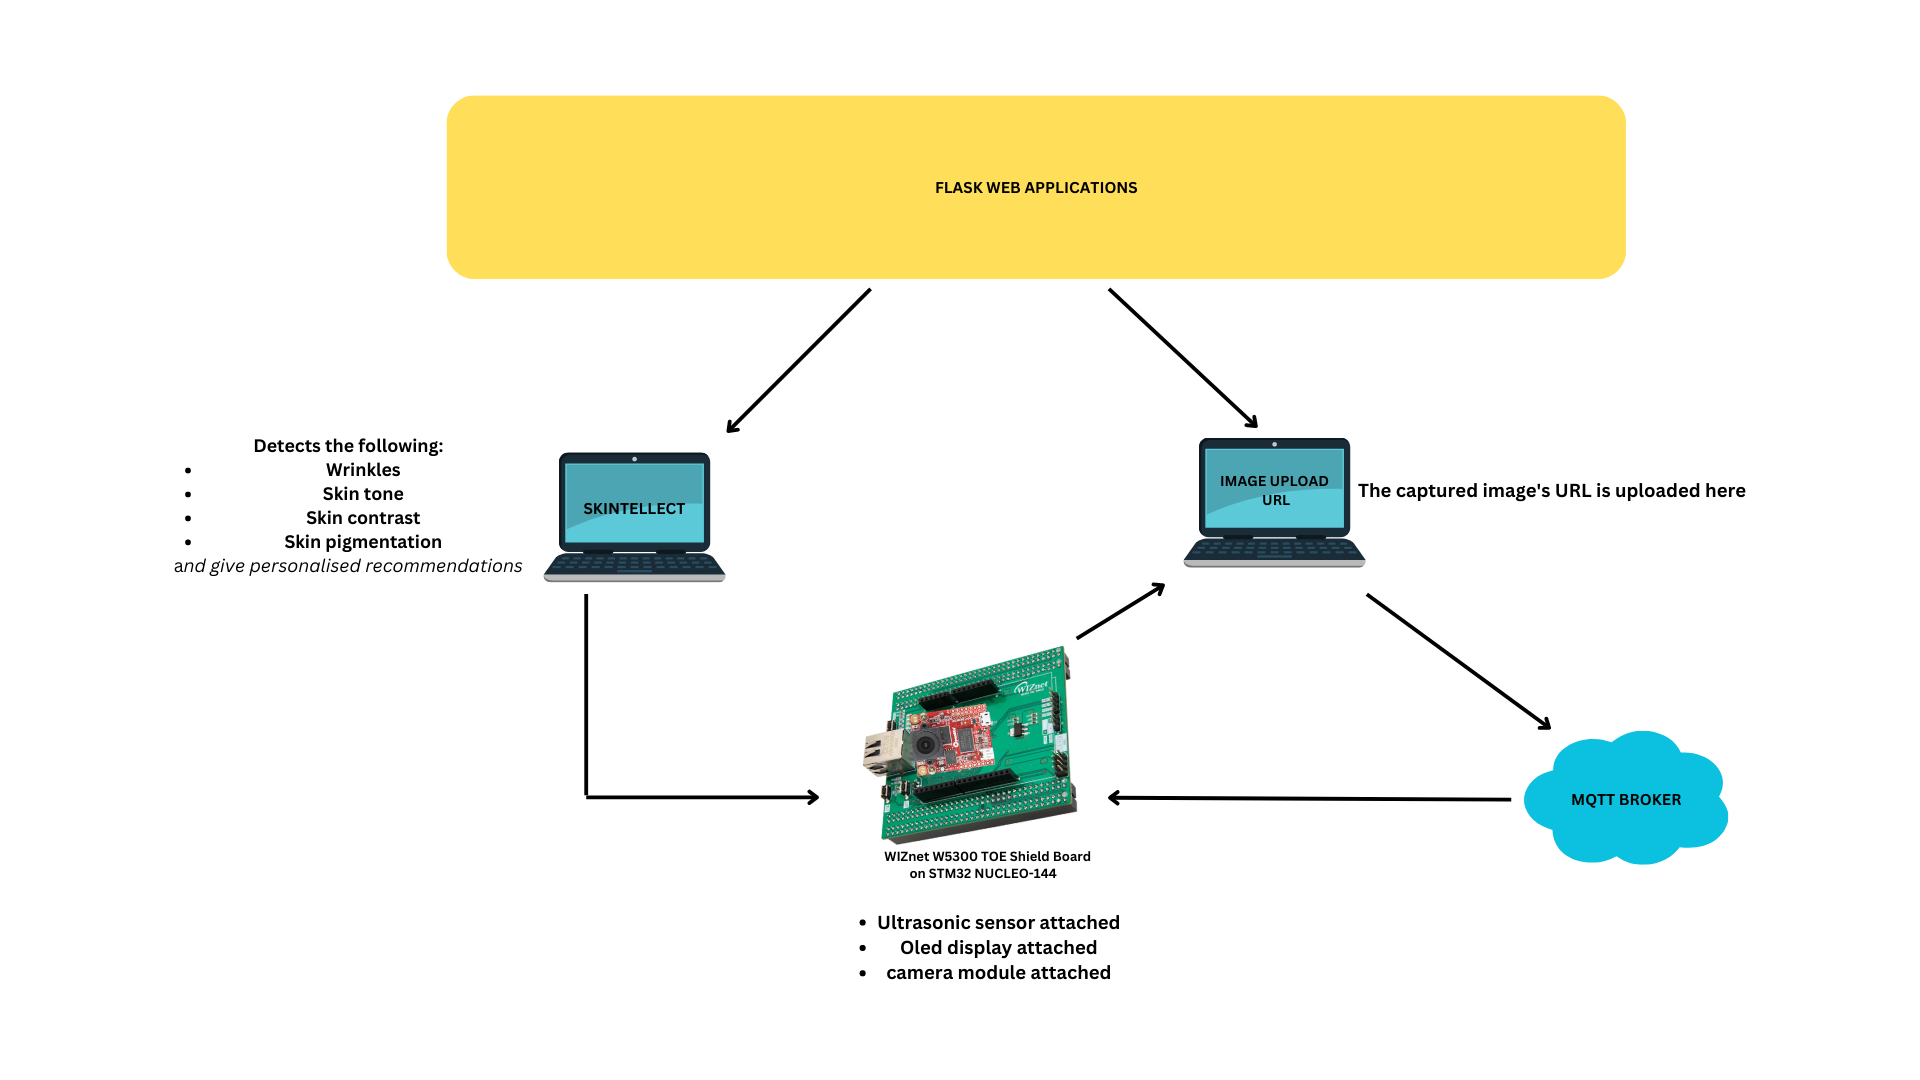
Block Diagram
-
Modules
-
Project and Code Explanation