
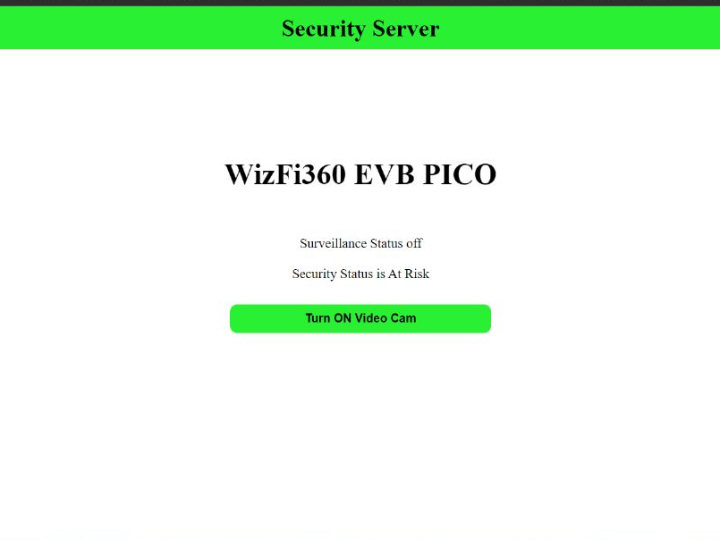
Surveillance -- Security Server
An integrated system consisting of preventive measures in the form of surveillance of the vicinity and keeping track of the activities.

WIZnet - WizFi360-EVB-Pico
x 1
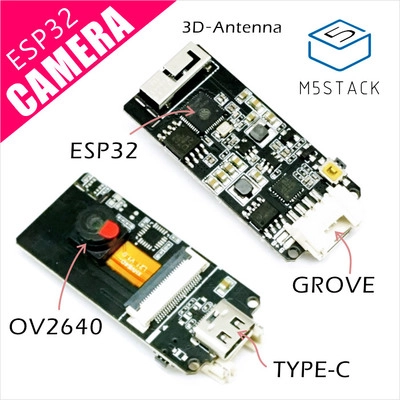
M5Stack - ESP32 Camera Module Development Board
x 1
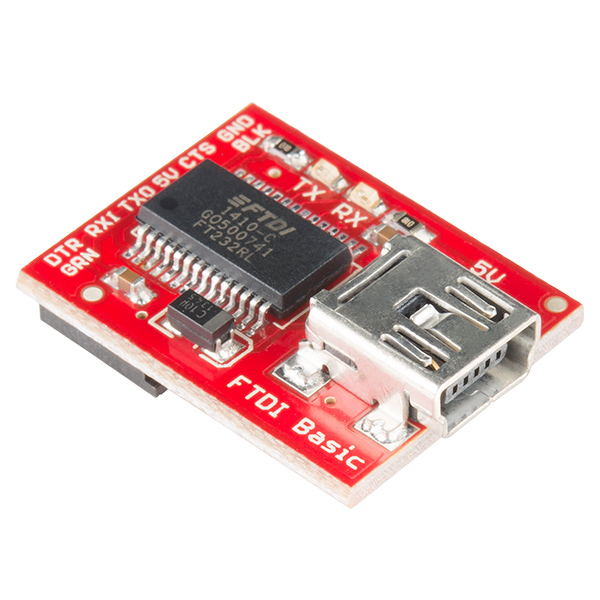
sparkfun - SparkFun FTDI Basic Breakout - 5V
x 1

Arduino - Arduino IDE
x 1
WIZnet - WIZnet io Library
x 1
Security Server using WizFi360-EVB-PICO
Story
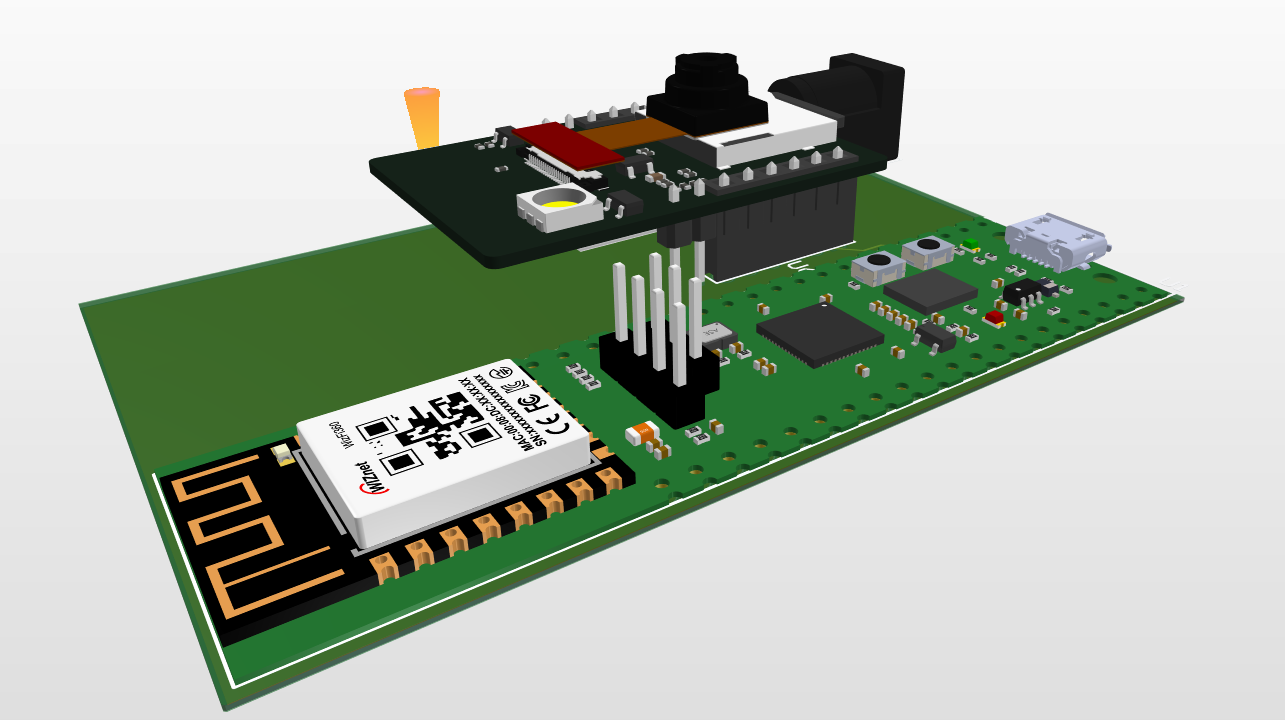
Security is an important part of a person's emotional state. It brings peace knowing that your environment is completely safe. The idea for this project came from a discussion with one of my friend. Owning a business means constantly worrying about the condition of your premises, such was the case of my friend. So, to provide a simple yet efficient live surveillance I decided to make one. Since it needed minimum hardware and wiring WizFi360-EVB-PICO and ESP32-CAM were my best options as both had a way of wireless communication(WiFi).
Hardware Setup
WizFi360-EVB-PICO
Setting up the WizFi360-EVB-PICO board on Arduino IDE -
https://github.com/earlephilhower/arduino-pico/releases/download/global/package_rp2040_index.json
Add the link in the preferences box of your IDE.
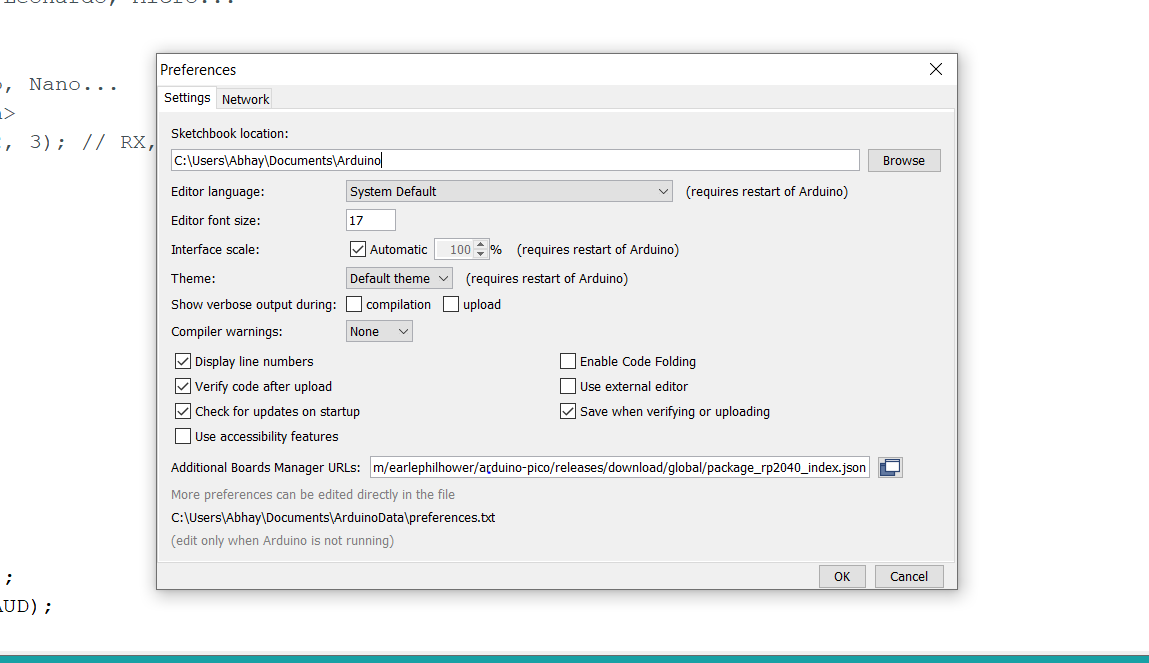
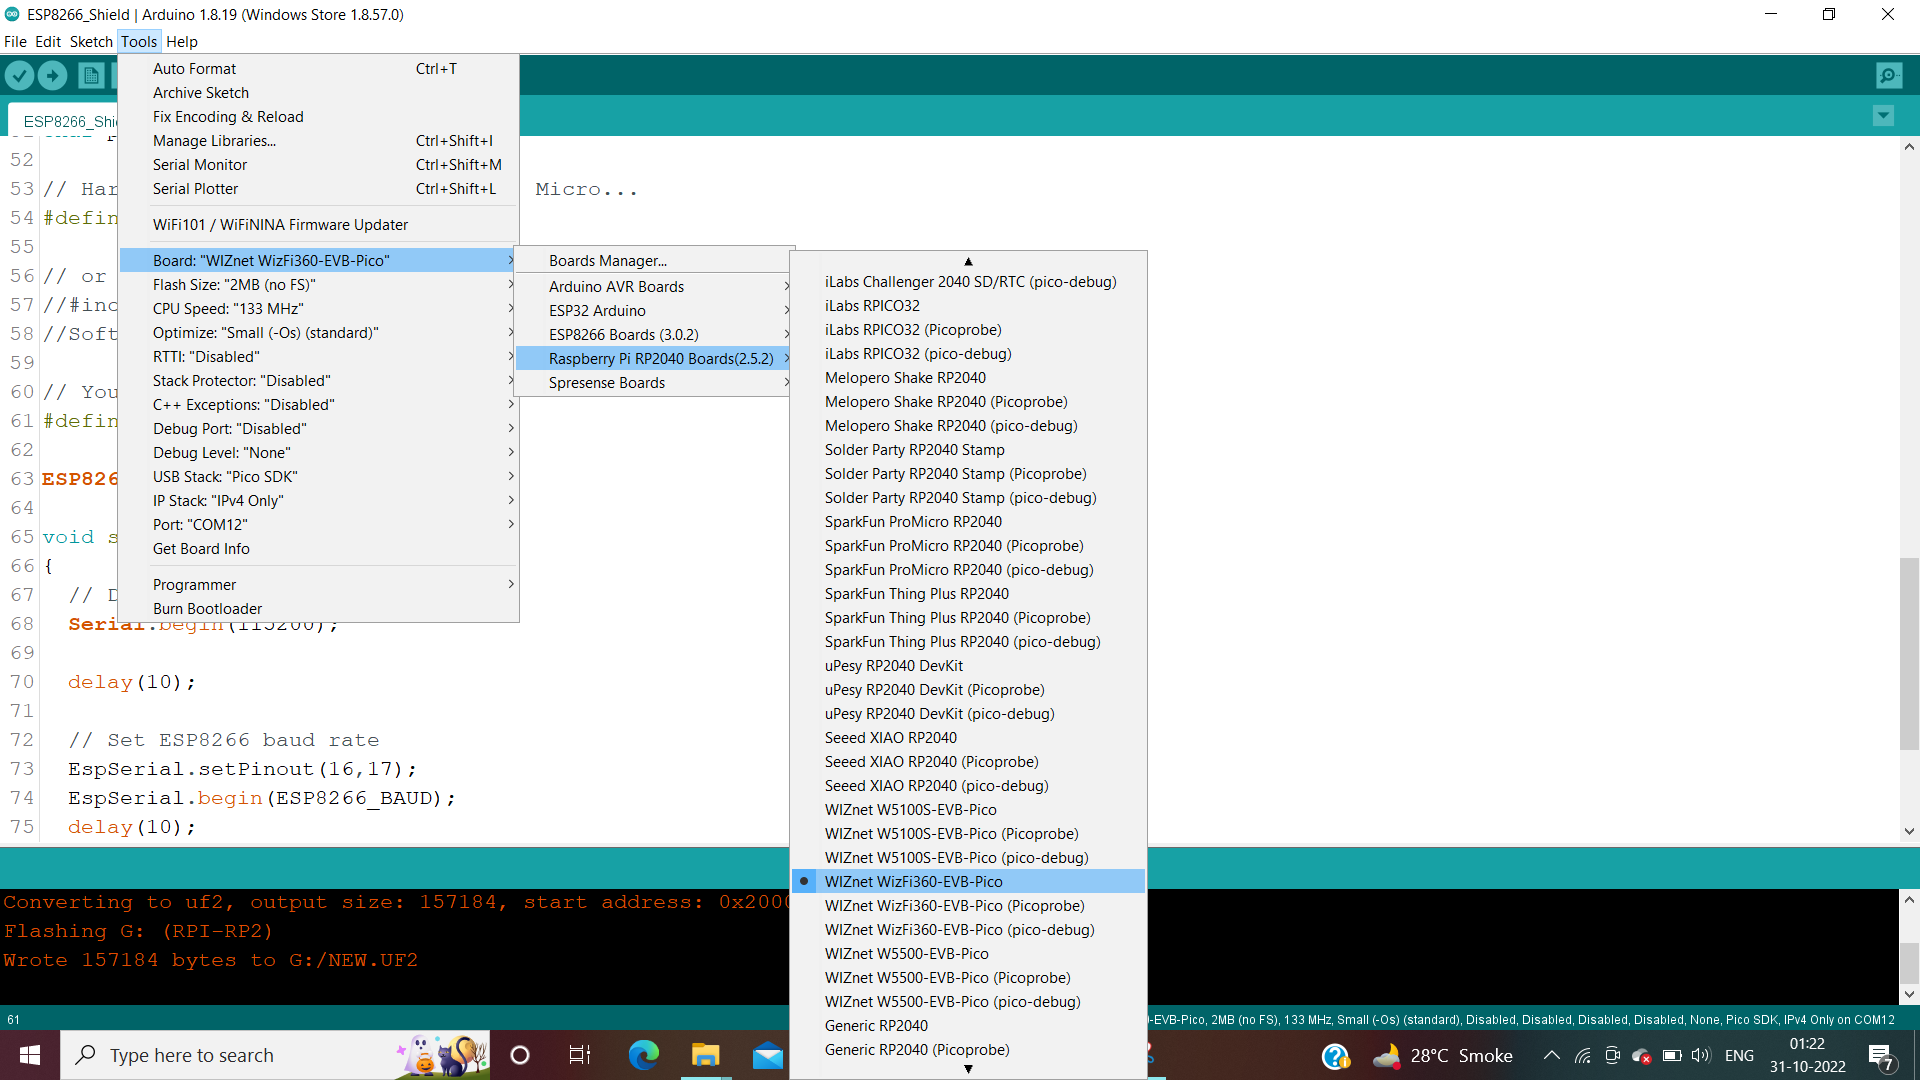
Go to Tools -> Board Manager -> Type: "RP2040" -> Click Install
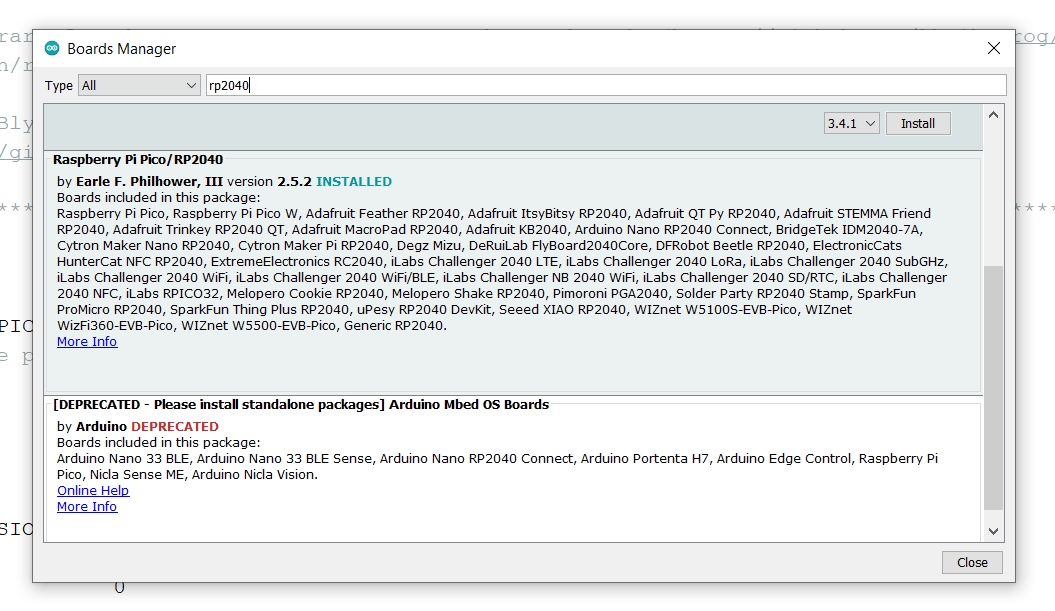
Go to Tools -> Boards -> Select "WizFi360-EVB-PICO"
ESP32-CAM
For ESP32-CAM select the AI Thinker Camera from the Boards tab.
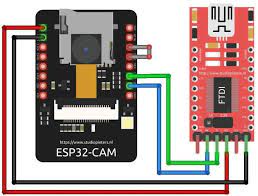
However to program the camera module you will require a separate module. Here I have used FTDI USB to UART TTL module.
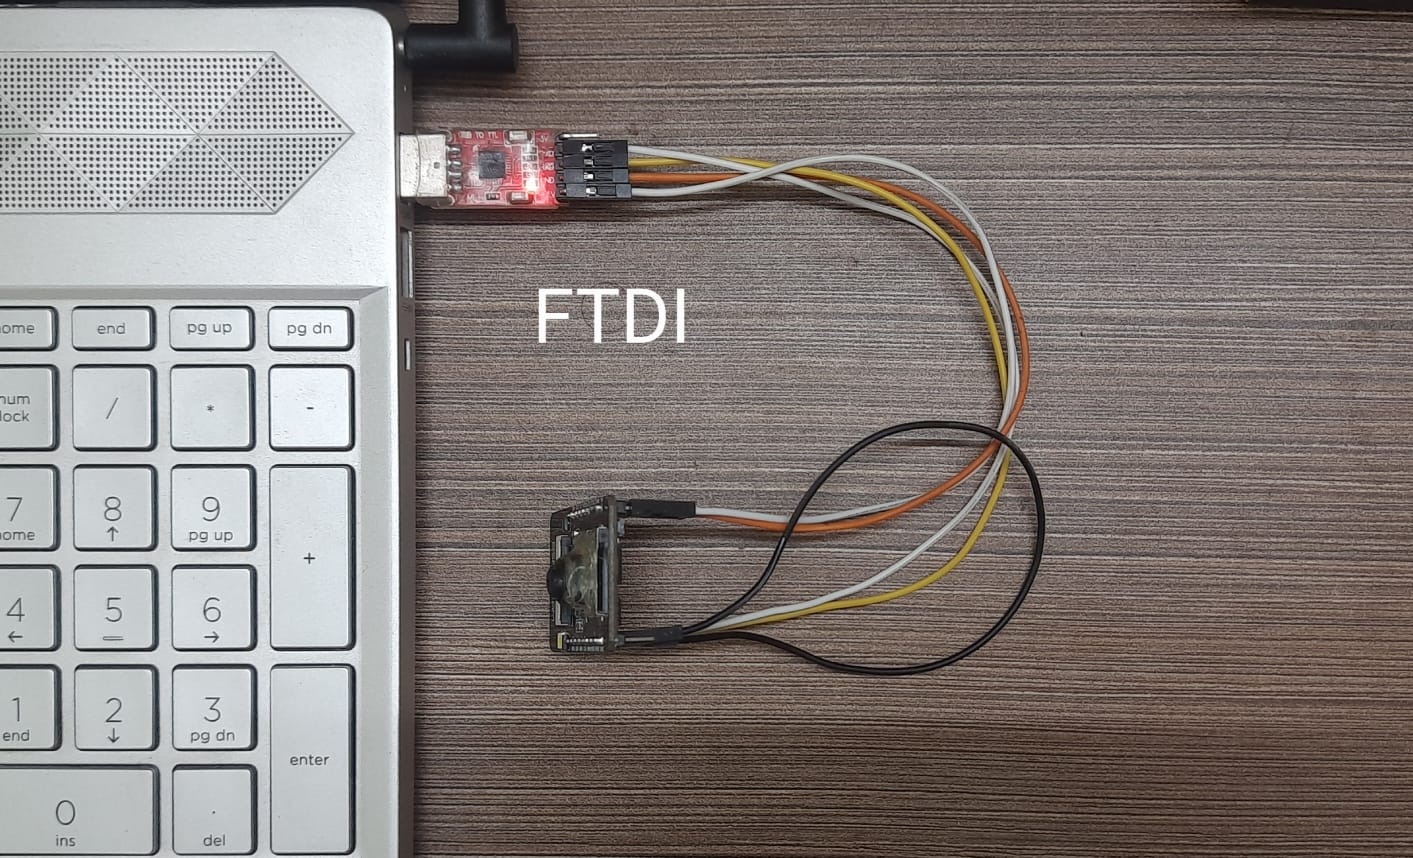
Connections while uploading the code.
Programming
WizFi360-EVB-PICO
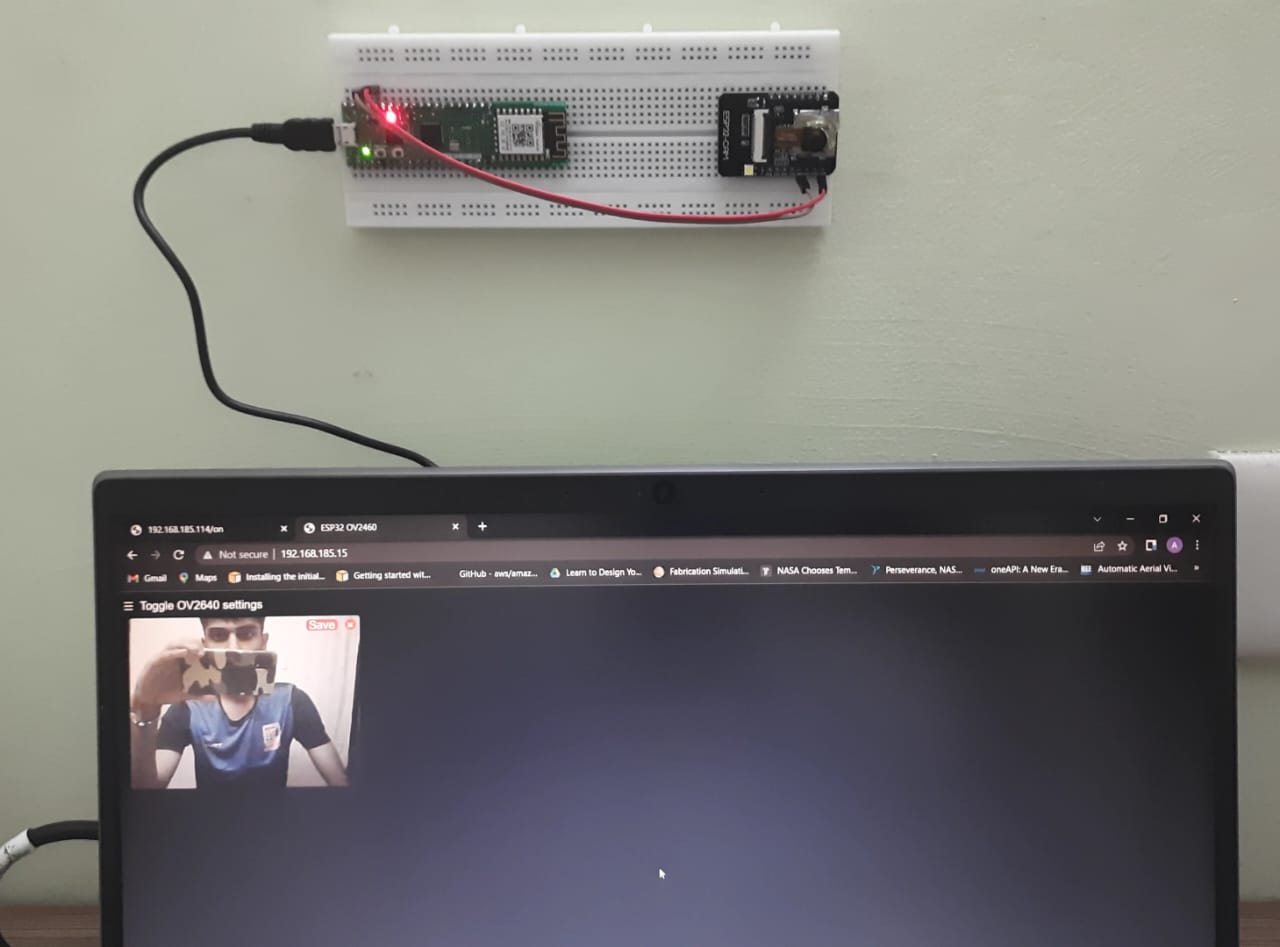
The Surveillance had to be controlled using a device which was on the same network hence a webserver was required. The server would contain web interrupts for various features regarding the feed from camera.
For this I create a UI using basic HTML and inserted a few buttons for interrupts.

It turned out to be simple but efficient since with increase in UI elements loading time was also increasing.

ESP32-CAM
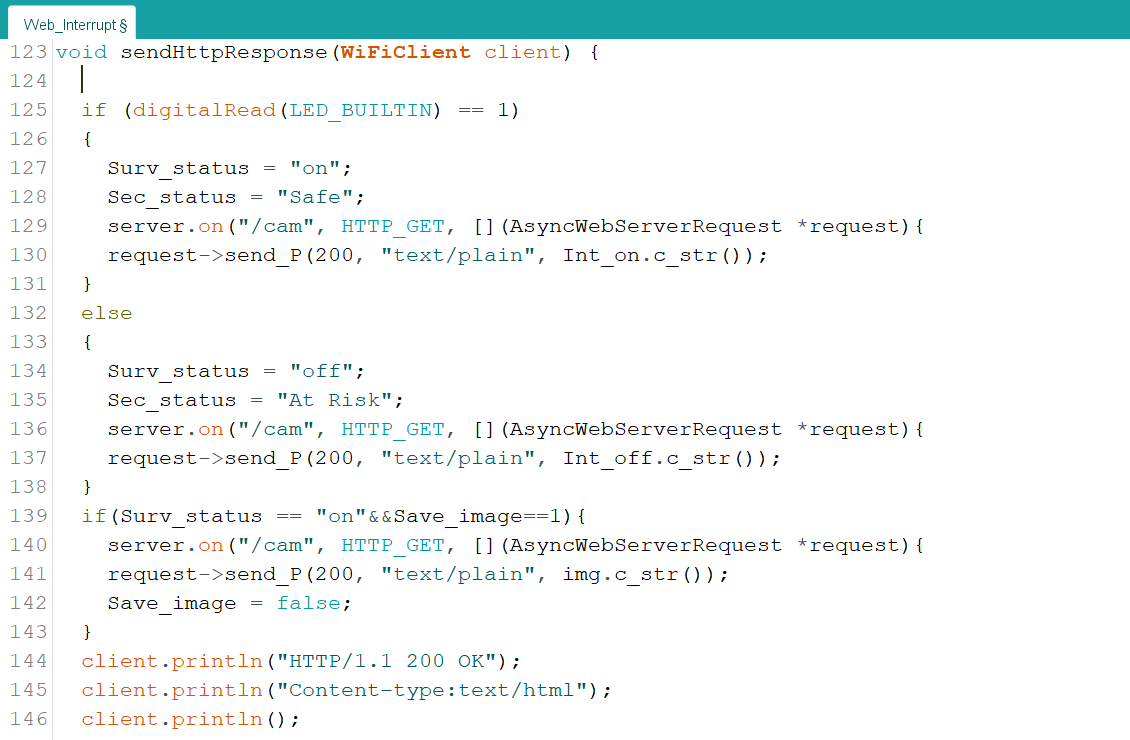
For the camera module I took reference from the example code "CameraWebServer" and made changes in the same since it was readily available. Throughout the process I came to understand how the camera server was built which was necessary for the editions I had to make.
Since both the camera and EVB-PICO were on the same WiFi AP, to determine whether an interrupt was sent I sent a confirmation string e.g. "Cam_ON" when clicked ON button to a localhost which was read by the camera web server before turning on the camera.
In the CameraWebServer:
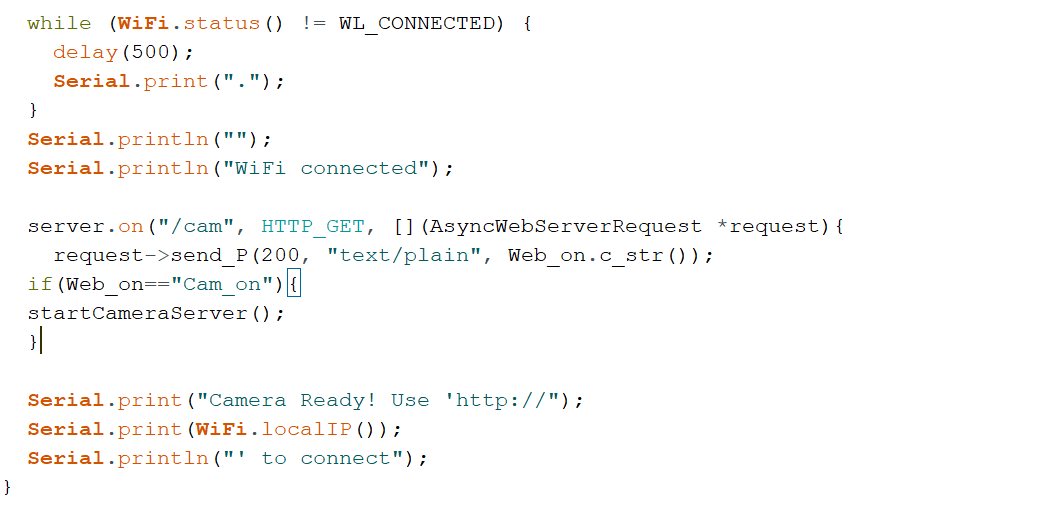
For Web_Interrupt:
Testing the Security Server
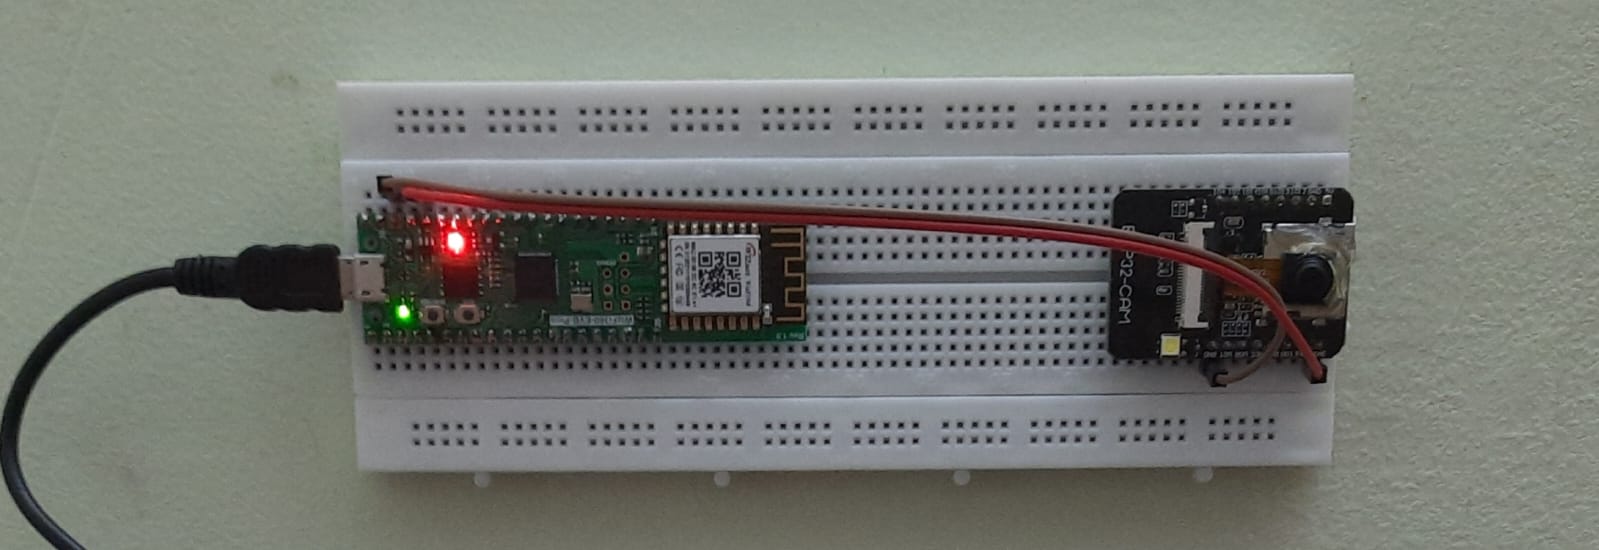
For purpose of testing I used the USB supply to EVB-PICO and 3V3 from PICO to ESP32-CAM. While in future a LiPo battery will be sufficient since the power consumption of the entire setup is minimal.
Features
The most important aspect of this project is its feasibility in terms of both power and cost. Where traditional surveillance cameras may provide better feed quality, nothing can match the low power consumption, minimal hardware and cost of this setup.
Further improvement in the features provided with the Security Server is being made such as:
-- Storing the feed (based on time interval as well as through interrupt).
--Connecting to AWS (for regular entries of the server).
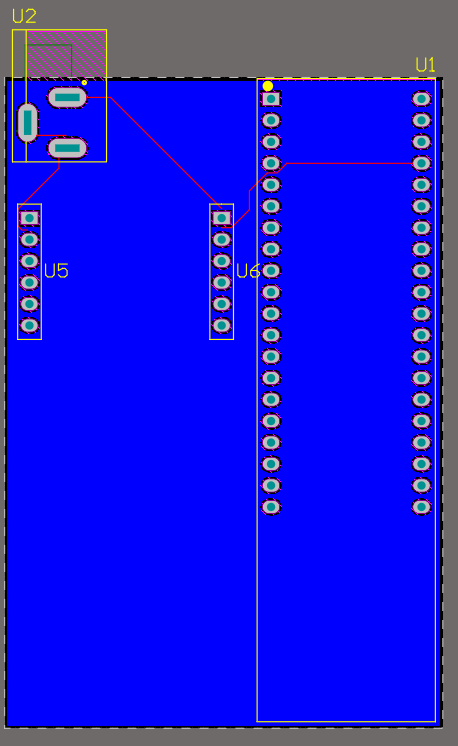
Currently working on the former as well as a PCB to inculcate everything.
-
Web_Interrupt
Upload on WizFi360-EVB-PICO

-
Testing Video
Turning On and Off the Security Server.
-
Testing Video 2
Turning On and Saving the feed as an image.