Agriculture, the backbone of human civilization, has sustained societies for millennia. As we navigate the challenges of a growing global population, changing climate patterns, and the need for sustainable resource management, the importance of agriculture has only intensified. The world's population is projected to reach 9.7 billion by 2050, demanding a 70% increase in food production. This surge in demand necessitates a shift from traditional farming methods, which often rely on generalised approaches and uniform practices.
Precision farming offers an alternative by providing farmers with real-time data about their fields, enabling them to make informed decisions and tailor their practices to individual plots of land. This targeted approach can result in higher crop yields, reduced resource waste, and minimized environmental impact. As concerns about food security, environmental degradation, and resource scarcity continue to mount, precision farming emerges as a beacon of hope. By integrating technology and data into agricultural practices, it paves the way for a more sustainable and resilient food production system.
Key Benefits of Precision Farming
Optimized Resource Utilization: Precision farming allows farmers to precisely apply fertilizers, pesticides, and irrigation based on the specific needs of each plant. This prevents the overuse of resources and minimizes environmental pollution while maximizing crop growth.
Cost Efficiency: By reducing waste and increasing productivity, precision farming helps farmers cut costs associated with inputs like fertilizers and water. Additionally, fewer wasted resources mean higher profitability.
Environmental Conservation: The precise application of inputs prevents the leaching of chemicals into soil and water bodies, promoting soil health and water quality. This reduces the negative impact of agriculture on ecosystems.
Reduced Environmental Footprint: Precision farming minimizes greenhouse gas emissions by reducing the use of energy-intensive inputs and optimizing machinery use. This aligns with global efforts to combat climate change.
Customized Crop Management: Different parts of a field may have varying soil types, nutrient levels, and water retention capabilities. Precision farming allows farmers to adapt their practices to suit these variations, enhancing overall yield and quality.
Technological Enablers of Precision Farming
Sensor networks are the eyes and ears of precision farming, capturing a wealth of data from the field. These sensors are designed to monitor critical variables such as soil moisture, temperature, nutrient levels, and pest presence. By continuously collecting real-time data, sensor networks offer farmers a detailed understanding of their fields' dynamic conditions.
The data gathered from sensor networks and processed through data analytics is presented in a comprehensible manner through visualization and remote control software. These user-friendly interfaces transform complex data into intuitive charts, graphs, and maps, allowing farmers to quickly grasp key information and take data-driven decisions. Many visualization platforms offer remote access, allowing farmers to monitor their fields and control connected devices from anywhere with an internet connection.
Our Solution
Leveraging Internet of Things (IoT) advancements, we have developed an integrated solution that seamlessly merges cutting-edge hardware and software components to enable precision farming practices. This solution comprises a robust gateway and interconnected nodes, creating a comprehensive ecosystem that enhances resource utilization, data-driven decision-making, and overall farm management.
Gateway Infrastructure: Enhancing Connectivity and Control
At the core of our precision farming solution lies the Gateway, a sophisticated hub designed to orchestrate seamless data communication between farm nodes and the central dashboard. Comprising an STM32F429ZI microcontroller alongside the LoRa E5 module, the Gateway achieves remarkable communication efficiency. Coupled with the W5300 Ethernet module, it ensures robust internet connectivity via Ethernet. This architecture forms a reliable backbone, enabling real-time data transmission, AI-driven insights, and remote control functionalities.
Node Intelligence: A Multifaceted Approach to Data Collection
Our solution's Node units serve as data collection endpoints, equipped with a suite of sensors to capture vital field information. These nodes include temperature, humidity, and soil moisture sensors, providing real-time environmental data critical for optimizing planting, irrigation, and resource allocation. An AI camera further enhances the node's capabilities, empowering it to detect wild animal intrusions. These combined sensors furnish invaluable insights into the field's conditions, minimizing risks and maximizing yield potential.
Seamless Communication: LoRa-Powered Connectivity
The seamless connection between Gateway and Nodes is facilitated by LoRa P2P communication, a low-power, long-range wireless technology. This communication mechanism enables uninterrupted data flow, allowing real-time monitoring and intervention. The LoRa architecture enhances our solution's scalability, allowing the integration of additional nodes to cover larger agricultural areas without compromising data integrity or system efficiency.
At the heart of our precision farming solution is the Dashboard - a centralized platform that transforms raw data into actionable insights. Real-time data from sensors and the AI camera converge here, presented through intuitive charts, graphs, and maps. These visualizations empower farmers to make informed decisions about irrigation, pest control, and resource management, leading to optimized yield and resource efficiency.
Control Widgets: Orchestrating Farm Operations
The Dashboard isn't just a visualization tool; it is a control centre. Embedded with intuitive control widgets, it allows farmers to remotely manage devices within the field. Water pumps, for instance, can be controlled with ease, enhancing irrigation precision and further automating farm operations. This functionality enhances not only efficiency but also frees up valuable time for farmers to focus on higher-level tasks.
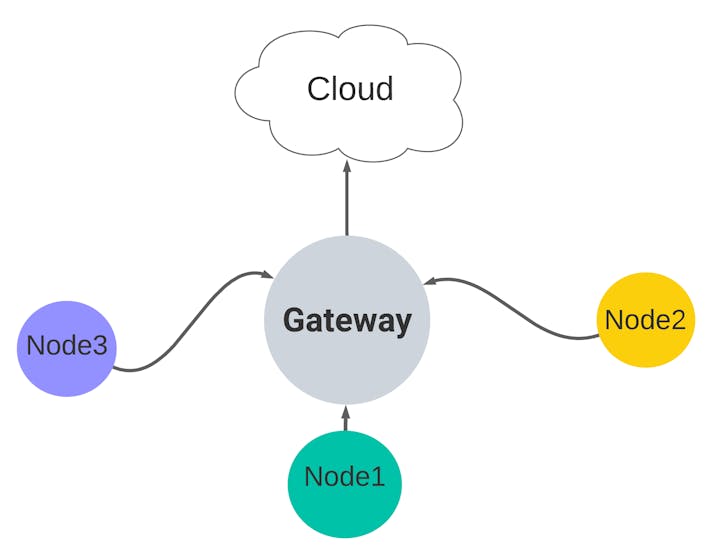
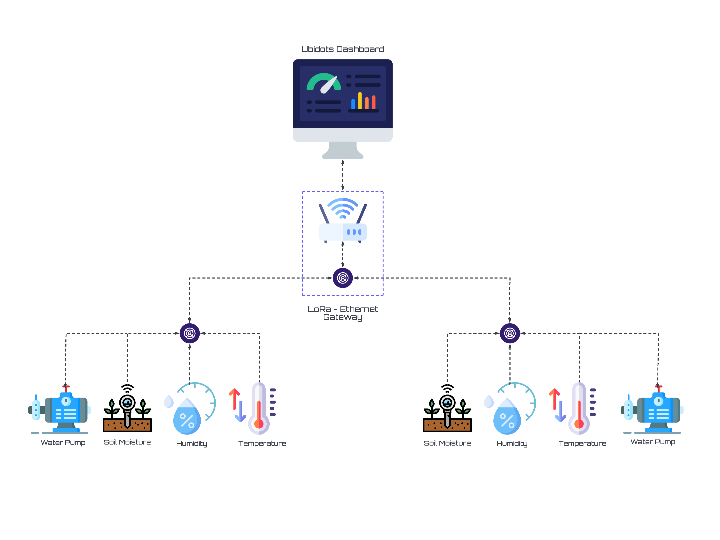
Basic Data Flow
The below diagram depicts the basic flow of data between the Nodes and the Cloud.
Why LoRa?
Effective communication is a crucial component within this setup, facilitating the seamless transmission of data from farms to the cloud. Currently, researchers employ diverse communication technologies, including 3G/4G, GSM, Wi-Fi, Bluetooth, and Zigbee. These technologies span various ranges, from short to long distances. However, challenges persist, particularly in regions with limited development, where rural areas encounter communication obstacles. In such contexts, mobile connectivity remains unreliable, and the issue of range exacerbates the problem. Furthermore, the cost factor comes into play, particularly in scenarios involving a multitude of devices. Each device necessitates an individual SIM card and a dedicated subscription, which can be financially burdensome when scaled to hundreds of units.
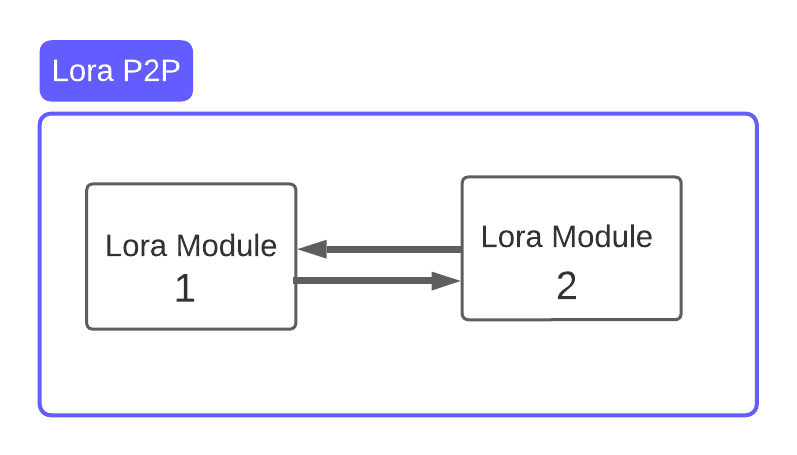
In this context, LoRaWAN emerges as an ideal communication mode due to its capability to transmit data over several kilometres while consuming minimal energy. However, a challenge arises from the multitude of LoRa modules required, each representing a distinct node. Here we can use LoRaWAN gateways, but it would not be cost-effective. To address this, we propose employing LoRa point-to-point (P2P) communication.
P2P LongRangeCommunication refers to LR communications that occur directly between end node devices (peer-to-peer), instead of those that occur between an end node and the gateway. This communication uses the same long-distance LR modulation between the two devices and enables numerous possibilities with LR technology.
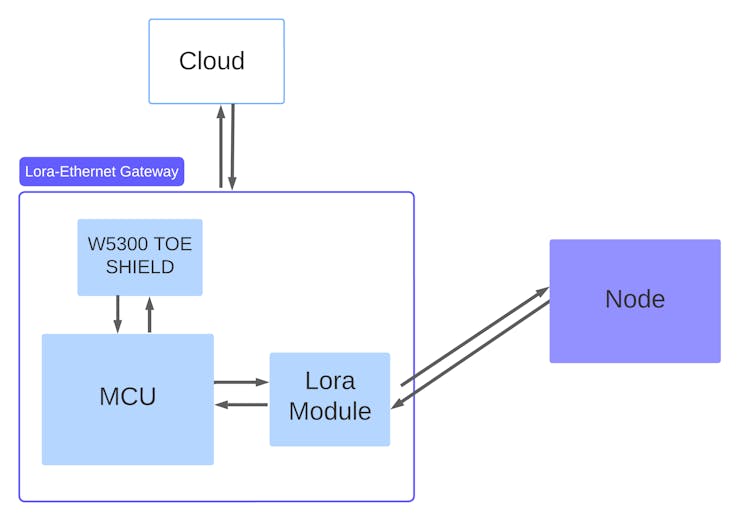
LoRa - Ethernet Gateway :
The Lora-Ethernet gateway is achieved by means of the Lora P2P communication. Each node will be outfitted with LoRa modules, facilitating direct data transmission to the gateway. The gateway, equipped with its own LoRa module, receives and sends the data by serially communicating with the microcontroller. Subsequently, the gateway employs an Ethernet connection to relay the data to the cloud. The illustration depicts the data flow dynamics between the node and the cloud via the gateway.
The key components of the Lora-Ethernet Gateway are
W5300 TOE Shield
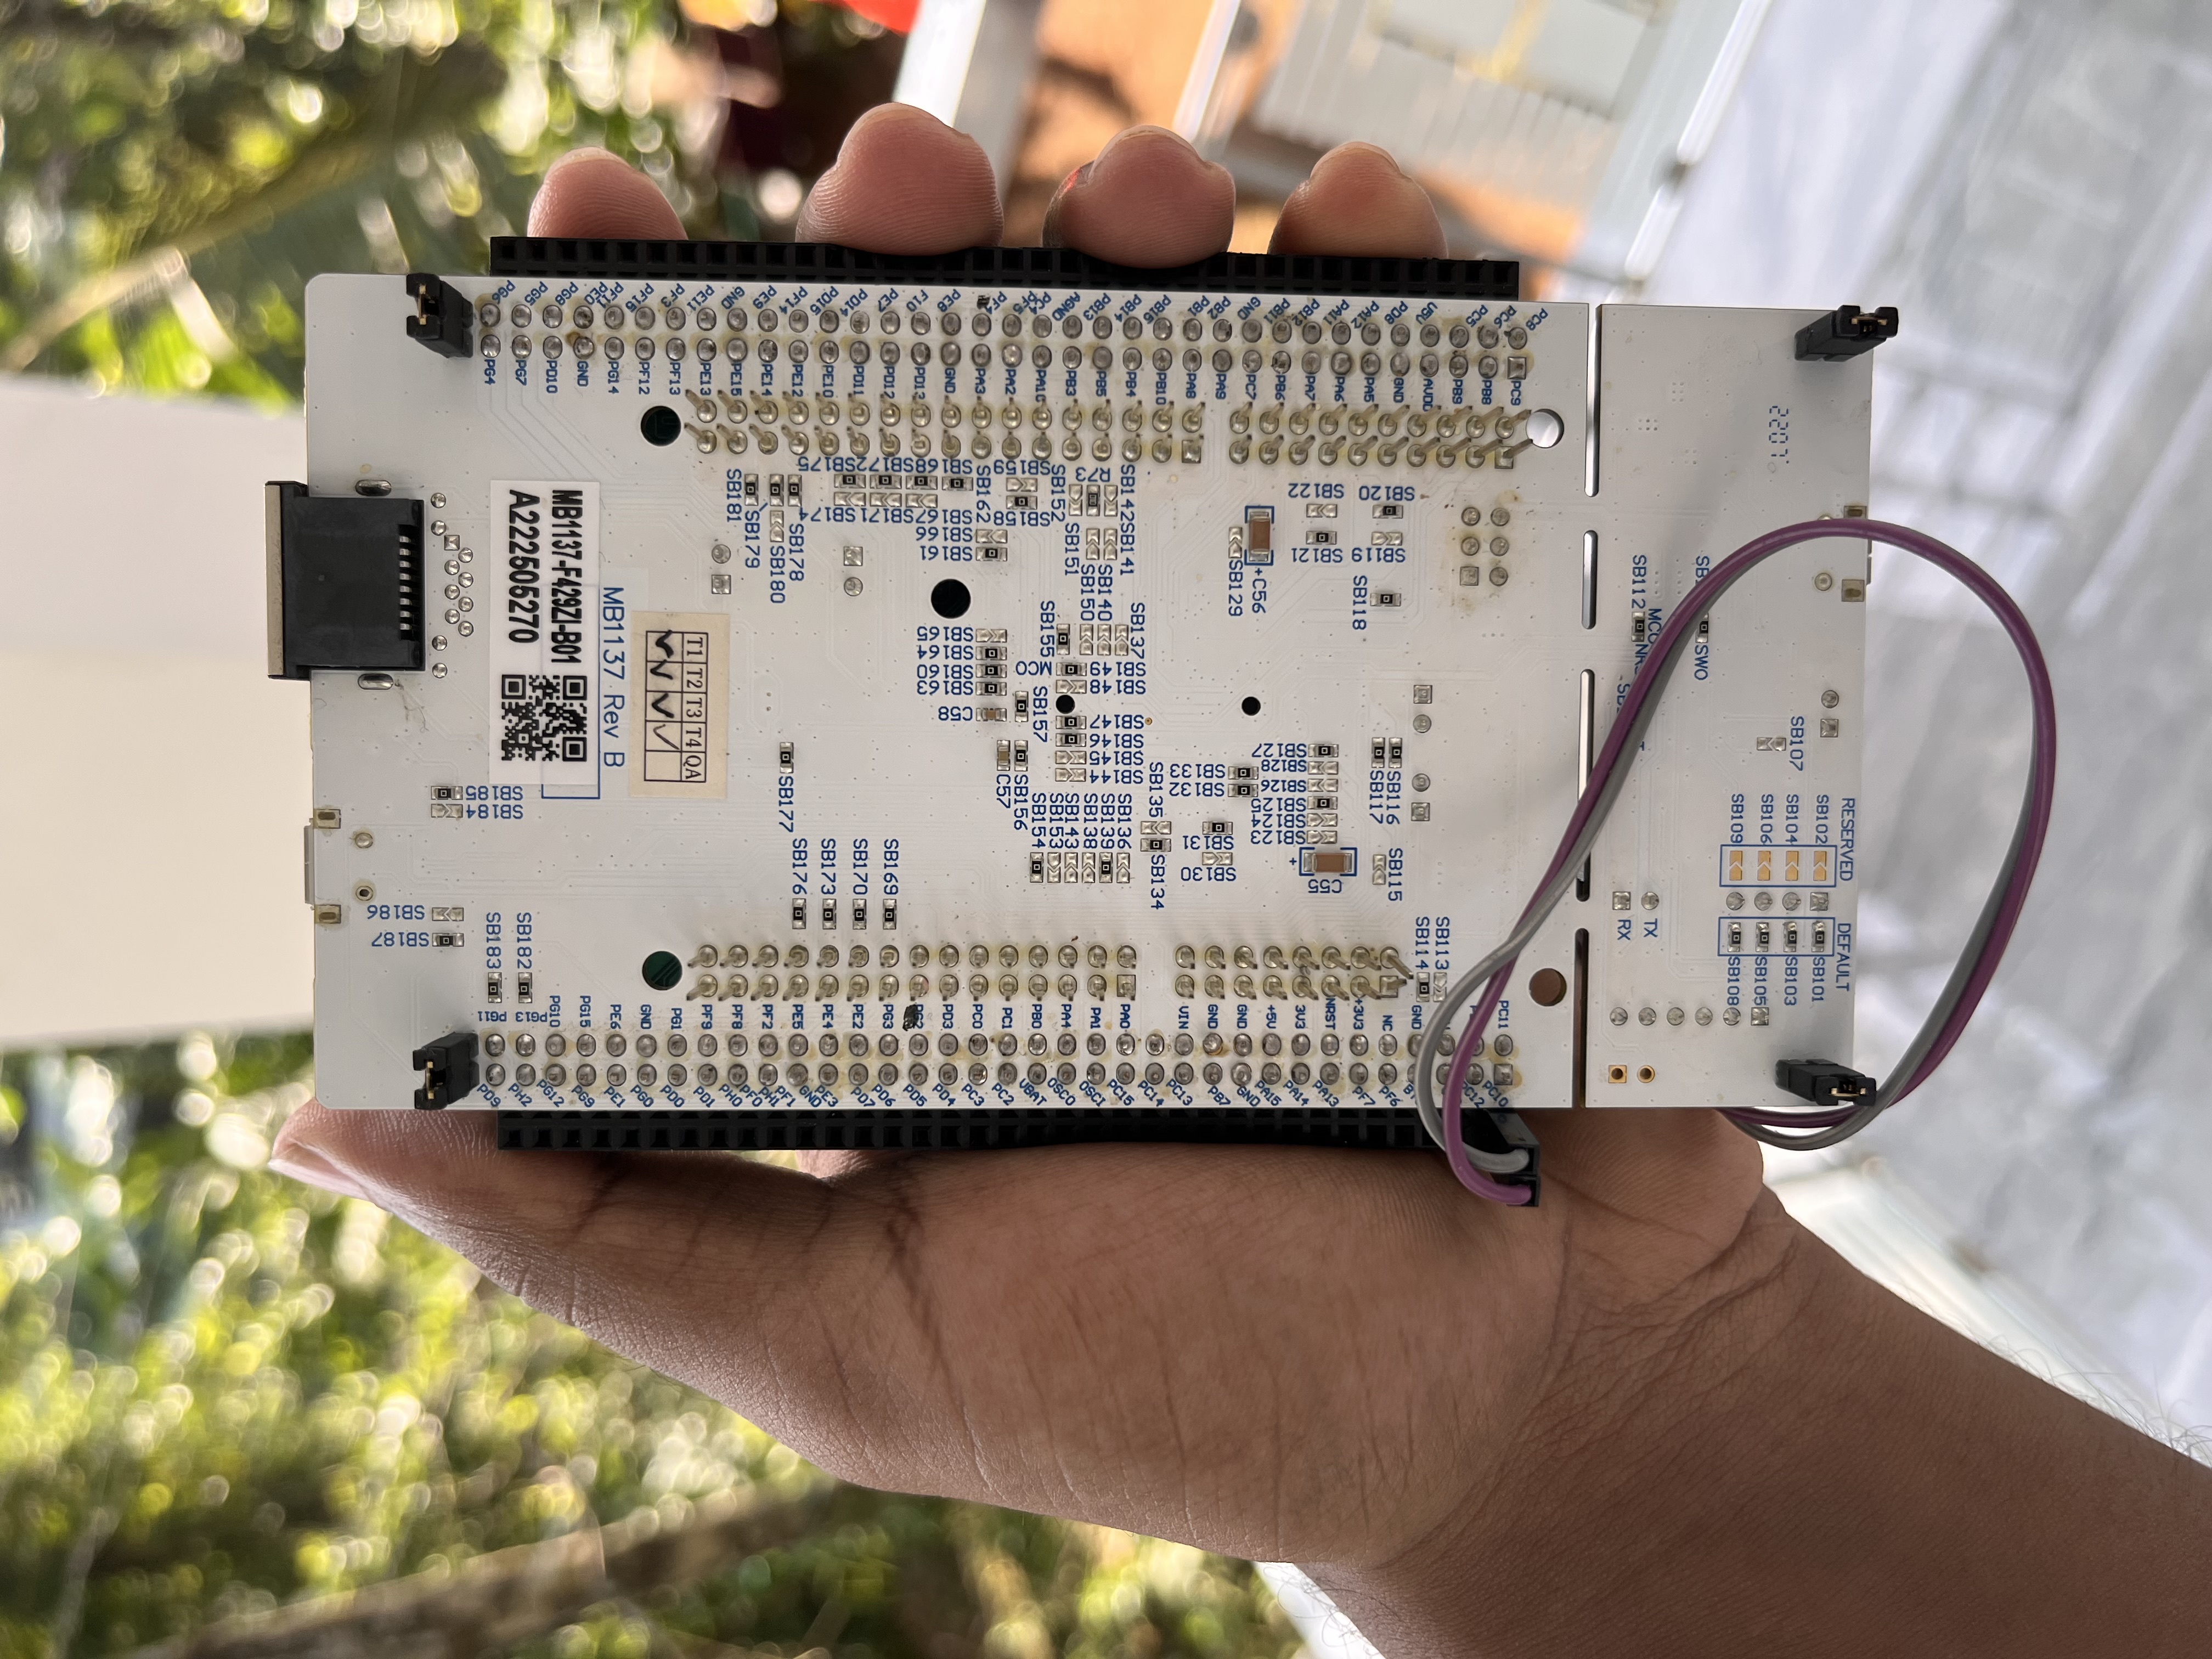
STM32 Nucleo-144 F429ZI
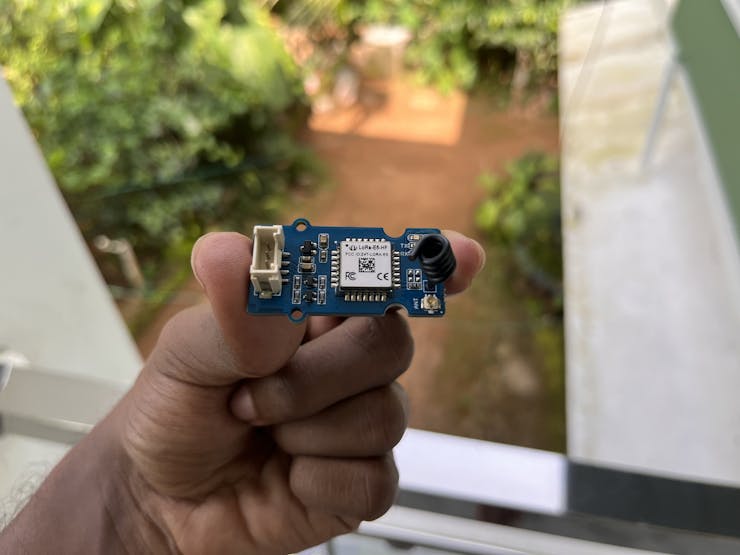
Lora E5 Module
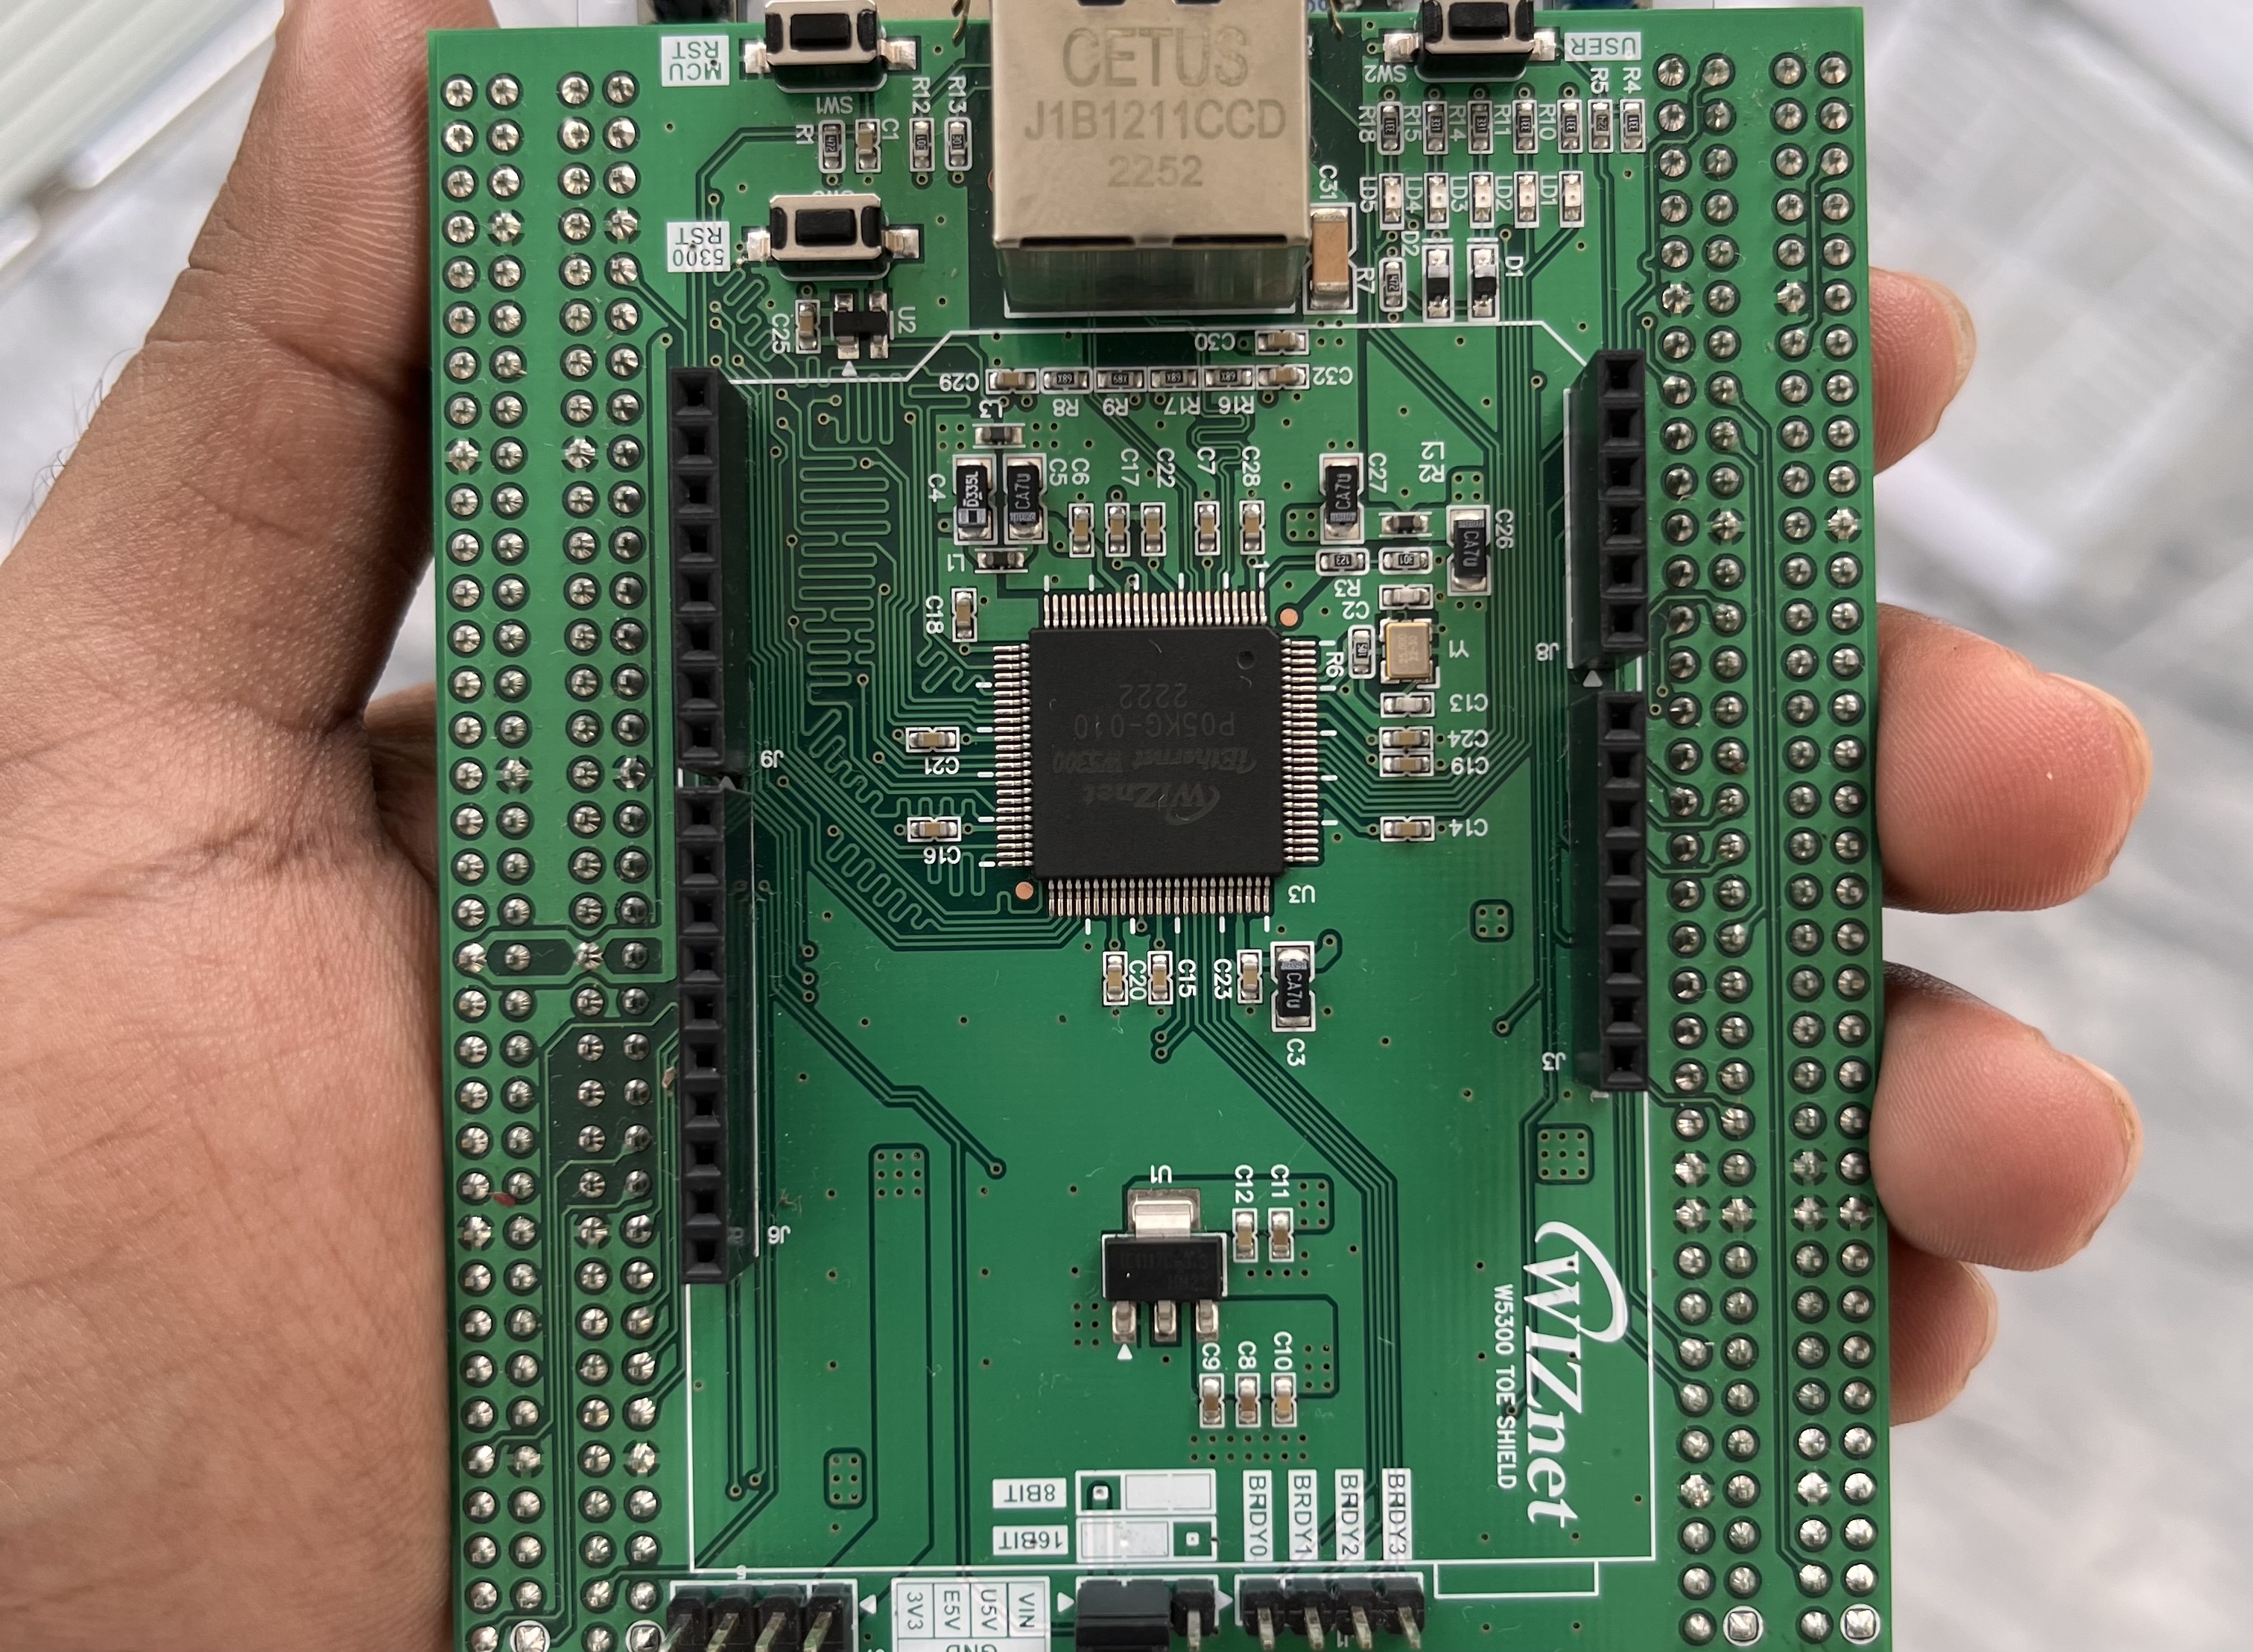
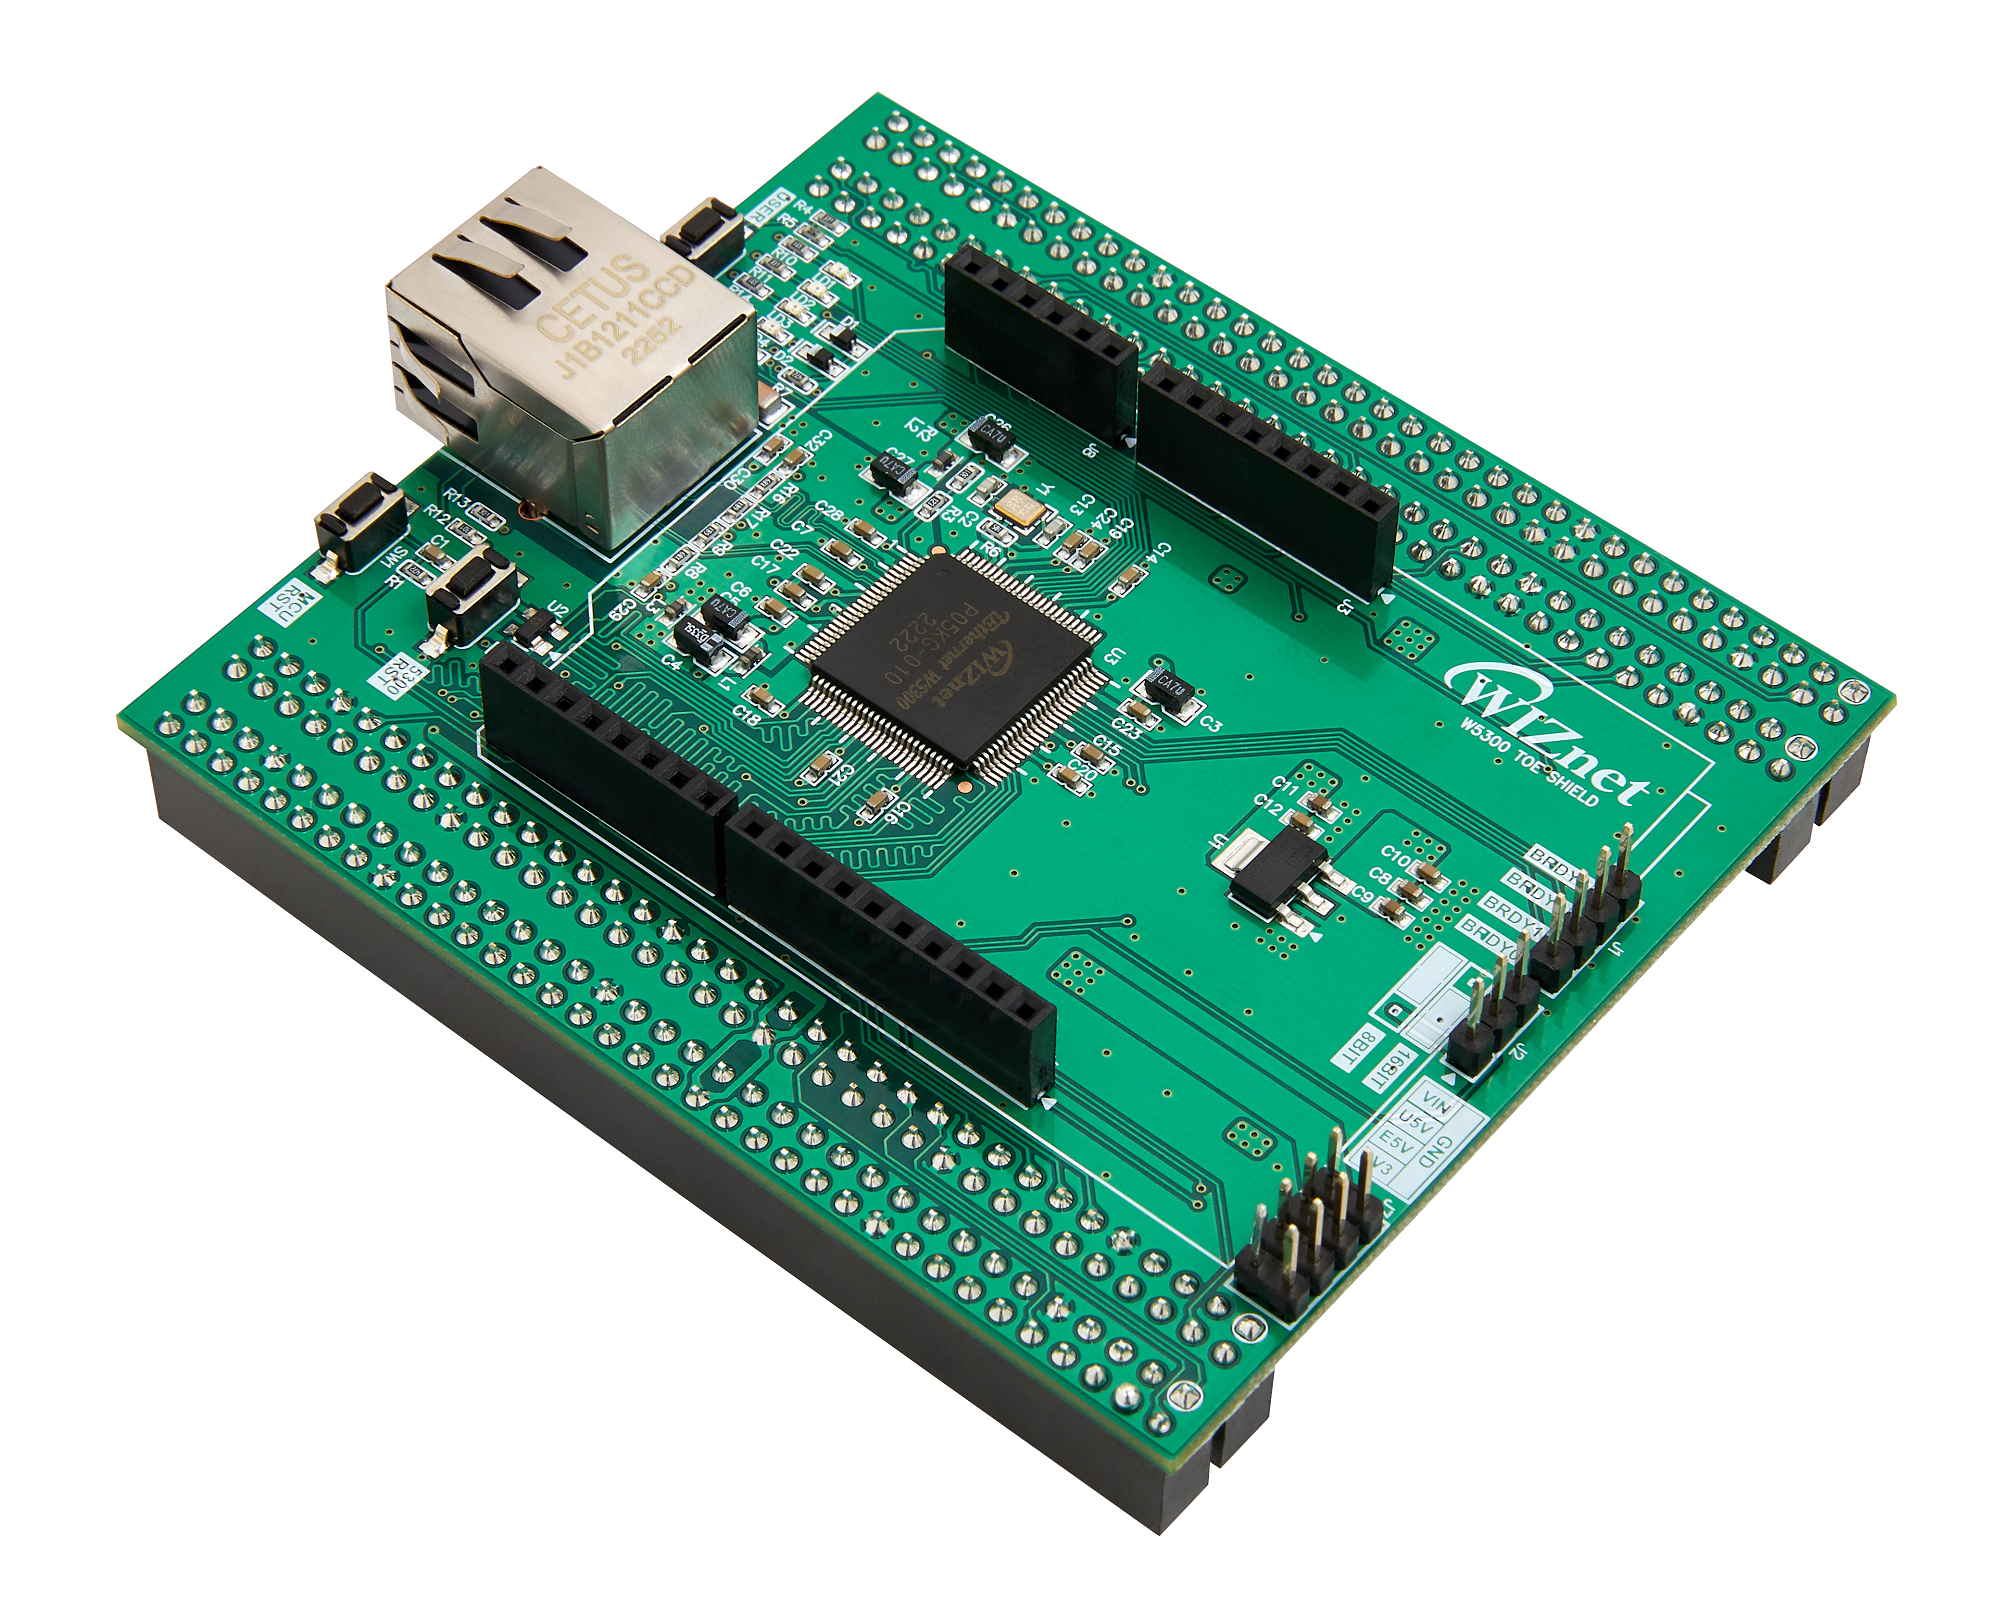
W5300 TOE shield
The W5300 TOE (TCP/IP Offload Engine) shield is a valuable component in a LoRa Ethernet gateway setup. It helps manage network communication and offloads TCP/IP processing, enhancing the gateway's efficiency and performance. Here are some points highlighting the benefits of using a W5300 TOE shield in the LoRa Ethernet gateway for farming:
Network Efficiency: The W5300 TOE shield offloads TCP/IP processing from the gateway's main microcontroller, allowing it to focus on LoRa communication and data processing. This separation of tasks improves overall network efficiency and reduces the load on the microcontroller.
Reliable Data Transfer: The TOE shield's hardware-based TCP/IP stack ensures reliable data transfer over Ethernet connections. This is crucial for transmitting sensor data and control commands reliably between the farming devices and the cloud
Low Latency: With TCP/IP processing offloaded to the shield, the gateway can achieve lower communication latency, which is important for real-time monitoring and control of agricultural processes.
STM32 Nucleo 144 F29ZI
STM Nucleo 144 F29ZI development board offers a combination of processing power, memory, connectivity options, and a rich development ecosystem, making it a suitable choice for building the gateway node in the LoRa Ethernet Farm Guardian project. Its capabilities enable efficient data handling, communication management, and real-time monitoring, contributing to the successful implementation of the project's goals.
Lora Module E5
The Grove - Wio-E5 is a high-performance wireless radio module that supports LoRaWAN protocol and is incredibly easy to use. At its core is the Wio-E5 LoRaWAN STM32WLE5JC module, which integrates the ARM Cortex M4 ultra-low-power MCU core and Wio SX126x. This module can be easily interfaced with a microcontroller with AT commands through UART communication.
If you need more about Lora module E5 just have a look here.
It plays a pivotal role in facilitating seamless and reliable communication between the distributed LoRa sensor nodes and the central gateway based on the STM Nucleo 144 F29ZI. Its long-range capabilities, low power consumption, and secure communication features contribute to the project's overall success in addressing challenges.
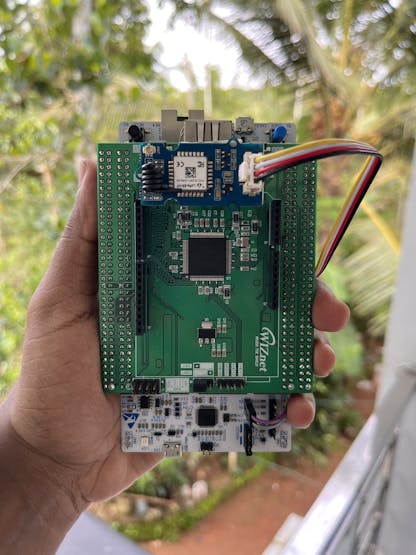
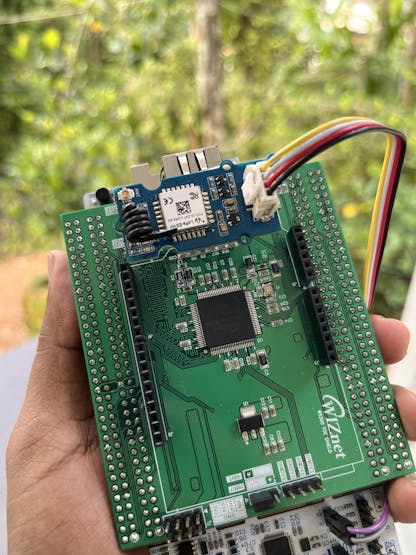
Here is my Lora-Ethernet Gateway Set up
Node
Let's see the components of the Node
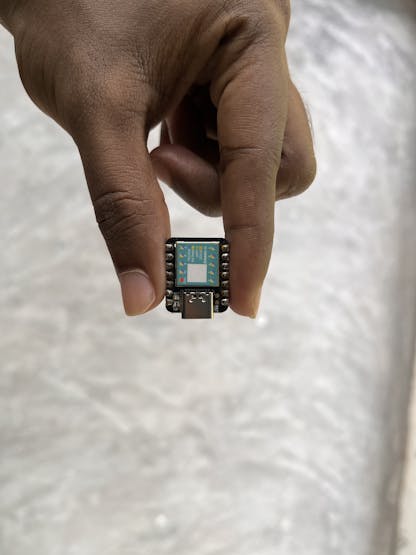
I used a Seeduino XIAO as the microcontroller because it is very cheap and consumes only less power. The Seeduino XIAO has no Wi-Fi or BLE capabilities and that's not a problem at all because here I use Lora as the mode of communication.
Seeduino XIAO
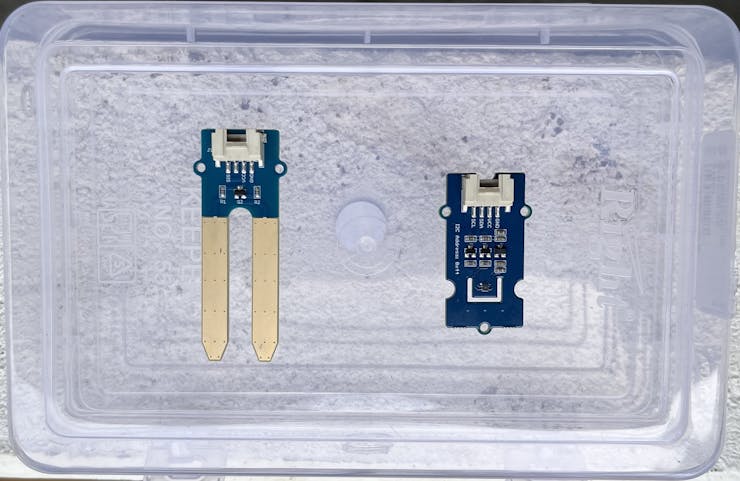
The node consists of two sensors
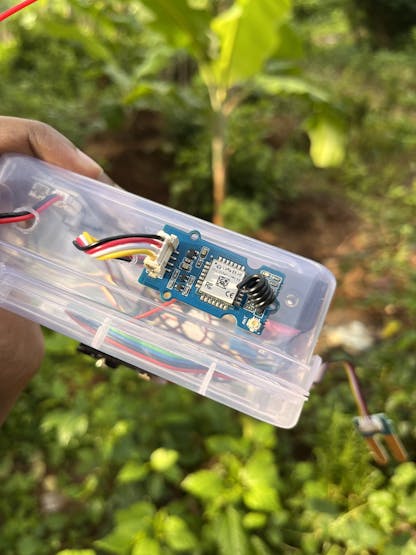
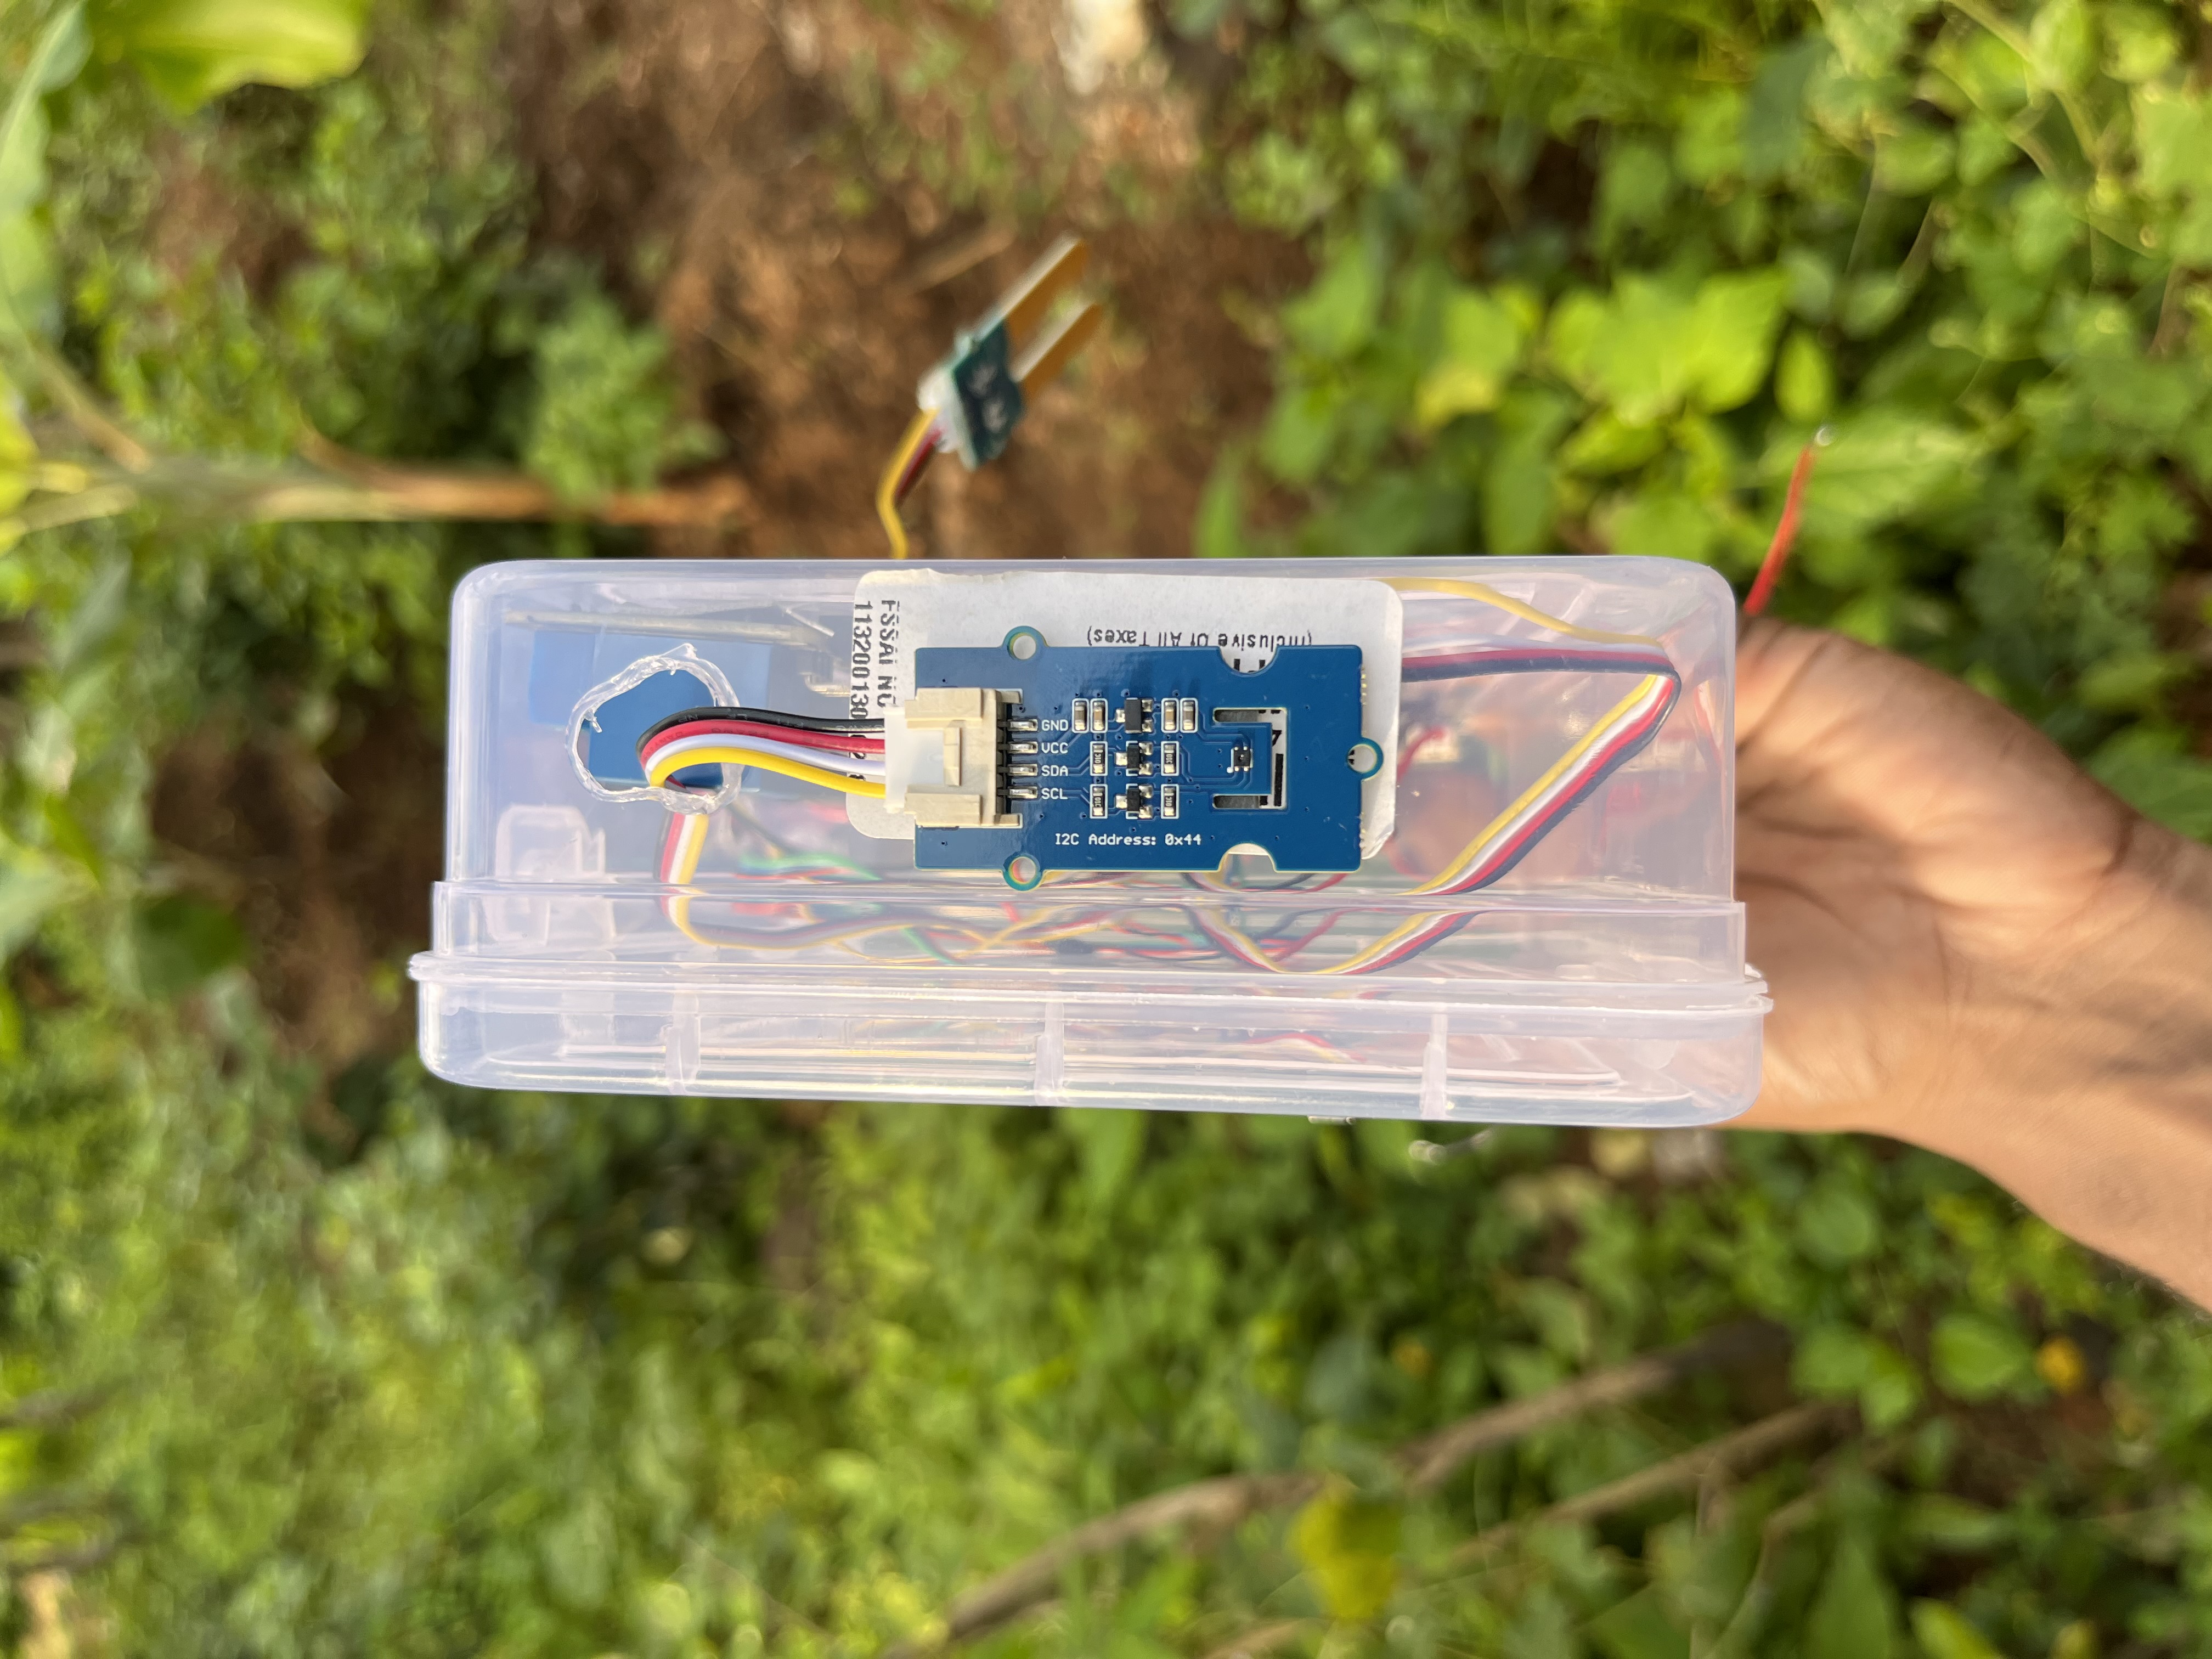
1) Sensirion Humidity and Temperature Sensor 40(SHT40): It is used here for measuring the temperature and humidity of the environment. Key advantages of the SHT40 sensor include High accuracy,Wide Measurement Range, Low Power Consumption and Fast response time. It uses I2C protocol for communicating with the seeduino XIAO.
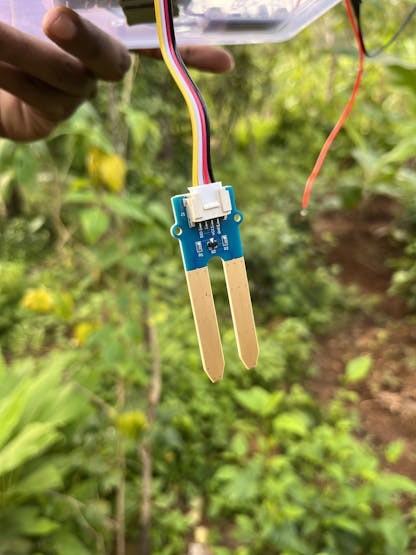
2) Moisture sensor: This Moisture Sensor can be used for detecting the moisture of soil. This sensor outputs analog value.
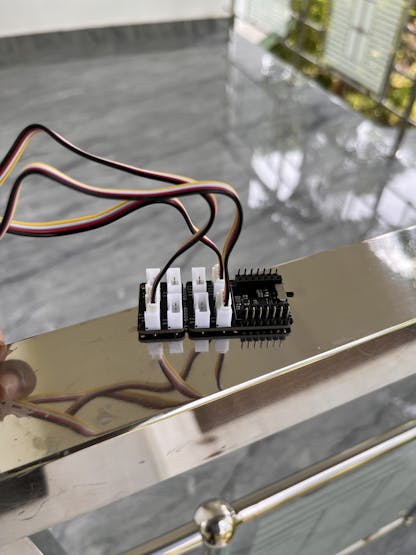
All these are groove sensors, so they can be easily plugged into the XIAO's Expansion shield by means of groove connectors.
Expansion shield with some groove connectors
On the Node side also we used the Lora-E5 module.
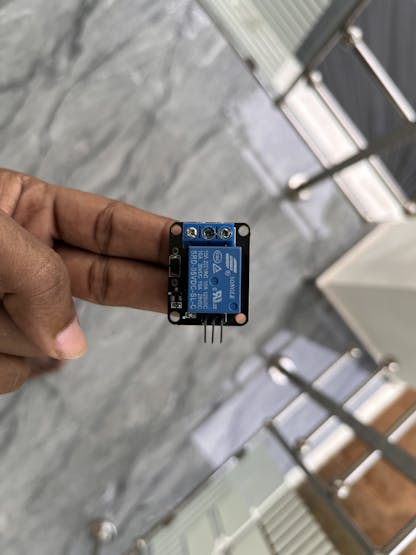
For controlling the motor for irrigation I have used Single channel relay module,
5V Relay Module
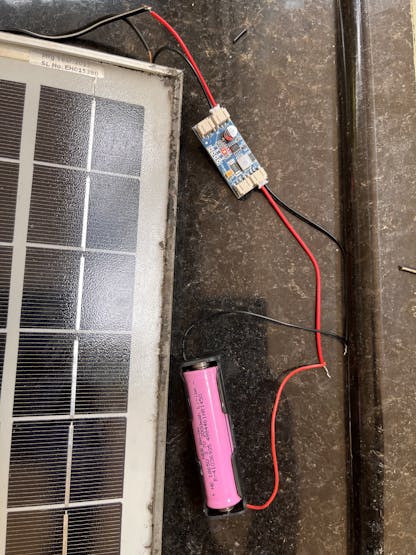
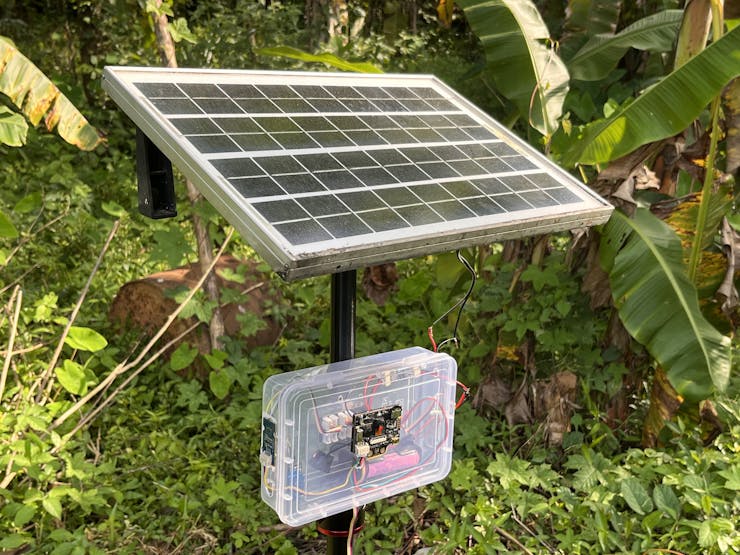
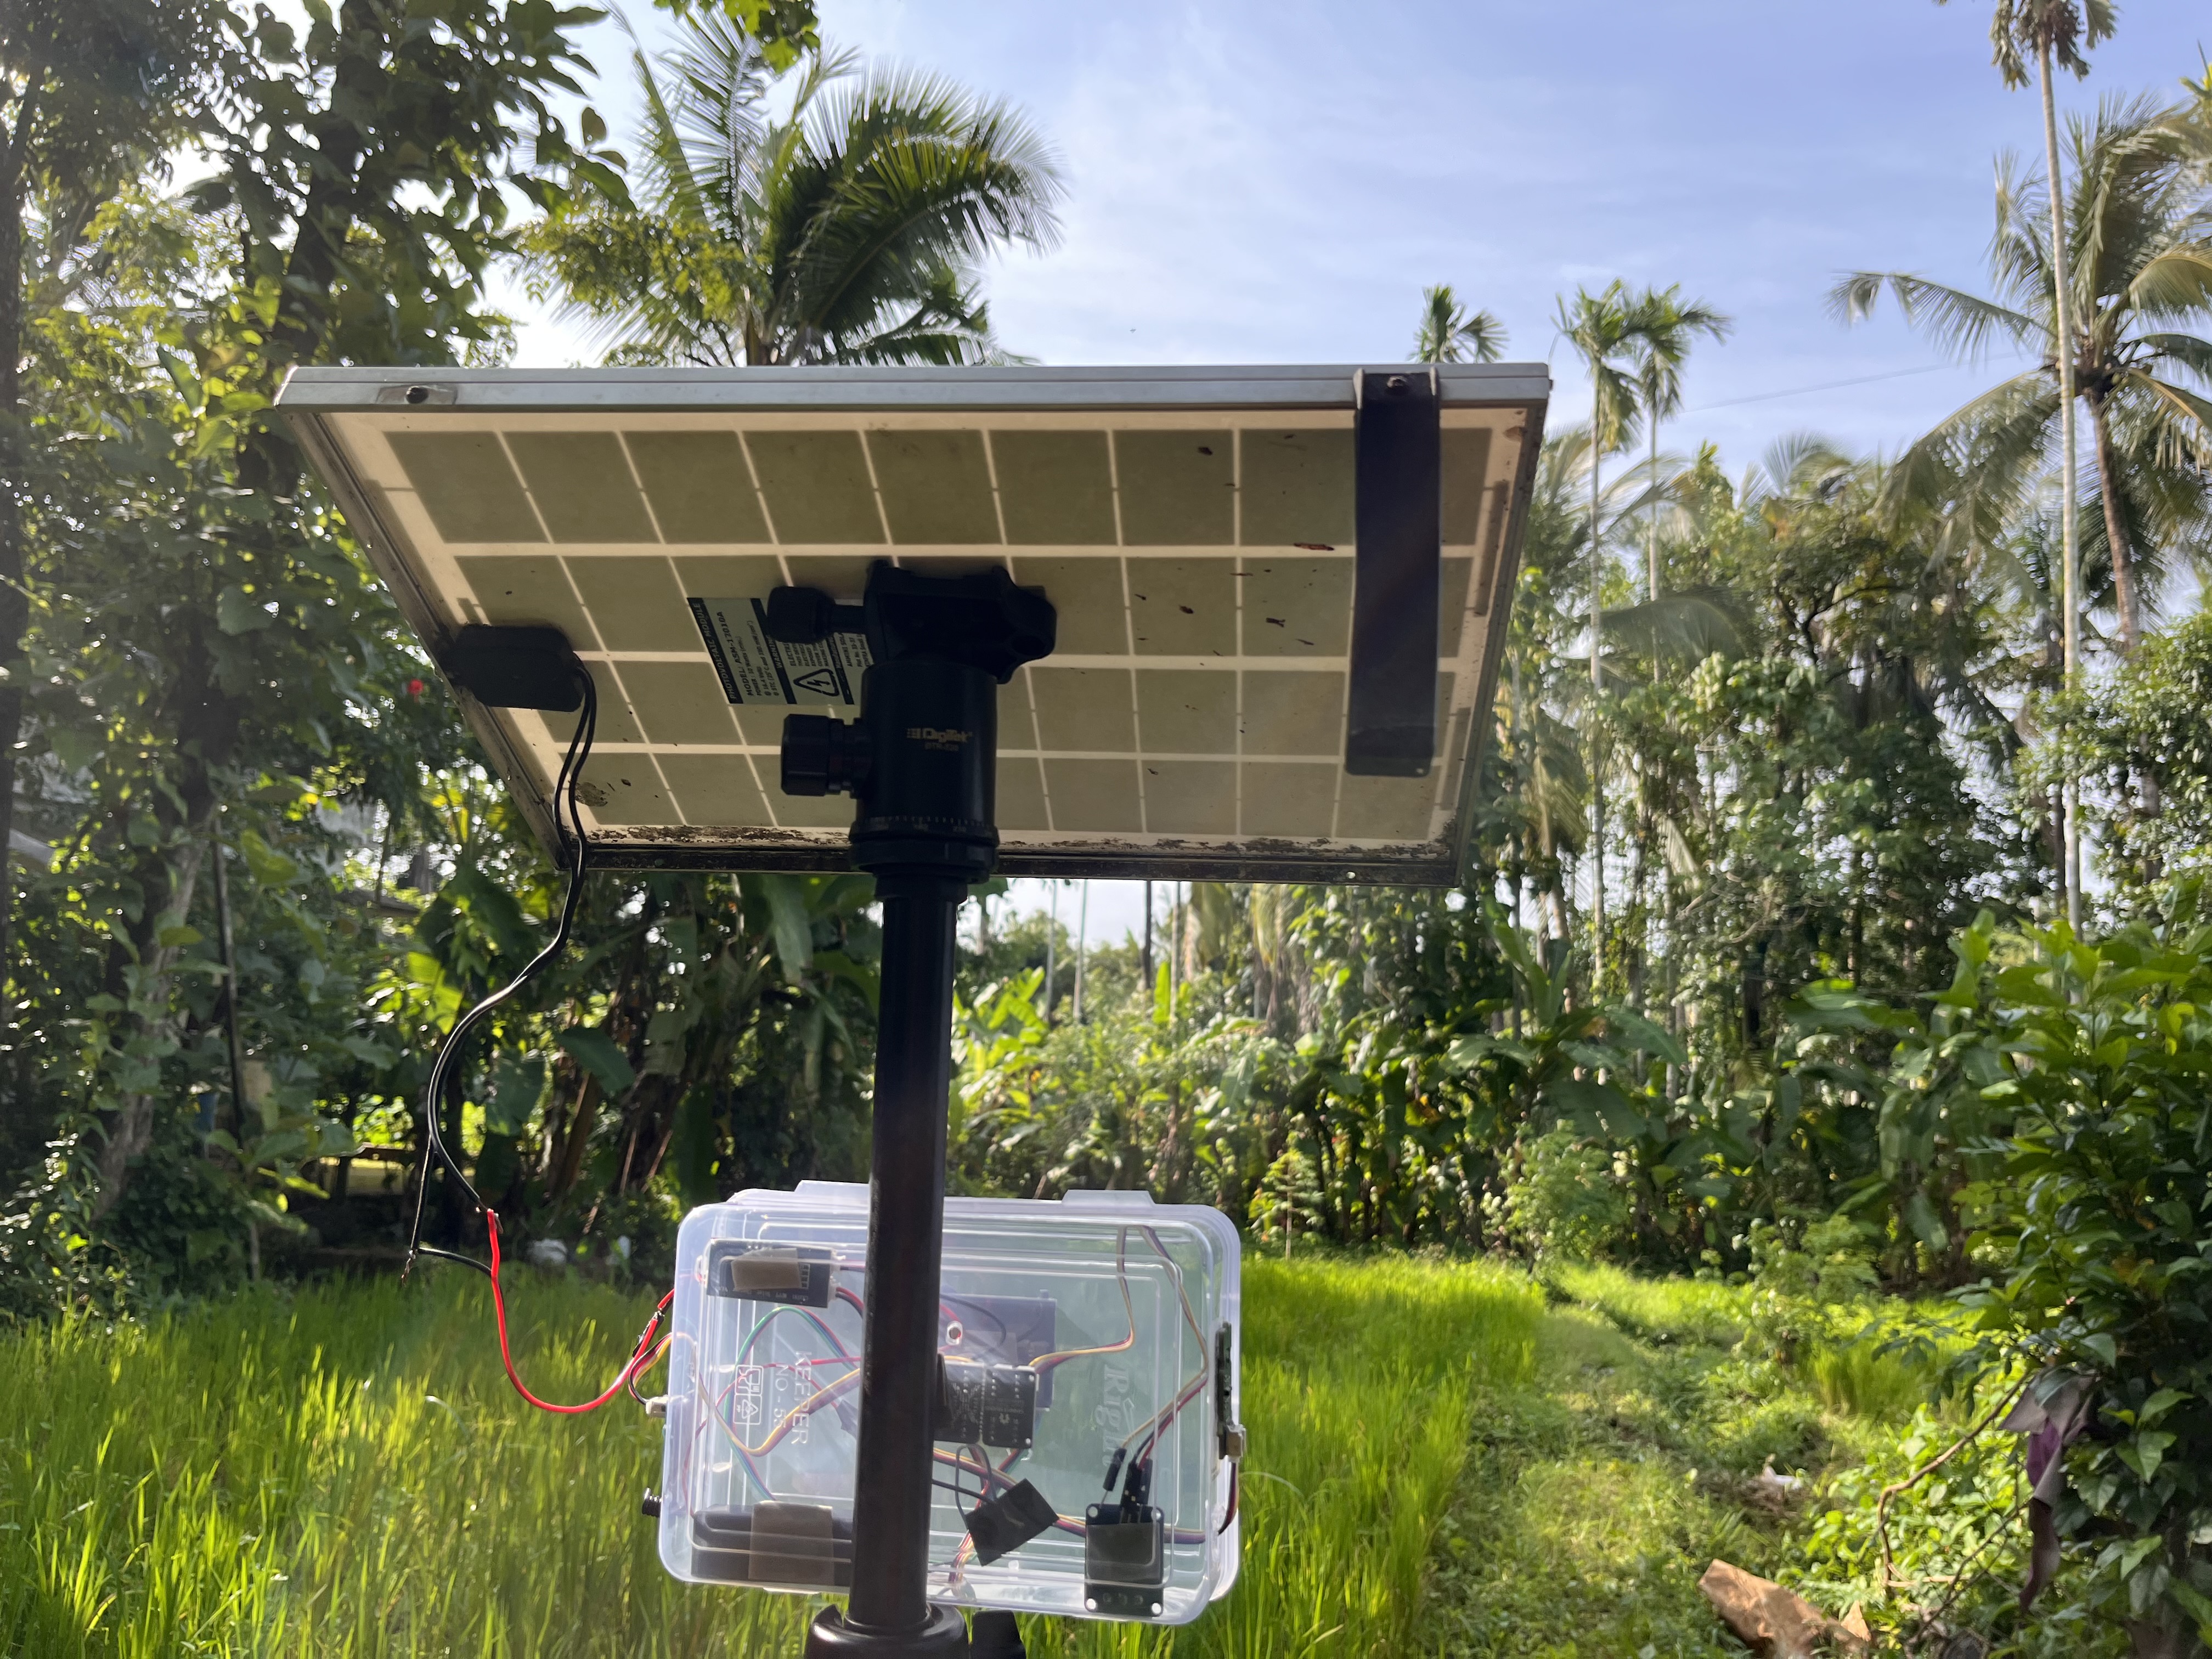
The main aspect of the Node is that, it's solar-powered. Here I repurposed my old solar panel for powering the Node. This panel is rated for 16V which can give up to a max current of 600ma.
It's not a good practice to power up the XIAO directly from the solar panel so I used CN3791 12V MPPT Solar Charger Module as the charge controller. Used an 18650 battery for storing the charge to use in night.
Charging battery via solar panel with charge controller
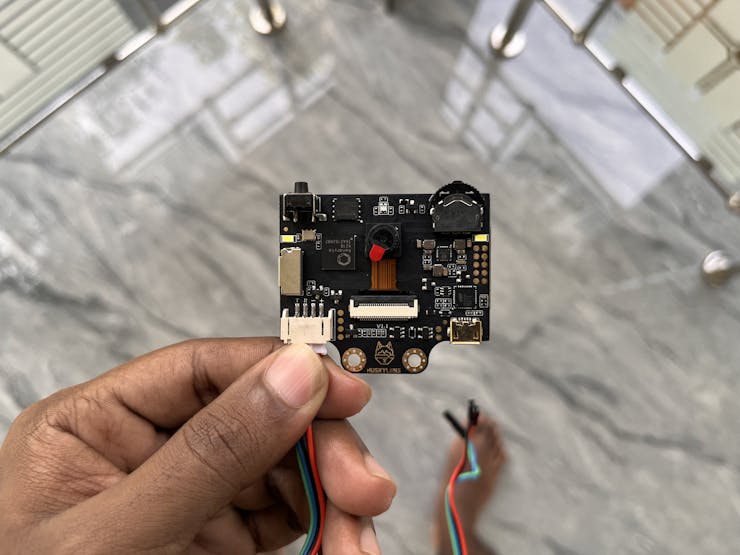
For detecting the wild animal intrusion on the farm, I used a Husky lens which is an easy-to-use AI machine vision sensor. It can learn to detect objects, faces, lines, colours and tags just by clicking. Through the UART / I2C port, HuskyLens can connect to any microcontroller.
Husky Lens
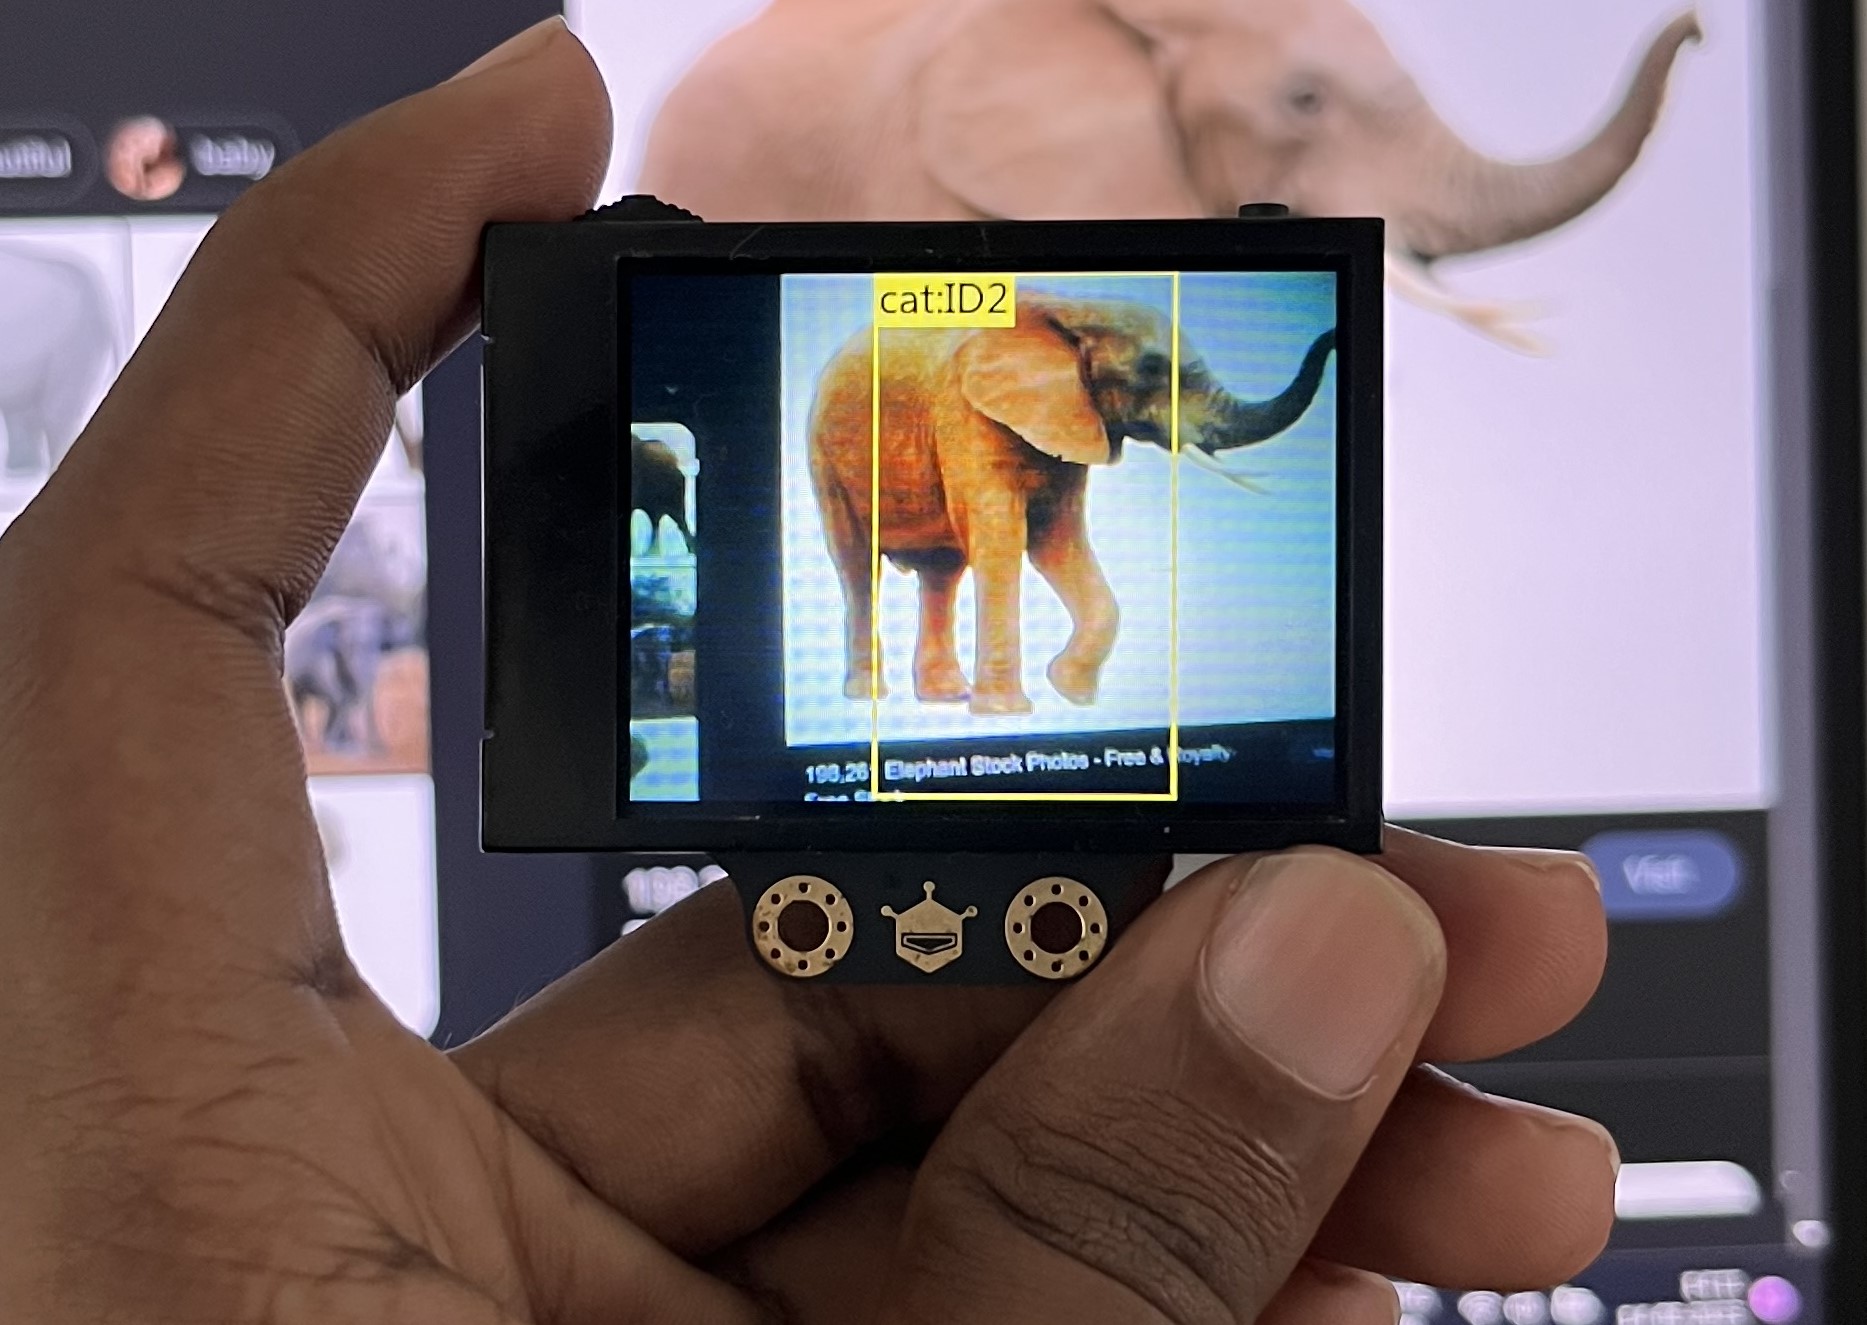
The specific animals that pose a threat can vary based on geographical location, ecosystem, and the type of farming being practised. Here I trained the Husky lens in a way that it will only detect Elephant and Wild Boar.
Husky lens Detecting Elephant
First I trained in a way that Elephant represents ID "1" and Wild Boar represents ID "2", but it produces poor accuracy, So I decided to give IDs 1 to 3 for elephants and 4 to 6 for wild boar. Each ID represents a different image of the same animal at a different angle.
That's all about the components of the Node.
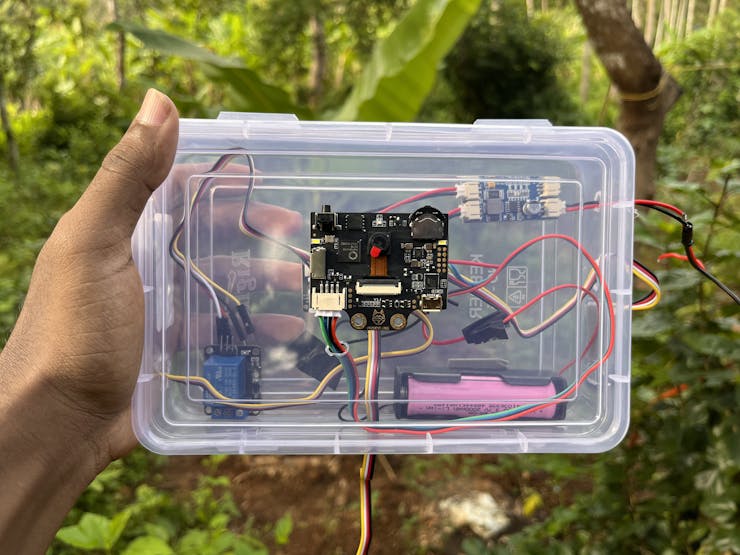
Then I secured all the components into this box.
Lora Module exposed outwards for getting better signal strength
SHT40 is also exposed outwards for getting a better accuracy
Moisture sensor pulled outside to place in soil
Finally attached the solar panel and the box to a long iron rod.
Node in action
Data Visualisation And Control With Ubidots
Ubidots is a comprehensive IoT (Internet of Things) platform designed to simplify the process of collecting, analyzing, and visualizing data from connected devices. The platform empowers everyone to monitor and manage real-time data streams, enabling them to make informed decisions and optimise operations.
Ubidots offers a user-friendly interface that allows users to seamlessly connect various sensors, devices, and equipment to the cloud. Through customizable dashboards, users can create visually engaging displays that showcase real-time data, trends, and insights. This enables them to gain a deeper understanding of their operations, identify patterns, and respond to changing conditions promptly.
The platform's capabilities extend beyond data visualization. Ubidots enable users to set up alerts and notifications based on specific thresholds, ensuring that they are promptly informed of critical events or deviations.
In this project, the Ubidots platform plays a crucial role in visualizing and interpreting the data collected from various nodes. Ubidots offers robust support for MQTT, HTTP, and TCP protocols, making it exceptionally well-suited for the requirements of this project.
Getting Started With Ubidots
This guide provides a structured pathway to familiarize yourself with the Ubidots platform. But, I have briefly outlined the steps that you can follow to connect your device to the platform and set up your dashboard.
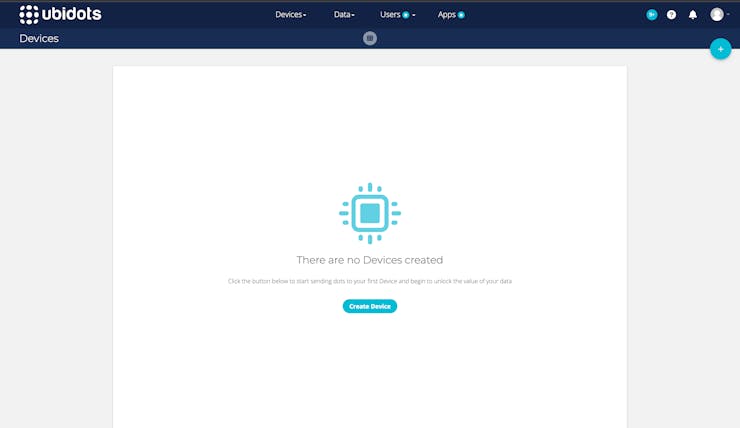
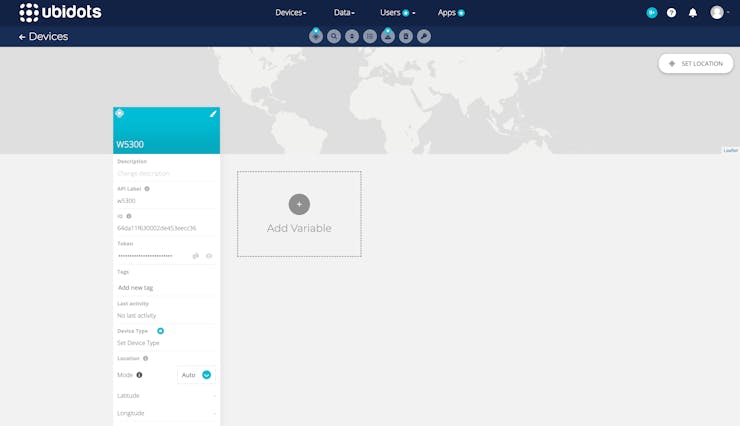
1. Create A New Device
Upon registering an account on the Ubidots platform, users are directed to a page enabling the creation of a new device.
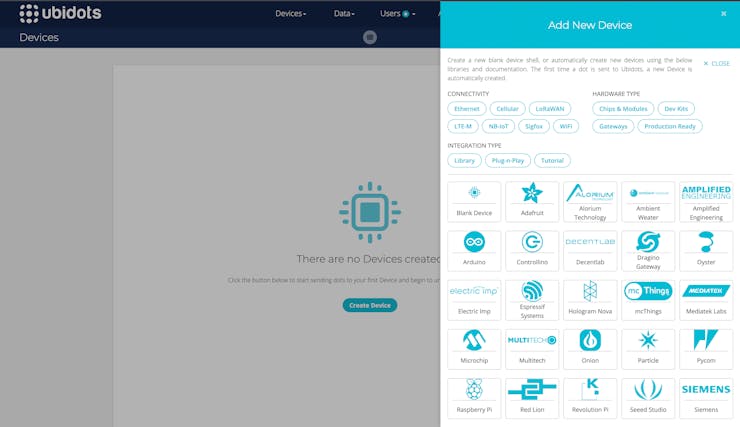
While multiple preset devices are available, I opted for a blank template.
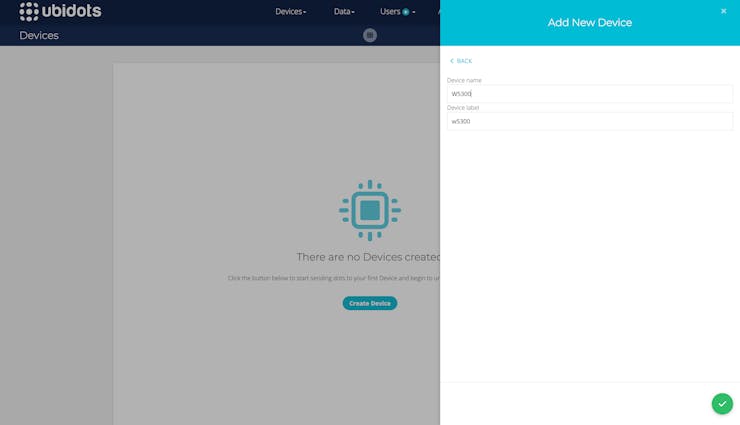
Subsequently, assign a distinct name to your device, which will be used to communicate with the device in upcoming steps.
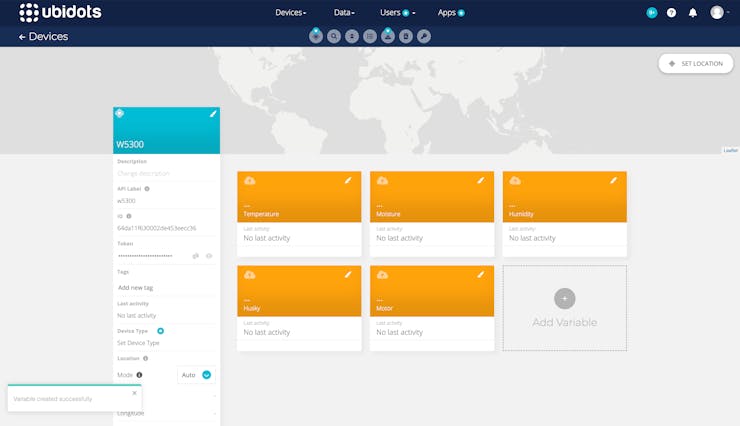
2. Create Variables
Ubidots variables represent dynamic data points within the Ubidots IoT platform. These variables encapsulate diverse sets of information such as sensor readings, measurements, or any data that changes over time. Each variable is associated with a specific device and holds real-time or historical data, which can be graphed, analyzed, and visualized to glean insights.
To create variables, navigate to the Devices section and choose the desired device. From there you can add variables that can hold data.
Here I have created five variables capable of storing data sourced from both sensors and the dashboard.
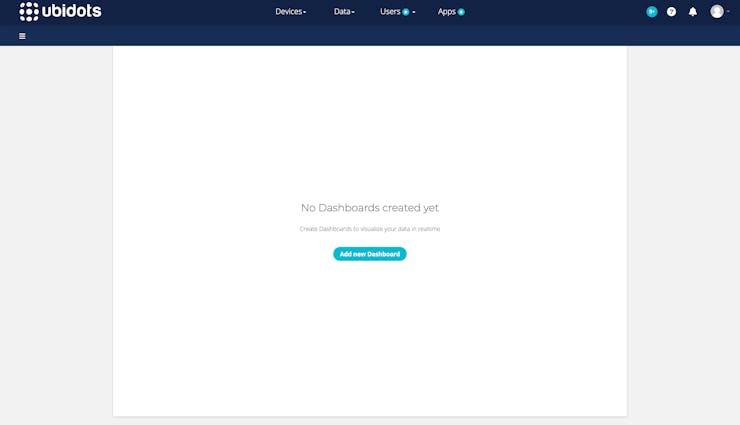
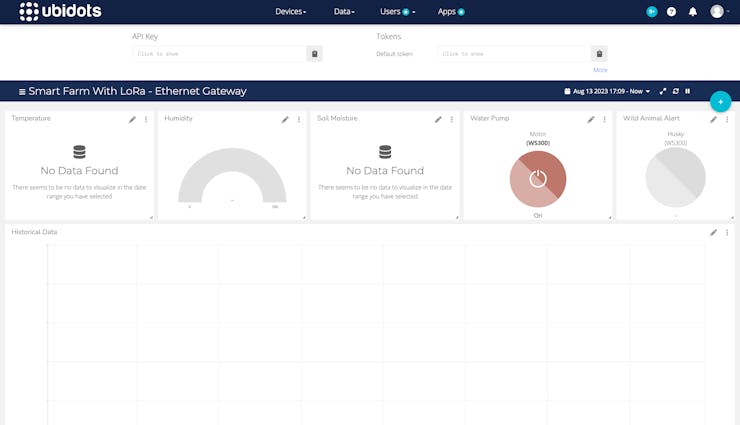
3. Create Dashboard
The next step involves crafting the dashboard, wherein we will integrate widgets to visualize data and include control widgets. To initiate the dashboard creation process, navigate to the Data and subsequently access the Dashboard tab.
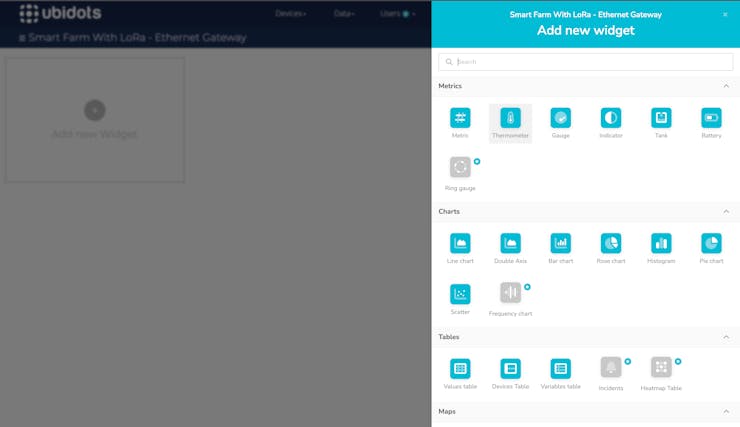
In the widgets panel you see an extensive array of widgets awaiting your selection, opt for the ones that align with your specific requirements.
Here is my dashboard design.
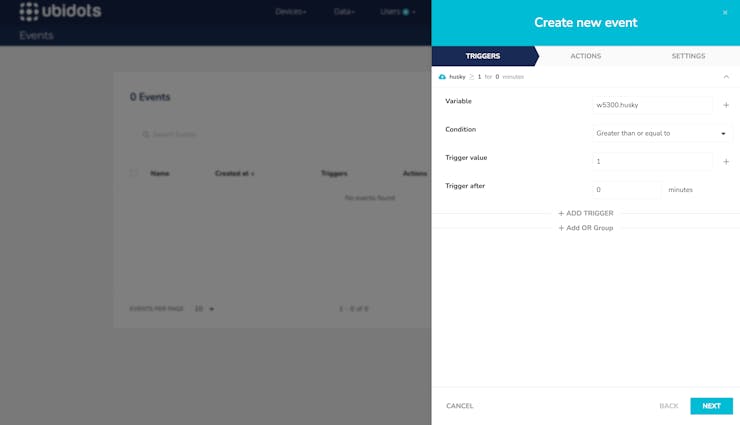
4. Creating Alerts With Events
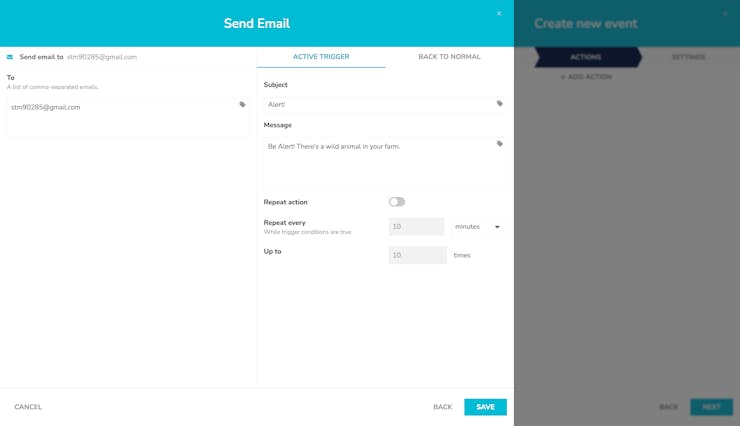
With the dashboard setup completed, the next step involves creating alerts. To initiate this process, go to the "Data" section and access the "Events" tab. Within this section, proceed to generate a new event, which comprises two essential components: a trigger and an action. A trigger denotes a conditional change in a variable that can be programmed to respond to specific conditions. In my case, the objective is to establish an alert system for instances when a wild animal infiltrates the farm premises. Whenever a wild animal is detected the 'husky' variable is set to greater than or equal to 1. So I'm creating a trigger that gets activated whenever the value of 'husky' is greater than or equal to 1.
On the action side, I am implementing a 'Send Email' action that becomes active whenever the trigger is triggered.
5. Establish Data Transfer Between Gateway And Dashboard
To establish a connection between gateway and dashboard we are using the Ubidots Data API. Ubidots support using HTTP, MQTT or TCP/UDP to send or retrieve data from your hardware devices. In this project I have opted for an HTTP over TCP approach to efficiently send and receive data to and from the dashboard. To use this API, you will need an authorization token. You can obtain it from the "API Credentials" section in your profile.
To get latest value from a variable you can use this CURL request
curl -X GET 'https://industrial.api.ubidots.com/api/v1.6/variables/<variable_id>/values/?page_size=1' \ -H 'X-Auth-Token: Token'
which can be translated to an Arduino function as given below.
void GetHttpRequest() {
int value;
Ethernet.begin(mac);
Serial.println("Getting Data From Ubidots");
if (client.connect(server, port)) {
Serial.println("Connected to Ubidots");
String httpResponse;
String headers = "GET /api/v1.6/variables/64d9ae5f30002d000e0d40db/values/?page_size=1 HTTP/1.1\r\n";
headers += "Host: industrial.api.ubidots.com\r\n";
headers += "X-Auth-Token: Token\r\n";
headers += "Connection: close\r\n\r\n";
client.print(headers);
while (client.connected()) {
if (client.available()) {
String httpResponse = client.readStringUntil('\n');
if (httpResponse.startsWith("{\"count\":")){
Serial.println(httpResponse);
deserializeJson(jsonResponse,httpResponse);
JsonObject root = jsonResponse.as<JsonObject>();
if (root.containsKey("results") && root["results"][0].containsKey("value")) {
value = root["results"][0]["value"];
Serial.print("Value: ");
Serial.print(value);
Serial.print("\r\n");
}
}
}
}
client.stop();
Serial.println("\nDisconnected from server");
} else {
Serial.println("Connection to Ubidots failed");
}
}
To send values to a device, you can use this CURL request
which can be translated to an Arduino function as given below.
void PostHttpRequest(String variable1, String variable2){
Ethernet.begin(mac);
Serial.println("Start Sending Data");
if (client.connect(server, port))
{
Serial.println("Connected to Ubidots");
// Create the JSON payload.
String payload = "{\"variable1\":" + String(value1) + ",\"hvariable2\":" + String(value2)+"}";
Serial.println("Payload: "+ payload);
// Create the HTTP request headers.
String headers = "POST /api/v1.6/devices/w5300/ HTTP/1.1\r\n";
headers += "Host: industrial.api.ubidots.com\r\n";
headers += "Content-Type: application/json\r\n";
headers += "X-Auth-Token: Toke\r\n";
headers += "Content-Length: ";
headers += payload.length();
headers += "\r\n\r\n";
// Send the HTTP request to Ubidots using TCP.
client.print(headers);
client.print(payload);
// Print the server's response to the serial monitor.
while (client.available()) {
char c = client.read();
Serial.write(c);
}
// Close the connection.
client.stop();
Serial.println("\nDisconnected from server");
} else {
Serial.println("Connection to Ubidots failed");
}
}
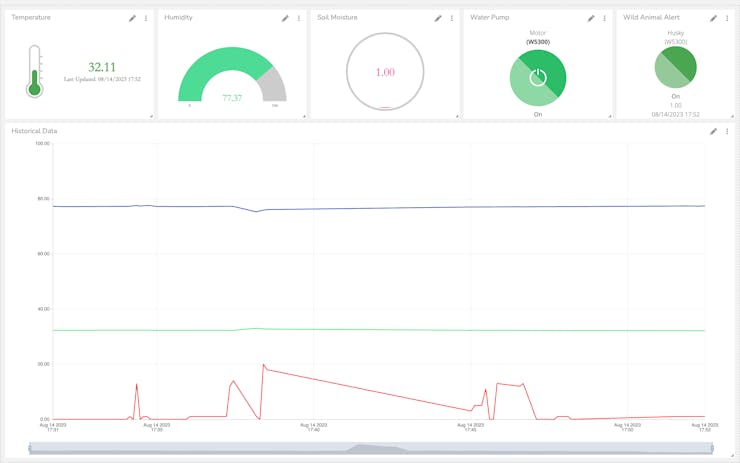
Upon successfully doing all these steps you can establish a two-way communication between the dashboard and our LoRa Ethernet Gateway. Now you can see the data getting updated in your dashboard and you can control the device using designated control widgets.
Demo Video:
To provide a comprehensive understanding of our innovation, the project features an informative demo video. It demonstrates how our solution operates harmoniously to protect crops and optimize yields for the betterment of the farming community.

 Software Apps and online services